
1. Product Overview
The intelamp Solar Flood Light is an advanced outdoor lighting solution featuring a motion sensor and remote control. It is designed to provide efficient and reliable illumination for various outdoor areas such as gardens, garages, pathways, and balconies. With its high-capacity battery and efficient solar panel, it offers long-lasting brightness and enhanced security.

Image: The intelamp Solar Flood Light unit, showing the three adjustable lamp heads, the separate solar panel, and the included remote control.
2. Key Features
- Remote Control Operation: Equipped with a comprehensive remote for easy control of settings and modes.
- Adjustable Sensing Time: Motion sensor highlight time can be set to 20, 30, or 40 seconds.
- Wide-Angle Lighting: Three adjustable lamp heads provide a 270° wide-angle illumination.
- Multiple Lighting Modes: Features 4 distinct lighting modes to suit various needs.
- High-Efficiency Solar Panel: Large 40 sq. inch solar panel for faster and more efficient charging.
- High-Capacity Battery: 6000mAh battery provides up to 3 nights of illumination in sensing mode.
- Dual Sensor Design: Two motion sensors offer 180-degree detection, covering a wider area and reducing blind spots.
- IP65 Waterproof: Durable construction ensures reliable performance in various weather conditions.
- Easy Installation: Comes with screws and cable ties for flexible mounting options on walls, fences, or poles.

Image: An outdoor patio and lawn illuminated by the intelamp solar flood light, demonstrating its 1200LM high brightness and 270-degree wide-angle lighting coverage.
3. Package Contents
Please check the package carefully to ensure all items are present:
- 1 x intelamp Solar Flood Light Unit
- 1 x Solar Panel (with 9.8ft cable)
- 1 x Remote Control
- Mounting Screws and Wall Plugs
- Cable Ties
- 1 x User Manual
4. Specifications
| Specification | Value |
|---|---|
| Brand | intelamp |
| Model Number | 12B-CA-parent |
| Product Dimensions | 25 x 11.8 x 13.5 cm; 880 g |
| Battery Capacity | 6000mAh (included AAA batteries for remote) |
| Brightness | 1200 Lumens |
| Solar Panel Size | 9.4 inch x 4.3 inch (approx. 40 sq. inches) |
| Cable Length | 9.8 ft |
| Motion Sensor Angle | 180° |
| Waterproof Rating | IP65 |
| Material | Acrylonitrile Butadiene Styrene |
| Power Source | Solar Powered |
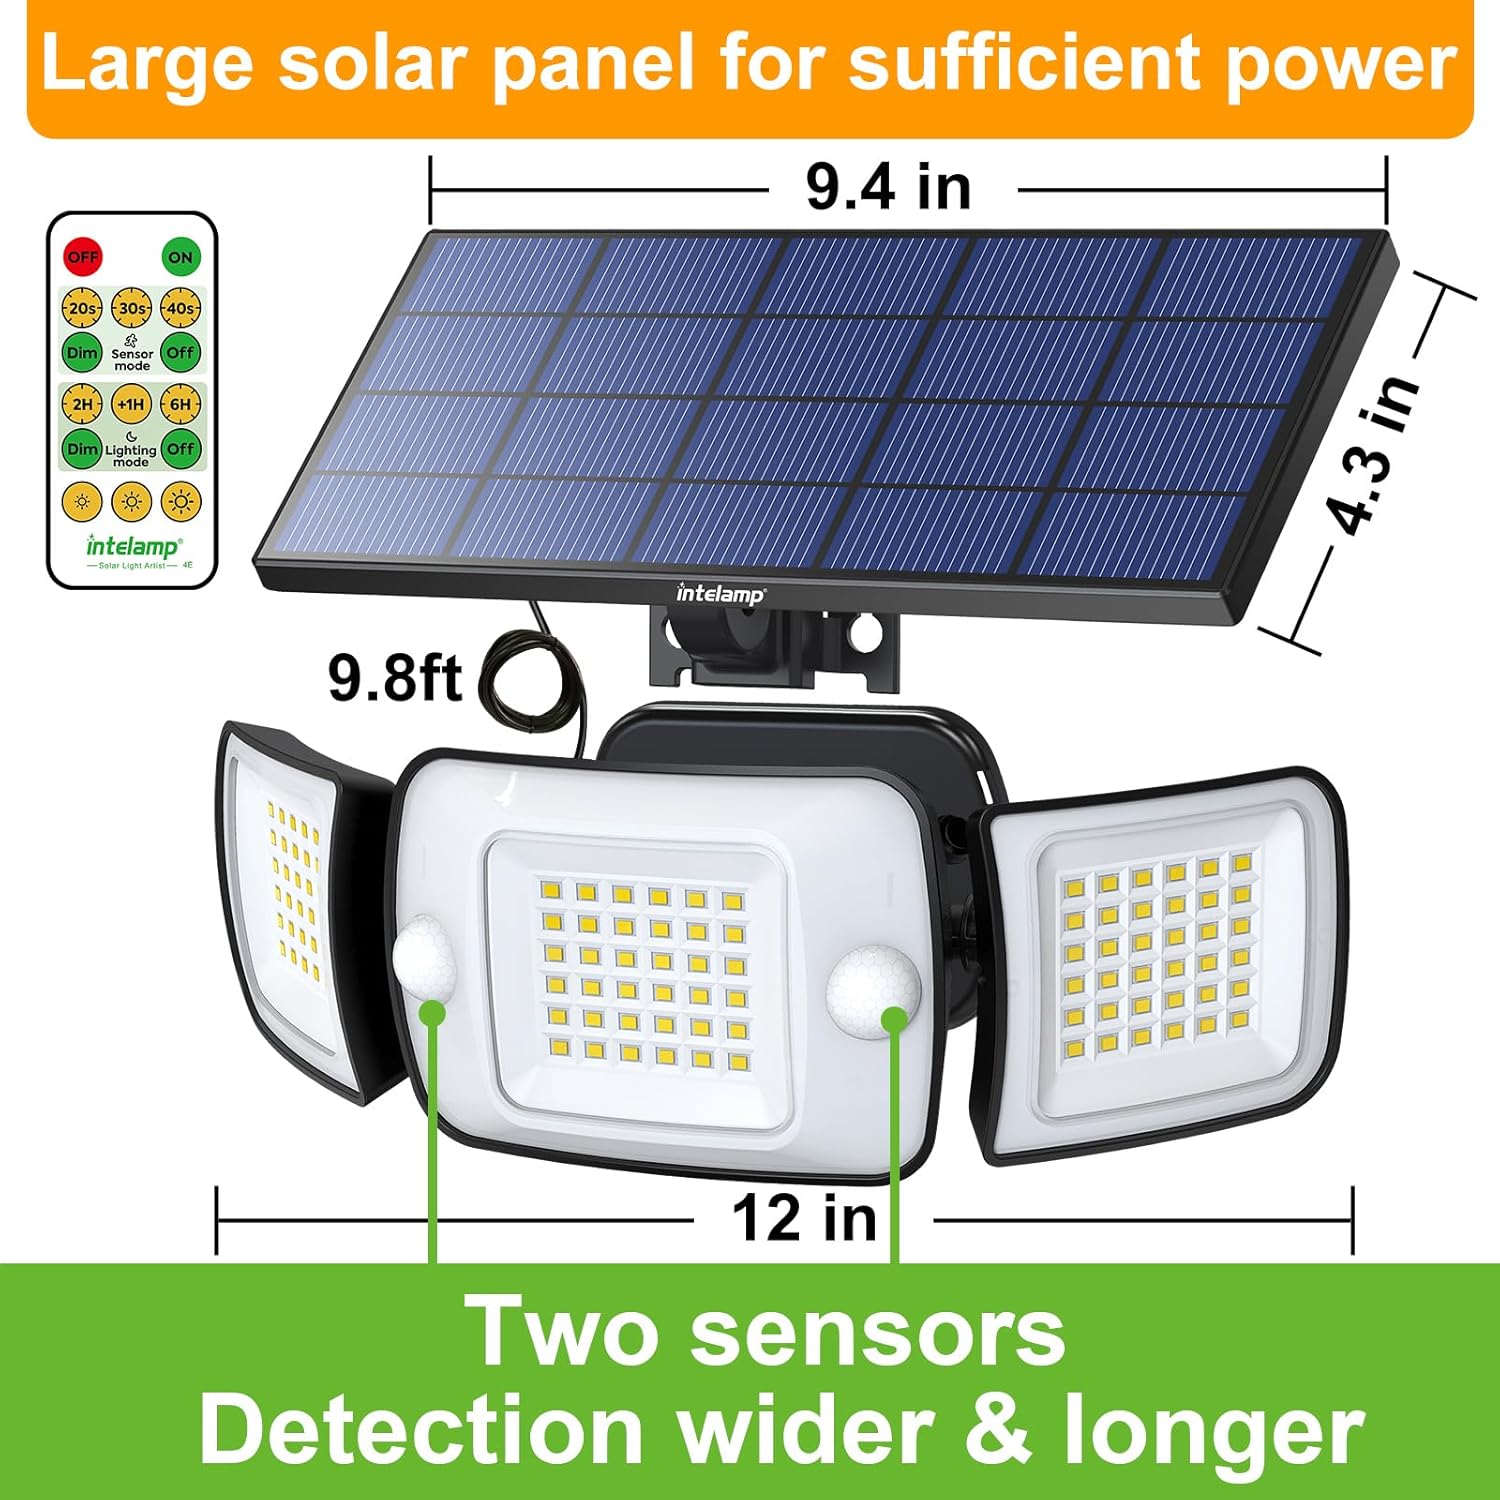
Image: Detailed dimensions of the solar panel (9.4 inches by 4.3 inches) and the light unit (12 inches wide), along with the 9.8ft cable length and the dual sensor design.
5. Safety Information
Please read all safety instructions before installation and use.
- Do not disassemble or modify the product. Unauthorized modifications may cause damage or injury.
- Ensure the solar panel is installed in a location that receives direct sunlight for optimal charging.
- Keep the product away from fire, heat sources, and flammable materials.
- Do not immerse the product in water. While IP65 rated, prolonged submersion can cause damage.
- Handle the product with care to avoid damage to the solar panel or light components.
- When installing, ensure the mounting surface is stable and can support the weight of the light.
- Keep out of reach of children.
6. Setup and Installation
Follow these steps for proper installation of your intelamp Solar Flood Light:
- Choose an Installation Location: Select a location where the solar panel can receive at least 6-8 hours of direct sunlight daily. The light unit should be positioned to cover the desired area. Ensure the 9.8ft cable length is sufficient to connect the solar panel to the light unit.
- Mount the Solar Panel: Secure the solar panel to a wall, roof, or other stable surface using the provided screws. Adjust the angle of the solar panel to maximize sun exposure.
- Mount the Light Unit: The light unit can be mounted in two ways:
- Wall Installation: Use the provided screws and wall plugs to secure the light unit to a wall. Ensure the hole spacing (approx. 3.5 inches) is correct. Rotate the solar panels from side to side and the central lamp vertically up and down to provide space for screw installation.
- Cable Tie Installation: Insert the cable ties through the mounting holes on the back of the light unit. Tie the light to a pole, tree trunk, or similar structure.
- Connect the Solar Panel to the Light Unit: Plug the cable from the solar panel into the designated port on the light unit. Ensure a secure connection.
- Adjust Lamp Heads: Manually adjust the three lamp heads to direct light to your desired areas, providing up to 270° wide-angle coverage.

Image: Illustrations demonstrating two installation methods: wall mounting with screws and pole/tree mounting using cable ties. It also shows how to adjust the lamp heads for screw access.
7. Operating Instructions
Your intelamp Solar Flood Light is controlled by the included remote. Ensure the remote has a working AAA battery (included).

Image: A detailed view of the remote control, highlighting buttons for ON/OFF, sensing time (20s, 30s, 40s), lighting modes (Dim Sensor Mode, Dim Lighting Mode), and brightness adjustment (60%, 80%, 100%).
Initial Use:
Before first use, allow the solar panel to charge the light for at least 6-8 hours in direct sunlight. The light will automatically turn on at dusk once charged.
Remote Control Functions:
- ON/OFF: Press the red 'OFF' button to turn off the light, and the green 'ON' button to turn on.
- Sensing Highlight Time: Adjust how long the light stays at high brightness after motion detection. Options: 20s, 30s, 40s.
- Lighting Modes: Select from 4 distinct modes:
- Mode 1 (Strong Light Motion Sensor Mode - Dim to Strong to Dim): Low brightness always on. Turns to 100% brightness when motion is detected, then dims back to 20% brightness after 20/30/40 seconds (based on setting) when no motion is detected.
- Mode 2 (Strong Light Motion Sensor Mode - Closure to Strong to Closure): Light is off when no motion is detected. Turns to 100% brightness when motion is detected, then turns off after 20/30/40 seconds (based on setting) when no motion is detected.
- Mode 3 (Long Light Mode - Motion Sensor Disabled, Dims after Timing): Turns on at 80% brightness at night. After a set timing (2H, 4H, 6H, 8H, 10H, 12H), it dims to 20% brightness until dawn.
- Mode 4 (Long Light Mode - Motion Sensor Disabled, Turns Off after Timing): Turns on at 80% brightness at night. After a set timing (2H, 4H, 6H, 8H, 10H, 12H), it turns off completely. It will automatically turn on after dark the next day.
- Brightness Adjustment: In modes where constant brightness is maintained (Modes 3 & 4), you can adjust the brightness level to 60%, 80%, or 100% using the sun icon buttons on the remote.

Image: Visual representation of Mode 1, showing the light at 20% brightness, increasing to 100% upon motion detection, and returning to 20% after the set time.

Image: Visual representation of Mode 2, showing the light off, increasing to 100% brightness upon motion detection, and turning off after the set time.

Image: Visual representation of Mode 3, showing the light at 80% brightness, then dimming to 20% brightness after a set timer.

Image: Visual representation of Mode 4, showing the light at 80% brightness, then turning off completely after a set timer.
8. Maintenance
To ensure optimal performance and longevity of your solar flood light, follow these maintenance guidelines:
- Clean Solar Panel: Regularly wipe the solar panel with a soft, damp cloth to remove dust, dirt, leaves, or snow. A clean panel ensures maximum sunlight absorption and efficient charging.
- Clean Light Unit: Periodically clean the light unit and sensor lenses to ensure clear light output and accurate motion detection.
- Check Connections: Occasionally inspect the cable connection between the solar panel and the light unit to ensure it remains secure and free from corrosion.
- Battery Replacement (Remote): If the remote control stops responding, replace its AAA battery.
9. Troubleshooting
If you encounter issues with your intelamp Solar Flood Light, refer to the following common problems and solutions:
| Problem | Possible Cause | Solution |
|---|---|---|
| Light does not turn on at night. | Insufficient solar charge. | Ensure solar panel is in direct sunlight for 6-8 hours daily. Clean the solar panel. |
| Light is dim or only stays on for a short time. | Low battery charge. | Allow more charging time. Check for obstructions blocking sunlight. |
| Motion sensor not detecting movement. | Sensor obstructed or dirty. Incorrect mode selected. | Clean the sensor lens. Ensure the light is in a motion-sensing mode (Mode 1 or 2). |
| Remote control not working. | Remote battery low or dead. Obstruction between remote and light. | Replace the AAA battery in the remote. Ensure clear line of sight to the light unit. |
| Light flickers. | Loose connection or low battery. | Check all cable connections. Allow the light to charge fully. |
10. Warranty and Support
For warranty information, technical assistance, or any product-related inquiries, please contact intelamp customer service. You can typically find contact details on the product packaging, the official intelamp website, or through the retailer where you purchased the product.
Please have your model number (12B-CA-parent) and purchase details ready when contacting support.