Introduction
This manual provides detailed instructions for the setup, operation, and maintenance of your Uniclife 20 Position Key Cabinet with Combination Lock. Please read this guide thoroughly before installation and use to ensure proper functionality and security.

Image: The Uniclife 20 Position Key Cabinet, shown open with various keys and colorful tags organized on its hooks.
Safety Information
- Install indoors only. Do not use outdoors or freestanding.
- Keep the combination code confidential to prevent unauthorized access.
- Always follow proper wall mounting techniques to avoid injuries.
- Use caution when resetting the code to prevent accidental lockouts.
What's in the Box
- 1 x Uniclife 20 Position Key Cabinet
- 20 x Key Tags (in assorted colors)
- 4 x Sheets of Number Stickers
- Mounting Screws and Wall Anchors
Setup & Installation
1. Setting the Combination Lock
Your key cabinet comes with a resettable 3-digit combination lock. The initial factory code is "000". Follow these steps to set your personal code:
- Open the cabinet using the default code "000".
- Locate the control lever inside the cabinet, near the lock mechanism.
- Push the control lever from position A to position B.
- While the lever is in position B, set your desired 3-digit combination by rotating the number wheels on the front of the cabinet.
- Once your new code is set, pull the control lever back from position B to position A.
- Close the cabinet and scramble the numbers to lock it. Test your new combination to ensure it works correctly.
Important: Record your new combination code in a safe place. If you forget your code, you will not be able to open the cabinet.

Image: A detailed view of the 3-digit resettable combination lock, highlighting the number wheels and the knob.

Image: Visual instructions demonstrating the process of resetting the combination lock, showing the internal lever and number wheel adjustments.
2. Mounting the Cabinet
The key cabinet is designed for wall mounting to ensure security and stability. It must be installed indoors only.
- Choose a suitable indoor location for mounting.
- Open the cabinet to access the pre-formed mounting holes on the back panel.
- Mark the positions for drilling on the wall using the cabinet's holes as a template.
- Drill pilot holes into the wall at the marked positions. Insert the provided wall anchors if necessary (e.g., for drywall).
- Align the cabinet with the drilled holes and secure it firmly to the wall using the provided mounting screws.
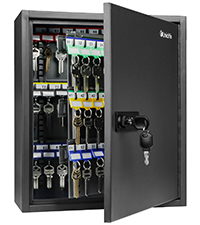
Image: A diagram illustrating the preformed mounting holes on the back of the cabinet and the included screws and wall anchors for installation.
3. Attaching Key Tags and Number Stickers
The included key tags and number stickers help you organize your keys efficiently.
- Each flexible key tag contains a removable blank paper label. Slide the label sideways to remove it.
- Write identifying information (e.g., room number, key purpose) on the paper label.
- Slide the labeled paper back into the key tag.
- Attach your keys to the key rings on the tags.
- Apply the number stickers to the designated areas above each hook inside the cabinet to create a numerical organization system.

Image: A person applying number stickers to the interior of the key cabinet, indicating the numerical order for key organization.

Image: A selection of colorful key tags, each featuring a removable blank label for easy identification and customization.
Operating Instructions
1. Opening the Cabinet
To open the key cabinet:
- Enter your 3-digit combination code on the number wheels.
- Turn the knob clockwise to unlock the cabinet.
- Pull the door open.
2. Closing the Cabinet
To close and secure the key cabinet:
- Ensure all keys are properly hung on their respective hooks.
- Close the cabinet door firmly.
- Turn the knob counter-clockwise to engage the lock.
- Scramble the numbers on the combination wheels to secure the cabinet.

Image: The interior of the key cabinet displaying keys arranged on numbered hooks, demonstrating effective organization.
3. Organizing Keys
The cabinet features 20 hooks for individual keys. Use the provided number stickers and key tags to maintain an organized system, making it easy to track and retrieve specific keys.
Video: This video demonstrates the setup, combination lock functionality, and key organization within the Uniclife 20 Position Key Cabinet.
Maintenance
- Regularly wipe the exterior of the cabinet with a soft, dry cloth to remove dust and grime.
- Avoid using abrasive cleaners or solvents, as these can damage the finish.
- Periodically check the mounting screws to ensure the cabinet remains securely attached to the wall. Tighten if necessary.
- Ensure the combination wheels turn smoothly. If they become stiff, a small amount of graphite lubricant can be applied.
Troubleshooting
- Cabinet will not open: Double-check that you are entering the correct 3-digit combination. Ensure the control lever inside the cabinet was returned to position A after setting the code.
- Combination wheels are stiff: Apply a small amount of graphite lubricant to the wheels to improve movement.
- Keys are difficult to hang/remove: Ensure key tags are properly attached and not obstructing other keys. The design allows for slim storage; avoid overcrowding individual hooks with too many keys.
Specifications
| Feature | Detail |
|---|---|
| Brand | Uniclife |
| Model Name | Uniclife-3530 |
| Color | Black |
| Material | Alloy Steel |
| Product Dimensions | 3"D x 6.3"W x 8"H |
| Item Weight | 1.98 pounds (0.9 Kilograms) |
| Key Capacity | 20 Positions |
| Lock Type | Combination (3-digit resettable) |
| Mounting Type | Wall Mount |
| Included Components | Key Box, Key Tags, Mounting Hardware |

Image: The Uniclife key cabinet with its dimensions (depth, width, height) clearly indicated.
Warranty and Support
For any questions, concerns, or warranty claims regarding your Uniclife 20 Position Key Cabinet, please contact Uniclife customer support through the retailer's platform or the official Uniclife website. Please have your product model number and purchase date available when contacting support.