1. Introduction
Thank you for purchasing the TEMKIN 15L Digital Air Fryer Oven. This appliance is designed to provide a healthier alternative to traditional frying methods by using rapid hot air circulation to cook your favorite foods with little to no oil. Please read this instruction manual thoroughly before operating the appliance to ensure safe and efficient use. Keep this manual for future reference.
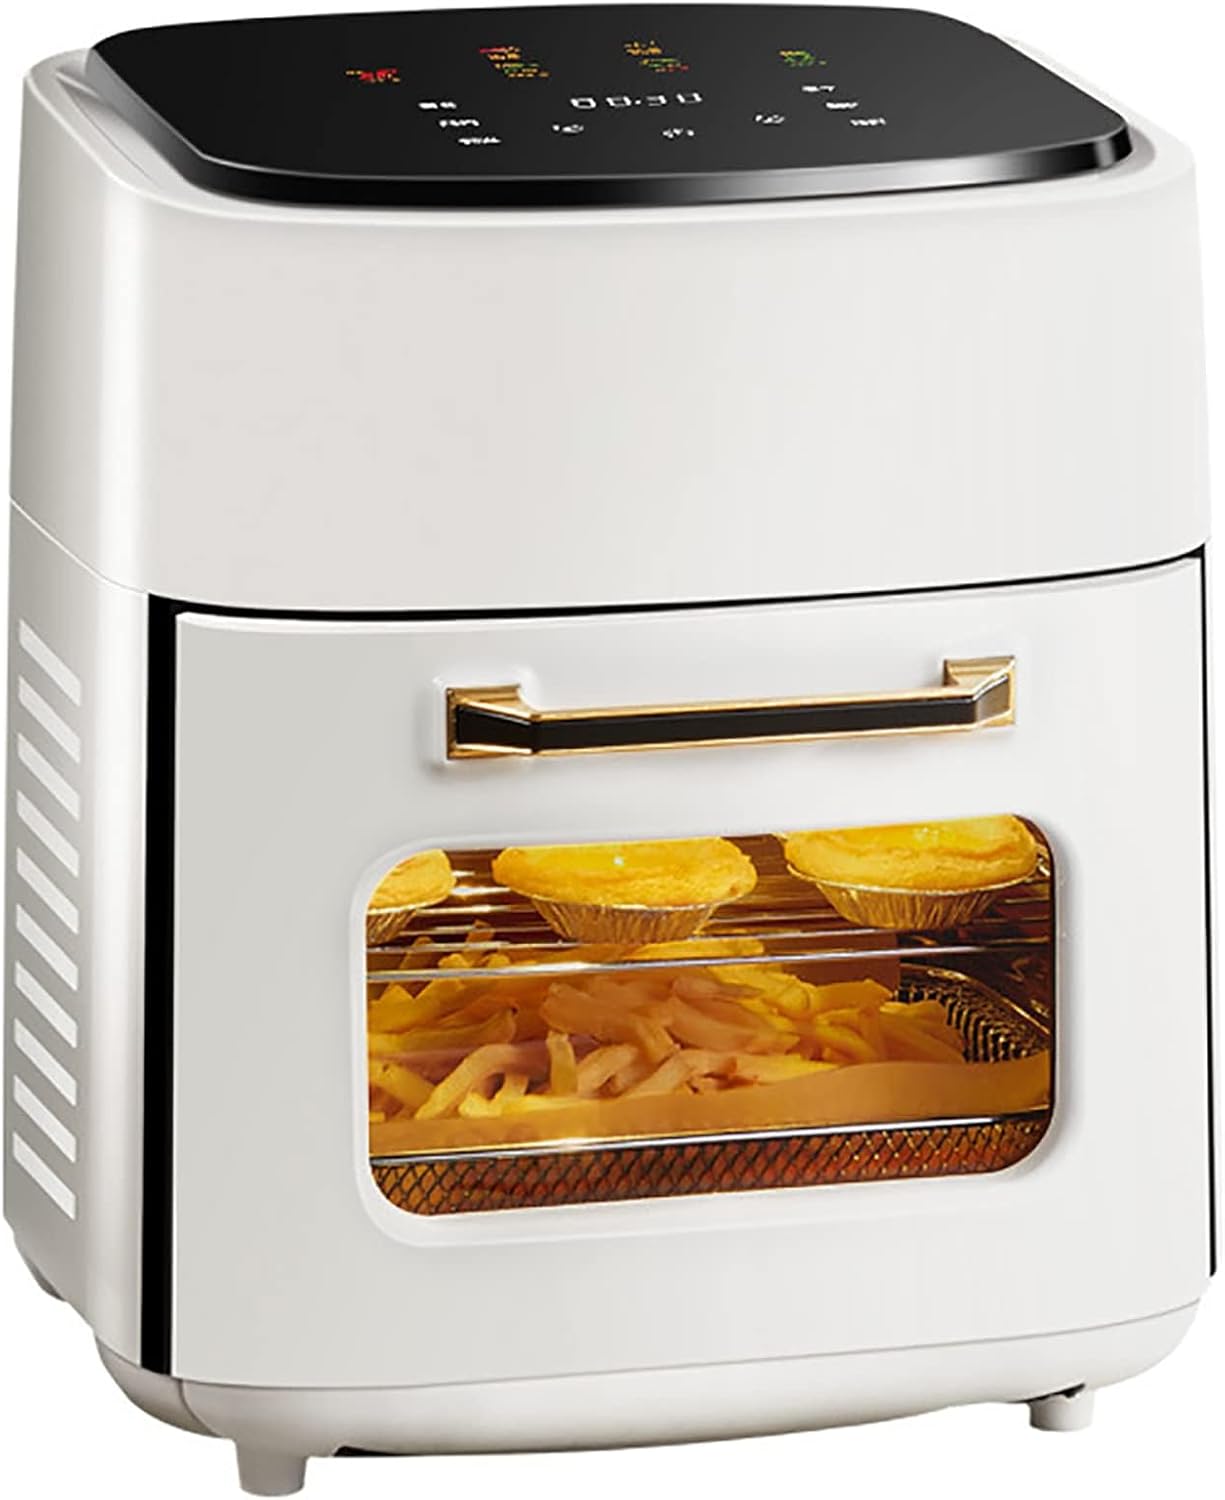
Figure 1.1: TEMKIN 15L Digital Air Fryer Oven. This image displays the front view of the white air fryer oven with a clear window showing food inside.
2. Important Safety Instructions
When using electrical appliances, basic safety precautions should always be followed to reduce the risk of fire, electric shock, and injury to persons.
- Read all instructions before use.
- Do not touch hot surfaces. Use handles or knobs.
- To protect against electric shock, do not immerse cord, plugs, or the main unit in water or other liquid.
- Close supervision is necessary when any appliance is used by or near children.
- Unplug from outlet when not in use and before cleaning. Allow to cool before putting on or taking off parts.
- Do not operate any appliance with a damaged cord or plug, or after the appliance malfunctions or has been damaged in any manner. Contact customer support for assistance.
- The use of accessory attachments not recommended by the appliance manufacturer may cause injuries.
- Do not use outdoors.
- Do not let cord hang over edge of table or counter, or touch hot surfaces.
- Do not place on or near a hot gas or electric burner, or in a heated oven.
- Extreme caution must be used when moving an appliance containing hot oil or other hot liquids.
- Always attach plug to appliance first, then plug cord into the wall outlet. To disconnect, turn any control to "off", then remove plug from wall outlet.
- Do not use appliance for other than intended use.
- Ensure the appliance is placed on a stable, level, heat-resistant surface.
- Provide adequate ventilation around the appliance during operation.
3. Product Overview
3.1 Key Features
- 15L Large Capacity: Suitable for family meals and gatherings.
- Rapid Air Circulation Technology: 360° high-speed hot air circulation for efficient and even cooking.
- Digital LED Screen: Intuitive touch control panel for easy operation.
- Multi-functional: Combines air frying, roasting, grilling, baking, dehydrating, and rotisserie functions.
- Adjustable Temperature & Timer: Temperature range from 60°C to 200°C and a timer up to 60 minutes.
- Automatic Shut-Off: Enhances safety by preventing overcooking.
- Nonstick Basket & Accessories: Easy to clean and PFOA/BPA free.

Figure 3.1: Overview of the TEMKIN Air Fryer Oven's 5-in-1 capabilities, including rotisserie function, vortex technology for 99% less fat, and faster cooking.

Figure 3.2: Illustration of the 5-in-1 cooking modes: Air Frying, Rotisserie, Dehydrator, Roast, and Bake, demonstrating the versatility of the appliance.
3.2 Components
- Main Unit: Houses the heating element, fan, and control panel.
- Digital LED Touch Screen: For setting cooking parameters and selecting presets.
- Ergonomically Designed Handle: For opening and closing the oven door.
- Viewing Window: Allows monitoring of food during cooking.
- Multi-dimensional Cooling Holes: Located on the sides and back for efficient heat dissipation.
- Hollow Frying Basket: For air frying, designed for even heat distribution.
- Drip Pan/Baking Tray: Collects excess grease and can be used for baking.
- Power Cord: For connecting to an electrical outlet.
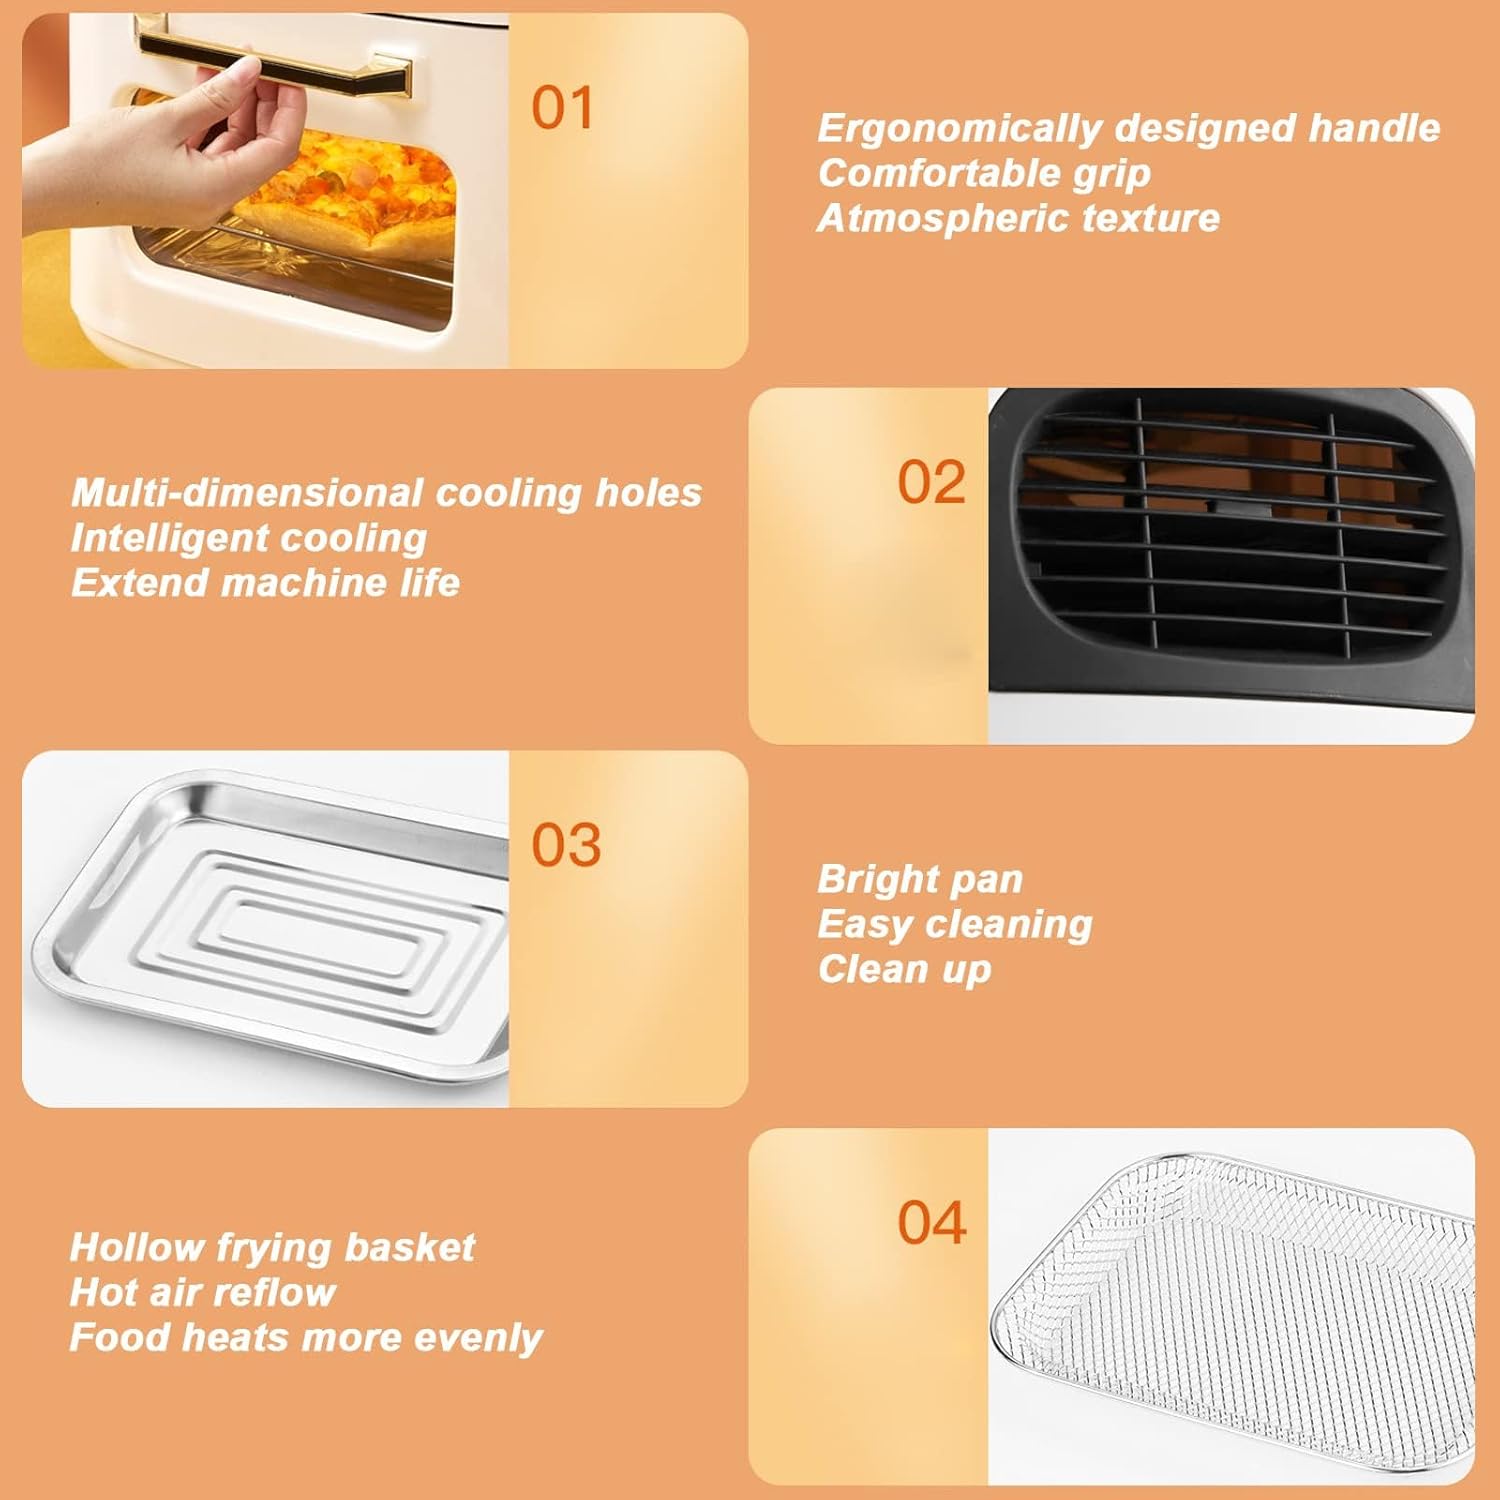
Figure 3.3: Detailed view of key components including the ergonomically designed handle, multi-dimensional cooling holes, bright pan, and hollow frying basket.
4. Setup
4.1 Unpacking
- Carefully remove all packaging materials from the air fryer oven.
- Remove any stickers or labels from the appliance.
- Check that all components are present and undamaged.
4.2 Initial Cleaning
- Wipe the exterior of the appliance with a damp cloth.
- Wash the frying basket, drip pan, and any other removable accessories in warm, soapy water. Rinse thoroughly and dry completely. Alternatively, these accessories are dishwasher safe.
- Wipe the interior of the oven with a damp cloth.
4.3 Placement
- Place the air fryer oven on a stable, level, and heat-resistant surface.
- Ensure there is at least 10 cm (4 inches) of clear space around the back and sides of the appliance to allow for proper ventilation.
- Do not place the appliance directly against a wall or under cabinets during operation.
- Plug the power cord into a grounded electrical outlet.
5. Operating Instructions
5.1 Control Panel Overview
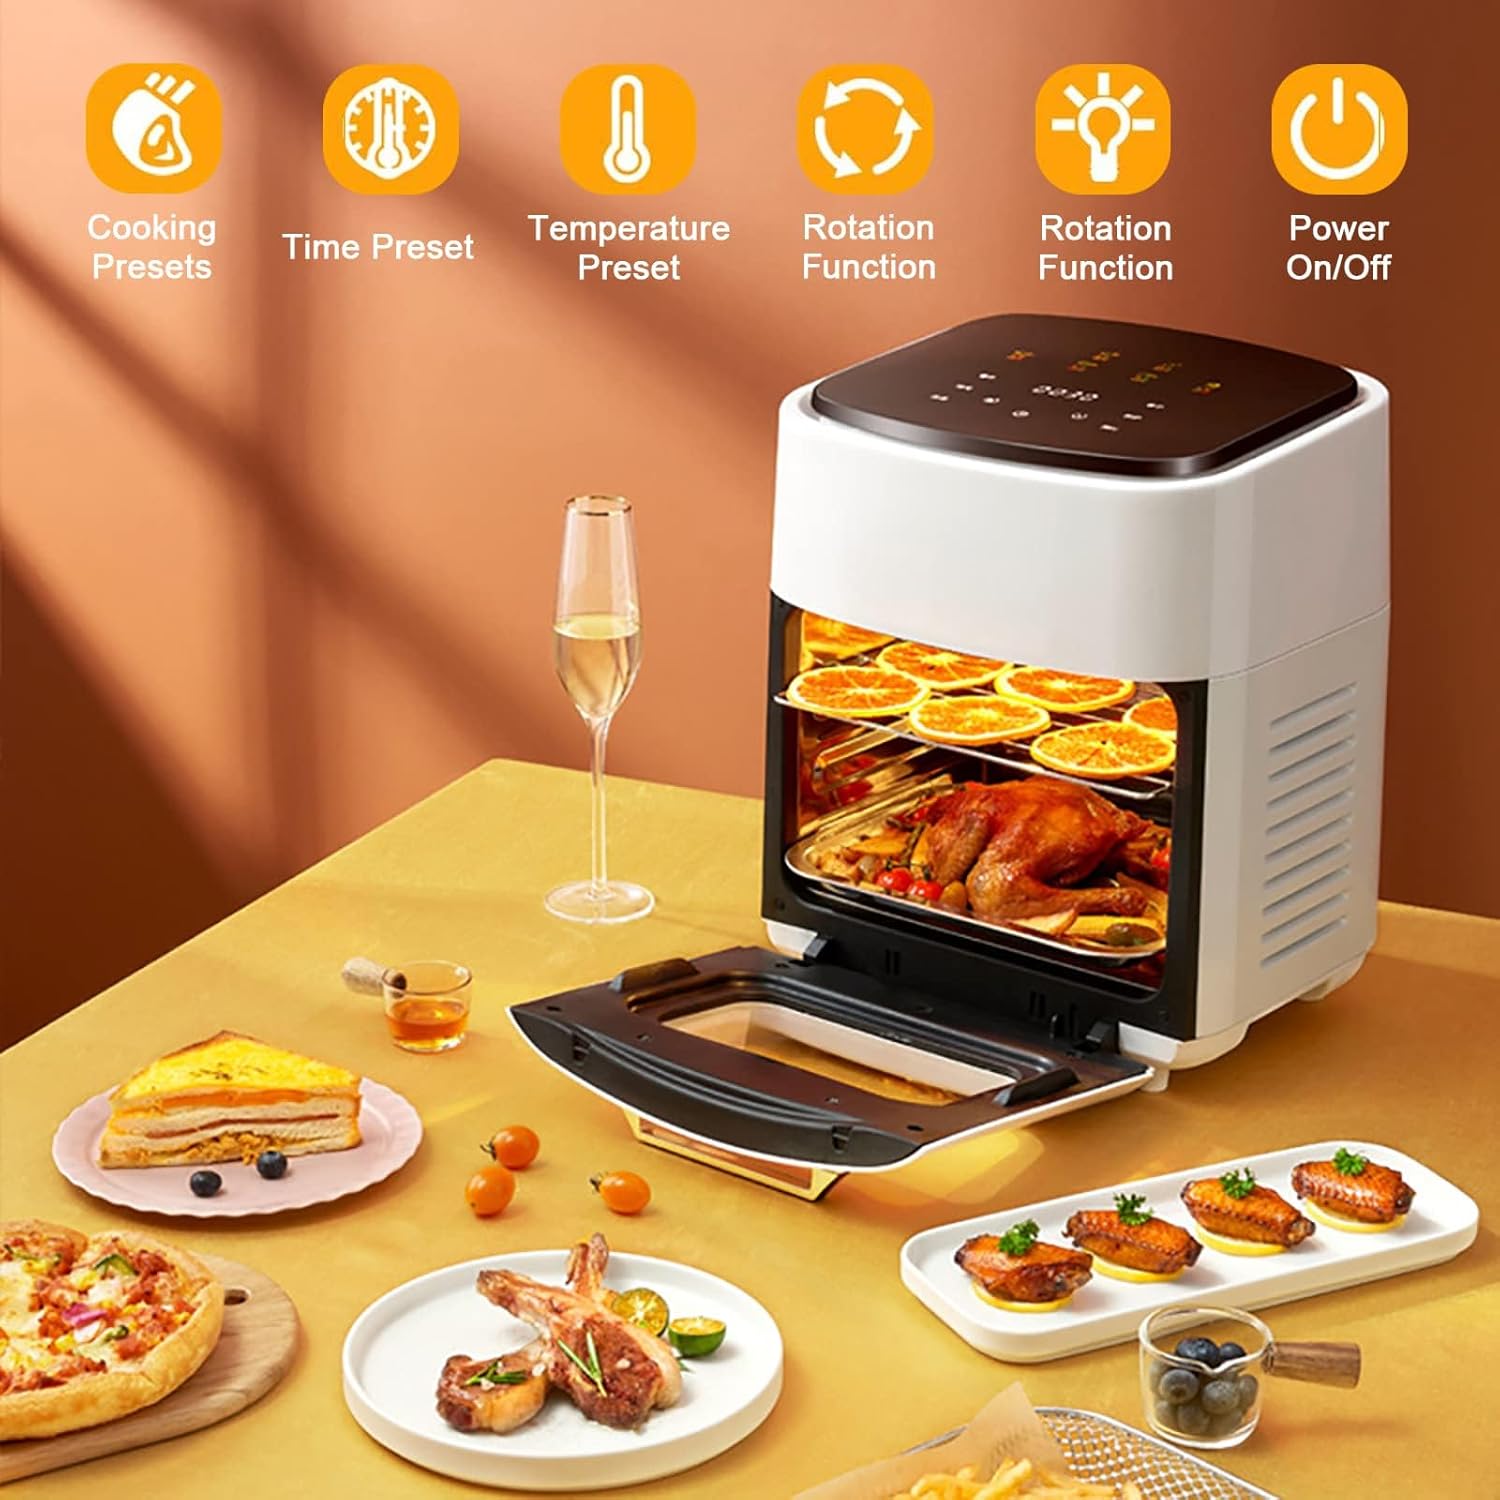
Figure 5.1: The digital LED touch screen control panel, showing icons for cooking presets, time, temperature, rotation function, and power.
5.2 Basic Operation
- Prepare Food: Place your desired food into the frying basket or on the drip pan. Do not overfill.
- Insert Accessories: Slide the basket/pan into the oven. Close the oven door securely.
- Power On: Press the Power On/Off icon on the LED screen to turn on the appliance.
- Set Temperature and Time:
- Press the Temperature Preset icon to adjust the cooking temperature (60°C-200°C).
- Press the Time Preset icon to adjust the cooking time (0-60 minutes).
- Select Presets (Optional): The appliance features 4 one-touch presets: Chip, Meat, Nut, and Pizza. Press the corresponding preset icon for pre-programmed settings. You can adjust time and temperature after selecting a preset if needed.
- Start Cooking: Once settings are confirmed, the appliance will automatically begin cooking after a few seconds, or you may need to press a start button (if available, indicated by a play/pause icon).
- Monitor Cooking: Use the viewing window to check on your food.
- Automatic Shut-Off: The appliance will automatically turn off when the timer reaches zero.
- Remove Food: Carefully open the oven door and use heat-resistant tongs or oven mitts to remove the cooked food and accessories.
- Power Off: Press the Power On/Off icon to turn off the appliance if not using the auto-shut off.
5.3 Rotisserie Function
If your model includes a rotisserie spit, follow these steps:
- Prepare your food (e.g., whole chicken) and secure it onto the rotisserie spit according to the accessory instructions.
- Carefully insert the rotisserie spit into the designated slots inside the oven.
- Set the desired temperature and time.
- Press the Rotation Function icon on the control panel to activate the rotisserie.
- Monitor cooking through the viewing window.

Figure 5.2: Example cooking times for common foods, illustrating the efficiency of the air fryer oven.
6. Maintenance and Cleaning
Regular cleaning ensures optimal performance and extends the lifespan of your air fryer oven.
- Unplug and Cool: Always unplug the appliance from the power outlet and allow it to cool completely before cleaning.
- Clean Accessories: The removable frying basket, drip pan, and other accessories are dishwasher safe. Alternatively, wash them in warm, soapy water using a non-abrasive sponge. Rinse and dry thoroughly.
- Clean Interior: Wipe the interior of the oven with a damp cloth. For stubborn food residue, use a mild detergent and a soft brush. Avoid abrasive cleaners or metal scouring pads.
- Clean Exterior: Wipe the exterior of the appliance with a damp cloth. Do not use harsh chemicals or abrasive materials.
- Do Not Immerse: Never immerse the main unit, power cord, or plug in water or any other liquid.
- Storage: Ensure all parts are clean and dry before storing the appliance in a cool, dry place.
7. Troubleshooting
If you encounter issues with your air fryer oven, refer to the following table for common problems and solutions.
| Problem | Possible Cause | Solution |
|---|---|---|
| Appliance does not turn on. | Not plugged in. Power outlet malfunction. | Ensure the power cord is securely plugged into a working outlet. Check the circuit breaker. |
| Food is not cooked evenly. | Overcrowding the basket. Incorrect temperature/time. | Do not overcrowd the basket; cook in smaller batches. Adjust temperature and time as needed. Shake or flip food halfway through cooking. |
| White smoke coming from the appliance. | Grease residue from previous use. Fatty food cooking. | Clean the basket and drip pan thoroughly after each use. For fatty foods, place a small amount of water in the drip pan to reduce smoke. |
| Food is not crispy. | Too much moisture. Not enough oil (for certain foods). | Pat food dry before cooking. Lightly brush or spray food with oil for extra crispiness. Increase cooking time or temperature slightly. |
If the problem persists after attempting these solutions, please contact customer support.
8. Specifications
| Feature | Specification |
|---|---|
| Model Number | 124511425 |
| Capacity | 15 Liters |
| Wattage | 1400 Watts |
| Voltage | 220-240V |
| Temperature Range | 60°C - 200°C (140°F - 400°F) |
| Timer Range | 0 - 60 Minutes |
| Control Method | Touch Control |
| Special Feature | Automatic Shut-Off |
| Nonstick Coating | Yes |
| Dishwasher Safe Accessories | Yes |
| Dimensions (H x W x D) | 370.5mm x 290mm x 370.5mm (approx. 14.6" x 11.4" x 14.6") |
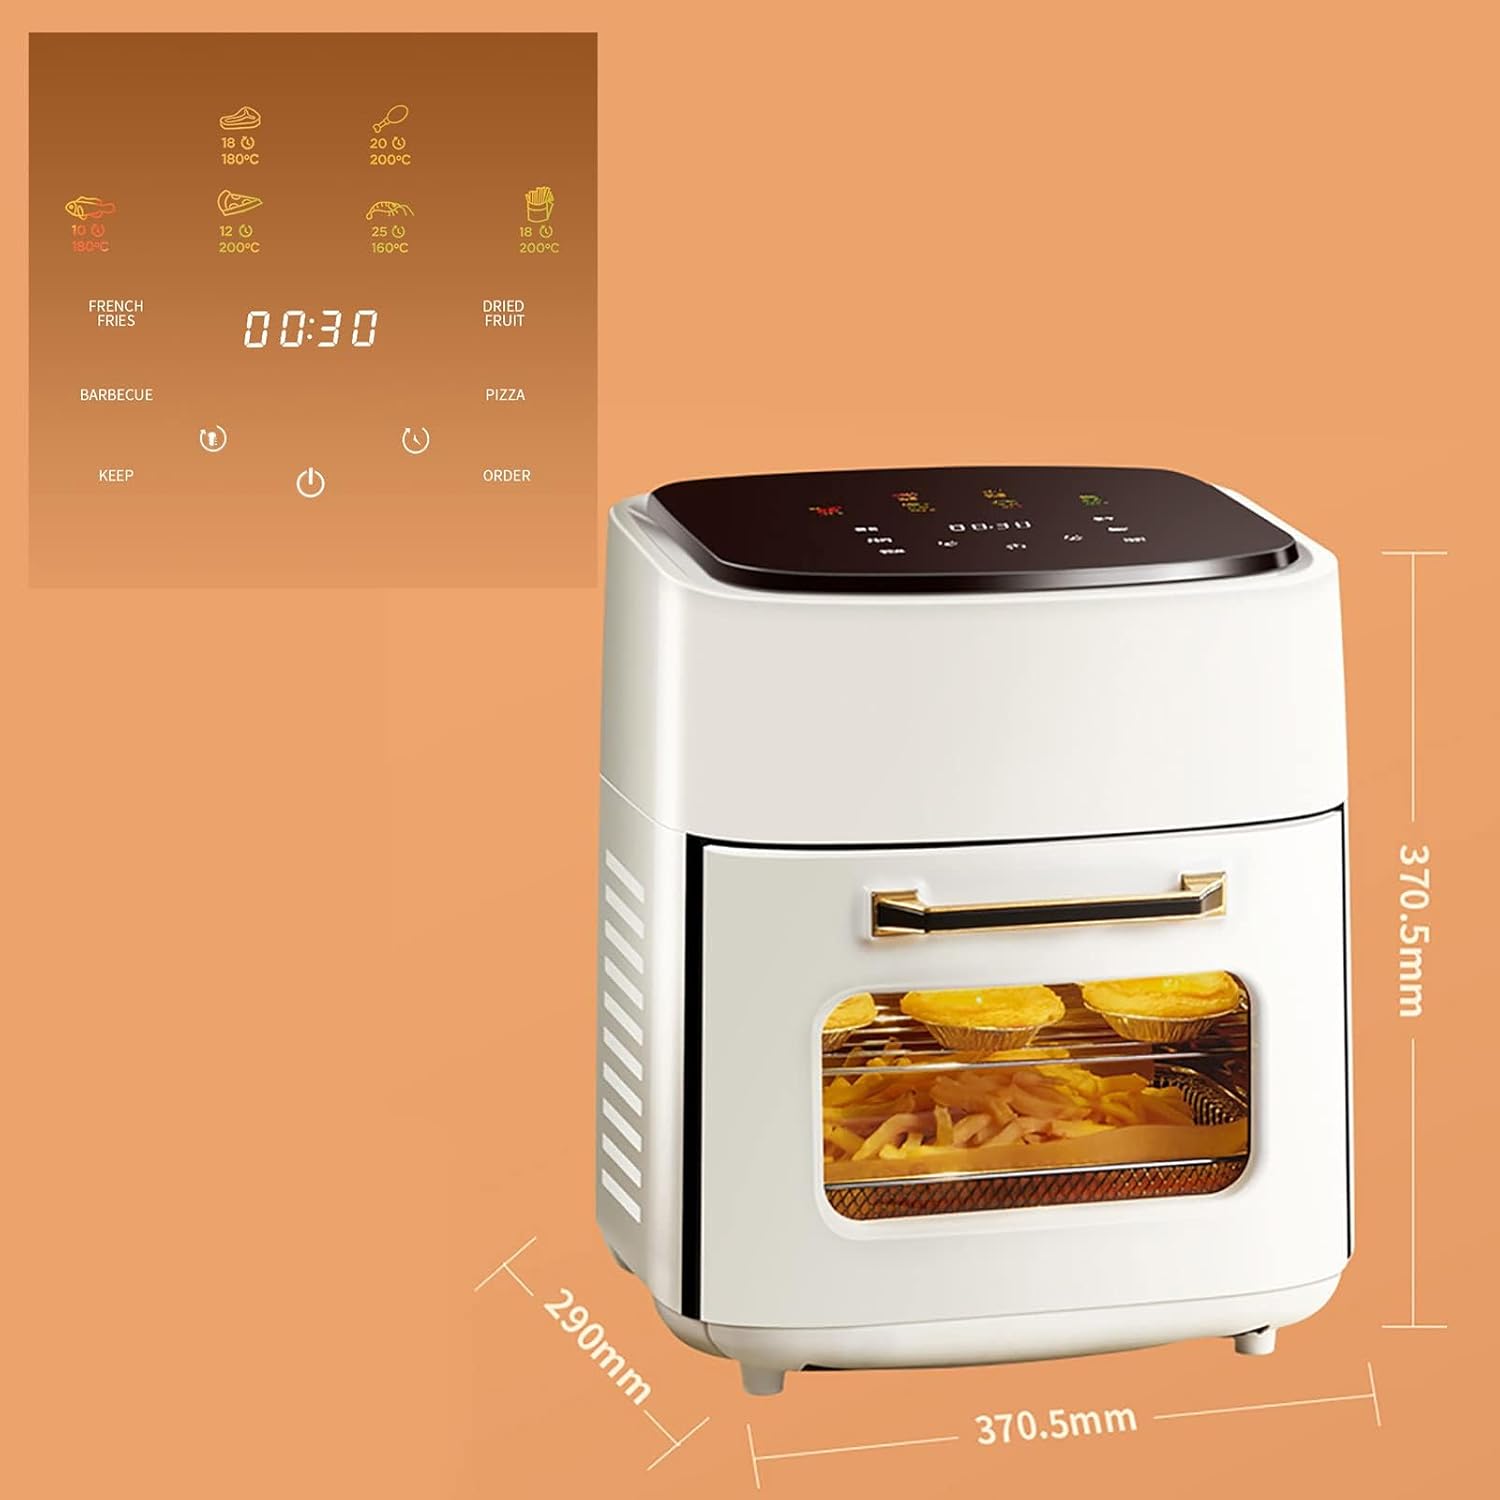
Figure 8.1: Diagram showing the approximate dimensions of the TEMKIN 15L Digital Air Fryer Oven.
9. Warranty and Support
For warranty information or technical support, please refer to the product packaging or contact the retailer from whom you purchased the product. If you have any questions about the product, please contact us promptly, and we will respond within 24 hours.
