Introduction
This manual provides detailed instructions for the safe and effective use of your VASTFIRE USB-C Rechargeable Green Flashlight. Please read this manual thoroughly before operating the device to ensure optimal performance and longevity.

Image: The VASTFIRE USB-C Rechargeable Green Flashlight in use, demonstrating its green light beam and USB-C charging capability with a smartphone.
Product Features
- Green Light Illumination: Specifically designed for hunting and tactical applications, providing a green light beam that is less disruptive to certain animal species.
- Adjustable Beam: Features a zoomable and focusable beam, allowing transition between a wide floodlight for close-range illumination (up to 500 feet) and a tight spotlight for long-range identification (up to 1000 yards).
- Multiple Operating Modes: Offers a single brightest mode when connected with the pressure switch for tactical use, and five modes (High, Mid, Low brightness, Strobe, and SOS) when using the tail cap switch.
- USB-C Rechargeable with Power Bank Function: Equipped with a USB-C charging port for convenient recharging and a standard USB Type-A output port to function as a power bank for charging other devices.
- Low Battery Indicator: A red indicator light illuminates to warn when the battery power is low.
- Durable Construction: Made from lightweight aluminum casing, water and dust-proof with an IP65 rating, ensuring reliability in various conditions.
- Versatile Mounting Options: Features a 48mm bezel diameter and 1-inch body, compatible with most standard mounts, including universal scope and rail mounts.
Package Contents
Upon opening the package, please verify that all the following components are included:
- USB-C Green Light Rechargeable Flashlight
- Rechargeable Battery (1 D battery included)
- Charging Cable (USB-C)
- Pressure Switch (Coiled tactical click switch tailcap)
- Push Button On/Off Tailcap
- Rail Mount
- Scope Mount

Image: A complete view of the VASTFIRE Green Flashlight kit, showing the flashlight, pressure switch, charging cable, battery, and various mounting accessories.
Setup
1. Battery Installation
- Unscrew the tail cap of the flashlight by turning it counter-clockwise.
- Insert the included D battery with the positive (+) end facing towards the flashlight head.
- Screw the tail cap back on clockwise until it is securely tightened.
2. Charging the Flashlight
The flashlight features a USB-C charging port. Ensure the battery is installed before charging.
- Locate the USB-C input port on the flashlight body.
- Connect the provided USB-C charging cable to the flashlight's USB-C port.
- Connect the other end of the cable to a compatible USB power source (e.g., wall adapter, computer USB port).
- The power indicator light on the flashlight will turn red during charging and green when fully charged.

Image: Close-up of the VASTFIRE flashlight demonstrating its USB-C charging capability and its function as a power bank to charge a smartphone.
3. Mounting the Flashlight
The flashlight comes with both a rail mount and a scope mount for versatile attachment to firearms or other equipment.
- Rail Mount: Attach the rail mount to your firearm's Picatinny or Weaver rail. Secure the flashlight into the mount and tighten the screws until firm.
- Scope Mount: Use the scope mount to attach the flashlight directly to your scope tube. Ensure the mount is securely fastened to both the scope and the flashlight.
- For optimal stability, ensure all mounting screws are tightened appropriately, but do not overtighten.
Operating Instructions
1. Power On/Off and Mode Selection
The flashlight offers two primary methods for operation: using the standard push-button tail cap or the coiled tactical pressure switch.
- Using the Push-Button Tail Cap:
- Press the button firmly to turn the flashlight ON or OFF.
- With the flashlight ON, lightly press the button (without clicking) to cycle through the five modes: High, Mid, Low, Strobe, and SOS. A full click will turn the flashlight off.
- Using the Coiled Tactical Pressure Switch:
- Replace the standard tail cap with the pressure switch tail cap.
- When the pressure switch is connected, the flashlight operates in a single, brightest mode.
- Press and hold the pressure pad for momentary on. Release to turn off.
- Some pressure switches may have a constant on/off button in addition to the momentary pad. Refer to your specific pressure switch for details.

Image: Illustration of the VASTFIRE flashlight's operating modes, including the single brightest setting with the remote pressure switch and the five modes (High, Mid, Low, Strobe, SOS) available with the standard tail cap switch.
2. Adjusting the Beam (Zoom Function)
The flashlight features an adjustable head to change the beam from a wide floodlight to a focused spotlight.
- To adjust the beam, gently slide the head of the flashlight forward or backward.
- Sliding the head forward will narrow the beam into a focused spotlight for long-range illumination.
- Sliding the head backward will widen the beam into a floodlight for broader area illumination.
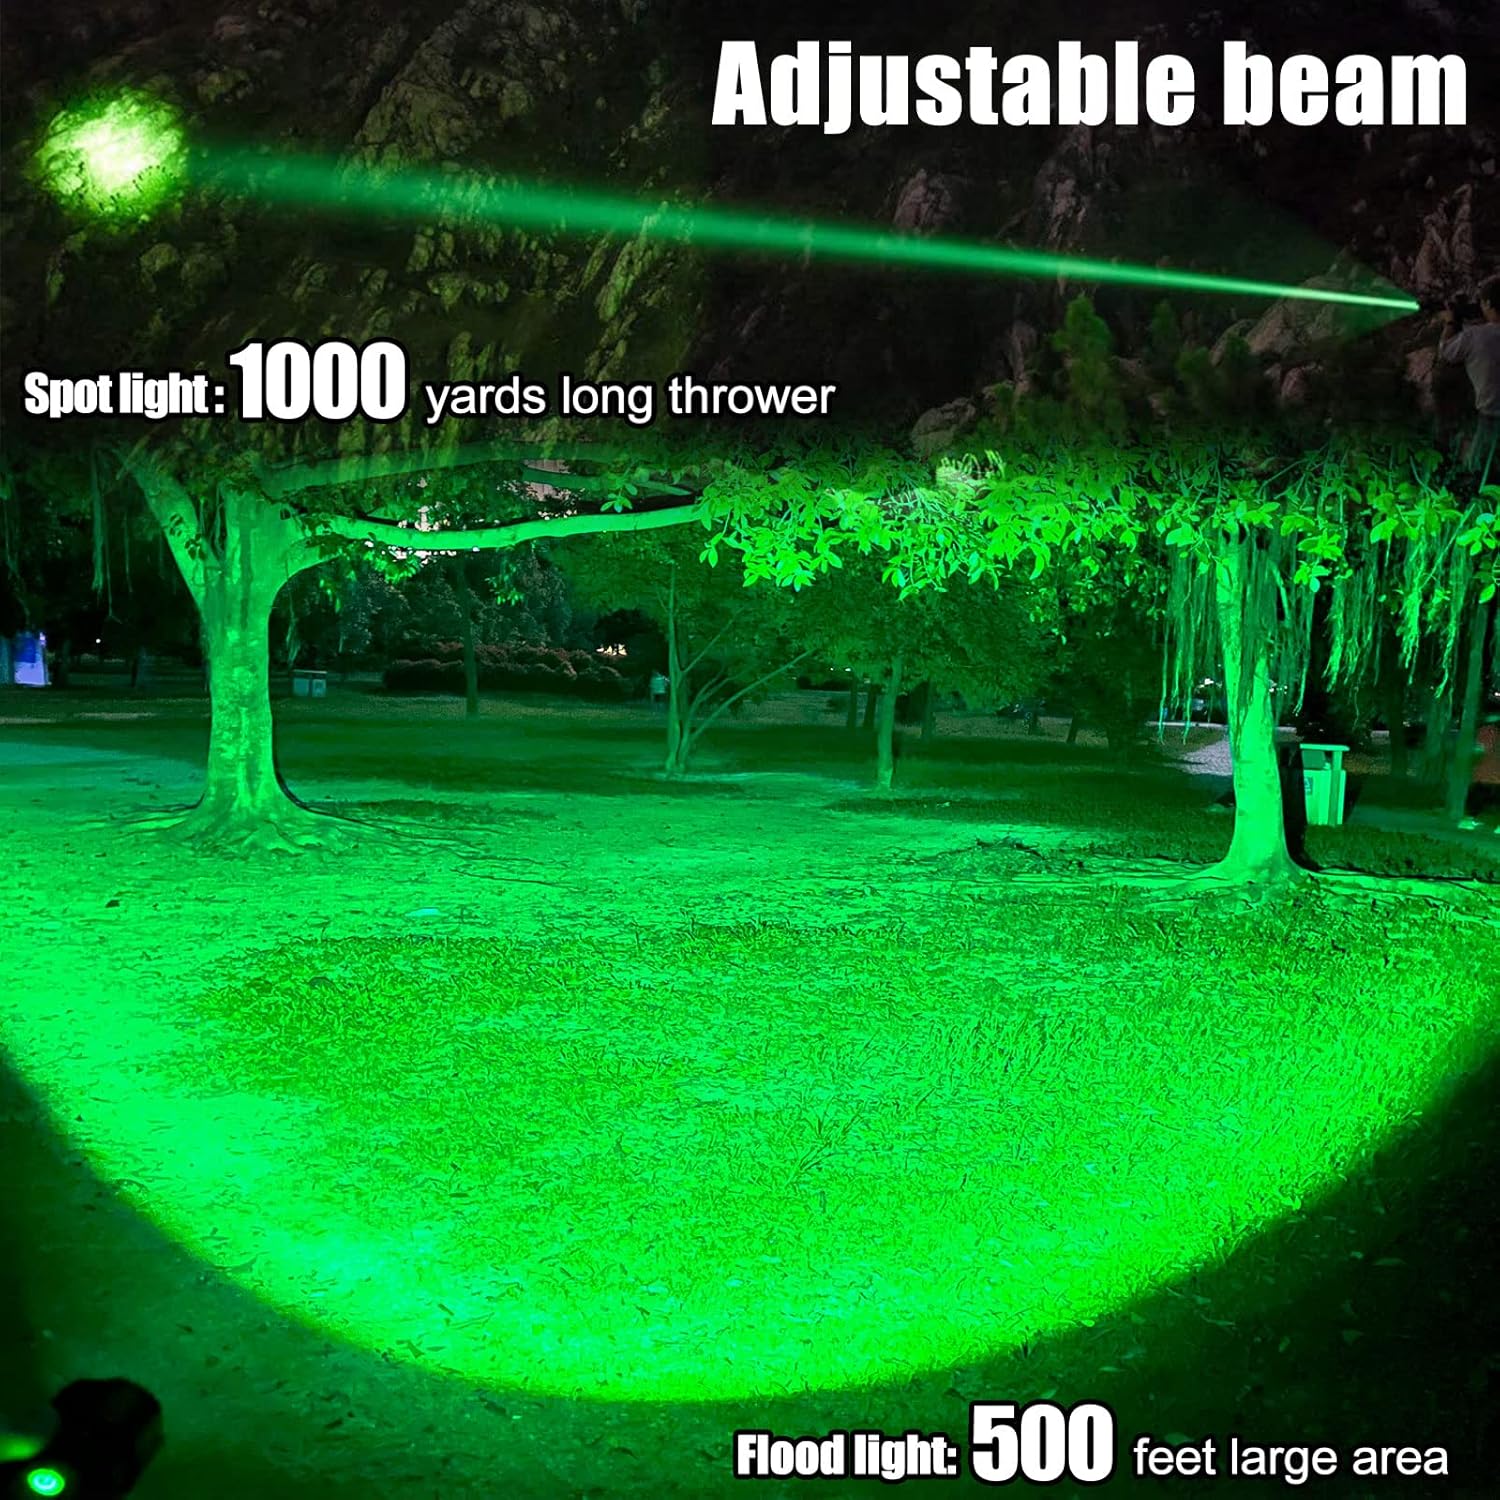
Image: The VASTFIRE flashlight showcasing its adjustable beam capability, transitioning from a narrow 1000-yard spotlight to a wide 500-foot floodlight.
3. Using as a Power Bank
Your VASTFIRE flashlight can also serve as an emergency power bank to charge small electronic devices.
- Locate the standard USB Type-A output port on the flashlight body (next to the USB-C input).
- Connect your device's charging cable to this USB output port.
- The flashlight will begin charging your device. Monitor your device's charging indicator.
Maintenance
- Cleaning: Wipe the flashlight body with a clean, soft cloth. For stubborn dirt, a slightly damp cloth can be used. Do not use abrasive cleaners or solvents.
- Lubrication: Periodically apply a thin layer of silicone grease to the O-rings and screw threads to maintain water resistance and smooth operation.
- Battery Care: If the flashlight will not be used for an extended period, remove the battery to prevent leakage and damage. Store batteries in a cool, dry place.
- Storage: Store the flashlight in a cool, dry environment away from direct sunlight and extreme temperatures.

Image: The VASTFIRE flashlight partially submerged in water, illustrating its IP68 standard for total protection against water and dust, including submersion up to 25 meters for 5 hours.
Troubleshooting
| Problem | Possible Cause | Solution |
|---|---|---|
| Flashlight does not turn on. | Low or dead battery; Incorrect battery insertion; Loose tail cap; Faulty switch. | Charge the battery or replace it. Ensure battery is inserted correctly (positive end towards head). Tighten the tail cap. If using pressure switch, ensure it is fully connected. |
| Light is dim or flickers. | Low battery; Loose connections; Dirty contacts. | Recharge the battery. Ensure tail cap and head are tightly screwed. Clean battery contacts and flashlight threads with a clean cloth. |
| Beam adjustment is stiff. | Dirt or debris in the zoom mechanism. | Clean the exterior of the flashlight head. Avoid forcing the mechanism. |
| Power bank function not working. | Flashlight battery too low; Incorrect cable; Device incompatibility. | Ensure flashlight battery is sufficiently charged. Use a known good charging cable. Verify device compatibility with standard USB charging. |
Specifications
| Model Name: | VA-F04 |
| Light Source Type: | LED (Green) |
| Brightness: | Up to 2000 Lumens |
| Max Beam Distance: | 1000 Yards (Spotlight), 500 Feet (Floodlight) |
| Power Source: | Battery Powered (1 D battery included) |
| Charging: | USB-C Rechargeable |
| Material: | Aluminum |
| Water Resistance Level: | IP65 (Water Resistant) |
| Product Dimensions: | Approx. 3"D x 3"W x 13"H (Length: 8 1/2 inches, Diameter: 2 1/4 inches) |
| Weight: | 1.2 lbs (approx. 0.54 kg) |

Image: A hand holding the VASTFIRE flashlight, illustrating its compact size with indicated weight (2.31 oz) and length (4.39 inches). Note: The image text for weight/length seems to contradict the product specifications, so the specifications table uses the provided product data.
Warranty and Support
Your VASTFIRE USB-C Rechargeable Green Flashlight comes with the following warranty:
- Pressure Switch: Free lifetime warranty.
- Flashlight Kit: 2-year manufacturer warranty.
- Returns: 60-day return policy.
For any issues, missing parts, or defective items, please contact the manufacturer directly. There is no need to return the item through the retailer; a new, workable item will be provided.
Product Video
Video: An overview of the VASTFIRE Green Flashlight, demonstrating its components, features, and green light output. This video is provided by the seller, VASTFIRE DIRECT.


