Introduction
Thank you for choosing the OKPRO O-168XBJ Solar Outdoor Lights. This manual provides essential information for the proper setup, operation, and maintenance of your new solar lights. Please read these instructions carefully before installation and retain them for future reference.
Product Overview
The OKPRO O-168XBJ Solar Outdoor Lights are designed to provide efficient and reliable outdoor illumination. Featuring an octagonal design with 168 super bright LED beads, these lights offer 360° wide-angle lighting without blind spots. Equipped with an intelligent radar motion sensor and a 180° adjustable bracket, they are ideal for various outdoor applications such as yards, pools, and pathways. The IP66 waterproof rating ensures durability against diverse weather conditions.

Image: Key features of the OKPRO Solar Street Outdoor Lights.
What's in the Box
- Lamp body (x4 for 4-pack)
- Lamp post (x4 for 4-pack)
- Screw accessories (for installation)
- Remote Control (x1)
- Instruction Manual (x1)
Specifications
| Brand | OKPRO |
| Model Number | O-168XBJ |
| Material | Acrylonitrile Butadiene Styrene (ABS) |
| Light Source | LED |
| Number of LEDs | 168 |
| Light Color | 6500K (White) |
| Brightness | 24000 Lumen |
| Voltage | 6 Volts |
| Power Source | Solar Powered |
| Water Resistance Level | IP66 Waterproof |
| Special Features | Energy Efficient, Motion Sensor, Timer, Adjustable Bracket |
| Mounting Type | Wall Mount |
| Item Dimensions (L x W x H) | 7.87"L x 1.18"W x 9.1"H |
| Item Weight | 1.1 Pounds |
Setup & Installation
The OKPRO Solar Outdoor Lights are designed for easy, wire-free installation. Ensure the solar panel receives direct sunlight for optimal charging.
Choosing an Installation Location
- Select a location where the solar panel can receive at least 6-8 hours of direct sunlight daily.
- Avoid areas under eaves, trees, or other obstructions that may block sunlight.
- Consider the desired illumination area and the motion sensor's range when positioning.
Assembly Steps
- Attach the Lamp Post: Secure the lamp post to the back of the lamp body using the provided screws. Ensure it is firmly attached.
- Mount the Bracket: Use the screw accessories to securely mount the adjustable bracket to your desired surface (e.g., wall, fence post).
- Attach the Light: Slide the lamp post with the attached light body onto the mounted bracket. Tighten any securing screws to prevent movement.
- Adjust Angle: Utilize the 180° adjustable bracket to angle the solar panel for maximum sun exposure and direct the light towards the desired area.

Image: Illustration of the upgraded solar panel and its features.

Image: The 180° adjustable bracket allows for flexible positioning.
Video: This video demonstrates the unboxing and basic assembly of the OKPRO Solar Lights, including attaching the bracket and light body.
Operating Instructions
The OKPRO Solar Outdoor Lights feature an intelligent radar sensor chip with three distinct lighting modes, controllable via the included remote.
Remote Control Functions
- ON/OFF: Turns the light on or off. When turned off, it will remain off until manually turned on again or until the next dusk-to-dawn cycle if in a sensor mode.
- Sensor 1 (Mode 1): 100% brightness when motion is detected. Automatically turns off when no motion is detected at night.
- Sensor 2 (Mode 2): 100% brightness when motion is detected. After 30 seconds of no motion, it switches to 30% brightness.
- Sensor 3 (Mode 3): Lights automatically turn on at night at 50% brightness, remaining constant.
- Timer Functions (1H/2H/3H/5H to Sensor): After the set time (1, 2, 3, or 5 hours) expires, the light will switch to motion sensor Mode 1.
- 4H: The light will turn on at high brightness for 4 hours, then automatically turn off.
- AUTO: Activates the dusk-to-dawn sensor, automatically turning the light on at dusk and off at dawn.
- RESET: Resets the light to its default settings.

Image: Remote control and its functions for setting lighting modes.
Maintenance
To ensure optimal performance and longevity of your OKPRO Solar Outdoor Lights, follow these maintenance guidelines:
- Clean Solar Panel: Regularly wipe the solar panel with a soft, damp cloth to remove dust, dirt, and debris. A clean panel ensures efficient charging.
- Inspect for Damage: Periodically check the light body, bracket, and wiring (if any) for signs of wear, damage, or loose connections.
- Clear Obstructions: Ensure no new obstructions (e.g., growing branches, new structures) are blocking sunlight from reaching the solar panel.
- Battery Care: The integrated battery is designed for long-term use. Avoid disassembling the unit to access the battery unless performed by a qualified technician.
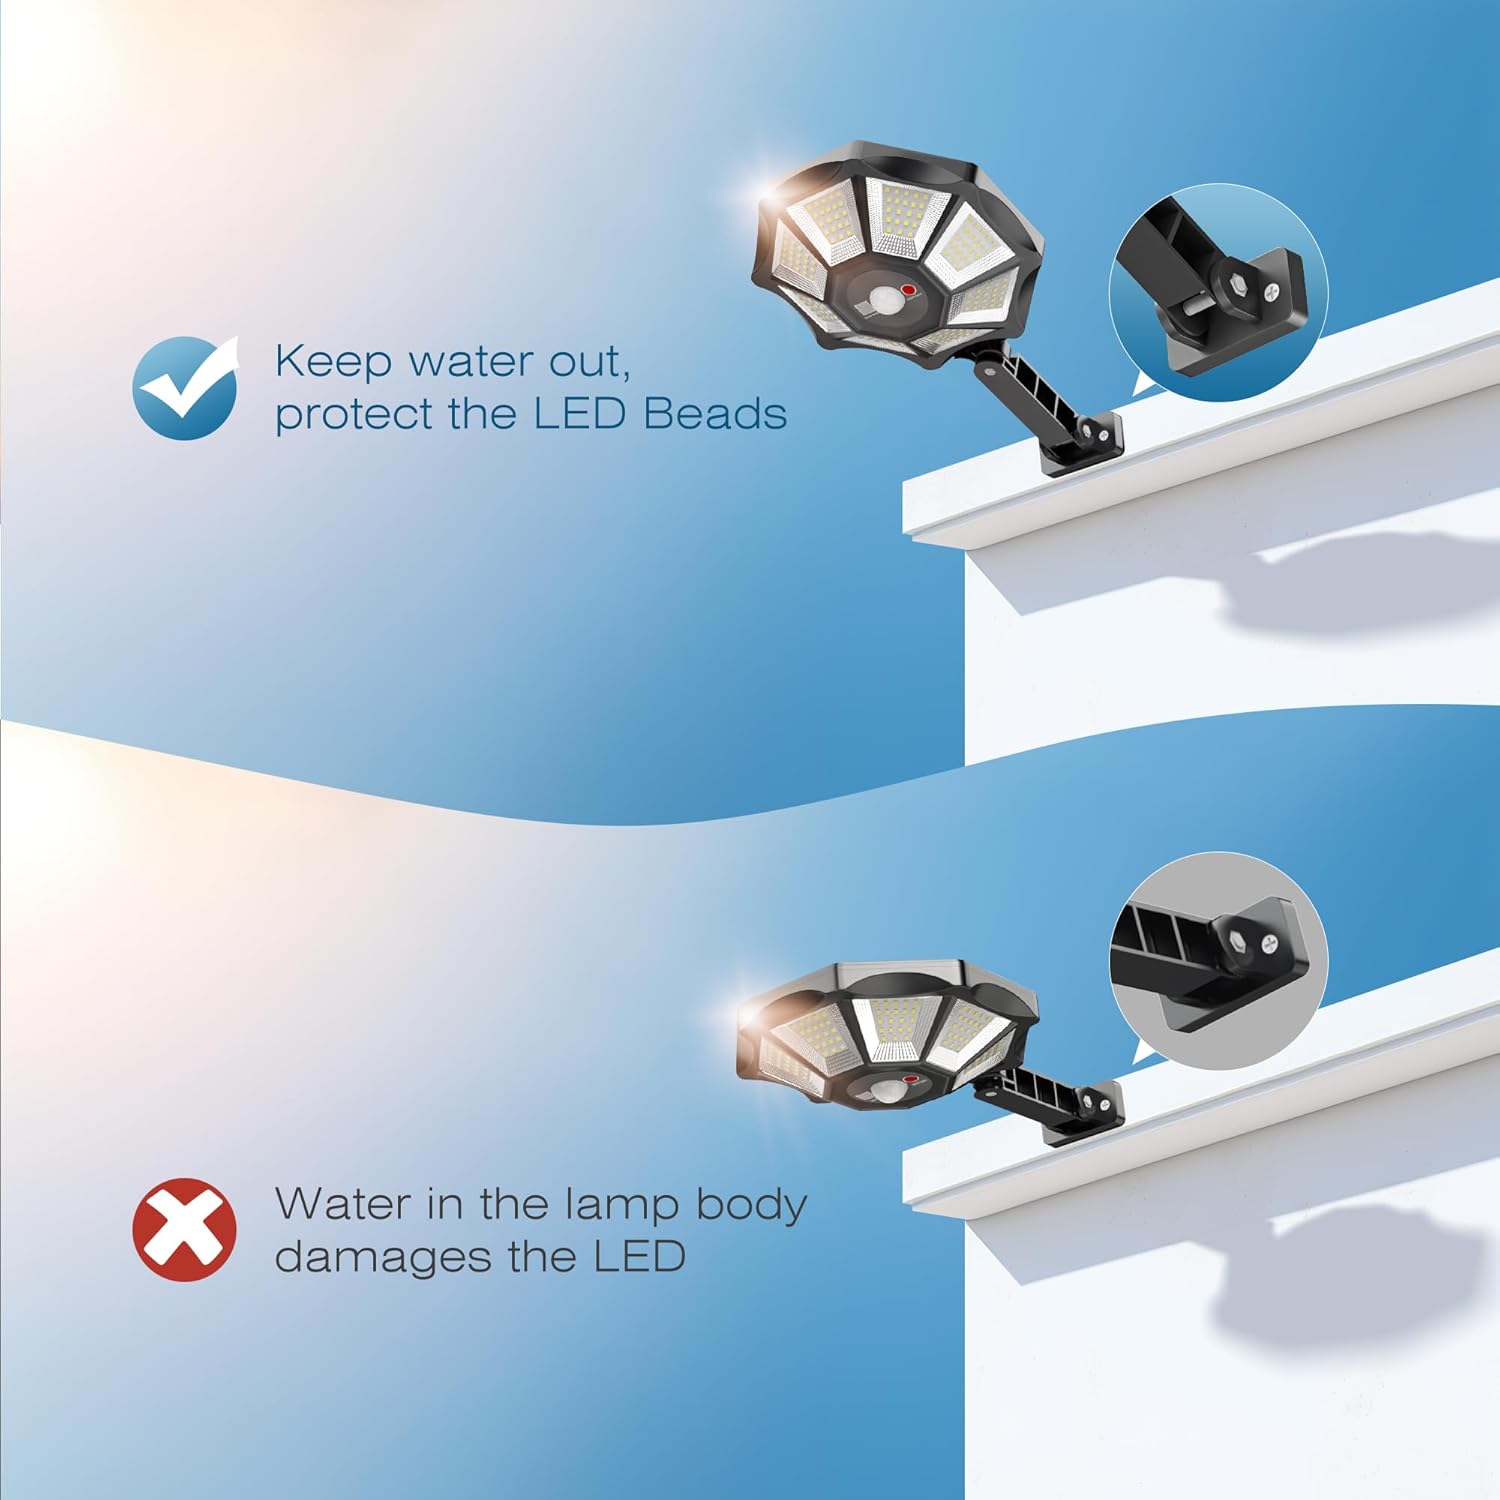
Image: Proper care helps protect the LED beads from water damage.
Troubleshooting
If your solar light is not functioning as expected, refer to the following common issues and solutions:
| Problem | Possible Cause | Solution |
|---|---|---|
| Light does not turn on at night. | Insufficient solar charge. | Ensure the solar panel is in direct sunlight for 6-8 hours daily. Clean the solar panel surface. |
| Light is dim or flickers. | Low battery charge or dirty solar panel. | Allow several days of full sunlight charging. Clean the solar panel. |
| Motion sensor not working. | Sensor obstructed or incorrect mode selected. | Ensure the sensor is clear of obstructions. Verify the light is set to a motion sensor mode (Mode 1 or Mode 2) using the remote control. |
| Remote control not responding. | Remote battery depleted or line of sight issue. | Replace the remote control battery. Ensure direct line of sight between the remote and the light's IR receiver. |
Warranty & Support
OKPRO provides a 2-year warranty for its street lights. Our products are FCC, CE, and RoHS certified, ensuring quality and safety. If you encounter any issues or have questions regarding your LED solar street lights, please do not hesitate to contact us. Our customer support team is available to assist you.
For support, please visit the OKPRO Store on Amazon or refer to the contact information provided in your product packaging.


