
1. Introduction
This manual provides detailed instructions for the installation, operation, and maintenance of your ARREGUI Elek 22500W-S1 Hidden Wall Safe. This safe is designed for discreet storage of small valuables, featuring a unique camouflage design that integrates into your wall behind a standard junction box lid. Please read these instructions carefully before installation and use to ensure proper function and security.

Figure 1: The ARREGUI Elek 22500W-S1 Hidden Wall Safe with its protective junction box lid open, revealing the key-operated safe door.
2. Safety Information
- Always keep the safe keys in a secure location, separate from the safe itself.
- Ensure the safe is installed in a structurally sound wall capable of supporting its weight and resisting tampering.
- Do not store flammable materials, explosives, or illegal items inside the safe.
- This safe is designed for security against theft, not against fire or water damage. It is best to assume it is not water resistant for critical documents.
- Keep children away from the safe and its keys.
3. Package Contents
Verify that all the following items are included in your package:
- ARREGUI Elek 22500W-S1 Hidden Wall Safe unit
- Junction box lid (for camouflage)
- Instruction Manual (this document)
- 2 x Perforated keys
4. Specifications
| Feature | Detail |
|---|---|
| Model | Elek 22500W-S1 |
| External Dimensions (H x W x D) | 20 cm x 20 cm x 20.5 cm (approx. 7.87" x 7.87" x 8.07") |
| Internal Dimensions (H x W x D) | 18.8 cm x 16 cm x 19.3 cm (approx. 7.4" x 6.3" x 7.6") |
| Door Opening Dimensions (H x W) | 15.5 cm x 13.8 cm (approx. 6.1" x 5.4") |
| Capacity | 5 Liters |
| Weight | 4 kg (approx. 8.8 lbs) |
| Material | Alloy Steel (5mm thick front, 1mm thick body) |
| Lock Type | Key lock system with perforated key |
| Mounting Type | Wall Mount (flush mounting) |

Figure 2: Detailed dimensional diagram of the ARREGUI Elek 22500W-S1 safe, illustrating external and internal measurements.
5. Installation (Wall Mounting)
The ARREGUI Elek 22500W-S1 safe is designed for flush mounting into a wall. This process requires construction work.
- Select Location: Choose a suitable wall location. Ensure the wall is thick enough and structurally sound to accommodate the safe's external dimensions (20 cm H x 20 cm W x 20.5 cm D). Use a drill to verify wall depth before proceeding.
- Prepare Wall Opening: Create an opening in the wall that matches the external dimensions of the safe. The opening should be precise to allow for a flush fit.

Figure 3: The ARREGUI Elek 22500W-S1 safe from the rear, showing the junction box lid attached. This view helps visualize the depth required for installation.
- Insert Safe: Carefully push the safe into the prepared wall opening. Ensure the front frame of the safe is flush with the wall surface.

Figure 4: The safe partially recessed into a wall opening, demonstrating the flush mounting concept. The junction box lid is visible on the front.
- Secure with Concrete/Mortar: Once the safe is correctly positioned and flush, fill the surrounding gaps with concrete or mortar to permanently secure it within the wall. Allow sufficient time for the concrete/mortar to dry completely.
- Finish Wall: After the concrete/mortar is dry, plaster and finish the wall around the safe. The goal is for only the junction box lid to be visible, ensuring the safe remains fully camouflaged.
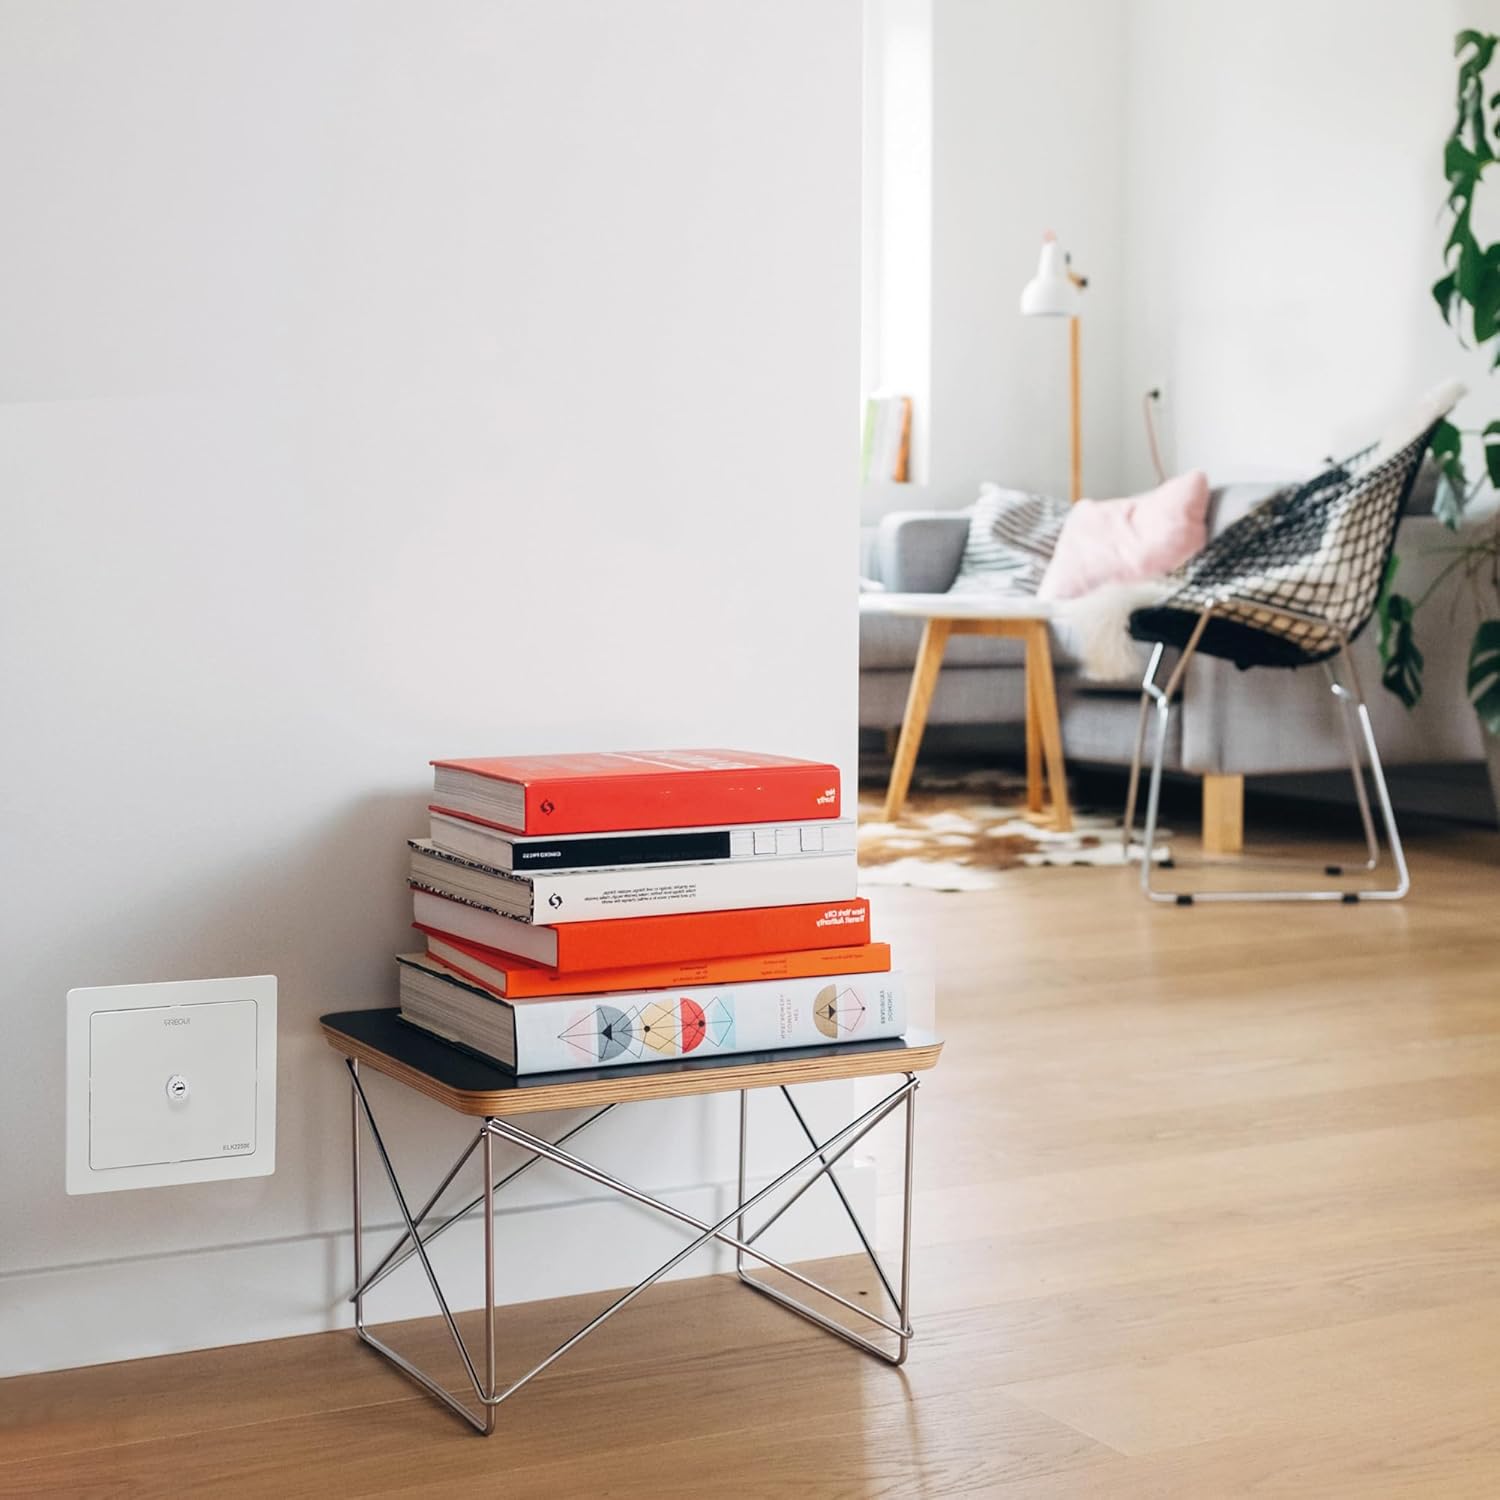
Figure 5: The ARREGUI Elek safe fully installed and camouflaged within a wall, with only the junction box lid visible, blending seamlessly into the environment.
6. Operating Instructions
6.1 Opening the Safe
- Remove Junction Box Lid: The junction box lid is attached to the safe door by four magnets. Gently pull the lid to detach it from the safe.
- Insert Key: Insert one of the provided perforated keys into the keyhole on the safe door.
- Turn Key and Open Door: Turn the key clockwise (or counter-clockwise, depending on the lock mechanism) to unlock the safe. Pull the door open.
6.2 Closing and Locking the Safe
- Close Door: Push the safe door firmly shut.
- Lock Safe: Turn the key counter-clockwise (or clockwise) to lock the safe. Remove the key and store it in a secure location.
- Reattach Junction Box Lid: Align the junction box lid with the safe door and allow the magnets to secure it in place. Ensure it sits flush with the wall for optimal camouflage.

Figure 6: An interior view of the ARREGUI Elek safe, demonstrating its capacity for small valuables such as a wallet and a phone.
7. Maintenance
- Cleaning: Wipe the exterior and interior of the safe with a soft, dry cloth. Avoid abrasive cleaners or solvents that could damage the finish.
- Lock Mechanism: Periodically check the lock mechanism for smooth operation. If the key becomes stiff, a small amount of graphite lubricant (not oil-based) can be applied to the key and inserted into the lock.
- Key Storage: Always keep spare keys in a secure location away from the safe and accessible only to trusted individuals.
- Magnet Check: Ensure the four magnets on the junction box lid remain securely attached and provide sufficient hold. If they weaken, they may need re-gluing.
8. Troubleshooting
| Problem | Possible Cause | Solution |
|---|---|---|
| Key does not turn or is stiff. | Dust or debris in the lock; lack of lubrication. | Apply a small amount of graphite lubricant to the key and insert it into the lock several times. Do not force the key. |
| Junction box lid does not stay attached. | Weak or dislodged magnets. | Check if the magnets are still in place on the lid. If dislodged, re-glue them securely. If weak, consider replacing them or adding stronger magnets. |
| Safe door is difficult to open/close. | Misalignment during installation; debris obstructing the door. | Inspect the door frame and hinges for any obstructions. If the issue is due to installation, professional assistance may be required. |
| Lost all keys. | Keys are misplaced or lost. | Contact ARREGUI customer support for assistance. You may need to provide proof of ownership and the lock number (if available). |
9. Warranty and Support
For warranty information or technical support, please refer to the documentation provided with your purchase or visit the official ARREGUI website. Keep your purchase receipt as proof of purchase.
ARREGUI Official Website: www.arregui.es