
1. Introduction
Thank you for choosing the LuxeBath Sahara Bathroom Radiator. This manual provides essential information for the safe and efficient installation, operation, and maintenance of your new radiator. Please read these instructions carefully before installation and retain them for future reference.
The LuxeBath Sahara radiator is designed to provide comfortable warmth and a modern aesthetic to your bathroom or living space. Its high-quality construction ensures efficient heat dissipation and durability.
2. Safety Information
Always adhere to local regulations and safety standards during installation and operation. Incorrect installation can lead to hazards.
- Installation should only be performed by a qualified professional.
- Ensure the wall structure can support the weight of the radiator when filled with water.
- Do not cover the radiator with flammable materials.
- Keep children and pets away from the hot surface of the radiator during operation.
- Before any maintenance or cleaning, ensure the heating system is turned off and the radiator has cooled down.
- For detailed safety information, please refer to the official Safety Information PDF.
3. Package Contents
Please check that all components are present and undamaged before beginning installation:
- 1 x LuxeBath Bathroom Radiator (300x1400 mm, Matte Black)
- 1 x Air Vent Valve 1/2 inch
- 1 x Blanking Plug 1/2 inch
- 1 x Installation Manual
- Wall Mounting Kit:
- 4 x Wall Brackets
- 4 x Screws and Wall Plugs
- 4 x Fixing Screws
- 4 x Washers
- 4 x Covers

Image: Included wall mounting kit and accessories.
4. Specifications
| Feature | Specification |
|---|---|
| Model | Luxe-108 |
| Dimensions (W x H x D) | 300 x 1400 x 30 mm (excluding wall distance) |
| Color | Matte Black |
| Material | Steel |
| Connection Type | Side Connection |
| Connection Distance | 255 mm |
| Pipe Diameter | Ø 22 mm |
| Profile (Vertical D-profiles) | 30 x 40 x 1.5 mm |
| Heat Output (EN 442) | 360 W |
| Heat Capacity | 1201 BTU |
| Water Volume | 4.34 liters |
| Weight | 6.63 kg |
| Maximum Working Pressure | 10 bar (1 MPa) |
| Test Pressure | 12 bar (1.2 MPa) |
| Distance to Wall | Approx. 5 cm |

Image: Technical drawing showing radiator dimensions and wall clearance.
5. Installation
This radiator is designed for connection to a central heating system. Installation should be carried out by a qualified professional in accordance with all relevant building and plumbing regulations.
5.1 Pre-Installation Checks
- Unpack the radiator and check for any transport damage.
- Verify all parts listed in the 'Package Contents' section are present.
- Ensure the chosen installation location has a solid wall capable of supporting the radiator's weight.
5.2 Mounting Steps
- Mark Drilling Points: Using the provided wall brackets and the technical drawing, mark the precise drilling points on the wall. Ensure the marks are level and correspond to the radiator's connection points.
- Drill Holes: Drill holes at the marked points using an appropriate drill bit for your wall type. Insert the wall plugs into the drilled holes.
- Attach Wall Brackets: Secure the wall brackets to the wall using the provided screws and washers. Ensure they are firmly attached and correctly aligned.
- Mount Radiator: Carefully lift the radiator and position it onto the installed wall brackets. Ensure it sits securely.
- Connect to Heating System: Connect the radiator to your central heating system using appropriate fittings. The radiator features side connections. Ensure all connections are sealed properly to prevent leaks.
- Install Air Vent Valve and Blanking Plug: Screw the 1/2 inch air vent valve into the top connection point and the 1/2 inch blanking plug into the bottom connection point on the side. Tighten them securely.
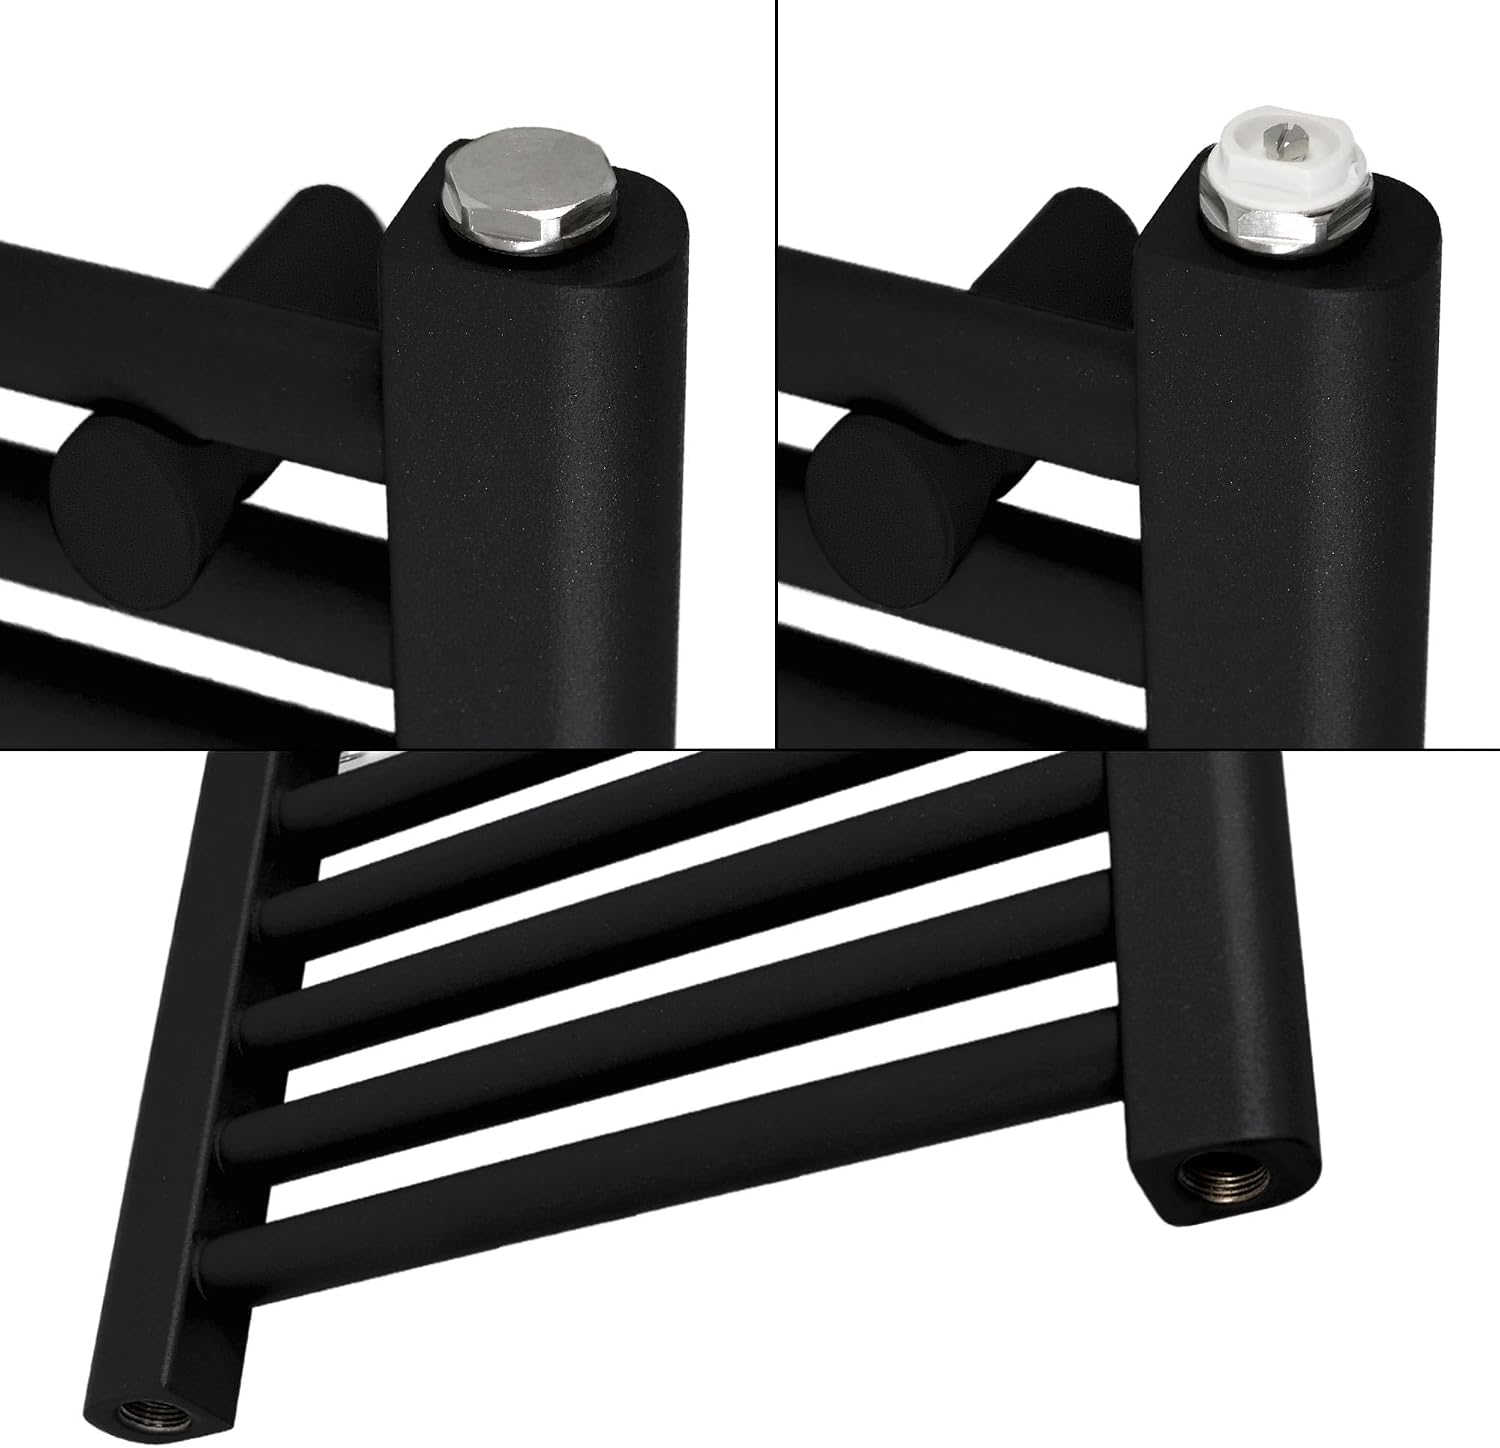

Image: Details of radiator connections and mounting bracket.
6. Operating Instructions
Once the radiator is installed and connected to the central heating system, follow these steps for initial operation:
- Fill the System: Ensure the central heating system is filled with water and pressurized according to the manufacturer's guidelines.
- Bleed the Radiator: Open the air vent valve on the radiator using a radiator key. Air will escape, followed by water. Close the valve once a steady stream of water emerges, indicating all air has been expelled. This step is crucial for efficient heating.
- Check for Leaks: Inspect all connections for any signs of water leakage. Tighten connections if necessary.
- Turn on Heating: Gradually turn on your central heating system. The radiator will begin to warm up.
- Adjust Temperature: Use your central heating system's controls to set the desired room temperature.
Regularly check the system pressure and bleed the radiator if you notice cold spots or gurgling sounds, which indicate trapped air.
7. Maintenance
Proper maintenance ensures the longevity and efficiency of your LuxeBath radiator:
- Cleaning: Clean the radiator regularly with a soft, damp cloth. Avoid abrasive cleaners or harsh chemicals, as these can damage the matte black finish.
- Bleeding: Bleed the radiator periodically (e.g., once a year before the heating season, or if cold spots appear) to remove trapped air and maintain optimal heating performance.
- System Checks: Have your central heating system professionally serviced annually to ensure it operates efficiently and safely.
- Corrosion Protection: Ensure your heating system uses appropriate corrosion inhibitors as recommended by your heating system manufacturer.
8. Troubleshooting
If you encounter issues with your radiator, consider the following common troubleshooting steps:
| Problem | Possible Cause | Solution |
|---|---|---|
| Radiator is cold at the top, warm at the bottom | Trapped air in the radiator. | Bleed the radiator using the air vent valve until water flows steadily. |
| Radiator is completely cold | Heating system off, low system pressure, or valve closed. | Check if the central heating system is on. Check system pressure and refill if necessary. Ensure radiator valves are open. |
| Water leakage from connections | Loose connections or faulty seals. | Turn off heating system and allow to cool. Carefully tighten connections. If leakage persists, replace seals or consult a professional. |
| Radiator making gurgling noises | Air trapped in the system. | Bleed the radiator. If noises persist, bleed other radiators in the system. |
If these steps do not resolve the issue, please consult a qualified heating engineer.
9. Warranty and Support
For warranty information and customer support, please refer to your purchase documentation or contact your retailer. Keep your proof of purchase for any warranty claims.
For additional technical documentation, including the User Manual (PDF), please visit the product page or contact LuxeBath customer service.