
1. Introduction
This manual provides instructions for the VGEBY Digital Alarm Clock, Model VGEBYi97o52dptm-12. This device features a digital display, dual power options (solar and battery), and functions as an alarm clock, weather forecaster, temperature monitor, and humidity sensor.
The clock is designed for use in various environments, including homes, offices, and other indoor spaces where monitoring time and environmental conditions is beneficial.

Figure 1: Front view of the VGEBY Digital Alarm Clock displaying time, temperature, humidity, and a sunny weather icon.
2. Setup
2.1. Battery Installation
- Locate the battery compartment on the back of the alarm clock.
- Open the battery compartment cover.
- Insert one AAA battery, ensuring correct polarity (+/-). The battery is not included with the product.
- Close the battery compartment cover securely.
2.2. Placement
Place the alarm clock in a location where it can receive adequate light for the solar panel to function effectively. Ensure the display is clearly visible from your desired viewing position. The solar panel is located on the side of the unit.

Figure 2: Side view of the alarm clock, highlighting the solar panel for dual energy operation.
3. Operation
The alarm clock features several buttons on its side for configuration and control. Refer to the image below for button identification.
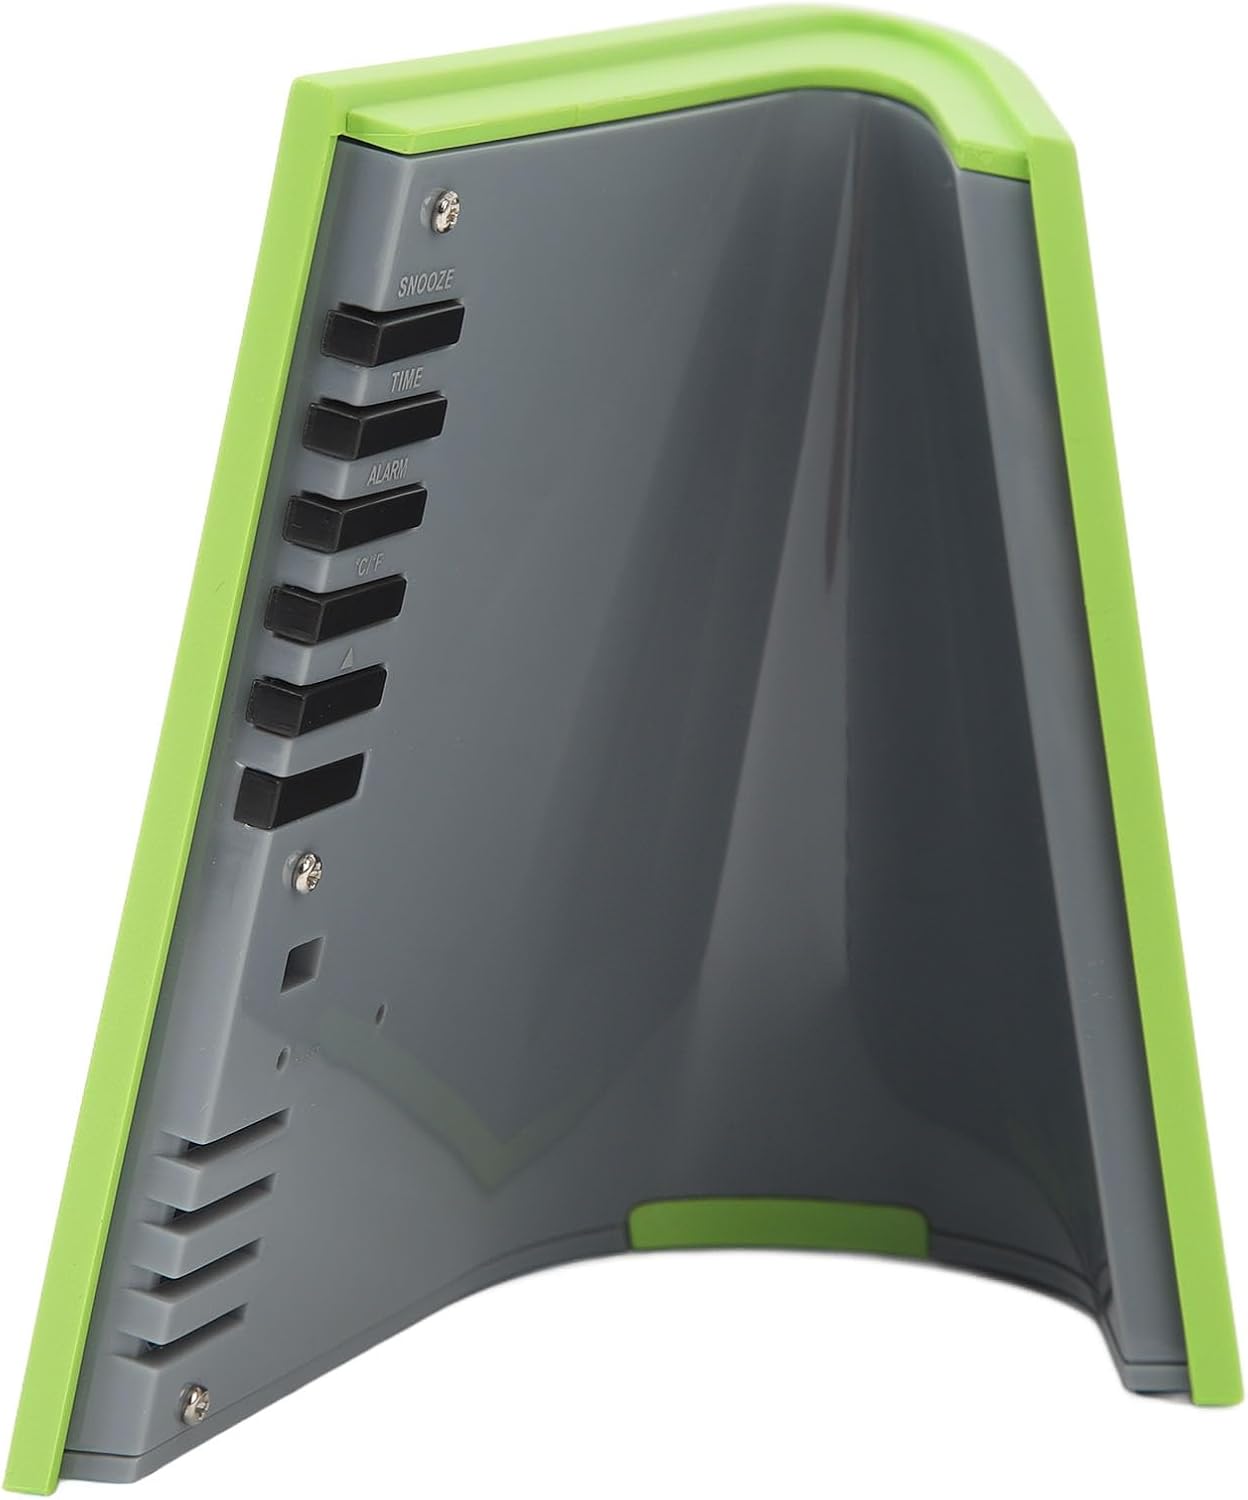
Figure 3: Control buttons located on the side of the alarm clock.
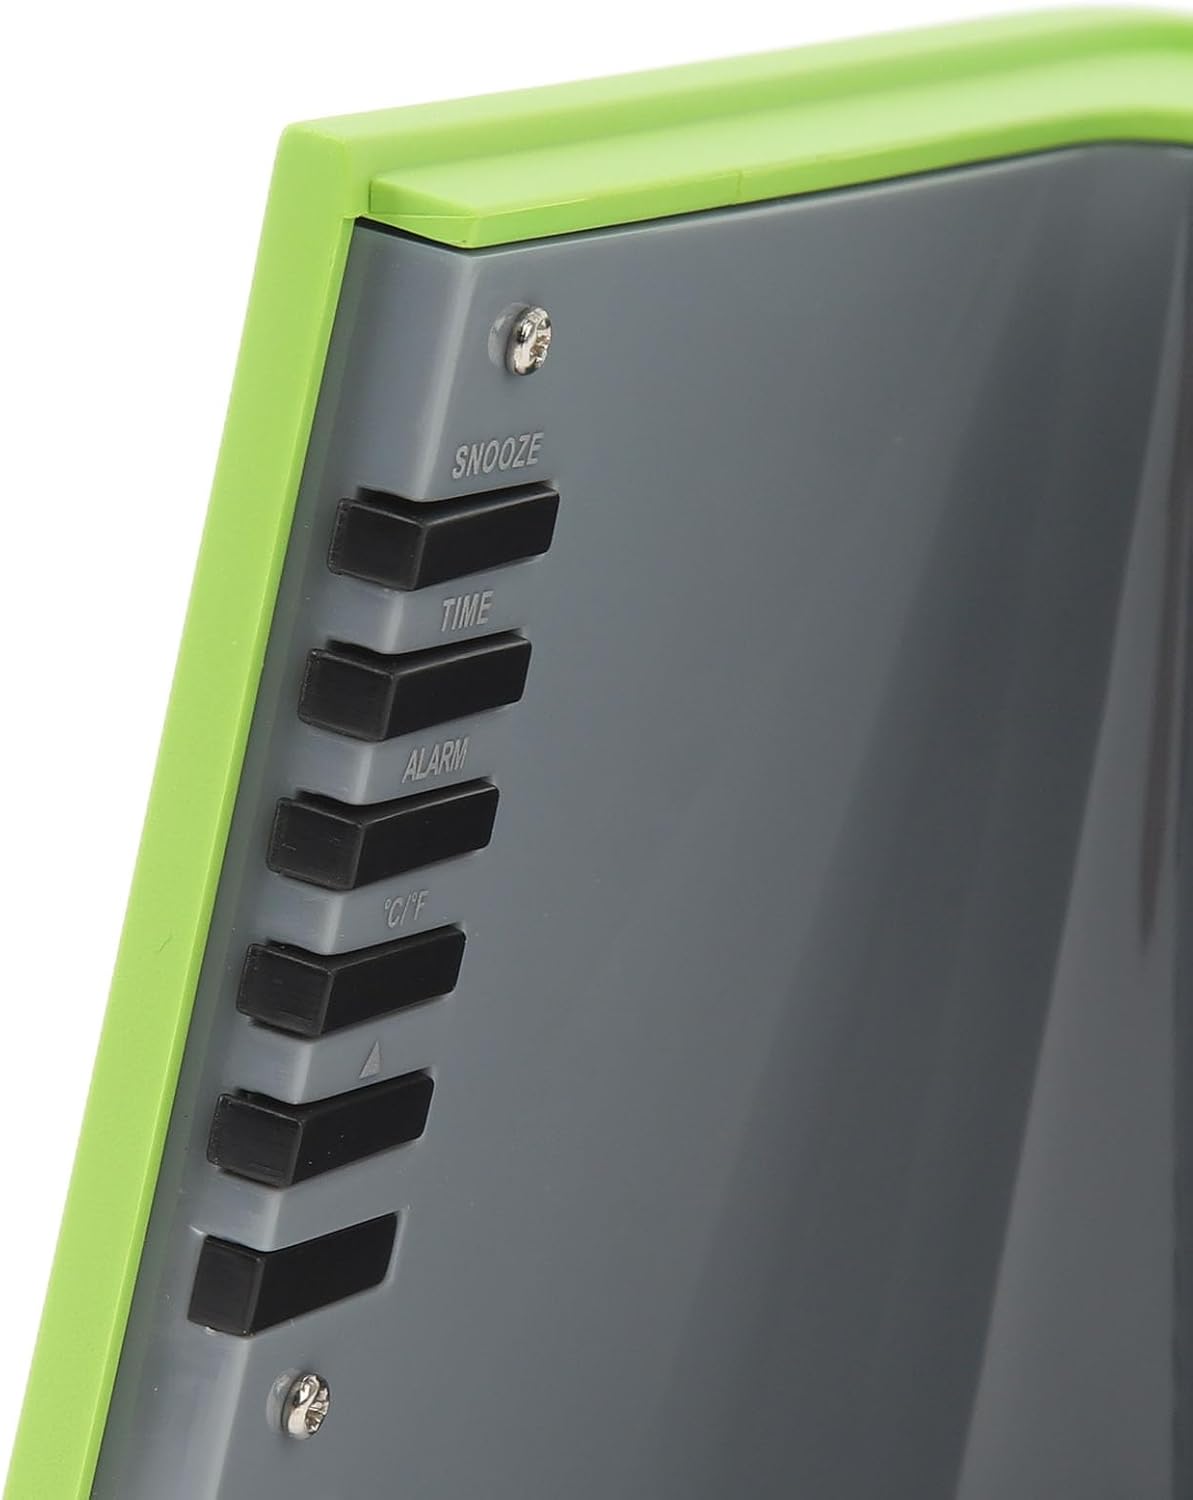
Figure 4: Detailed view of the control buttons.
3.1. Setting the Time
- Press and hold the TIME button until the hour display begins to flash.
- Use the UP or DOWN arrow buttons to adjust the hour.
- Press the TIME button again to switch to minute adjustment.
- Use the UP or DOWN arrow buttons to adjust the minutes.
- Press the TIME button once more to confirm and exit time setting mode.
3.2. Setting the Alarm
- Press and hold the ALARM button until the alarm hour display begins to flash.
- Use the UP or DOWN arrow buttons to set the desired alarm hour.
- Press the ALARM button again to switch to alarm minute adjustment.
- Use the UP or DOWN arrow buttons to set the desired alarm minutes.
- Press the ALARM button once more to confirm and exit alarm setting mode.
- To activate or deactivate the alarm, briefly press the ALARM button. An alarm icon will appear or disappear on the display.
3.3. Snooze Function
When the alarm sounds, press the SNOOZE button to temporarily silence the alarm. The alarm will sound again after a short interval (typically 5-10 minutes).
3.4. Temperature and Humidity Display
The clock automatically measures and displays the current temperature and humidity. You can switch between Celsius (°C) and Fahrenheit (°F) by pressing the °C/°F button.
3.5. Weather Forecast
The alarm clock provides a basic weather forecast based on internal sensors. The display will show icons representing conditions such as sunny, cloudy, or rainy. This forecast is an estimation and should not replace official weather reports.
4. Maintenance
4.1. Cleaning
To clean the alarm clock, use a soft, dry cloth. Do not use abrasive cleaners, solvents, or chemical sprays, as these can damage the display or casing.
4.2. Battery Replacement
When the display dims or functions become erratic, it may be time to replace the AAA battery. Follow the battery installation steps in Section 2.1.
4.3. Solar Panel Care
Ensure the solar panel remains clean and free of dust or obstructions to maximize its efficiency. Periodically wipe the solar panel with a soft, dry cloth.
5. Troubleshooting
| Problem | Possible Cause | Solution |
|---|---|---|
| Display is blank or dim. | Low battery or insufficient light for solar charging. | Replace AAA battery. Ensure the solar panel is exposed to light. |
| Incorrect time displayed. | Time not set correctly. | Refer to Section 3.1 to reset the time. |
| Alarm does not sound. | Alarm is deactivated or set incorrectly. | Refer to Section 3.2 to activate and set the alarm. |
| Temperature/Humidity readings seem inaccurate. | Sensor obstruction or extreme environmental conditions. | Ensure the clock is not placed near heat sources, vents, or in direct sunlight for prolonged periods. Clean the unit. |
6. Specifications
- Brand: VGEBY
- Model Name: VGEBYi97o52dptm-12
- Display Type: Digital
- Power Source: Solar Powered, 1 x AAA Battery (not included)
- Special Feature: Alarm, Temperature Sensor, Humidity Sensor, Weather Forecast
- Frame Material: Acrylonitrile Butadiene Styrene (ABS)
- Mounting Type: Tabletop
- Item Package Dimensions: 5.71 x 5.56 x 4.1 inches
- Package Weight: Approximately 0.26 Kilograms
7. Warranty and Support
This product is covered by a standard manufacturer's warranty. For specific warranty details, please refer to the documentation provided at the time of purchase or contact your retailer.
For technical support or inquiries, please contact VGEBY customer service through the retailer's platform or the official VGEBY website.