Introduction
This manual provides detailed instructions for the Ejoyous Portable Mini Touchpad Keyboard, Model A8. This compact and versatile keyboard features an integrated touchpad, backlit keys, and a rechargeable battery, making it ideal for various devices including HTPCs, gaming consoles, and computers. Please read this manual carefully before using the product to ensure proper operation and longevity.
Package Contents
Verify that all items listed below are included in your package:
- 1 x Ejoyous Portable Mini Touchpad Keyboard
- 1 x USB Receiver
- 1 x USB Data Line (Charging Cable)
- 1 x User Instruction Manual

Image: The Ejoyous Portable Mini Touchpad Keyboard, its USB receiver, and the included USB charging cable.
Product Overview
The Ejoyous Mini Touchpad Keyboard combines a full QWERTY keyboard with a sensitive touchpad, offering a comprehensive input solution in a compact form factor. It features 69 backlit keys for visibility in low-light conditions and a 2.4GHz wireless connection for stable performance.

Image: Top view of the keyboard, emphasizing its super slim and lightweight design.
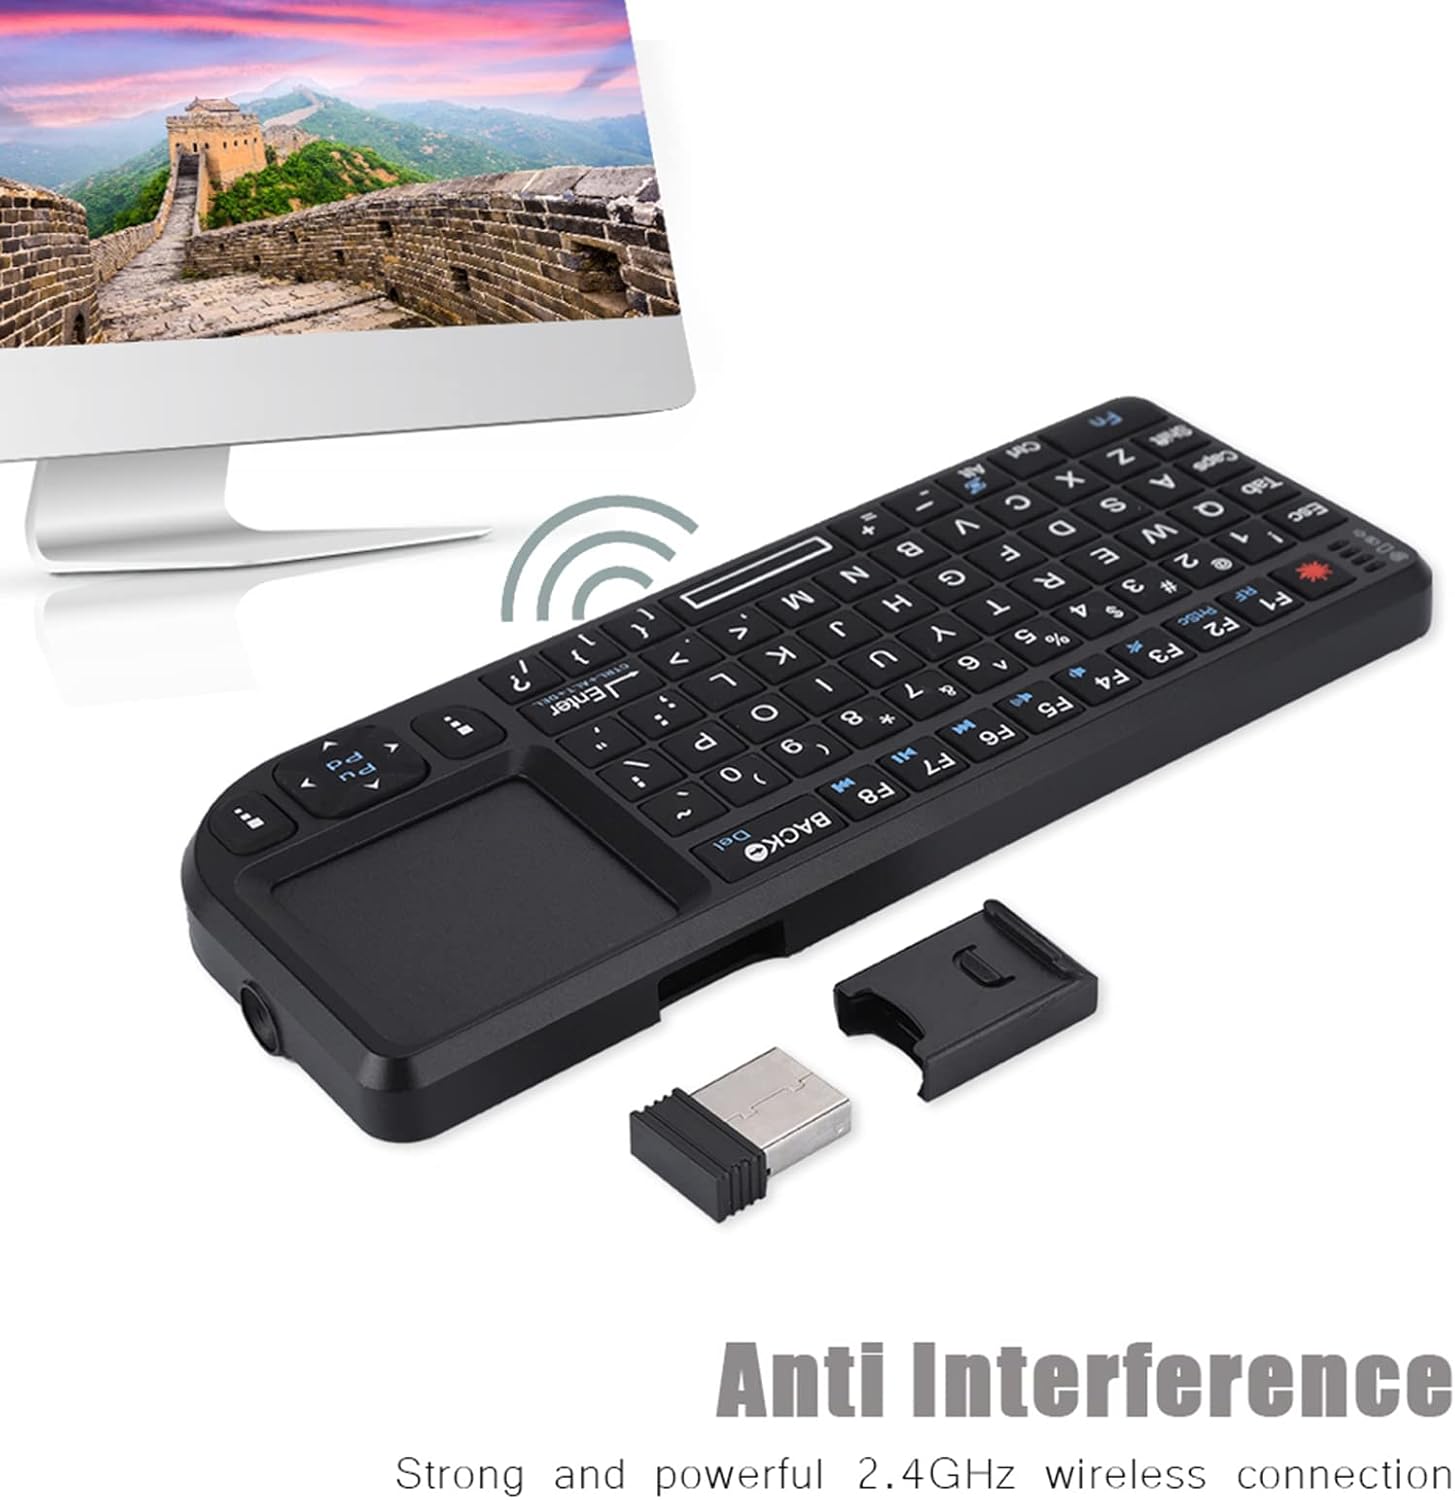
Image: The keyboard demonstrating its strong 2.4GHz wireless connection, ensuring anti-interference performance.
Setup
Charging the Keyboard
Before first use, fully charge the keyboard using the provided USB data line.
- Connect the small end of the USB data line to the charging port on the keyboard.
- Connect the standard USB end to a USB power source (e.g., computer USB port, USB wall adapter).
- The charging indicator light will illuminate. Once fully charged, the light may change color or turn off.
Connecting the USB Receiver
The keyboard uses a 2.4GHz wireless connection via a USB receiver.
- Locate the USB receiver, which is typically stored in a dedicated slot within the keyboard itself for convenience.
- Remove the USB receiver from its storage slot.
- Insert the USB receiver into an available USB 2.0 port on your device (HTPC, computer, gaming console, etc.).
- The device should automatically recognize the keyboard. No additional drivers are usually required (plug and play).

Image: The keyboard and its USB receiver positioned near a computer, demonstrating its simple plug-and-play setup.
Operating Instructions
Power On/Off
Locate the power switch on the keyboard (usually on the side or back) and slide it to the "ON" position to power on. Slide it to "OFF" when not in use to conserve battery.
Using the Touchpad
The integrated touchpad functions like a mouse. Use your finger to move the cursor on the screen. Tapping the touchpad acts as a left-click. Two-finger tapping or a dedicated button (if present) may act as a right-click.
Keyboard Functions
The keyboard features a standard QWERTY layout. Special function keys (F1-F12) may require pressing the "Fn" key simultaneously with the desired function key to activate their secondary functions (e.g., volume control, media playback).
Backlight Control
The keyboard is equipped with 69 backlit keys for enhanced visibility in dark environments. Refer to the keyboard's specific key combinations (often involving the "Fn" key and a backlight icon key) to turn the backlight on/off or adjust its brightness.

Image: A user holding the keyboard, demonstrating its comfortable use and the visibility of its backlit keys, suitable for various devices.
Compatibility
This keyboard is compatible with a wide range of operating systems and devices, including:
- Android devices
- Linux systems
- Windows 2000, Windows XP, Windows Vista, Windows 7
- HTPC (Home Theater PC)
- Gaming Consoles (e.g., PS3/PS4, Xbox 360, Xbox ONE)
Maintenance
Cleaning
To clean the keyboard, gently wipe the surface with a soft, dry, or slightly damp cloth. Avoid using harsh chemicals, abrasive cleaners, or excessive moisture, as these can damage the device.
Battery Care
To prolong battery life, avoid fully discharging the battery frequently. Charge the keyboard regularly, especially if it will be stored for an extended period. Store the keyboard in a cool, dry place.
Storage
When not in use, store the USB receiver in its dedicated slot within the keyboard to prevent loss. Keep the keyboard away from extreme temperatures, direct sunlight, and liquids.
Troubleshooting
If you encounter issues with your Ejoyous Mini Touchpad Keyboard, please refer to the following common solutions:
| Problem | Possible Cause | Solution |
|---|---|---|
| Keyboard not responding | Low battery; Receiver not connected; Keyboard not powered on; Interference | Charge the keyboard; Ensure receiver is fully inserted; Turn on the keyboard; Move closer to the receiver or away from other wireless devices. |
| Touchpad not working | Touchpad disabled (if applicable); Software issue | Check if there's a function key to enable/disable the touchpad; Restart your device. |
| Backlight not working | Backlight off; Low battery | Press the backlight control key combination (e.g., Fn + F2); Charge the keyboard. |
| Lag or delayed input | Distance from receiver; Interference; Low battery | Reduce distance to receiver (within 10M); Minimize other 2.4GHz devices; Charge the keyboard. |
Specifications
| Feature | Detail |
|---|---|
| Model | A8 |
| Connection | 2.4GHz Wireless (USB 2.0 Receiver) |
| Working Voltage | 3.3V |
| Working Current | 80mA |
| Sleep Current | 1mA |
| Wireless Distance | Approx. 10 meters (33 feet) |
| Number of Keys | 69 |
| Dimensions (L x W x H) | Approx. 15 x 5.9 x 1.3 cm (5.9 x 2.3 x 0.5 inches) |
| Weight | Approx. 89g (3.1 oz) |
| Battery Type | Rechargeable USB Built-in Battery |
| Special Features | Integrated Touchpad, Backlit Keys, Portable, Plug and Play |
| Compatible Systems | Android, Linux, Windows 2000/XP/Vista/7, HTPC, PS3/PS4, Xbox 360/ONE |
Warranty and Support
This Ejoyous product is covered by a standard manufacturer's warranty. Please refer to the warranty card included in your package or contact your retailer for specific warranty terms and conditions.
For technical support, troubleshooting assistance, or inquiries regarding your product, please contact Ejoyous customer service through the contact information provided on the product packaging or the official Ejoyous website.
Please retain your purchase receipt as proof of purchase for warranty claims.