1. Introduction
This manual provides detailed instructions for the setup, operation, and maintenance of your Easymet AL-06 Digital Timer Switch. This device is designed to automatically control the power supply to electrical appliances based on programmed schedules, offering convenience and energy management.
2. Safety Information
- Electrical Safety: Always ensure the timer is correctly plugged into a suitable power outlet. Do not exceed the maximum load ratings of 10A and 2300W. Overloading can cause damage to the device and connected appliances, and poses a fire risk.
- Indoor Use Only: This timer is designed for indoor use in dry conditions. Do not expose it to water, moisture, or extreme temperatures.
- Children and Pets: Keep the device out of reach of children and pets.
- Maintenance: Do not attempt to open or repair the device yourself. Refer all servicing to qualified personnel.
- Disconnection: Always unplug the timer from the wall outlet before cleaning or when not in use for extended periods.
3. Product Overview
The Easymet AL-06 Digital Timer Switch features an LCD display for time and program settings, along with several control buttons for configuration. It includes a universal socket for connecting various electrical appliances.
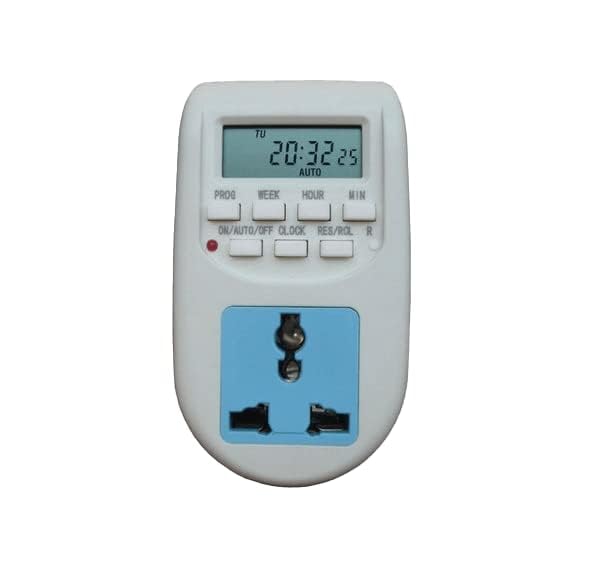
Image 1: Front view of the Easymet AL-06 Digital Timer Switch, showing the LCD display, control buttons, and universal socket.
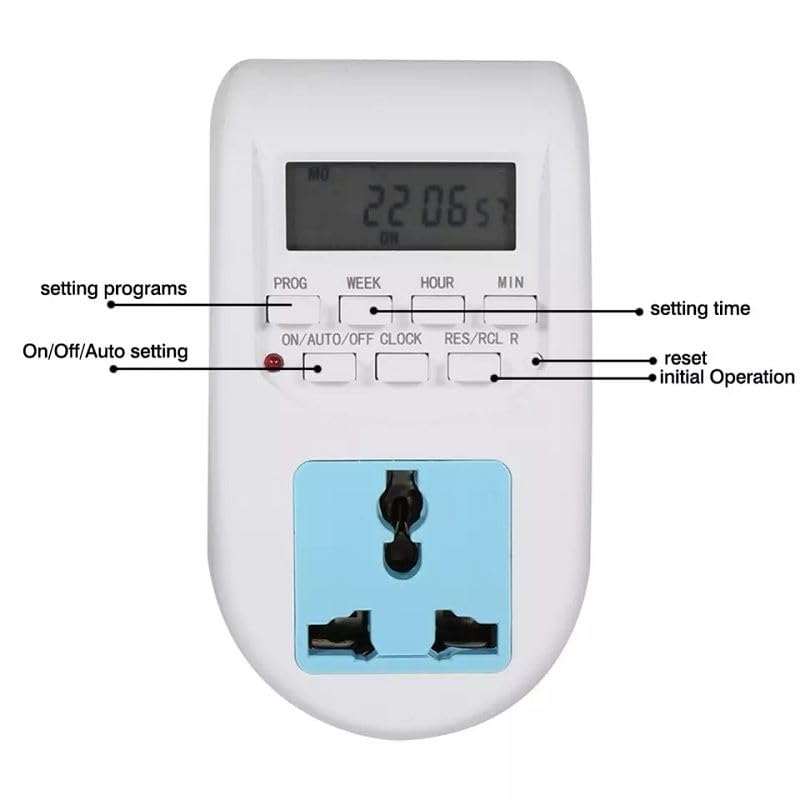
Image 2: Front view of the timer with labels indicating the function of each button: PROG, WEEK, HOUR, MIN, ON/AUTO/OFF, CLOCK, RES/RCL R.
4. Specifications
- Model: AL-06
- Voltage Rating: 220-240V AC
- Frequency: 50Hz
- Max Current: 10A
- Max Power: 2300W
- Programmable Settings: Up to 10 ON/OFF programs
- Type: Plug-in Digital Timer Switch
- Color: White
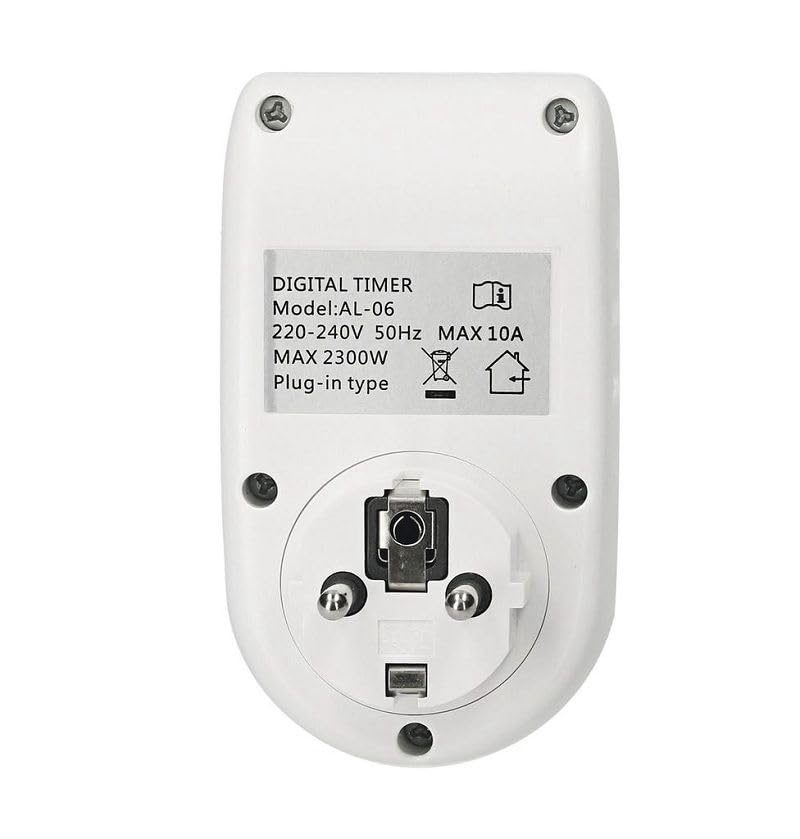
Image 3: Back view of the timer showing the product label with model number, voltage, frequency, max current, and max power specifications.
5. Setup
- Initial Charge: Before first use, plug the timer into a live wall socket for at least 30 minutes to charge its internal battery. This ensures the display functions and settings are retained during power outages.
- Clear All Settings: Press the RES/RCL R button with a pointed object (like a pen tip) to clear all previous settings and reset the timer. The display will show '0:00'.
- Set Current Time:
- Press and hold the CLOCK button.
- While holding CLOCK, press WEEK to select the current day of the week.
- While holding CLOCK, press HOUR to set the current hour.
- While holding CLOCK, press MIN to set the current minute.
- Release the CLOCK button. The current time is now set.
- Plug In Appliance: Connect the appliance you wish to control into the universal socket of the timer.
- Plug Timer into Wall: Insert the timer into a suitable wall power outlet.
6. Operating Instructions
Button Functions:
- PROG: Enters program setting mode.
- WEEK: Selects the day(s) of the week for time settings or programs.
- HOUR: Adjusts the hour for time settings or programs.
- MIN: Adjusts the minute for time settings or programs.
- ON/AUTO/OFF: Cycles through ON, AUTO, and OFF modes.
- CLOCK: Used in conjunction with WEEK, HOUR, MIN to set the current time.
- RES/RCL R: Resets all settings (requires a pointed object).
Programming ON/OFF Times:
The timer allows for up to 10 ON/OFF programs. Follow these steps to set a program:
- Press the PROG button once. The display will show '1 ON'.
- Press WEEK to select the desired day(s) for this 'ON' program. Options include individual days, weekdays, weekends, or all days.
- Press HOUR to set the hour for the 'ON' time.
- Press MIN to set the minute for the 'ON' time.
- Press PROG again. The display will show '1 OFF'.
- Repeat steps 2-4 to set the desired day(s), hour, and minute for the 'OFF' time for program 1.
- Continue pressing PROG to cycle through programs 2 ON, 2 OFF, up to 10 ON, 10 OFF, setting each as needed.
- After setting all desired programs, press the CLOCK button to exit program setting mode and return to the current time display.
Mode Selection (ON/AUTO/OFF):
Press the ON/AUTO/OFF button to cycle through the operating modes:
- ON: The timer output is continuously ON, overriding all programs.
- AUTO: The timer operates according to the programmed ON/OFF schedules. This is the standard operating mode for automated control.
- OFF: The timer output is continuously OFF, overriding all programs.
For programmed operation, ensure the timer is set to AUTO mode.
7. Maintenance
- Cleaning: Disconnect the timer from the power outlet before cleaning. Wipe the exterior with a soft, dry cloth. Do not use liquid cleaners or abrasive materials.
- Storage: Store the timer in a cool, dry place when not in use for extended periods.
8. Troubleshooting
- Display is blank: The internal battery may be depleted. Plug the timer into a live wall socket for at least 30 minutes to charge it. If the issue persists, the battery may need replacement (contact support).
- Programs are not executing:
- Ensure the timer is in AUTO mode.
- Verify that the current time is set correctly.
- Check that the ON/OFF programs are set accurately for the desired days and times.
- Appliance is not turning ON/OFF:
- Confirm the appliance itself is working correctly when plugged directly into a wall outlet.
- Check the timer's mode (should be AUTO).
- Ensure the timer is securely plugged into the wall outlet.
- Timer is unresponsive: Try performing a full reset by pressing the RES/RCL R button with a pointed object. You will need to re-set the current time and all programs afterward.
9. Warranty and Support
Warranty information for the Easymet AL-06 Digital Timer Switch is not provided in the product details. For warranty claims, technical support, or further assistance, please contact the seller or manufacturer directly through your purchase platform.


