1. Introduction
This manual provides detailed instructions for the installation, operation, and maintenance of your ANJIELO SMART Tuya Video Intercom System. This system includes a 10-inch touch screen monitor and a wired 1080P doorbell, designed to enhance your home security and communication. Please read this manual thoroughly before installation and use to ensure proper functionality and safety.
2. Product Overview
2.1 Key Features
- 10-inch TFT-LCD Touch Screen Monitor: Offers a clear display with touch operation and hands-free communication.
- 1080P Wired Doorbell: Features a 2-megapixel camera with a 140° wide-angle view, night vision, and is waterproof, dustproof, and vandal-proof.
- 5-in-1 Unlocking Methods: Supports unlocking via password, fingerprint, IC card, mobile app, and directly from the monitor.
- Automatic Recording & Motion Detection: The doorbell camera automatically records video or takes snapshots when a visitor presses the doorbell or motion is detected, saving to an included 32GB Micro SD card.
- Two-Way Audio: Allows real-time video conversation with visitors through the monitor or mobile phone.
- WiFi Connectivity: The main monitor connects to your home 2.4GHz WiFi network for mobile app integration.
- Expandable System: Supports up to 2 doorbells and 6 indoor monitors, and can connect to all 12V electronic locks.
2.2 Components and Tools Needed
The following components are included with your system. Please ensure all items are present before proceeding with installation. Tools required for installation are also listed.

Figure 2.2.1: Packing list and tools needed for installation.
- Doorbell Unit
- Doorbell Bracket
- Screw Packs (screws and wall anchors)
- 4-Pin Wire (3 meters provided per doorbell)
- Indoor Touch Monitor
- Monitor Hanging Plate
- Power Supply (1.2 meters external power supply per monitor)
- Drill (user-provided)
- Screwdriver (user-provided)
3. Specifications
| Component | Specification |
|---|---|
| Camera Sensor | 1/2.7 CMOS |
| Definition | 1080P |
| Lens | 3.2mm |
| View Angle | 148° |
| Night Vision LEDs | IR LEDs (120°) |
| Doorbell Power Consumption | 200mA max (supplied from indoor unit) |
| Doorbell Operating Temperature | -40℃ ~ +50℃ |
| Doorbell Installation | Surface mount with Rain Cover |
| Doorbell Size | 137mm x 85.5mm x 23.5mm |
| Monitor Screen | 10 inch TFT-LCD touch screen |
| Monitor Resolution | 1024 x 680 |
| Monitor Ring Tones | 7-chord melody rings |
| Monitor Connection | 4-wires (to doorbell), WIFI TUYA solution (to router) |
| Monitor Panel Material | Acrylic/ABS cover |
| Monitor Installation | Surface mounting |
| Monitor Input Voltage | AC 100-240V 50/60Hz |
| Monitor Working Voltage | DC 12V, 2A |
| Monitor Size | 198mm x 130mm x 21mm (7.8 × 5.1 × 0.8 inches) |
| Maximum Wiring Distance | Up to 300ft (using RVV4/Cat5/Cat6 wires) |
| Supported Devices | 2 doorbells, 6 indoor monitors, 5 mobile phones (via app) |
| Storage | 32GB Micro SD card included |

Figure 3.1: Doorbell unit dimensions.
4. Setup and Installation
4.1 Wiring Diagram
The indoor monitor and doorbell require a wired connection using a 4-wire cable. The monitor supports WiFi for app connectivity, but the primary communication between the monitor and doorbell is wired. Ensure proper wiring for stable operation.
Figure 4.1.1: Wiring diagram for the intercom system.
4.2 Installation Steps
Follow these steps for the physical installation of the doorbell and monitor. For a visual guide, refer to the installation video below.
Video 4.2.1: Detailed guide on how to install the ANJIELO SMART Video Intercom System, covering all steps from unboxing to final setup.
- Prepare the Installation Area: Choose a suitable location for both the doorbell and the indoor monitor. Ensure there is access to power and that wiring can be routed discreetly.
- Install Doorbell Bracket: Drill holes according to the bracket's dimensions. Secure the doorbell bracket to the wall using the provided screws and wall anchors.
- Connect Doorbell Wiring: Pass the 4-pin wire through the wall and connect it to the appropriate terminals on the back of the doorbell unit.
- Mount Doorbell: Attach the doorbell unit to its bracket, ensuring a secure fit.
- Install Monitor Hanging Plate: Drill holes and secure the monitor hanging plate to the desired indoor wall location.
- Connect Monitor Wiring: Route the 4-pin wire from the doorbell and the power supply cable to the monitor. Connect them to the designated ports on the back of the monitor. Insert the 32GB Micro SD card into the monitor's TF card slot.
- Mount Monitor: Carefully hang the monitor onto its wall plate.
- Power On and Test: Connect the power supply to the monitor and plug it into an AC outlet. The system should power on. Test the doorbell and monitor functions.

Figure 4.2.2: Examples of monitor placement in various rooms.
5. Operation
5.1 Unlocking Methods
Your intercom system offers five convenient ways to unlock your door:

Figure 5.1.1: Five unlocking methods.
- Monitor Unlock: Directly unlock the door from the indoor monitor's touch screen interface.
- Fingerprint Unlocking: Register fingerprints for quick and secure access.
- Password Unlock: Use a numerical keypad on the doorbell to enter a pre-set password.
- RFID Card Unlock: Tap an authorized RFID card on the doorbell reader for entry. Five IC cards are included.
- Mobile Phone Unlock: Use the Tuya app on your smartphone to remotely unlock the door.
5.2 Mobile App Integration (Tuya App)
Connect your main monitor to your 2.4GHz WiFi network to enable smart features via the Tuya app. This allows you to:
- Receive visitor notifications and motion detection alerts on your phone.
- View live video feed from the doorbell.
- Engage in two-way audio communication with visitors.
- Remotely unlock the door.
- Access recorded videos and snapshots.
Video 5.2.1: Demonstration of product usage scenarios, including remote monitoring and unlocking via the mobile app.
5.3 Two-Way Audio and Motion Detection
When a visitor presses the doorbell, you can see and speak to them from your indoor monitor or smartphone. The system's motion detection feature automatically triggers recording or takes snapshots, providing an additional layer of security.

Figure 5.3.1: Two-way audio communication via the monitor.

Figure 5.3.2: Motion detection alerts and recording.
5.4 Day and Night Vision
The doorbell camera is equipped with IR LEDs and an IR sensor for automatic day and night switching, ensuring clear visibility of visitors even in low-light conditions.
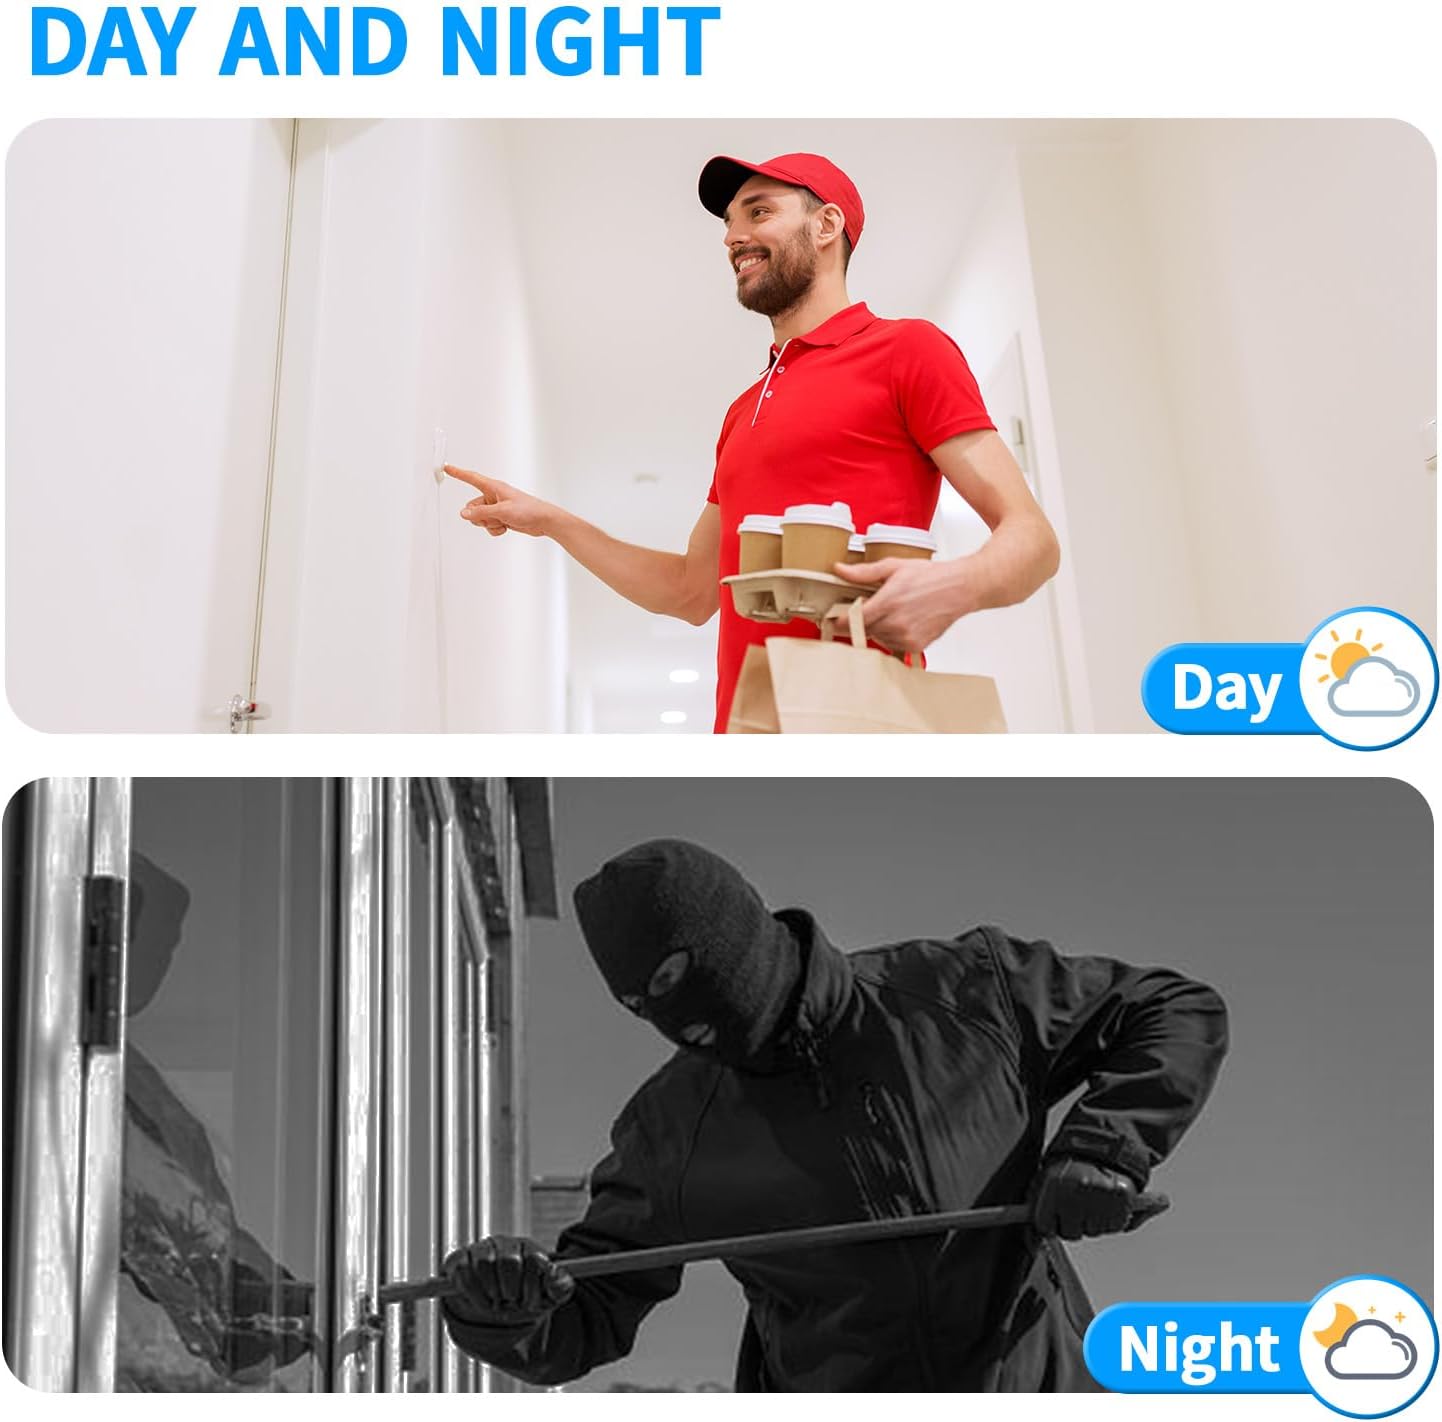
Figure 5.4.1: Day and night vision capabilities.
6. Maintenance
- Cleaning: Use a soft, damp cloth to clean the monitor screen and doorbell unit. Avoid abrasive cleaners or solvents.
- Software Updates: Periodically check the Tuya app for firmware updates for your system to ensure optimal performance and security.
- Wiring Inspection: Regularly inspect all wired connections for any signs of wear or damage.
- SD Card Management: The included 32GB Micro SD card will store recordings. Manage storage by regularly backing up important footage and deleting old files as needed.
7. Troubleshooting
- No Power to Monitor: Check the power adapter and ensure it is securely plugged into both the monitor and a working electrical outlet.
- No Video/Audio from Doorbell: Verify that the 4-wire connection between the doorbell and monitor is secure and correctly wired. Check for any damage to the cable.
- App Connectivity Issues: Ensure your indoor monitor is connected to a 2.4GHz WiFi network. Restart your router, monitor, and smartphone, then try reconnecting via the Tuya app.
- Unlocking Not Working: For fingerprint, password, or RFID card unlocking, ensure the credentials are correctly registered. For app unlocking, verify app connectivity and system status.
- Poor Night Vision: Ensure the doorbell camera lens is clean and free from obstructions. Check if the IR LEDs are functioning (they may emit a faint red glow).
If you encounter persistent issues, please contact ANJIELO SMART customer support for assistance.
8. Warranty and Support
Your ANJIELO SMART Video Intercom System is covered by a manufacturer's warranty. Please refer to the product packaging or the official ANJIELO SMART website for specific warranty terms and conditions. For technical support, troubleshooting assistance, or warranty claims, please contact ANJIELO SMART customer service through the contact information provided with your product or on their official website.


