Introduction to Your himaly Mini Exercise Bike
The himaly Mini Exercise Bike is designed to be your ideal fitness partner, offering a convenient way to stay active whether at home or in the office. Its compact and portable design allows for versatile use, improving overall health and muscular endurance. This manual provides essential information to ensure safe and effective use of your new exercise bike.
Key Features:
- Home Pedal Exerciser: Designed for both arm and leg exercises with adjustable resistance levels to target various muscle groups.
- Adjustable Pedal Resistance: A whirling knob allows you to customize resistance for different fitness levels and exercise intensities.
- Digital LCD Display: Monitor your workout progress with a multi-function LCD screen displaying time, count, calories, and distance (in meters). A scan feature cycles through all measurements.
- Lightweight & Portable Design: Compact size (40.5x32x19cm / 15.9x12.5x7.4inch) and light weight (4kg / 8lb) make it easy to use and store anywhere.
- Easy Assembly: Comes with all necessary accessories for quick setup without special tools. Features anti-slip pedals and non-slip feet for stability.
- Important Pedal Tip: The right pedal has a standard thread, and the left pedal has a reverse thread. To tighten, turn the right pedal clockwise and the left pedal counterclockwise, or follow the arrow on the pedal.
Package Contents
Upon opening your himaly Mini Exercise Bike package, you should find the following components:
- 1 x Mini Exercise Bike with LCD Display
- 1 x Fixing Strap
- 1 x Accessories (including tools for assembly)
- 1 x User Manual (this document)
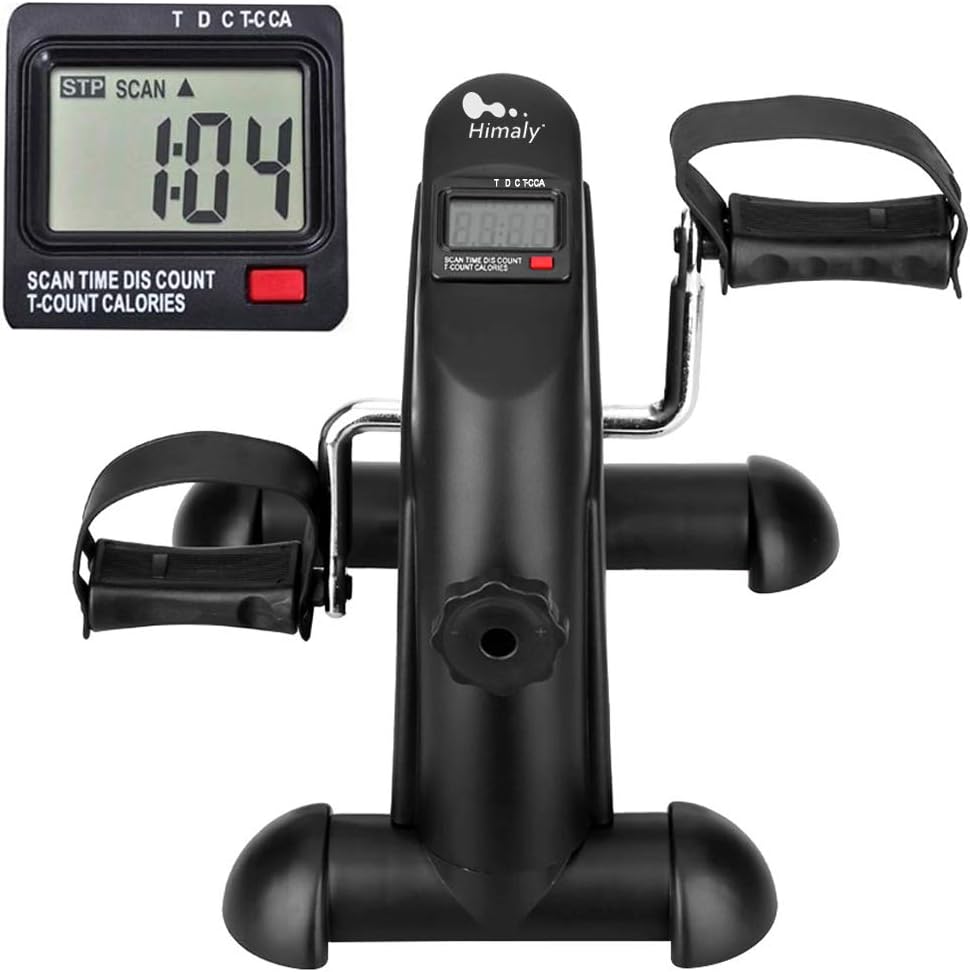
Image: The himaly Mini Exercise Bike, showing the main unit, pedals, and LCD display.
Setup and Assembly
Follow these steps to assemble your himaly Mini Exercise Bike:
1. Attach the Stabilizer Bars
The main body of the exercise bike comes with pre-drilled holes for attaching the front and rear stabilizer bars. Use the provided hex key and bolts to secure them. Ensure the wider stabilizer bar is attached to the front of the unit.

Image: Step-by-step visual guide for attaching the stabilizer bars to the main unit.
2. Install the Pedals
This is a crucial step for proper function and to prevent pedals from falling off during use. Note that the left pedal has a reverse thread and the right pedal has a standard thread. Always refer to the 'L' and 'R' markings on the pedals and crank arms, and rotate in the direction of the arrow indicated on the pedal for tightening.
- Identify the 'L' (Left) and 'R' (Right) markings on both the pedals and the crank arms.
- For the right pedal (R), thread it clockwise by hand until it is snug.
- For the left pedal (L), thread it counterclockwise by hand until it is snug.
- Use the provided spanner to fully tighten both pedals. Ensure they are securely fastened to prevent loosening during exercise.
Video: Detailed instructions on how to correctly install the pedals, highlighting the left-hand and right-hand threads.
Video: A comprehensive guide to assembling the himaly Mini Exercise Bike, including attaching the base and pedals.
An extra strap is provided for securing the bike to a chair or desk leg for added stability during use, especially on smooth surfaces.
Operating Your Mini Exercise Bike
Using for Leg Exercise
Place the mini exercise bike on a flat, stable surface in front of your chair or under your desk. Sit comfortably and place your feet into the pedal straps. Adjust the straps to ensure your feet are secure. Begin pedaling in a smooth, controlled motion.

Image: A user engaging in leg exercises with the himaly Mini Exercise Bike from a seated position.
Using for Arm Exercise
Place the mini exercise bike on a sturdy table or desk. Sit comfortably in front of it and grasp the pedals with your hands. Begin rotating the pedals in a circular motion, engaging your arm muscles.

Image: A user performing arm exercises with the himaly Mini Exercise Bike placed on a desk.
Adjusting Resistance
The resistance level can be adjusted using the whirling knob located on the side of the main unit. Turn the knob clockwise to increase resistance for a more challenging workout, or counter-clockwise to decrease resistance for an easier session.

Image: The adjustable resistance knob on the himaly Mini Exercise Bike.
Understanding the LCD Display
The multi-function LCD monitor provides real-time feedback on your exercise. Press the red button to cycle through different display modes:
- TIME: Duration of your current exercise session.
- COUNT: Number of rotations (pedal cycles) during the current session.
- CALORIES: Estimated calories burned.
- DISTANCE: Distance covered in meters.
- SCAN: Automatically cycles through all display modes every few seconds.

Image: The LCD display of the himaly Mini Exercise Bike, showing various metrics like time, count, distance, and calories.
Video: Demonstrates how to use the himaly Mini Exercise Bike for fitness anywhere, highlighting its portability and LCD tracking.
Maintenance
To ensure the longevity and optimal performance of your himaly Mini Exercise Bike, regular maintenance is recommended:
- Cleaning: Wipe down the unit with a damp cloth after each use to remove sweat and dust. Avoid using abrasive cleaners.
- Tighten Connections: Periodically check all bolts and screws, especially those on the pedals and stabilizer bars, and tighten them if necessary. This prevents wobbling and ensures safe operation.
- Storage: Store the bike in a cool, dry place away from direct sunlight and extreme temperatures when not in use. Its compact size allows for easy storage under a desk or in a closet.
Troubleshooting
Here are solutions to common issues you might encounter:
Pedals Loosening or Falling Off
This is typically caused by incorrect pedal installation. Remember that the left pedal has a reverse (counter-clockwise) thread and the right pedal has a standard (clockwise) thread. Ensure both are tightened securely in the correct direction using the provided spanner. Refer to the "Install the Pedals" section under Setup for detailed instructions and visual guides.
Bike Slides During Use
The himaly Mini Exercise Bike comes with a non-slip mat. Place this mat underneath the bike to prevent it from sliding on smooth floors. Additionally, you can use the provided fixing strap to secure the bike to a stable object like a chair leg or desk leg.

Image: The fixing strap provided with the himaly Mini Exercise Bike for enhanced stability.
Product Specifications
| Feature | Detail |
|---|---|
| Brand | himaly |
| Model Name | X1368-Mini Exercise Bike |
| Item Model Number | US-X1368 |
| Color | Black |
| Material | Plastic |
| Item Weight | 7.6 Pounds (approx. 3.45 kg) |
| Product Dimensions (LxWxH) | 15.98"D x 13.8"W x 12.6"H (approx. 40.5 x 35 x 32 cm) |
| Controls Type | Knob |
| Display Type | LCD |
| Number of Resistance Levels | 8 |
| Operation Mode | Manual |
| Maximum Weight Recommendation | 7.6 Pounds (This seems to be the product weight, not user weight capacity. User should refer to product listing for actual user weight capacity if available.) |
Warranty and Support
Your himaly Mini Exercise Bike comes with a 1-Year Warranty from the manufacturer.
For further assistance, detailed instructions, or troubleshooting not covered in this manual, please refer to the official User Manual (PDF) available online:
You can also visit the official himaly store on Amazon for more product information and support:


