
1. Introduction and Overview
This manual provides detailed instructions for the installation, operation, and maintenance of your GCSOAR 20A MPPT Solar Charge Controller (Model TD2207). This advanced Maximum Power Point Tracking (MPPT) controller is designed for 12V/24V DC systems, supporting a maximum PV voltage of 75V and maximum PV input power of 260W for 12V systems or 520W for 24V systems. It features a built-in WiFi adapter for remote monitoring and settings via a mobile application, an LCD display, and compatibility with various battery types including Gel-Sealed, Immersion, AGM, and Li-Ion batteries.
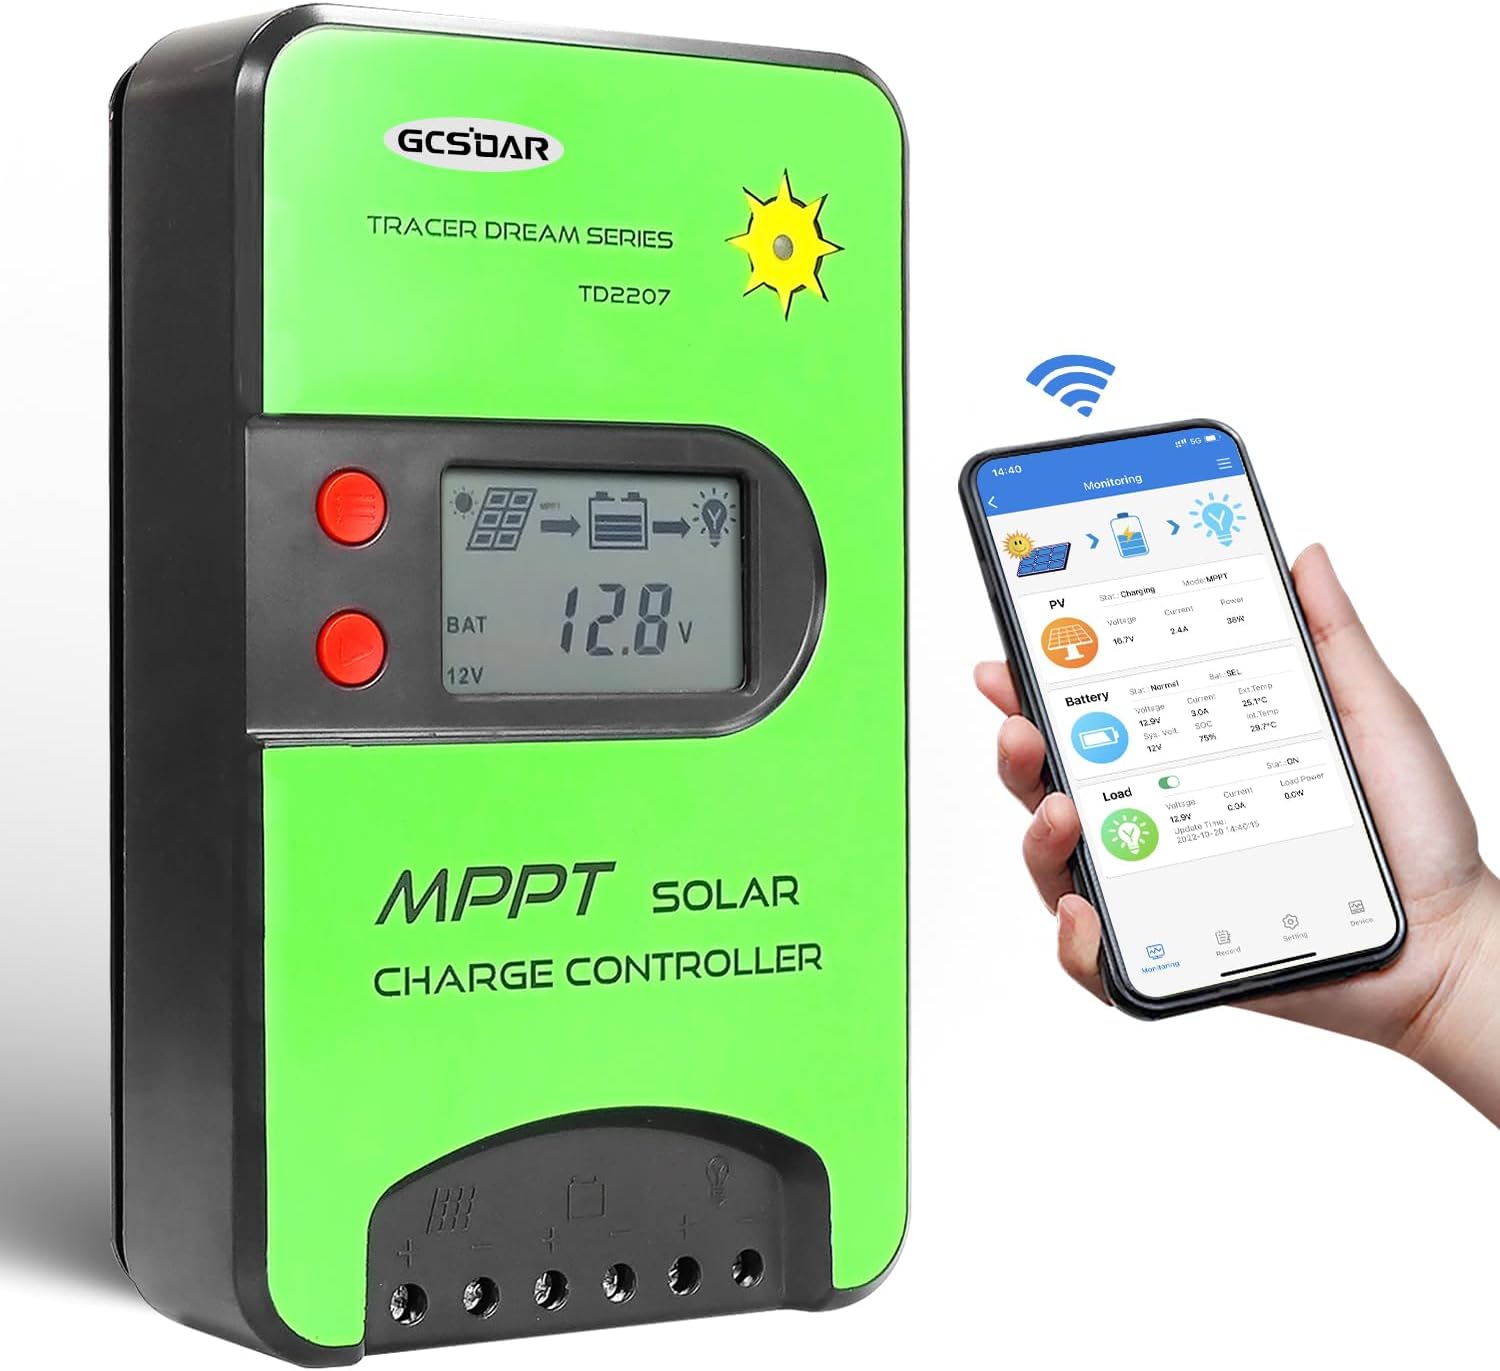
Figure 1.1: GCSOAR 20A MPPT Solar Charge Controller (TD2207) and Mobile App Interface
2. Safety Information
Please read all instructions carefully before installation and operation. Failure to follow these instructions may result in serious injury, damage to the controller, or damage to other components in your solar system.
- Ensure all connections are secure and correct polarity is observed to prevent damage.
- Always disconnect the solar panel and battery power before installing or servicing the controller.
- Install the controller in a well-ventilated area, away from flammable materials and direct sunlight.
- Do not disassemble or attempt to repair the controller. Refer to qualified personnel for service.
- Use appropriate wire gauges for all connections to prevent overheating.
- This device is designed for indoor use only. Protect it from moisture and extreme temperatures.
3. Product Features
- Advanced MPPT Technology: Tracking efficiency up to 99.5%, charging conversion efficiency up to 98%, with a wide range of MPP working voltage.
- Automatic System Voltage Recognition: Automatically works with 12V/24V DC systems.
- High PV Input Capacity: Maximum PV voltage 75V, maximum PV input power: 260W (12V system), 520W (24V system).
- Built-in WiFi Adapter: Enables APP remote monitoring and setting for convenient control.
- Broad Battery Compatibility: Supports lead-acid (sealed, gel, flooded, AGM) and lithium batteries (user-definable parameters).
- Efficient Heat Dissipation: Designed for optimal thermal performance.
- Multiple Load Control Modes: Includes 24-hour working mode, light control mode, and light + time control mode.
- Comprehensive Protections: Features short circuit, over current, and reverse polarity protection.
- User-Friendly Interface: Detailed LCD display and two buttons for easy operation.
4. Setup and Installation
Follow these steps for proper installation of your solar charge controller. Ensure all power sources are disconnected before making any connections.
4.1 Wiring Connections
Connect the components in the following order to ensure safe and correct operation:
- Connect the Battery: Connect the battery to the charge controller first. Ensure correct polarity (positive to positive, negative to negative). The controller will automatically detect the system voltage (12V or 24V).
- Connect the Load: Connect your DC load to the controller's load terminals.
- Connect the Solar Panel (PV): Connect the solar panel to the controller's PV terminals. Ensure correct polarity.
To disconnect the system, reverse the order: first disconnect the solar panel, then the load, and finally the battery.

Figure 4.1: Connection Order for Solar Charge Controller

Figure 4.2: Comprehensive Connection Diagram
4.2 WiFi Connectivity and App Setup
The controller includes a built-in WiFi module for remote monitoring and control via a mobile application. Follow these steps to connect your controller to your home WiFi network:
- Download the App: Search for and download the "iConnect" app from your device's app store (Android or iOS).
- Add Device: Open the app. For first-time login, you may need to register an account. Choose "Cloud Device" and click the "+" (Add Device) button.
- Enter WiFi Details: Enter your home WiFi password and click "Next".
- Connect to Controller's WiFi:
- For Android: Click "Connect".
- For iOS: Click "Go to setup wifi", then find the WiFi named "LDSOLAR-W01" and connect to it. After connecting, return to the "iConnect" app.
- Automatic Connection: Click "Next" in the app. The app will automatically connect to the controller.
- Name Device: Fill in a "Device Name" to complete the network assignment.
Video 4.1: GCSOAR Solar Charge Controller APP WiFi Online Connection Guide

Figure 4.3: WiFi Connectivity and App Interface
5. Operating Instructions
Once installed, the controller will begin operating automatically. You can monitor and adjust settings via the LCD display or the mobile app.
5.1 LCD Display Operation
The LCD display provides real-time information about your solar system, including PV voltage, battery voltage, charging current, and load status. Use the two buttons below the display to navigate through the menus and view different parameters.
5.2 Mobile App Monitoring and Control
The "iConnect" app provides a comprehensive interface for monitoring and controlling your solar charge controller remotely.
- Monitoring: View real-time data for PV, battery, and load, including voltages, currents, and power. This allows you to check the energy flow in real-time.
- Load Control: Easily switch the load ON or OFF directly from the app.
- Settings: Adjust various parameters such as battery type (Sealed, Gel, Flooded, AGM, Lithium, User-defined), boost charge voltage, float charge voltage, and load working hours.

Figure 5.1: Real-time Energy Flow Monitoring via App

Figure 5.2: Battery Type Selection and 4-Stage Charging Process

Figure 5.3: Detailed Settings and Parameter Adjustment in the App
6. Maintenance
Regular maintenance ensures the longevity and optimal performance of your solar charge controller.
- Periodic Inspection: Inspect the controller and all connections regularly (e.g., monthly) for any signs of damage, corrosion, or loose wiring.
- Cleanliness: Keep the controller clean and free from dust and debris. Use a dry cloth to wipe the surface. Ensure ventilation openings are not blocked.
- Connection Check: Verify that all wire connections are tight and secure. Loose connections can cause overheating and damage.
- Battery Health: Monitor your battery's health and ensure it is within its recommended operating parameters.
7. Troubleshooting
If you encounter issues with your GCSOAR solar charge controller, refer to the following common troubleshooting tips:
- No Display/No Power:
- Check battery connections and ensure they are secure and have correct polarity.
- Verify the battery voltage is within the controller's operating range (12V/24V).
- No Charging:
- Ensure solar panels are connected correctly and receiving sufficient sunlight.
- Check PV voltage and current on the display or app.
- Verify that the PV input voltage is below the maximum 75V.
- Load Not Working:
- Check load connections and ensure they are secure.
- Verify the load is enabled via the LCD display or mobile app.
- Check for overcurrent or short circuit protection activation.
- LCD Malfunction:
- If the LCD screen displays data erratically or is blank, ensure power connections are stable. If the issue persists, contact customer support.
- WiFi Connection Issues:
- Ensure your home WiFi network is active and the password is correct.
- Repeat the WiFi setup steps carefully, ensuring you connect to the controller's temporary WiFi network ("LDSOLAR-W01") during the process if using iOS.
- Ensure the controller is within range of your WiFi router.
For persistent issues not resolved by these steps, please contact GCSOAR customer support.
8. Specifications
| Feature | Specification |
|---|---|
| Model | TD2207 |
| Rated Charge Current | 20A |
| System Voltage | 12V/24V Auto Work |
| Max PV Voltage | 75V |
| Max PV Input Power (12V) | 260W |
| Max PV Input Power (24V) | 520W |
| Battery Type Support | Lead-Acid (Sealed, Gel, Flooded, AGM), Lithium (User-definable) |
| Display Type | LCD |
| Connectivity | Built-in WiFi |
| Product Dimensions | 7.68 x 4.84 x 1.81 inches (195 x 123 x 46 mm) |
| Item Weight | 1.85 pounds |
| Color | Green |

Figure 8.1: Product Dimensions
9. Warranty and Support
For warranty information, technical support, or service inquiries, please refer to the official GCSOAR website or contact their customer service directly. Keep your purchase receipt as proof of purchase for warranty claims.
You can visit the official GCSOAR Store for more information: GCSOAR Store on Amazon