
ECHTPower SP07
Contents
ECHTPower 2024 Upgrade Wireless Pro Controller User Manual
Model: SP07
Introduction
Thank you for choosing the ECHTPower 2024 Upgrade Wireless Pro Controller. This advanced gamepad is designed to enhance your gaming experience across multiple platforms, including Nintendo Switch, Switch OLED, Switch Lite, PC, Android, and iOS devices. Featuring vibrant RGB LED lighting, Hall Effect triggers, precision joysticks, programmable buttons, and adjustable vibration, this controller offers unparalleled control and immersion. Please read this manual carefully to ensure proper use and maintenance of your new controller.

Image: Front view of the ECHTPower 2024 Upgrade Wireless Pro Controller, showcasing its ergonomic design and illuminated joysticks and buttons.
Package Contents
- 1 x ECHTPower 2024 Upgrade Wireless Pro Controller
- 1 x USB-C Charging Cable
- 1 x User Manual
Controller Layout

Image: Diagram illustrating the various buttons and components of the ECHTPower Pro Controller, including joysticks, D-pad, action buttons (A, B, X, Y), shoulder buttons (L, R, ZL, ZR), and function buttons.
- Left/Right Analog Sticks: For precise movement and camera control.
- D-Pad: Directional input.
- A/B/X/Y Buttons: Action buttons.
- L/R/ZL/ZR Buttons: Shoulder and trigger buttons.
- +/- Buttons: System menu navigation.
- Home Button: Returns to the system home screen.
- Screenshot Button: Captures screenshots.
- M1/M2 Buttons: Programmable back buttons.
- USB-C Port: For charging and wired connection.
Setup
Charging the Controller
Before first use, fully charge the controller. Connect the supplied USB-C cable to the controller's USB-C port and the other end to a USB power source (e.g., console, PC, USB wall adapter). The LED indicators will show charging status and turn off when fully charged. A full charge takes approximately 3 hours and provides up to 18 hours of playtime.

Image: Illustration showing the controller connected via USB-C cable for charging, with an overlay indicating the 1000mAh battery capacity and charging/playtime durations.
Connecting to Nintendo Switch/OLED/Lite
- From the HOME Menu, select "Controllers" > "Change Grip/Order".
- Press and hold the Home button on the ECHTPower controller for 3-5 seconds until the LED indicators start flashing rapidly.
- The controller will pair automatically. Once connected, the corresponding player LED(s) on the controller will light up solid.
- For initial connection, a wired connection to the dock might be required for some Switch models, then disconnect the cable for wireless play.
Connecting to PC (Wired/Bluetooth)
Wired Connection:
- Connect the controller to your PC using the USB-C cable.
- The PC will automatically detect and install the necessary drivers. The controller will be recognized as an Xbox 360 controller or similar gamepad.
Bluetooth Connection:
- Ensure your PC has Bluetooth enabled.
- Go to "Bluetooth & other devices" settings on your PC.
- Select "Add Bluetooth or other device" > "Bluetooth".
- Press and hold the Home button on the ECHTPower controller for 3-5 seconds until the LED indicators flash rapidly.
- Select "Pro Controller" or "Wireless Controller" from the list of available devices.
- Once paired, the LED indicators on the controller will light up solid.
Connecting to Android/iOS Devices
- Enable Bluetooth on your Android or iOS device.
- Go to Bluetooth settings and scan for new devices.
- Press and hold the Home button on the ECHTPower controller for 3-5 seconds until the LED indicators flash rapidly.
- Select "Pro Controller" or "Wireless Controller" from the list of available devices.
- Once paired, the LED indicators on the controller will light up solid.

Image: Visual representation of the controller's broad compatibility with Nintendo Switch, PC, Android, and iOS devices, showing it connected to various gaming setups.
Operating Instructions
RGB LED Lighting
The controller features 9 colors and 5 lighting modes for its RGB LEDs around the joysticks and D-pad. Refer to the controller's specific button combination (usually a dedicated LED button or a combination with the Turbo button) to cycle through colors and modes. This allows for personalized aesthetics during gameplay.

Image: The ECHTPower controller with its joysticks and D-pad illuminated by vibrant RGB lighting, demonstrating the customizable visual effects.
Programmable Buttons (M1/M2)
The M1 and M2 buttons on the back of the controller can be programmed to perform single button presses or complex sequences (up to 16 button inputs). This feature is ideal for executing quick combos or frequently used actions in games.
- Programming Steps:
- Press and hold the "Program" button (often a small button near M1/M2) until the indicator light flashes.
- Press the M1 or M2 button you wish to program.
- Input the desired button sequence (e.g., A, B, X, Y, L, R, ZL, ZR, D-pad directions).
- Press the "Program" button again to save the sequence. The indicator light will turn off.
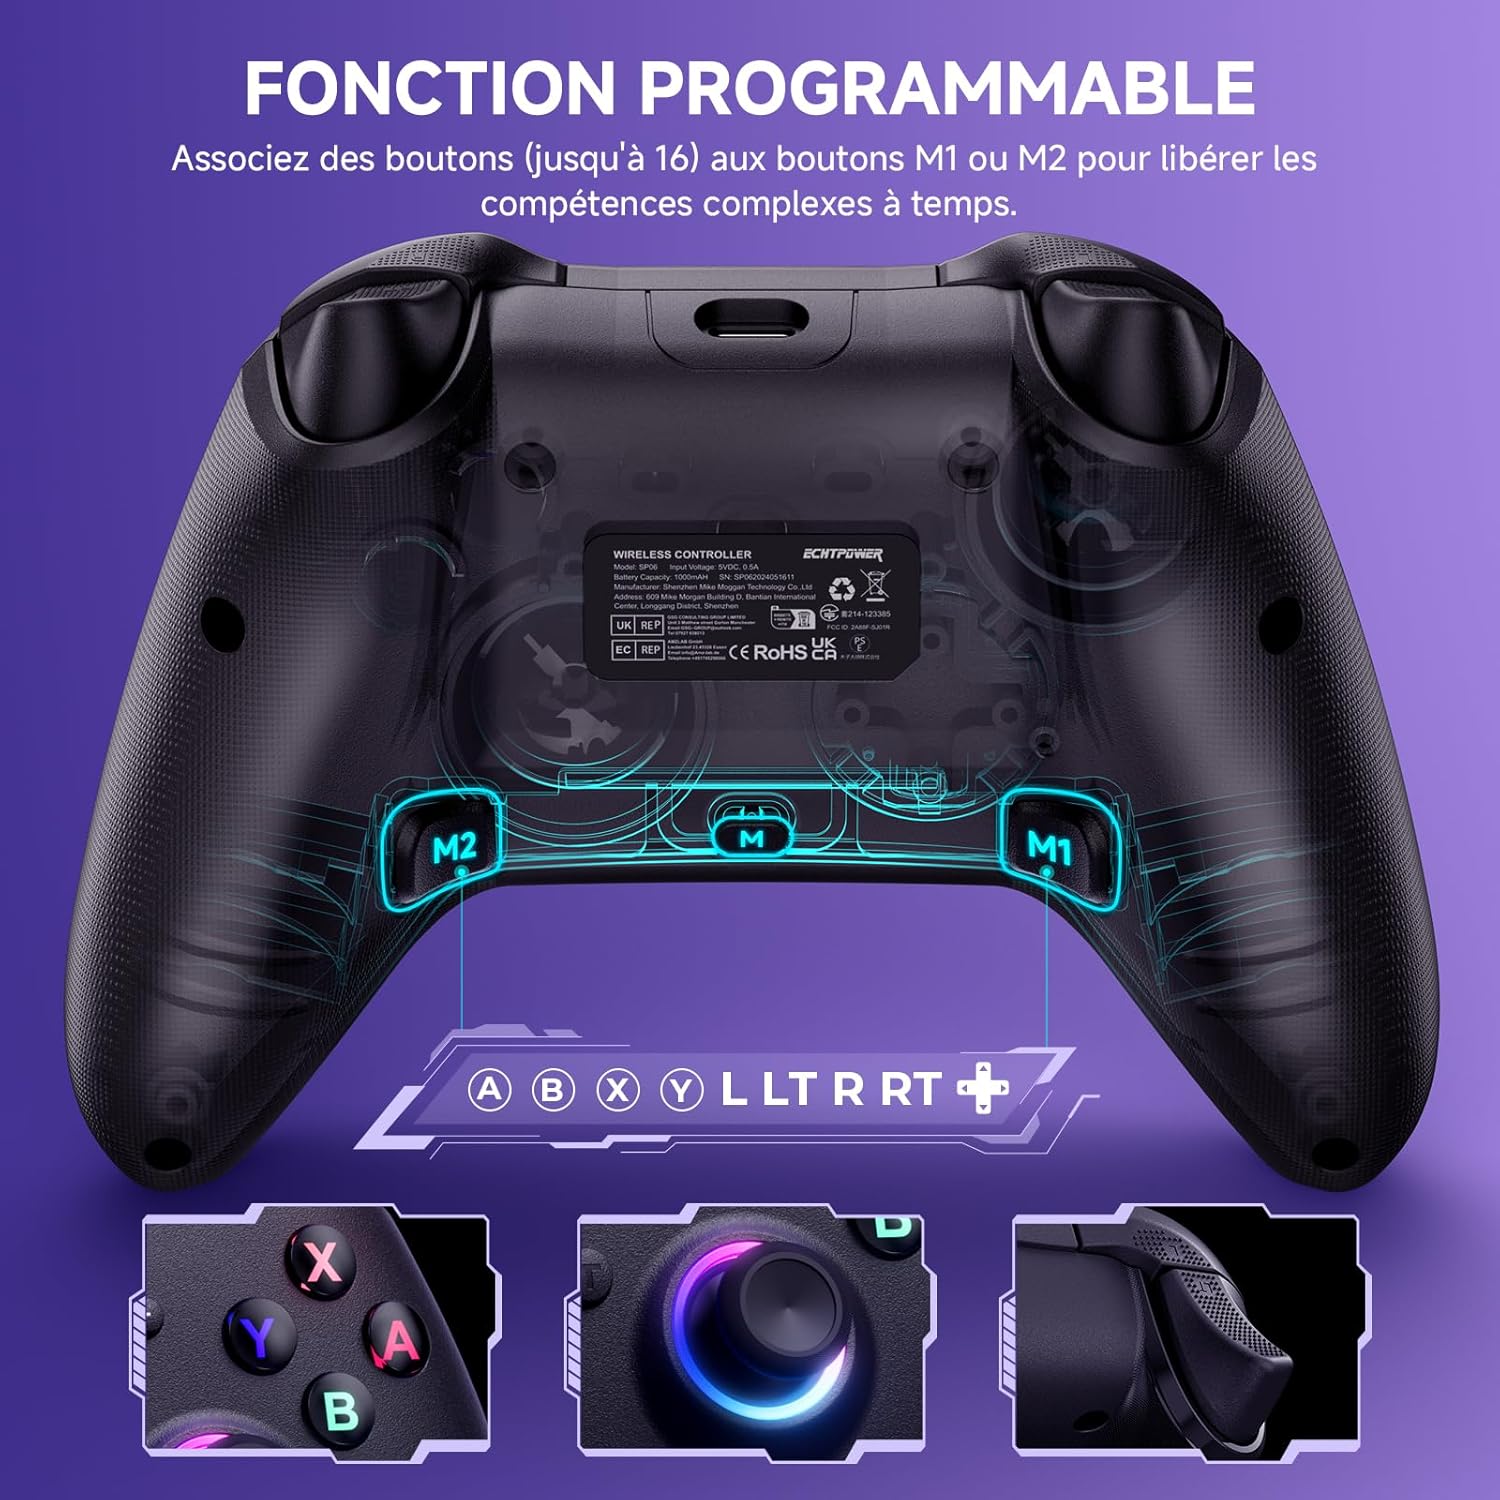
Image: Rear view of the controller highlighting the M1 and M2 programmable buttons, with an overlay indicating the types of button inputs that can be assigned.
Turbo Function
The Turbo function allows a button to be pressed continuously without holding it down, reducing finger fatigue and providing an advantage in games requiring rapid button presses.
- Activating Turbo: Press and hold the "Turbo" button, then press the action button you want to set to Turbo (e.g., A, B, X, Y, L, R, ZL, ZR).
- Adjusting Turbo Speed: Some controllers allow adjusting the Turbo speed by pressing the "Turbo" button and moving the right analog stick up or down.
- Deactivating Turbo: Press and hold the "Turbo" button, then press the same action button again.

Image: Close-up of the controller's center, illustrating the Turbo button and its functionality with an animated graphic indicating rapid button presses.
Adjustable Vibration
The dual vibration motors provide haptic feedback, enhancing immersion. The controller offers 4 levels of adjustable vibration intensity.
- Adjusting Vibration: Typically, this is done by holding a specific button (e.g., Turbo or a dedicated vibration button) and pressing the D-pad up/down or an analog stick. Refer to the quick start guide for exact button combinations.

Image: Transparent view of the controller showing the internal vibration motors and an indicator of four adjustable vibration intensity levels.
Hall Effect Triggers and Joysticks
The Hall Effect triggers utilize electromagnetic induction for more sensitive and durable input, reducing drift and increasing lifespan. The precision joysticks provide accurate and responsive control.

Image: Close-up view of the controller's trigger button, with an overlay illustrating the linear sensing mechanism of the Hall Effect technology, showing 255 levels of control.
6-Axis Gyroscope
The built-in 6-axis gyroscope sensor allows for precise motion control, enabling quick reactions and immersive gameplay in compatible titles.
Maintenance
- Cleaning: Use a soft, dry cloth to clean the controller. For stubborn dirt, slightly dampen the cloth with water. Do not use harsh chemicals or abrasive cleaners.
- Storage: Store the controller in a cool, dry place away from direct sunlight and extreme temperatures.
- Battery Care: To prolong battery life, avoid fully discharging the controller frequently. If storing for an extended period, charge the controller to about 50% every few months.
- Avoid Drops: Protect the controller from drops and impacts, which can damage internal components.
Troubleshooting
| Problem | Possible Cause / Solution |
|---|---|
| Controller does not turn on. | Battery is low or depleted. Charge the controller fully. |
| Controller does not connect to Switch/PC/Mobile. |
|
| Input lag or disconnection. |
|
| Buttons or joysticks are unresponsive/drifting. |
|
| Vibration not working or too weak/strong. | Adjust vibration intensity settings as described in the "Operating Instructions" section. Ensure the game supports vibration feedback. |
Specifications
| Feature | Detail |
|---|---|
| Model Number | SP07 |
| Connectivity | Bluetooth, USB-C (Wired) |
| Compatibility | Nintendo Switch/OLED/Lite, PC, Android, iOS |
| Battery Capacity | 1000mAh Lithium Battery |
| Charging Time | Approx. 3 hours |
| Playtime | Approx. 18 hours |
| Special Features | RGB LED Lighting (9 colors, 5 modes), Hall Effect Triggers, Precision Joysticks, Programmable M1/M2 Buttons, Turbo Function (Auto/Manual), 6-Axis Gyroscope, Adjustable Dual Vibration (4 levels) |
| Dimensions (L x W x H) | 16.1 x 11.99 x 6.91 cm |
| Weight | 308g |
Warranty and Support
ECHTPower products come with a standard manufacturer's warranty. For specific warranty terms and conditions, please refer to the warranty card included in your product packaging or visit the official ECHTPower website. If you encounter any issues or have questions regarding your controller, please contact ECHTPower customer support through their official channels. Provide your model number (SP07) and a detailed description of the issue for faster assistance.
Official Website: Visit ECHTPower Store on Amazon
Safety Information
- Do not disassemble or attempt to repair the controller yourself. This may void the warranty and cause damage.
- Keep the controller away from water, moisture, and extreme temperatures.
- Do not expose the controller to open flames or heat sources.
- Dispose of the battery according to local regulations. Do not dispose of it with household waste.
- Keep out of reach of small children.
Documents and downloads
Ask a question about this manual
Ask about setup, troubleshooting, compatibility, parts, safety, or missing instructions. Manuals+ will review the question and use this page’s manual context to help answer it.