
Introduction
This manual provides essential information for the safe operation, setup, maintenance, and troubleshooting of your PSI Woodworking TCLT10VS Turncrafter Commander Tailspinner 10" Variable Speed Midi Lathe. Please read all instructions carefully before operating the machine to ensure proper use and to prevent injury or damage.
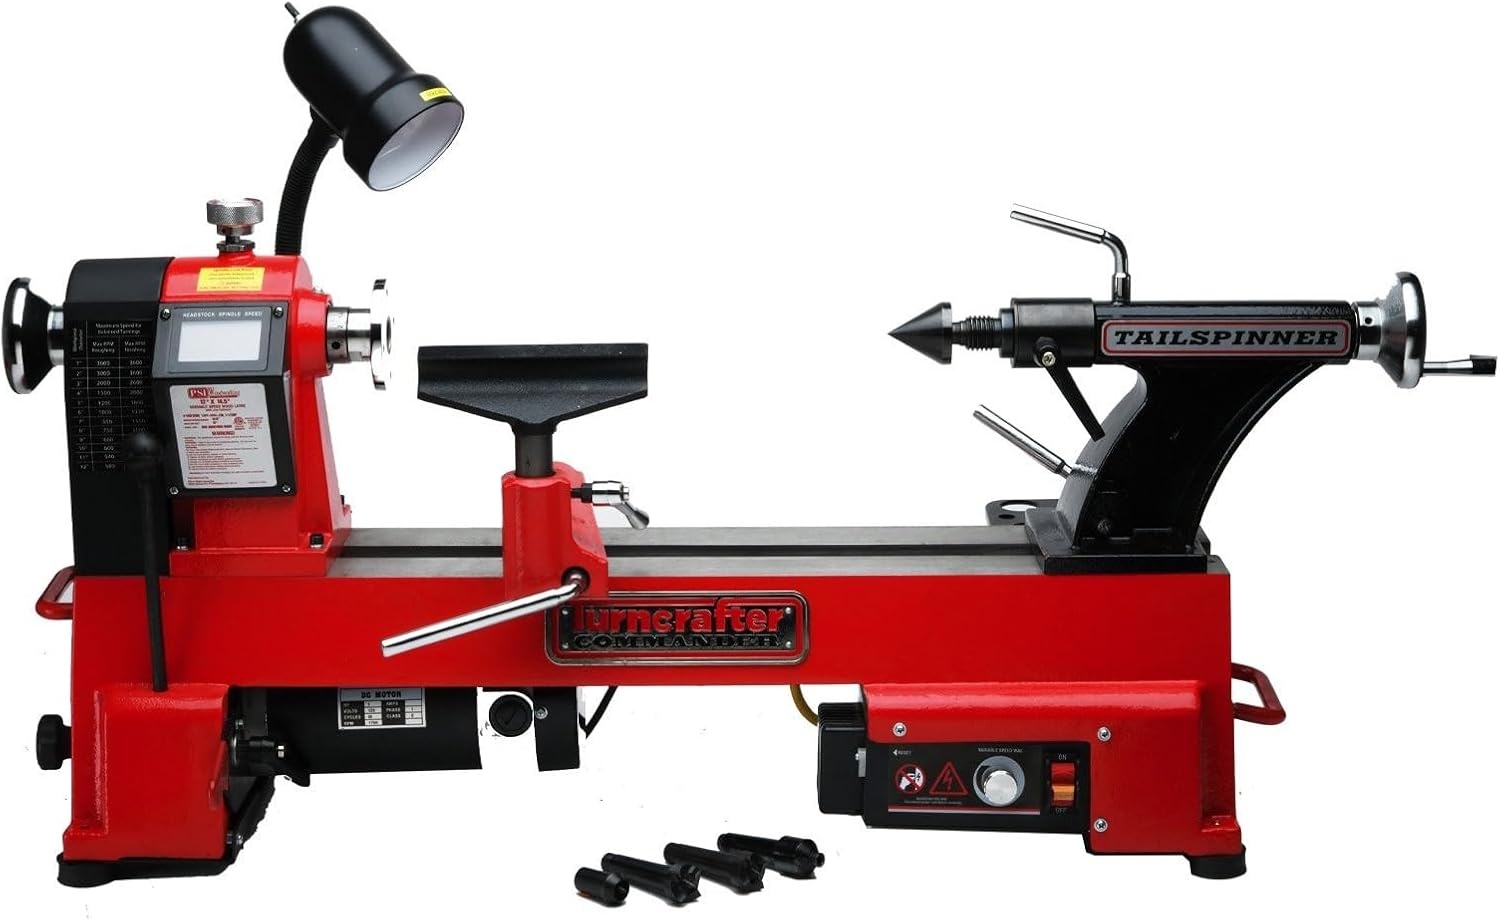
Figure 1: Overall view of the PSI Woodworking TCLT10VS Turncrafter Commander Tailspinner Midi Lathe, showcasing its red and black finish, headstock, tailstock, and tool rest.
Safety Instructions
Always prioritize safety when operating any power tool. Failure to follow these instructions may result in serious injury or property damage.
- Eye Protection: Always wear ANSI-approved safety goggles or a face shield.
- Work Area: Keep your work area clean, well-lit, and free of clutter. Ensure adequate space around the lathe.
- Clothing: Do not wear loose clothing, gloves, neckties, or jewelry that can become entangled in moving parts. Tie back long hair.
- Workpiece Security: Always ensure the workpiece is securely mounted before starting the lathe. Never turn a piece that is not properly centered or balanced.
- Tool Rests: Position the tool rest as close as possible to the workpiece without touching it. Adjust the tool rest height to be slightly below the center line of the workpiece.
- Speed Control: Start the lathe at the lowest speed setting and gradually increase as needed. Never change belt positions while the motor is running.
- Unattended Operation: Never leave the lathe running unattended.
- Power Disconnection: Disconnect power before performing any maintenance, adjustments, or when changing accessories.
- Read Manuals: Read and understand all instructions for any accessories used with the lathe.
Package Contents
Verify that all components are present upon unpacking. If any items are missing or damaged, contact PSI Woodworking customer support.
- TCLT10VS Midi Lathe Unit
- 6" Tool Rest with 5/8" post
- 12" Tool Rest with 5/8" post
- 3" Faceplate
- (2) 4-prong Dead Spur Centers
- 60° Dead Center
- Dead Mandrel Saver
- Dead Safety Center
- Tool Caddy storage rack
- (4) Hex Wrenches
- Phillips Screwdriver
- Knockout Rod
- Safety Goggles
Setup
1. Unpacking and Placement
Carefully remove all components from the packaging. Place the lathe on a sturdy, level workbench capable of supporting its 82-pound weight. Ensure the workbench is securely anchored to prevent movement during operation.
2. Power Connection
Connect the lathe to a standard 110V power outlet. Ensure the power switch on the lathe is in the 'OFF' position before plugging it in.
3. Attaching Tool Rests
Insert the post of the desired tool rest (6" or 12") into the banjo assembly. Adjust the height and position of the tool rest using the locking levers. Ensure the tool rest is securely locked before operation.

Figure 2: Angled view of the lathe, highlighting the control panel with variable speed dial and power switch, and the tailstock assembly.
Operating Instructions
1. Mounting Workpieces
Workpieces can be mounted between centers for spindle turning or on a faceplate for bowl turning.
- Between Centers: Insert a 4-prong spur center into the headstock spindle and a dead center into the tailstock quill. Bring the tailstock forward to engage the workpiece firmly between the centers. Lock the tailstock in position.
- Faceplate Mounting: Securely attach the workpiece to the 3" faceplate using appropriate screws. Thread the faceplate onto the headstock spindle.

Figure 3: A wooden workpiece secured between the headstock and tailstock centers, ready for spindle turning.

Figure 4: A close-up view of a workpiece mounted on the lathe, with the tool rest properly positioned for turning operations.
2. Variable Speed Control
The lathe is powered by a 1 hp variable speed 110V motor. It features two belt positions for different RPM ranges:
- Low Range: 450-1700 RPM
- High Range: 950-3800 RPM
To change belt positions, ensure the lathe is powered off and unplugged. Open the belt cover and manually move the belt to the desired pulley combination. The digital readout displays the current RPM, allowing for precise speed adjustments using the variable speed dial.
3. Live Tailstock Functionality
The Tailspinner features a unique live tailstock. The tailstock spindle is identical to the headstock spindle, with 1" x 8tpi threads and #2 Morse Taper mounting capabilities. This allows any chuck, center, faceplate, or other accessories to operate as live on the tailstock.
This feature is particularly beneficial for bowl turning, as it allows you to remount a wood blank without fear of misalignment. You can leave your faceplate or chuck attached when reversing a bowl blank, ensuring the bowl remains perfectly centered on the lathe axis. The live tailstock spindle can also be locked with a handle to convert it to a traditional lathe's tailstock function when needed.
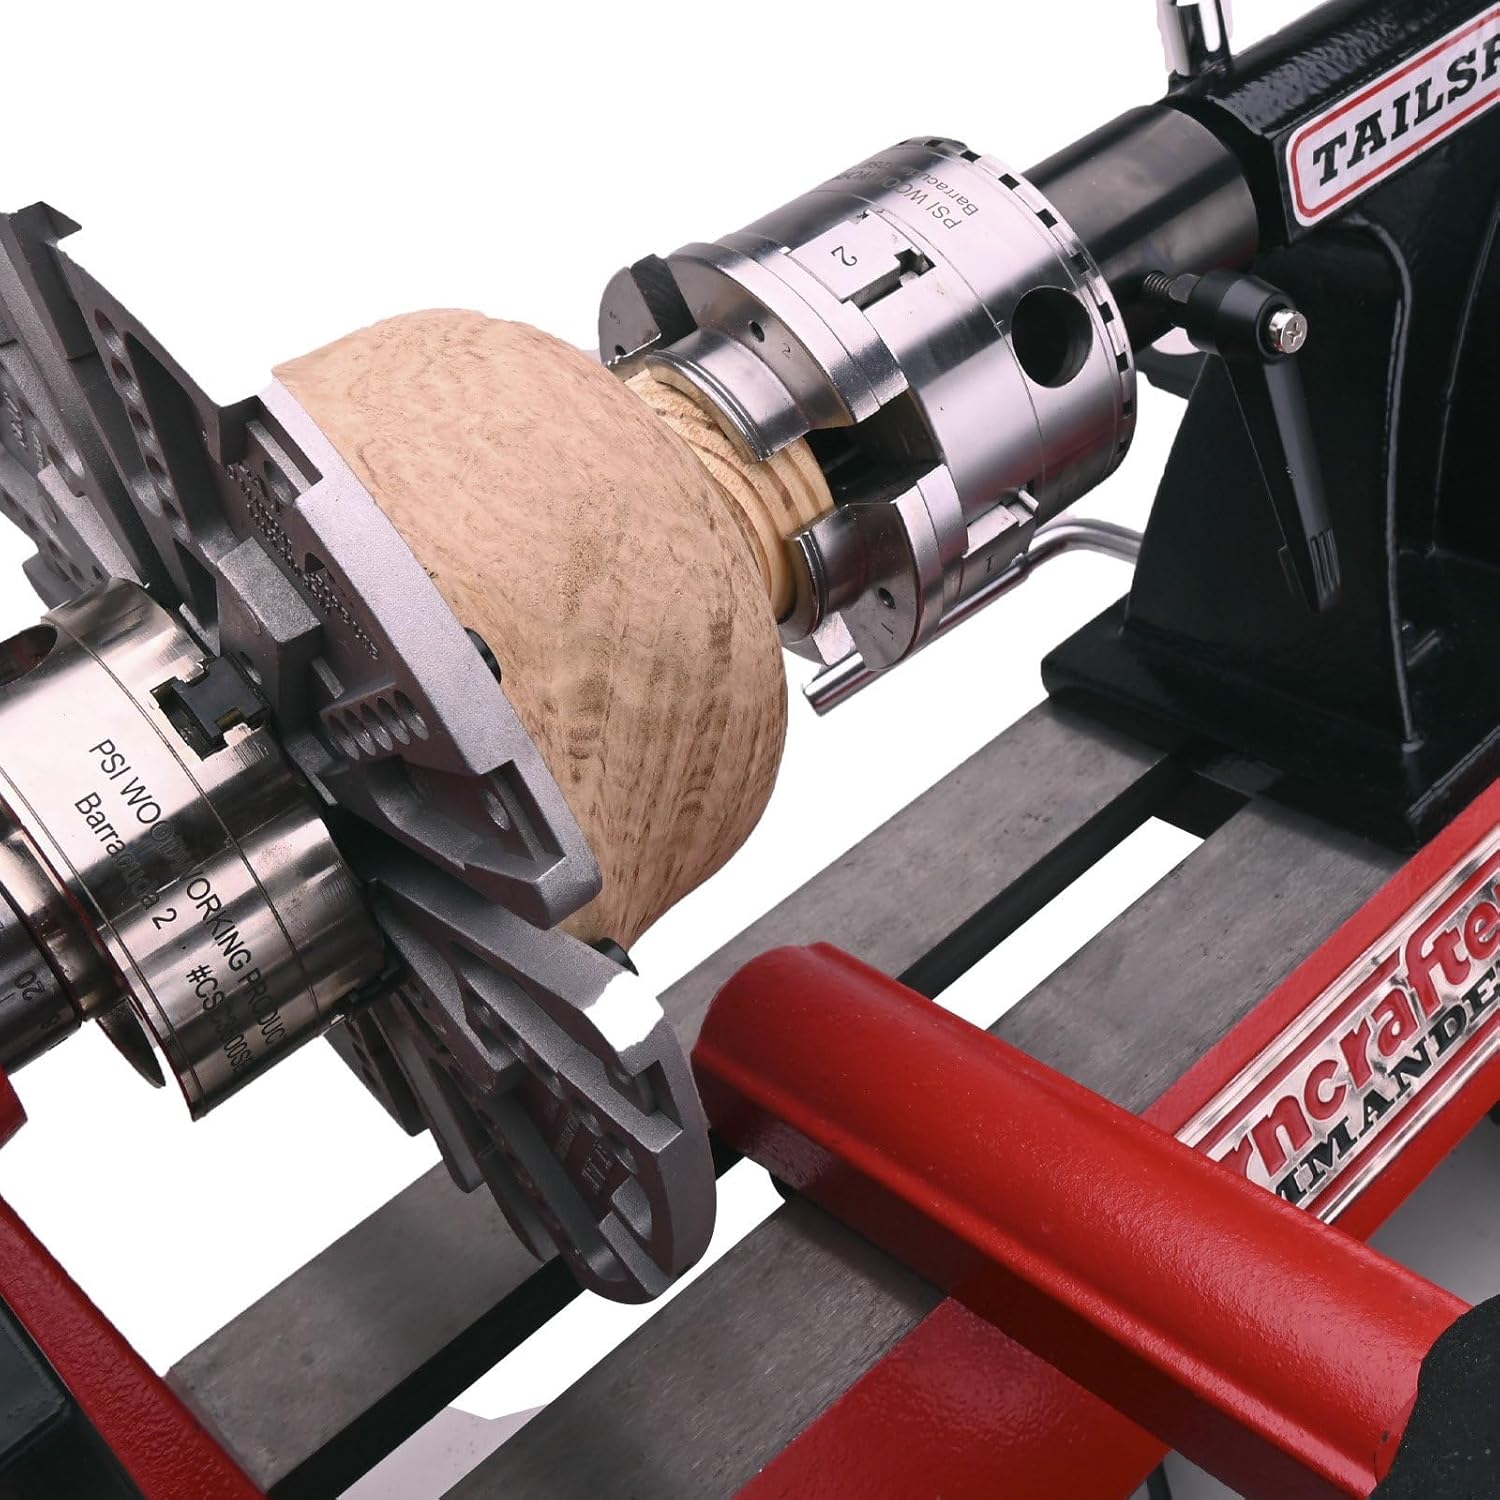
Figure 5: A wooden bowl blank being turned on the lathe, secured by a chuck, demonstrating the machine's capability for bowl turning.

Figure 6: A finished wooden bowl being detached from the chuck on the lathe, illustrating the ease of workpiece removal.
Maintenance
Regular maintenance ensures the longevity and optimal performance of your lathe.
- Cleaning: After each use, clean the lathe bed, headstock, tailstock, and tool rest with a brush or compressed air to remove wood dust and debris. Avoid using solvents that may damage painted surfaces.
- Lubrication: Periodically apply a light machine oil to the tailstock quill and other moving parts to ensure smooth operation.
- Belt Inspection: Regularly inspect the drive belt for wear, cracks, or damage. Replace the belt if any signs of wear are present.
- Fasteners: Check all nuts, bolts, and screws periodically to ensure they are tight. Tighten as necessary.
Troubleshooting
This section addresses common issues you might encounter with your lathe.
- Lathe Does Not Start:
- Check if the power cord is securely plugged into a live outlet.
- Ensure the power switch is in the 'ON' position.
- Verify that the circuit breaker has not tripped.
- Excessive Vibration:
- Ensure the workpiece is properly balanced and securely mounted.
- Check that the lathe is securely fastened to the workbench.
- Inspect the drive belt for damage or improper tension.
- Inconsistent Speed:
- Verify the drive belt is correctly seated in the pulleys and is not slipping.
- Ensure the variable speed control dial is functioning correctly.
- Tailstock Not Holding Position:
- Tighten the tailstock locking lever.
- Clean any debris from the lathe bed that might prevent proper clamping.
For issues not covered here, please contact PSI Woodworking customer support.
Specifications
| Feature | Specification |
|---|---|
| Model Number | TCLT10VS |
| Manufacturer | PSI Woodworking |
| Distance between Centers | 14-1/2 inches |
| Swing over Bed | 10 inches |
| Quill Travel | 4 inches |
| Indexing Positions | 24 |
| Motor | 1 hp variable speed 110V |
| Low RPM Range | 450-1700 RPM |
| High RPM Range | 950-3800 RPM |
| Headstock/Tailstock Spindle | 1" x 8tpi threads, #2 Morse Taper |
| Item Weight | 82 pounds |
| Base Footprint | 31" x 7-1/4" |
Warranty and Support
For warranty information, technical assistance, or to order replacement parts, please contact PSI Woodworking directly. Refer to the product packaging or the manufacturer's official website for current contact details.


