
Introduction
Thank you for choosing the Auto-Mow Robotic Lawnmower Garage 1 - Large. This manual provides essential information for the proper assembly, installation, operation, and maintenance of your new robotic lawnmower garage. Please read this manual thoroughly before beginning assembly or use to ensure safe and efficient operation and to maximize the lifespan of your product.
This garage is designed to protect your robotic lawnmower from various weather conditions, including rain, sun, and hail, extending its operational life and maintaining its appearance. It features a robust metal frame and a transparent roof, suitable for robotic lawnmowers up to 5,000 m² coverage area.
Safety Information
Always observe the following safety precautions:
- Ensure all components are securely fastened during assembly.
- Do not attempt to modify the garage structure.
- Keep children and pets away from the assembly area.
- Place the garage on a stable, level surface.
- Regularly inspect the garage for any signs of damage or wear.
- This product is intended for outdoor use only.
Package Contents
Verify that all parts are present before beginning assembly. If any parts are missing or damaged, contact Auto-Mow customer support.
- Main frame components (metal)
- Transparent roof panel
- Assembly hardware (screws, nuts, bolts)
- Instruction manual (this document)

Image: The Auto-Mow Robotic Lawnmower Garage 1 - Large, showcasing its overall structure with a black frame and transparent roof.
Setup and Assembly
The Auto-Mow Robotic Lawnmower Garage 1 is designed for easy assembly. Follow these steps carefully:
- Unpack Components: Carefully remove all parts from the packaging and lay them out on a clean, flat surface. Check against the package contents list.
- Assemble Frame: Connect the metal frame components using the provided screws and bolts. Ensure all connections are tight and secure. Refer to the included diagrams for correct orientation.
- Attach Roof Panel: Carefully place the transparent roof panel onto the assembled frame. Secure it using the designated fasteners. Be gentle to avoid scratching the roof.
- Positioning: Choose a suitable location for the garage. It should be on a level surface, ideally near the robotic lawnmower's charging station, and provide easy access for the mower.
- Secure to Ground (Optional): For added stability, especially in windy conditions, the garage can be anchored to the ground using appropriate ground stakes (not included).
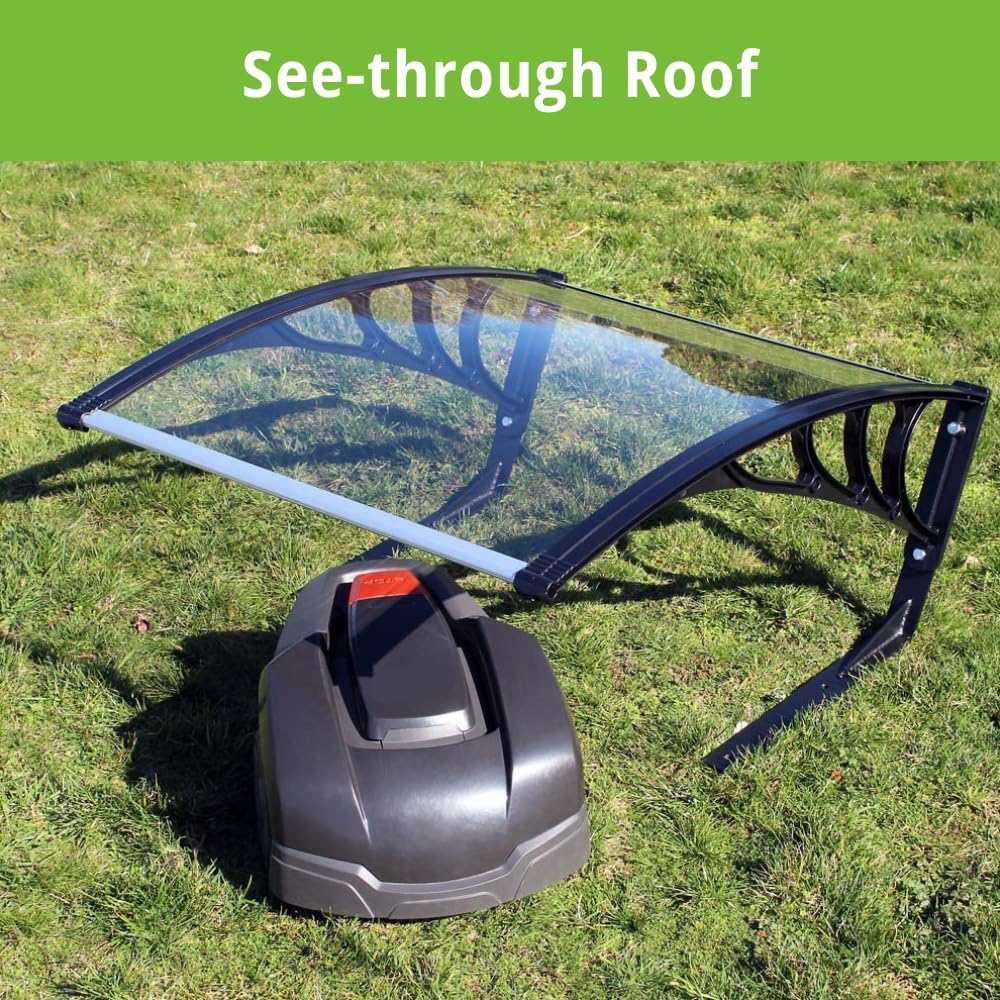
Image: The assembled garage positioned over a robotic lawnmower, demonstrating the transparent roof feature and how it provides shelter.
Operating Instructions
The Auto-Mow Robotic Lawnmower Garage 1 is a passive protective structure. It does not require active operation.
- Once assembled and positioned, guide your robotic lawnmower into the garage. Ensure there is sufficient clearance for the mower to enter and exit freely.
- The transparent roof allows light to pass through, which can be beneficial for robotic lawnmowers that use light sensors for navigation or charging.
- The garage provides protection from direct sunlight, rain, and other environmental elements, helping to preserve the condition of your robotic lawnmower.

Image: A side view of the robotic lawnmower garage, emphasizing its sturdy construction and the clear roof design.
Maintenance
Regular maintenance will ensure the longevity and effectiveness of your garage:
- Cleaning: Periodically wipe down the frame and roof panel with a damp cloth to remove dirt, dust, and debris. Avoid abrasive cleaners that could scratch the transparent roof.
- Inspection: Annually, or more frequently if exposed to harsh weather, inspect all screws and connections to ensure they remain tight. Re-tighten if necessary.
- Damage Check: Check for any signs of rust on the metal frame or cracks in the transparent roof. Address any damage promptly to prevent further deterioration.
Troubleshooting
| Problem | Possible Cause | Solution |
|---|---|---|
| Garage feels unstable. | Not on a level surface; loose connections; not anchored. | Relocate to a level surface; tighten all screws; consider anchoring the garage to the ground. |
| Robotic mower cannot enter/exit easily. | Garage misaligned with charging station; obstacles. | Adjust garage position; remove any obstructions around the entrance. |
| Water pooling on roof. | Roof panel not properly angled or installed. | Ensure roof panel is installed with a slight incline for water runoff as per assembly instructions. |
Specifications
| Feature | Detail |
|---|---|
| Model Number | Garage 1 |
| Product Dimensions (L x W x H) | 104.14 x 76.2 x 45.72 cm (41 x 30 x 18 inches) |
| Item Weight | 5.9 kg (13 pounds) |
| Material | Metal frame, Transparent roof |
| Color | Black |
| Style | Modern |
| Compatibility | Suitable for robotic lawnmowers covering up to 5,000 m² |
| Special Features | RTK Ready, High-quality stainless steel frame, Easy assembly |

Image: Diagram illustrating the dimensions of the Auto-Mow Robotic Lawnmower Garage 1 - Large: Length (L) 41 inches, Width (W) 30 inches, Height (H) 18 inches.
Warranty and Support
For warranty information or technical support, please contact Auto-Mow customer service. Keep your purchase receipt as proof of purchase.
Manufacturer: Auto-Mow
ASIN: B0CNHRXF4B
Part Number: 38501697
For further assistance, visit the official Auto-Mow website or contact your local dealer.