
Nisorpa 5ton
Contents
Nisorpa 5 Ton Heavy Duty Vertical Beam Clamp Instruction Manual
Model: 5ton
Introduction
This manual provides essential instructions for the safe and effective use of your Nisorpa 5 Ton Heavy Duty Vertical Beam Clamp. Designed for lifting and positioning loads on I-beams, this clamp features a robust alloy steel construction and an adjustable opening range. Please read this manual thoroughly before operation to ensure proper usage and to prevent injury or damage.
Safety Information
WARNING: Failure to follow these safety instructions may result in serious injury or death.
- Always inspect the beam clamp for damage or wear before each use. Do not use if damaged.
- Ensure the I-beam is structurally sound and capable of supporting the intended load.
- Never exceed the Working Load Limit (WLL) of 5 tons (11,000 lbs).
- Ensure the clamp is securely attached to the I-beam and fully tightened before lifting.
- Distribute the load evenly. Avoid eccentric loading.
- Keep hands and body clear of the load and moving parts during operation.
- Use appropriate personal protective equipment (PPE), including safety helmets, gloves, and safety footwear.
- Only trained and authorized personnel should operate lifting equipment.
- Avoid sudden movements or jerking of the load. Lift and lower smoothly.
Product Components
The Nisorpa Vertical Beam Clamp consists of the following main components:
- Main Body: The primary structure that grips the I-beam.
- Adjustable Screw Mechanism: Allows for adjustment of the clamp's opening width.
- T-Handle: Used to tighten and loosen the adjustable screw.
- Lifting Eye: The attachment point for lifting hooks or shackles.

Image: The Nisorpa 5 Ton Heavy Duty Vertical Beam Clamp securely attached to an I-beam, demonstrating its primary function in a warehouse setting.
Setup
- Inspect the Clamp: Before each use, visually inspect the clamp for any signs of damage, cracks, deformation, or excessive wear on any components, especially the main body, screw mechanism, and lifting eye. Ensure all pins and fasteners are secure.
- Verify I-Beam Condition: Confirm that the I-beam to which the clamp will be attached is free from damage, corrosion, or structural weaknesses. Ensure the beam's capacity is sufficient for the intended load.
- Adjust Opening Range:
The clamp's opening range is adjustable from 3.14 inches (8 cm) to 12.59 inches (32 cm). To adjust, rotate the T-handle counter-clockwise to widen the opening or clockwise to narrow it. Position the clamp over the I-beam flange.
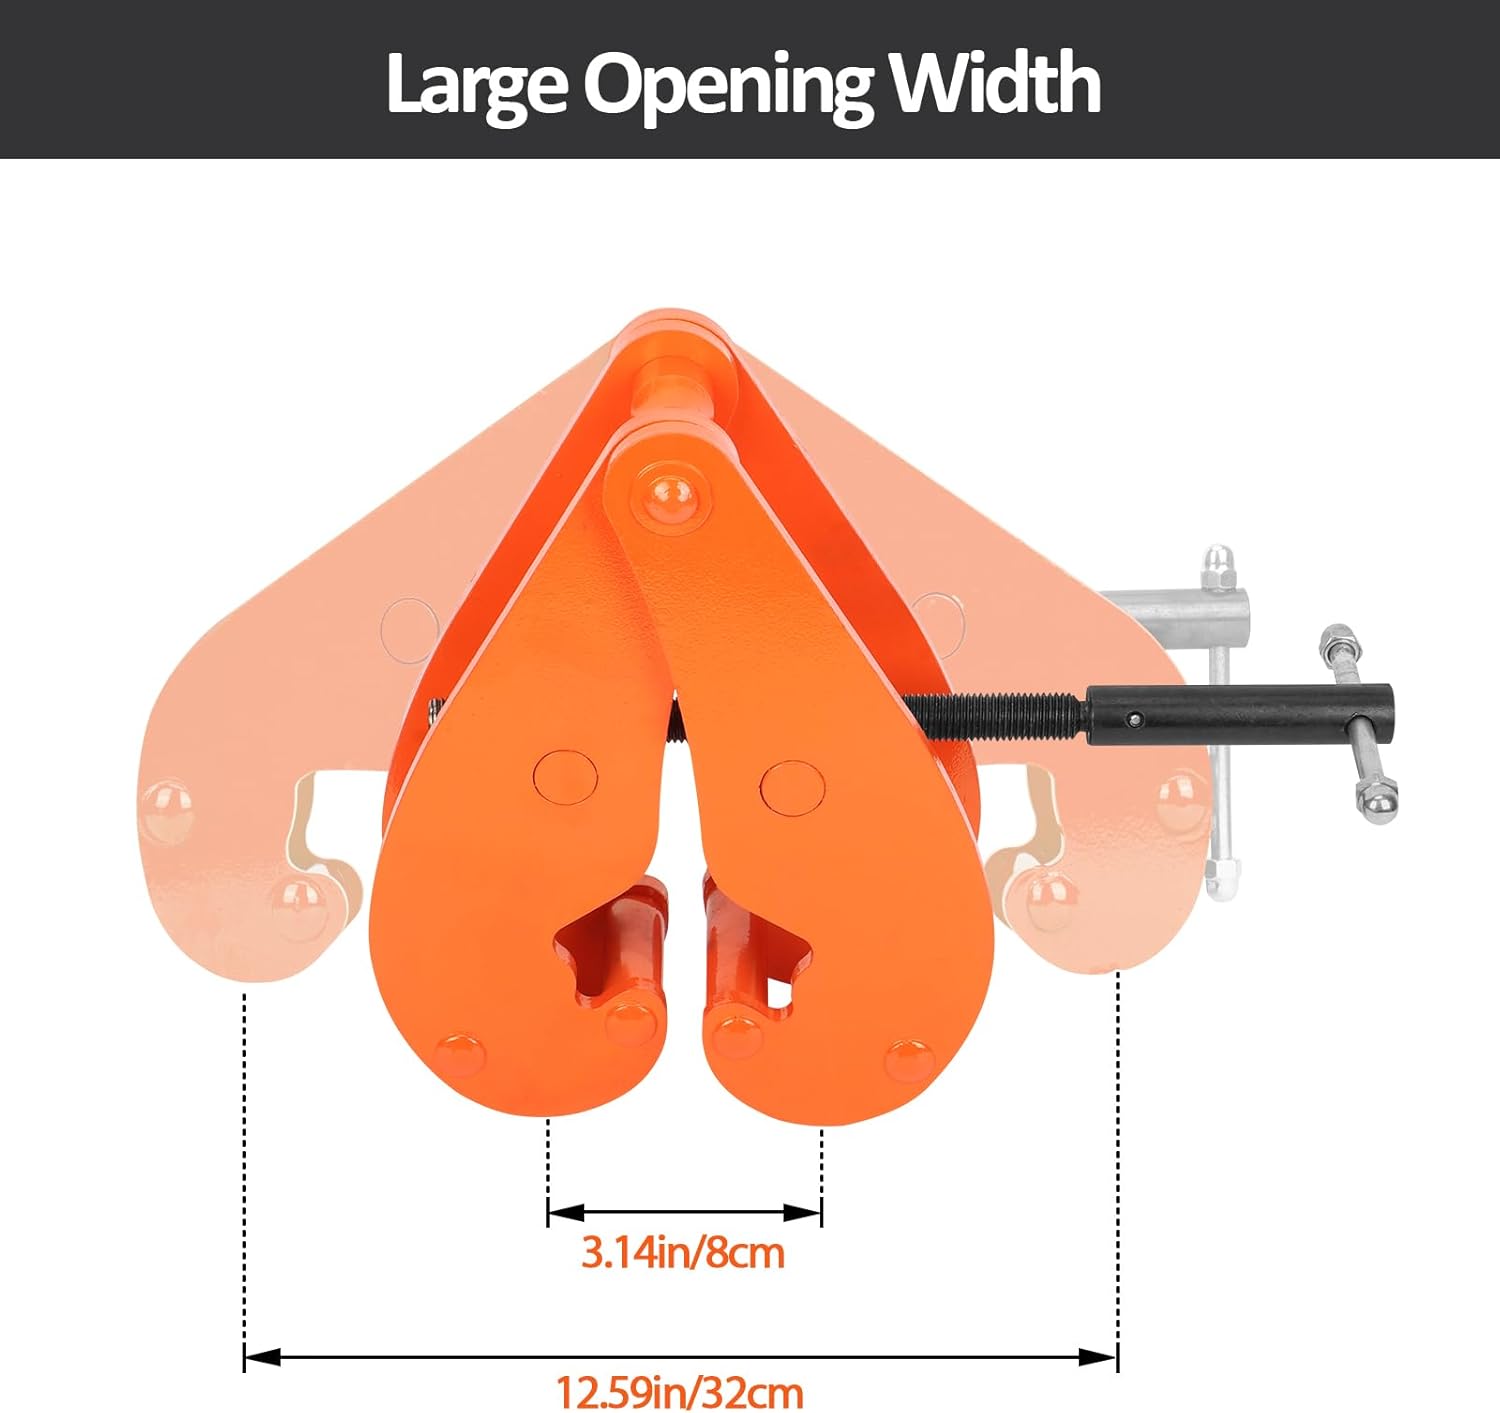
Image: A diagram illustrating the adjustable opening width of the beam clamp, highlighting its minimum and maximum dimensions.
- Secure to I-Beam: Once positioned, rotate the T-handle clockwise to tighten the clamp firmly onto the I-beam flange. Ensure both gripping jaws are in full contact with the beam and the clamp is stable and cannot shift. The clamp must be perpendicular to the beam.
- Final Check: Double-check that the clamp is securely fastened and the T-handle is fully tightened. Give the clamp a gentle tug to confirm it is stable before attaching any load.
Operating Instructions
- Attach Lifting Equipment: Connect your lifting hook or shackle to the lifting eye of the beam clamp. Ensure the connection is secure and rated for the load.
- Position the Load: Carefully position the load to be lifted directly beneath the beam clamp.
- Lift the Load: Slowly and smoothly begin to lift the load. Monitor the clamp and the I-beam for any signs of stress, slippage, or deformation. If any issues are observed, immediately lower the load and investigate.
- Move the Load: Once the load is lifted, move it to the desired location. Avoid swinging or sudden movements.
- Lower the Load: Slowly and smoothly lower the load to its destination. Ensure the landing area is clear and stable.
- Remove the Clamp: After the load is safely placed and disconnected from the clamp, rotate the T-handle counter-clockwise to loosen the clamp from the I-beam. Carefully remove the clamp.
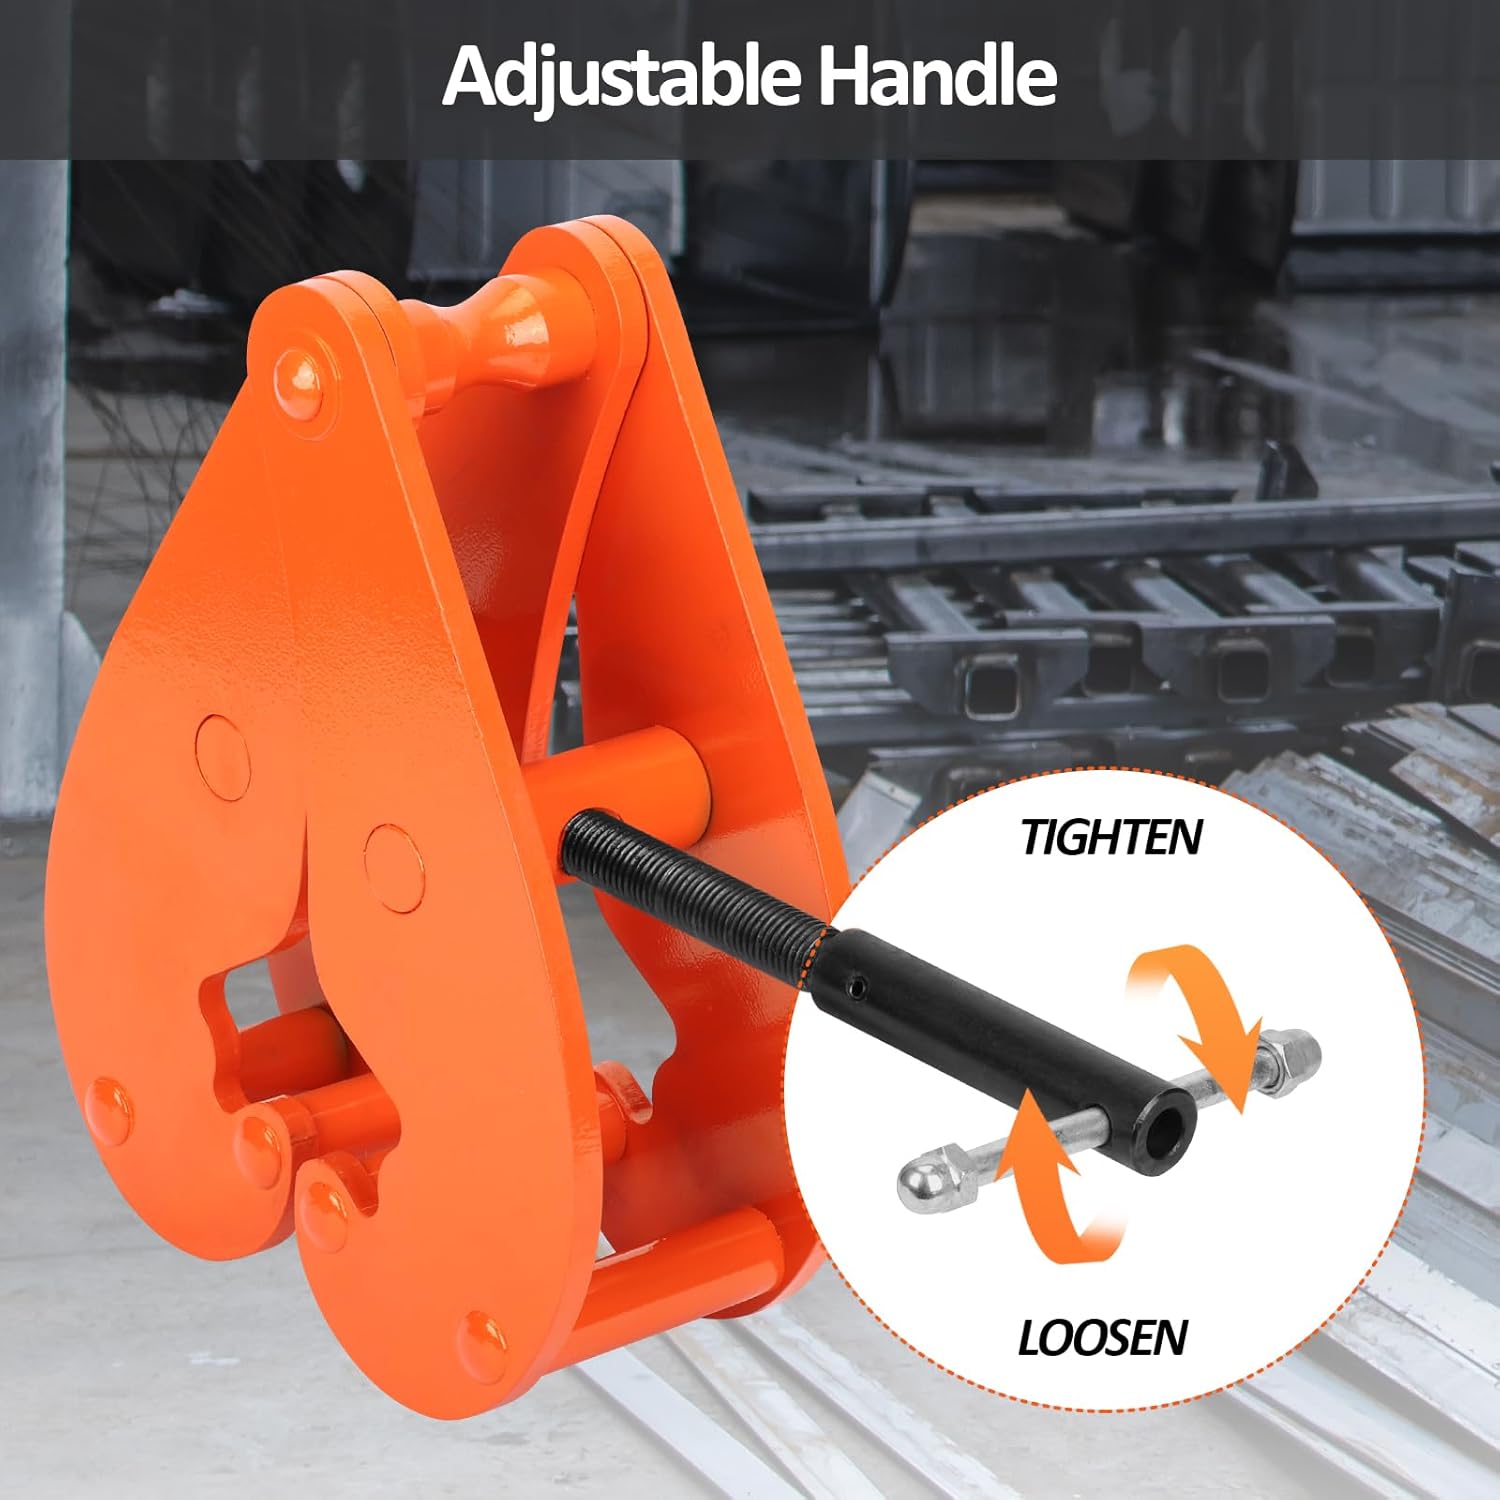
Image: A detailed view of the adjustable T-handle, showing the rotational directions for tightening and loosening the clamp.
Maintenance
- Regular Inspection: Conduct thorough inspections before and after each use. Pay close attention to the main body, lifting eye, and the screw mechanism for any signs of wear, corrosion, or damage.
- Cleaning: Keep the clamp clean and free from dirt, debris, and corrosive substances. Wipe down with a clean cloth after use.
- Lubrication: Periodically lubricate the screw mechanism with a suitable grease to ensure smooth operation and prevent rust.
- Storage: Store the beam clamp in a dry, clean environment, protected from extreme temperatures and corrosive elements.
- Professional Servicing: If any significant damage or wear is detected, or if the clamp's performance degrades, discontinue use immediately and have it inspected and repaired by qualified personnel.
Troubleshooting
| Problem | Possible Cause | Solution |
|---|---|---|
| Clamp does not tighten securely. | Incorrect I-beam size; debris in mechanism; worn screw threads. | Verify I-beam dimensions are within the clamp's range (3.14-12.59 inches). Clean mechanism. Inspect screw for wear; replace if necessary. |
| Difficulty adjusting the T-handle. | Lack of lubrication; rust; bent screw. | Apply lubricant to the screw mechanism. Clean off rust. If bent, discontinue use and replace. |
| Clamp slips on I-beam during lift. | Not tightened sufficiently; I-beam surface is oily/greasy; clamp jaws are worn. | Ensure clamp is fully tightened. Clean I-beam surface. Inspect clamp jaws for wear; replace clamp if jaws are compromised. |
| Visible damage to clamp components. | Overloading; impact damage; improper use. | Discontinue use immediately. Do not attempt to repair. Replace the clamp. |
Specifications
| Feature | Detail |
|---|---|
| Brand | Nisorpa |
| Model Number | 5ton |
| Material | Alloy Steel |
| Working Load Limit (WLL) | 5 Tons (11,000 lbs) |
| Adjustable Opening Range | 3.14 - 12.59 inches (8 - 32 cm) |
| Item Dimensions (L x W x H) | 16.4 x 13.2 x 5.88 inches |
| Item Weight | 24.25 Pounds |
| Color | Orange |
Warranty and Support
Nisorpa products are manufactured to high-quality standards. For warranty information, technical support, or to inquire about replacement parts, please contact Nisorpa customer service through their official channels or the retailer where the product was purchased. Please retain your proof of purchase for warranty claims.
For additional information, you may visit the Nisorpa Store on Amazon.
Documents and downloads
Ask a question about this manual
Ask about setup, troubleshooting, compatibility, parts, safety, or missing instructions. Manuals+ will review the question and use this page’s manual context to help answer it.