
HNARL 300833
Skyjack Safety Lanyard 300833 User Manual
Model: 300833
1. Product Overview
This manual provides essential information for the proper use, installation, and maintenance of the HNARL Skyjack Safety Lanyard, part number 300833. This safety lanyard is designed for specific Skyjack Lift models, including SJII 3215, SJII 3219, and SJIII 3219. It serves as a critical component for ensuring operational safety and compliance.
The lanyard's primary function is to secure components or prevent accidental detachment, contributing to the overall safety system of the lift equipment.

Figure 1: Full view of the Skyjack Safety Lanyard (Part No. 300833). This image shows the complete assembly of the lanyard, including the cable and the attachment points at both ends.
2. Safety Information
Always adhere to all safety guidelines provided by Skyjack for the specific lift equipment. This lanyard is a safety-critical component. Failure to install or maintain it correctly can lead to serious injury or equipment damage.
- Ensure the lanyard is free from damage, kinks, or corrosion before installation.
- Only use this lanyard for its intended purpose and with compatible Skyjack lift models.
- Refer to the Skyjack lift's official service manual for detailed installation procedures.
3. Setup and Installation
The Skyjack Safety Lanyard (Part No. 300833) is designed for specific attachment points on Skyjack Lift models SJII 3215, SJII 3219, and SJIII 3219. Installation should only be performed by qualified personnel following the lift manufacturer's instructions.
- Identify Attachment Points: Locate the designated attachment points on your Skyjack lift for the safety lanyard. These are typically specified in the lift's service manual.
- Inspect Lanyard: Before installation, visually inspect the lanyard for any signs of wear, damage, or deformation. Do not install a damaged lanyard.
- Secure First End: Attach the end of the lanyard with the flat metal plate to its corresponding mounting point on the lift. Ensure the bolt or pin passes securely through the hole in the plate.
- Secure Second End: Attach the looped end of the lanyard to its designated securing point. This loop is typically designed to go around a pin or hook, or to be secured by a fastener.
- Verify Security: After installation, gently tug on the lanyard to ensure both ends are securely fastened and there is no excessive slack or interference with moving parts.

Figure 2: Close-up view of the lanyard's flat metal plate attachment point. This end is designed to be secured with a bolt or pin to a specific mounting bracket on the Skyjack lift.

Figure 3: Close-up view of the lanyard's looped end. This loop provides a secure attachment point for various components or pins on the lift.
4. Operating Principles
The safety lanyard operates passively as a failsafe mechanism. Once installed, it maintains a secure connection between two components, preventing their accidental separation or loss during operation of the Skyjack lift. It does not require active user interaction during normal lift operation.
Its primary role is to ensure that if a primary fastening mechanism fails or becomes dislodged, the lanyard will retain the component, preventing it from falling or causing damage.
5. Maintenance and Care
Regular inspection and proper care are crucial for the longevity and effectiveness of the safety lanyard.
- Daily Inspection: Before each use of the Skyjack lift, visually inspect the lanyard for any signs of wear, fraying, cuts, kinks, corrosion, or deformation.
- Cleaning: If the lanyard becomes dirty, clean it with a mild detergent and water. Rinse thoroughly and allow it to air dry completely before re-use. Avoid harsh chemicals or abrasive cleaners.
- Storage: When not in use, store the lanyard in a clean, dry environment, away from direct sunlight, extreme temperatures, and corrosive substances.
- Replacement: Replace the lanyard immediately if any damage is observed, or if it has been subjected to excessive force or impact. Do not attempt to repair a damaged lanyard.
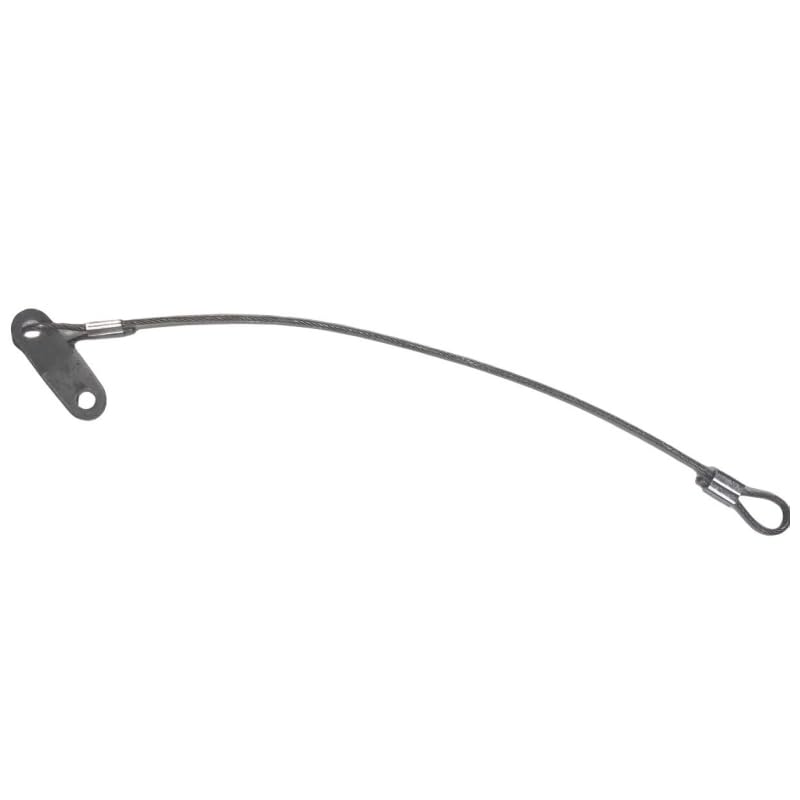
Figure 4: Detail view of the lanyard's cable construction. Regular inspection of the cable for fraying or damage is essential for safety.
6. Troubleshooting
As a passive safety component, the lanyard typically does not require "troubleshooting" in the traditional sense. However, issues can arise from improper installation or damage.
- Lanyard Appears Loose:
- Check Installation: Ensure both ends are correctly and securely fastened to their designated points.
- Verify Compatibility: Confirm that the lanyard is the correct part number (300833) for your specific Skyjack lift model (SJII 3215, SJII 3219, SJIII 3219).
- Visible Damage (Fraying, Kinks, Corrosion):
- Immediate Replacement: Any visible damage compromises the integrity of the lanyard. Replace it immediately with a new, genuine HNARL Skyjack Safety Lanyard Part No. 300833. Do not attempt to repair.
7. Specifications
| Attribute | Value |
|---|---|
| Part Number | 300833 |
| Product Name | Skyjack Safety Lanyard |
| Brand | HNARL |
| Compatible Skyjack Lift Models | SJII 3215, SJII 3219, SJIII 3219 |
| Length (mm) | 200 |
| Width (mm) | 30 |
| Height (mm) | 30 |
| Weight (kg) | 0.1 |
| Product Dimensions (inches) | 7.87 x 1.18 x 1.18 |
| Product Weight (ounces) | 3.53 |
| Country of Origin | China |
8. Warranty and Support
For information regarding warranty coverage for the HNARL Skyjack Safety Lanyard (Part No. 300833), please refer to the purchase documentation or contact your authorized HNARL distributor or the manufacturer directly.
For technical support, installation guidance, or to inquire about other aerial lift and forklift parts, please contact HNARL customer service or visit the official HNARL store online. Always provide the part number (300833) and your Skyjack lift model when seeking support.
HNARL Store: Visit the HNARL Store on Amazon
Ask a question about this manual
Ask about setup, troubleshooting, compatibility, parts, safety, or missing instructions. Manuals+ will review the question and use this page’s manual context to help answer it.