
wheelfun TH23137-AMZUS2-S
Double E 1:14 RC Excavator Model E010 EC160E Instruction Manual
Brand: wheelfun | Model: TH23137-AMZUS2-S
Introduction
This instruction manual provides detailed information on the operation, maintenance, and troubleshooting of your Double E 1:14 RC Excavator Model E010 EC160E. Designed for hobbyists, this full alloy metal RC engineering digger vehicle offers realistic functionality and durable construction. Please read this manual thoroughly before operating the excavator to ensure safe and optimal performance.
Key Features
- Full Alloy Metal Construction: Features an aluminum-zinc alloy structure for the entire vehicle, ensuring durability and a realistic feel.
- Realistic 1:14 Scale Replica: Impressively detailed with a boom and arm extension length of 56cm.
- Powerful Performance: Offers a boom lift force of 10kg, an arm lift force of 7kg, and a shovel force of 5kg for effective digging.
- 360-Degree Turret Rotation: The turret can rotate 11 times per minute, providing full operational flexibility.
- Durable Tracks: Equipped with corrosion-resistant aluminum tracks (40mm) for reliable movement across various terrains.
- Ready-to-Dig: Comes with a pre-set 2.4G Remote Controller for immediate operation.
Package Contents
Upon opening the package, please verify that all components are present and in good condition:
- 1 x Double E 1:14 RC Excavator Model E010 EC160E
- 1 x 2.4G Remote Controller
- 1 x Rechargeable Battery Pack
- 1 x USB Charging Cable
- 1 x Instruction Manual (this document)

Image: The complete package contents, including the excavator, remote control, battery, charging cable, and instruction manual.
Setup
1. Battery Installation
- Locate the battery compartment on the excavator, typically under a removable cover on the top rear section.
- Open the battery compartment cover.
- Carefully insert the rechargeable battery pack into the compartment, ensuring the correct polarity.
- Connect the battery cable to the excavator's power connector.
- Close the battery compartment cover securely.

Image: Close-up view of the excavator's battery compartment, showing the "Battery plug" label and the open hatch.
2. Powering On and Pairing
- Ensure the excavator's power switch (usually located near the battery compartment) is in the "OFF" position before connecting the battery.
- Turn on the remote controller by pressing its power button. The indicator light should flash.
- Turn on the excavator's power switch. The excavator and remote controller should automatically pair. A solid light on both devices indicates successful pairing.
Video: Demonstrates the process of connecting the battery, powering on the remote controller, and then powering on the excavator to establish a connection. This video also shows basic operational movements.
Operating Instructions
Familiarize yourself with the remote controller's layout and functions before operating the excavator.
1. Basic Movement
- Forward/Backward: Use the left joystick (or designated control) to move the excavator forward or backward.
- Turning: Use the right joystick (or designated control) to steer the excavator left or right.
2. Arm and Bucket Control
- Main Arm (Boom): Use the designated lever/button to raise and lower the main arm.
- Forearm (Stick): Use the designated lever/button to extend and retract the forearm.
- Bucket: Use the designated lever/button to open and close the bucket.
3. Turret Rotation
- Rotate Body: Use the designated control to rotate the excavator's upper body (turret) 360 degrees.
4. Light System
- The excavator is equipped with functional lights. Refer to the remote controller's specific buttons for activating and deactivating the lights.
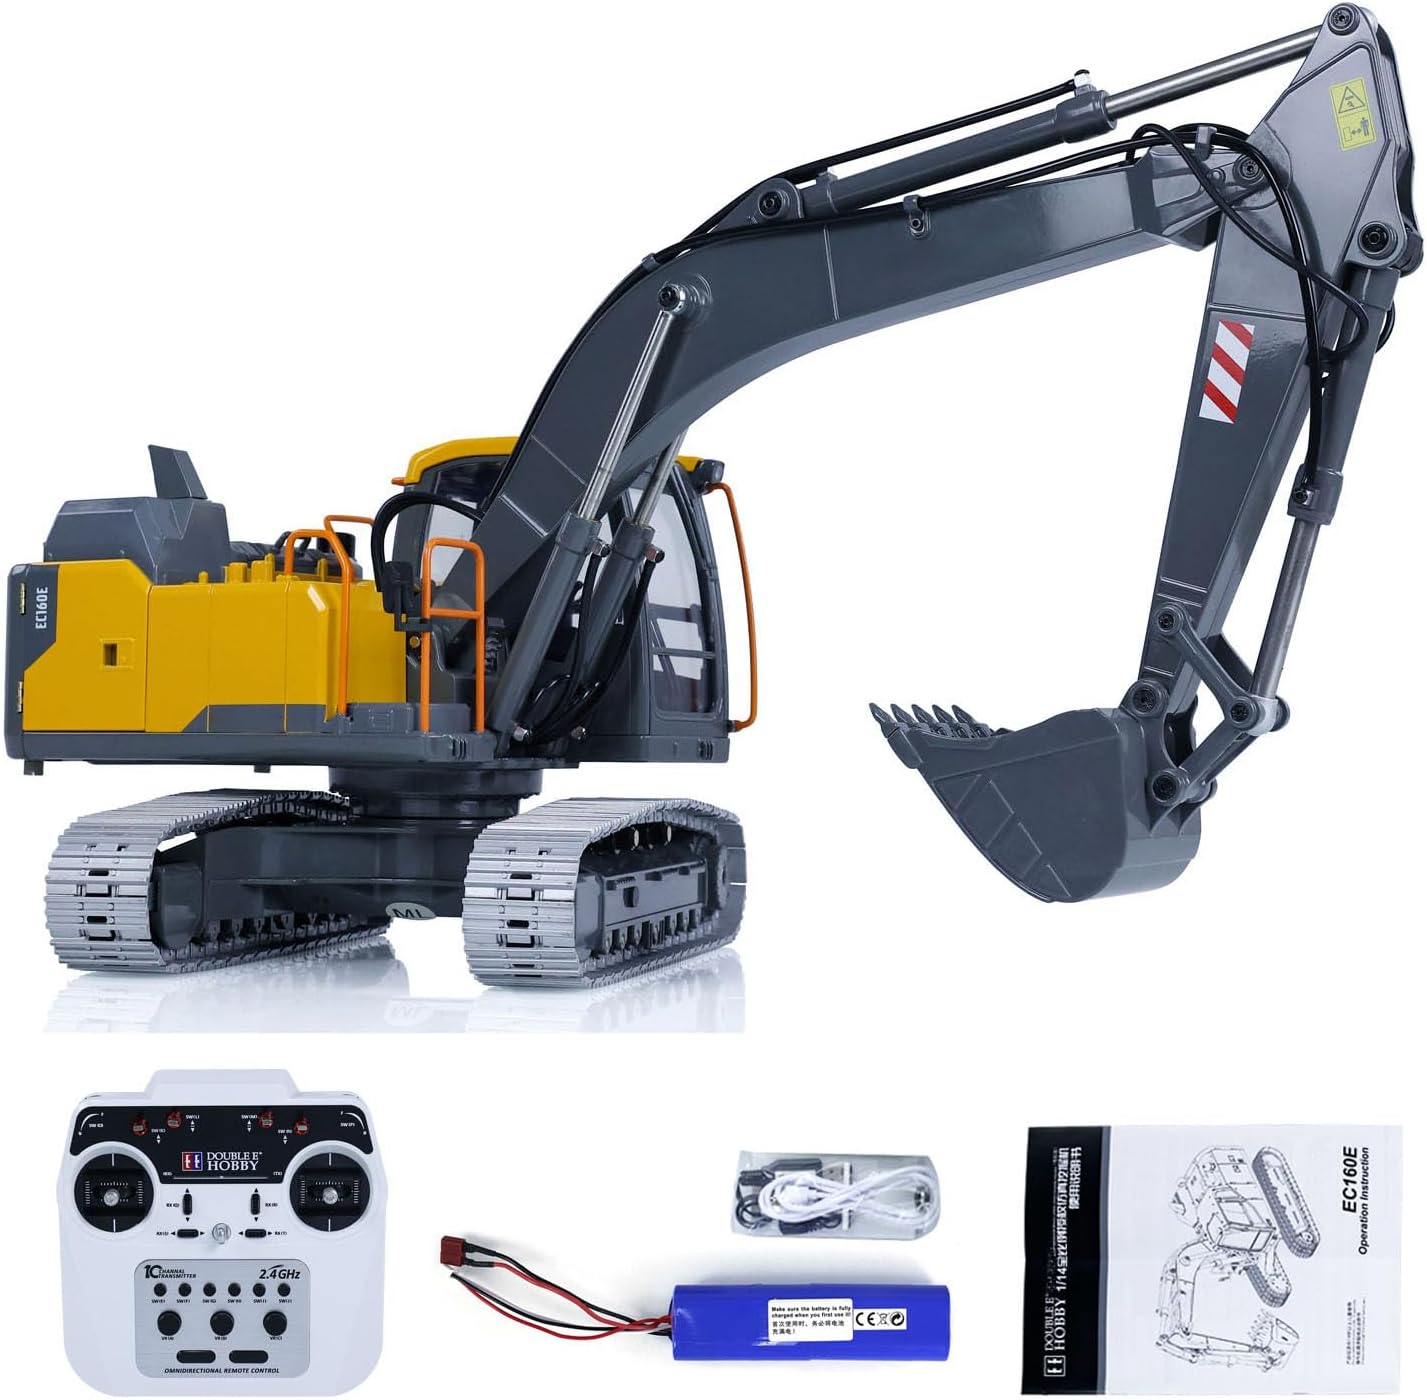
Image: The RC excavator and its remote control, providing a clear view of the product's scale and design.

Image: A detailed view of the excavator's cabin and the top of the main body, highlighting the realistic design elements.

Image: A close-up of the excavator's arm, showing the hydraulic cylinders and detailed construction.

Image: A detailed shot of the excavator's durable metal tracks, emphasizing their robust construction.
Maintenance
- Cleaning: After use, especially in dusty or dirty environments, gently wipe down the excavator with a soft, dry cloth. Avoid using water or chemical cleaners directly on electronic components.
- Battery Care: Always fully charge the battery before first use. Do not overcharge or completely drain the battery. Store the battery in a cool, dry place when not in use. Disconnect the battery from the excavator during storage.
- Lubrication: Periodically check moving parts for smooth operation. If necessary, apply a small amount of silicone-based lubricant to joints and gears, avoiding electronic components.
- Storage: Store the excavator and remote control in a dry, cool place away from direct sunlight and extreme temperatures.
Troubleshooting
- Excavator Not Responding:
- Ensure both the excavator and remote control are powered on.
- Check if the battery in the excavator is fully charged and properly connected.
- Verify that the remote control batteries are fresh and correctly installed.
- Re-pair the remote control with the excavator by turning both off and then on again.
- Limited Movement/Weak Performance:
- The battery may be low. Recharge the excavator's battery.
- Check for any obstructions in the tracks or arm mechanisms.
- Damage Upon Arrival:
- If the item is damaged out of the box, please contact customer support for a free replacement part.
Specifications
| Feature | Detail |
|---|---|
| Product Dimensions | 30 x 14 x 12.8 inches |
| Item Model Number | TH23137-AMZUS2-S |
| Manufacturer Recommended Age | 21 years and up |
| Manufacturer | wheelfun |
| Scale | 1:14 |
| Material | Aluminum-zinc alloy |
| Boom/Arm Extension Length | 56cm |
| Turret Rotation Speed | 11 times per minute |
| Boom Lift Force | 10kg |
| Arm Lift Force | 7kg |
| Shovel Force | 5kg |
Warranty and Support
Your Double E RC Excavator is backed by the manufacturer's commitment to quality. If you encounter any issues or require assistance:
- Damaged Items: If the item is damaged out of the box, a free replacement part can be resent.
- Technical Support: A professional after-sales team and technical maintenance team are available to provide guidance in English through video or text for repairs.
- For further assistance, please refer to the contact information provided on the product packaging or the seller's official website.
Ask a question about this manual
Ask about setup, troubleshooting, compatibility, parts, safety, or missing instructions. Manuals+ will review the question and use this page’s manual context to help answer it.