
1. Introduction
Thank you for choosing the IKOVWUK F-660K Compact Tripod. This instruction manual provides essential information for the safe and effective setup, operation, and maintenance of your new tripod. Please read this manual thoroughly before use and retain it for future reference.
The IKOVWUK F-660K is a versatile and portable tripod designed to provide stable support for various tools, including laser levels, laser distance meters, cameras, and camcorders. Its adjustable height, multi-angle head, and robust construction make it suitable for a wide range of applications.
2. Safety Information
Always observe the following safety precautions to prevent injury or damage to the tripod and connected equipment:
- Do not exceed the maximum load-bearing capacity of 6.61 lbs (3 kg).
- Ensure all locks (leg flip locks, center column lock, pan head adjustments) are securely tightened before leaving the tripod unattended.
- Place the tripod on a stable, level surface. Use the built-in bubble level to verify stability.
- Avoid placing the tripod in high-traffic areas where it could be tripped over.
- Do not attempt to force adjustments. If a part is stiff, check for obstructions or proper alignment.
- Keep the tripod away from extreme temperatures, moisture, and corrosive materials.
3. Package Contents
Verify that all items are present in the package:
- 1 x IKOVWUK F-660K Compact Tripod
- 1 x 1/4" Quick Release Plate
- 1 x 5/8" Adapter
- 1 x Storage Bag
4. Product Overview
Familiarize yourself with the main components of the IKOVWUK F-660K Tripod:

Figure 1: IKOVWUK F-660K Compact Tripod
- 3-Way Pan Head: Allows for precise horizontal (360°), front/rear (130°), and vertical (90°) adjustments.
- Quick Release Plate: Features a 1/4"-20 screw mount for easy attachment and detachment of equipment. A 5/8" adapter is included for broader compatibility.
- Center Column: Extends vertically to increase the tripod's height. Secured with a locking knob.
- Leg Flip Locks: Quick-release levers on each leg segment for fast height adjustment and secure locking.
- Non-slip Rubber Feet: Provide enhanced stability on various surfaces.
- Built-in Bubble Level: Ensures the tripod head is perfectly level for accurate measurements.
- Weight Gain Hook: Located at the bottom of the center column, allows for hanging additional weight to increase stability.

Figure 2: Illustrates the 3-Way Pan Head's 360° horizontal, 130° up/down, and 90° vertical adjustment capabilities.

Figure 3: Close-up view of the built-in bubble level for precise leveling, non-slip rubber feet for stability, and the weight gain hook for added security.
5. Setup
- Unpacking: Carefully remove the tripod and all accessories from the storage bag. Inspect for any damage.
- Extending the Legs: Release the leg flip locks on each leg. Extend the legs to the desired length and securely close the flip locks. Ensure all three legs are extended evenly for initial stability.
- Adjusting Tripod Height:
- For coarse adjustment, extend the leg sections using the flip locks.
- For fine adjustment, loosen the center column locking knob. Use the crank handle to raise or lower the center column to the precise height. Tighten the locking knob once the desired height is achieved.
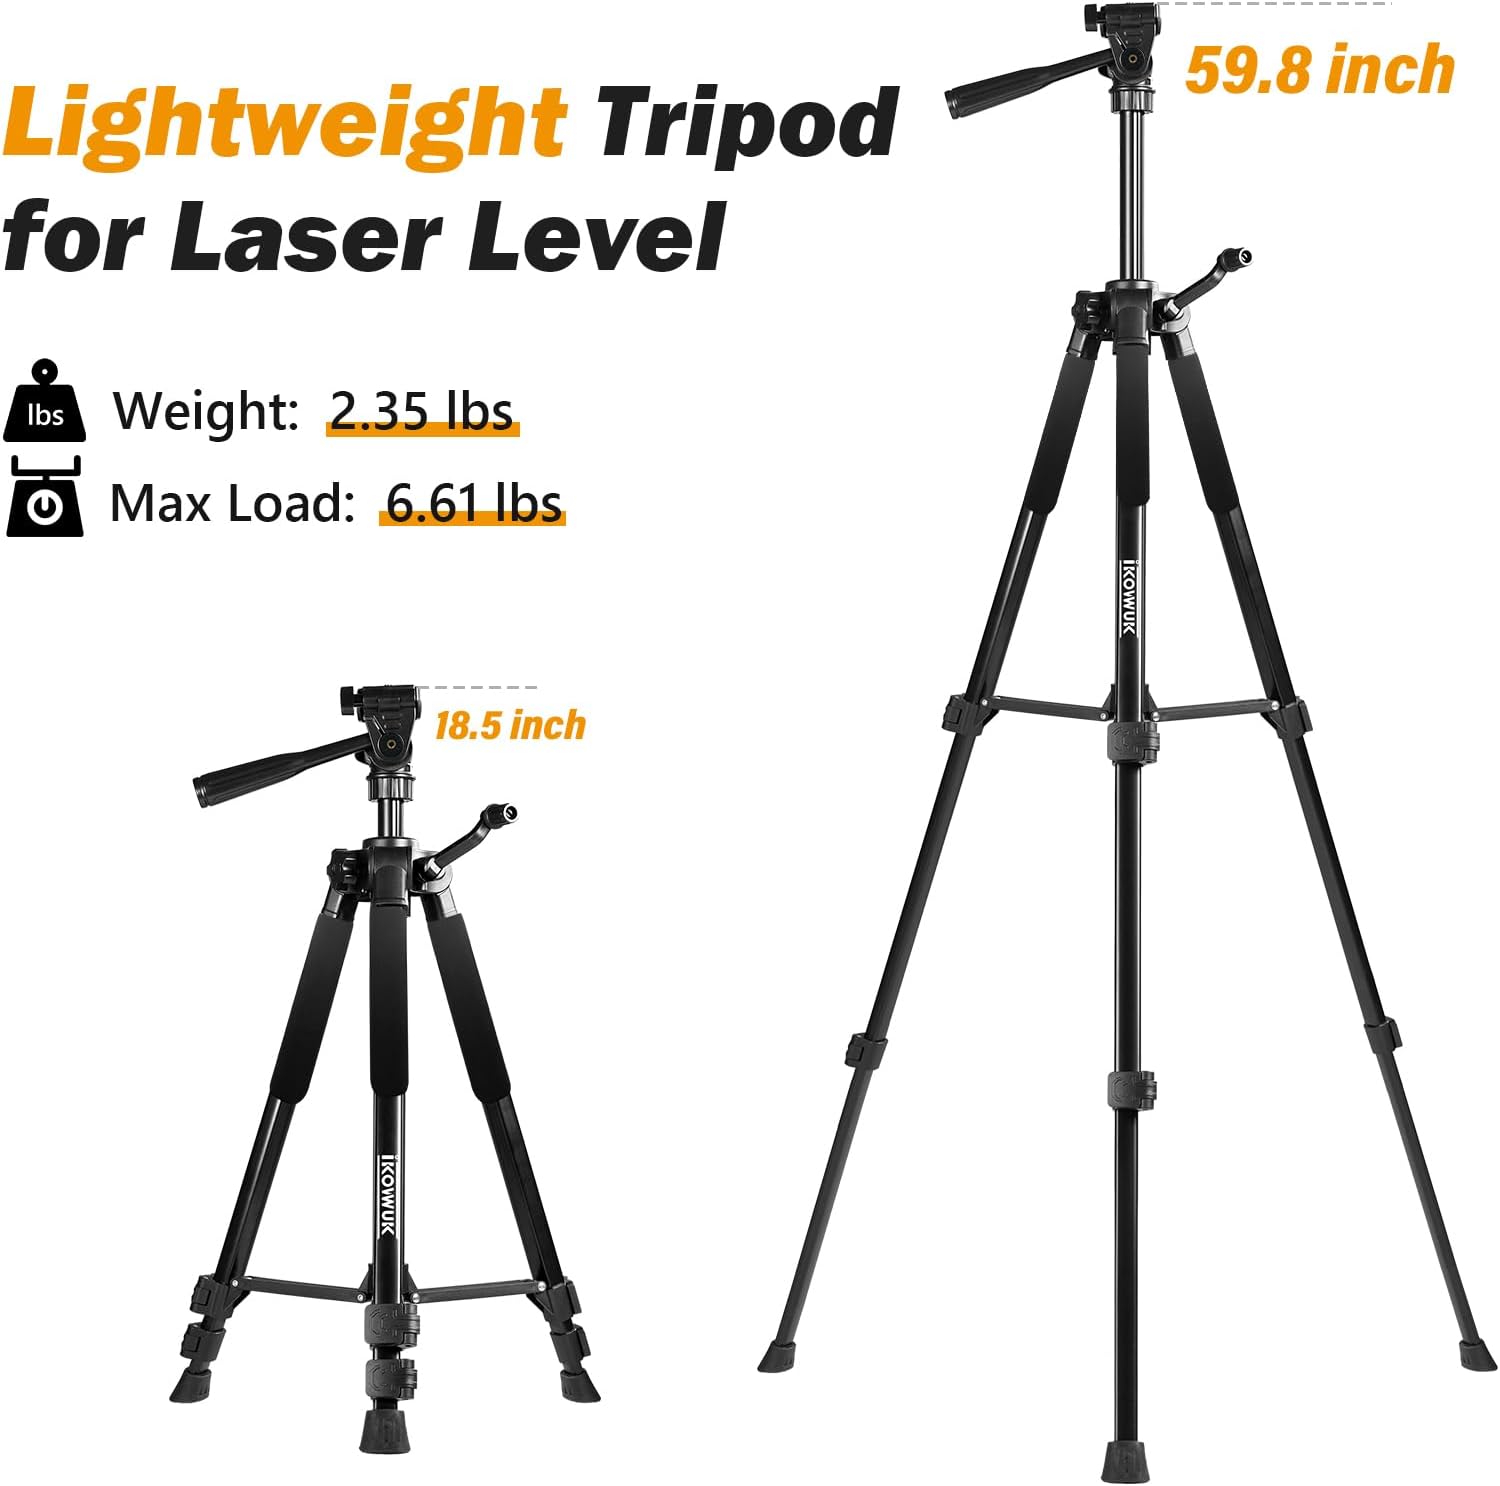
Figure 4: Demonstrates the tripod's adjustable height range from 18.5 inches (collapsed) to 59.8 inches (fully extended).

Figure 5: Shows the center column locking knob and crank for precise vertical height adjustments.
- Attaching Equipment:
- Remove the quick release plate from the pan head by releasing its lock.
- Screw your equipment (laser level, camera, etc.) onto the 1/4"-20 screw on the quick release plate. If your equipment requires a 5/8" mount, use the provided adapter.
- Slide the quick release plate with your equipment back into the pan head and secure the lock.

Figure 6: Illustrates the removable 1/4" quick release plate for easy attachment of devices.
- Leveling the Tripod: Use the built-in bubble level on the pan head to ensure your equipment is perfectly level. Adjust the leg lengths or the pan head tilt until the bubble is centered.
6. Operating Instructions
- Adjusting Pan and Tilt: Loosen the appropriate knobs on the 3-way pan head to adjust the horizontal pan, vertical tilt, or front/rear tilt. Tighten the knobs once the desired angle is achieved.
- Using the Weight Hook: For increased stability, especially in windy conditions or with heavier equipment (within limits), hang a weight (e.g., a sandbag or your equipment bag) from the hook located at the bottom of the center column.
7. Maintenance
- Cleaning: Wipe the tripod with a soft, dry cloth after each use. For stubborn dirt, use a slightly damp cloth and mild soap, then dry thoroughly. Avoid abrasive cleaners or solvents.
- Storage: Collapse the tripod fully and store it in the provided storage bag when not in use. Store in a cool, dry place away from direct sunlight and extreme temperatures.
- Inspection: Periodically check all screws, locks, and moving parts for tightness and proper function. Tighten any loose screws and replace worn parts if necessary.

Figure 7: The included storage bag for convenient transport and protection of the tripod.
8. Troubleshooting
- Tripod is unstable: Ensure all leg flip locks are securely closed. Verify the tripod is on a flat, level surface using the bubble level. Consider adding weight to the weight hook.
- Difficulty adjusting height: Check that the center column locking knob is fully loosened. Ensure no debris is obstructing the leg sections or center column.
- Equipment is loose on the head: Confirm the quick release plate is properly seated and its lock is engaged. Ensure the 1/4"-20 screw (or 5/8" adapter) is tightly fastened to your equipment.
9. Specifications
| Feature | Specification |
|---|---|
| Model Name | Tripod-F-660K |
| Adjustable Height Range | 18.5 inches (collapsed) to 59.8 inches (maximum) |
| Item Weight | 2.87 Pounds (1.3 kg) |
| Weight Limit | 6.61 Pounds (3 kg) |
| Material | Aluminum |
| Color | Black |
| Compatible Devices | Camera, Lens, Camcorder, Laser Levels, Laser Distance Measuring Tools |
| Special Features | Adjustable, Compact, Portable, Built-in Bubble Level, Non-slip Rubber Feet, Weight Hook |
| Tripod Head Type | 3-Way Pan Head (360° horizontal, 130° front/rear, 90° vertical) |
10. Warranty and Support
For warranty information or technical support, please refer to the product packaging or contact IKOVWUK customer service directly. Keep your purchase receipt as proof of purchase.