
1. Product Overview
The DykbRadio Nixie Tube Booster Module (Model DykbRadio-6233) is a compact DC-DC boost converter designed to provide a high voltage output for driving Nixie tubes and similar glow devices. It converts a low DC input voltage (9V-12V) into an adjustable high DC output voltage (150V-220V).
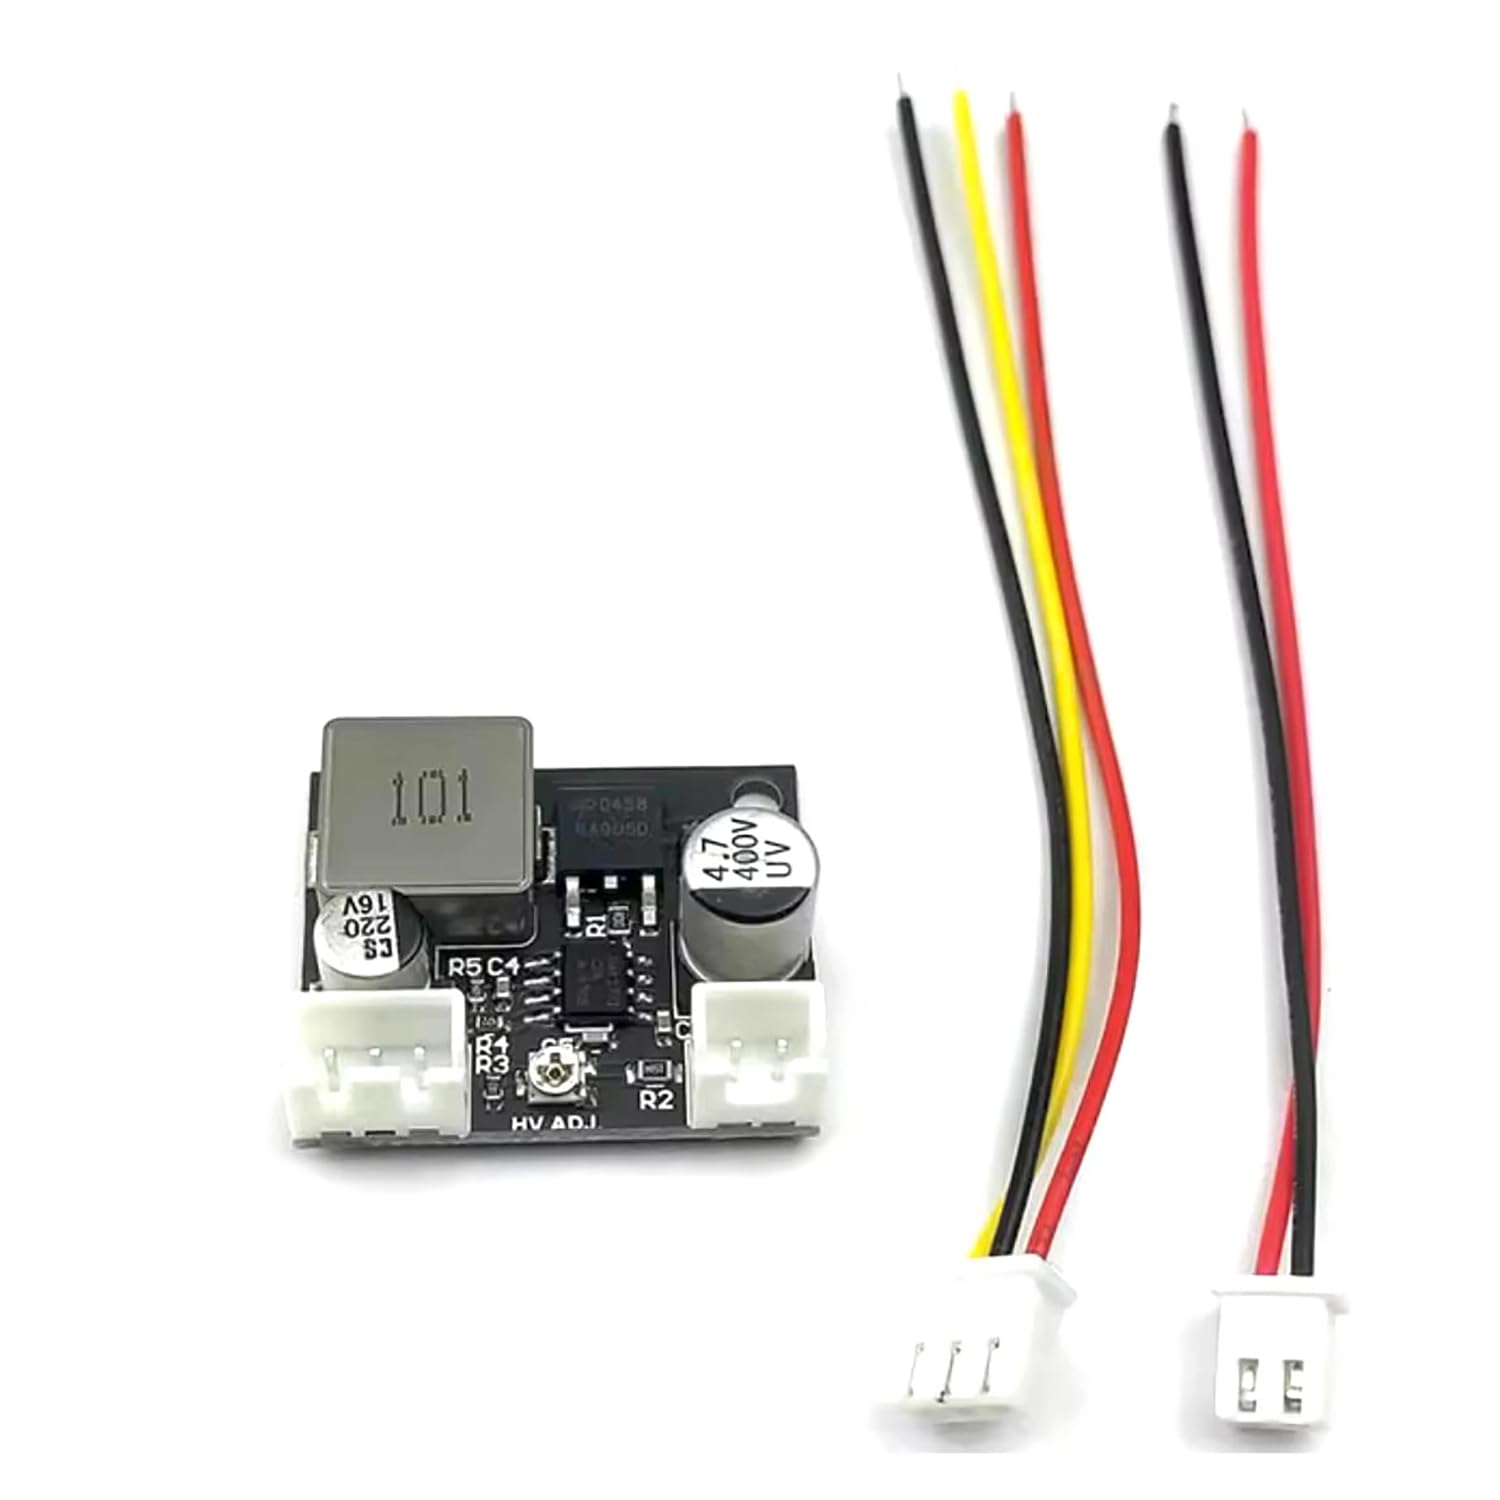
Figure 1: Top-down view of the DykbRadio Nixie Tube Booster Module. This image shows the compact design of the module, highlighting its main components including the inductor, capacitors, and the voltage adjustment potentiometer.
2. Key Features
- Input Voltage: DC 9V-12V.
- Output Voltage: Adjustable from 150V-220V DC.
- Control IC: Utilizes the MAX1771 program for stable step-up conversion.
- Thermal Management: Designed for low heat operation, typically not requiring an additional heat sink.
- Compact Size: Small form factor for integration into various projects.
- Shutdown Function: Includes a SHDN pin for external control (e.g., via a microcontroller) to enable or disable the boost module.
- Compatibility: Suitable for driving various Nixie tubes such as SZ3-1, QS30-1, and IN-14.
3. Setup and Connections
Careful attention to connections is crucial due to the high voltage output. Ensure all connections are secure before applying power.
3.1 Input Power Connection
Connect your DC 9V-12V power source to the input terminals. Observe polarity: + for positive and - for negative (GND).
3.2 Output High Voltage Connection
Connect your Nixie tube or high voltage load to the output terminals. Again, observe polarity: + for positive and - for negative (GND). Caution: High Voltage!
3.3 Output Voltage Adjustment
The output voltage can be adjusted using the onboard potentiometer labeled HV ADJ. Use a small screwdriver to carefully turn the potentiometer to set the desired output voltage between 150V and 220V.
3.4 Shutdown (SHDN) Function
The module includes a SHDN pin for external control. To enable the boost module for normal operation, the SHDN pin must be pulled high (e.g., connected to the input positive voltage or a microcontroller's high output). To disable the module, pull the SHDN pin low (e.g., connect to GND).

Figure 2: Connection diagram illustrating input (9-12V DC), output (150-220V DC), and the SHDN pin for MCU control. The HV ADJ potentiometer is also indicated.

Figure 3: Detailed connection diagram showing the SHDN pin connected to GND for normal operation. This image also includes a performance table detailing input voltage, input current, output voltage, output current, and efficiency under various conditions.
4. Operating Instructions
- Connect Power: Ensure the input power source (9V-12V DC) is connected correctly to the module's input terminals, observing polarity.
- Connect Load: Connect your Nixie tube or high voltage load to the output terminals, observing polarity.
- Enable Module: If using the SHDN function, ensure the SHDN pin is pulled high for the module to operate. If not using external control, connect SHDN to GND for continuous operation.
- Adjust Output Voltage: Carefully turn the HV ADJ potentiometer with a non-conductive tool to achieve the desired output voltage (150V-220V). It is recommended to monitor the output voltage with a high-voltage multimeter during adjustment.
- Power Off: To power off, disconnect the input power or pull the SHDN pin low.
5. Specifications
| Specification | Value |
|---|---|
| Input Voltage | 9V-12V DC |
| Output Voltage | 150V-220V DC (Adjustable) |
| Control IC | MAX1771 |
| Item Model Number | DykbRadio-6233 |
| Item Weight | 30 Grams (1.06 ounces) |
| UPC | 721410186329 |
5.1 Performance Table
| VIN (Input Voltage) | IIN (Input Current) | VOUT (Output Voltage) | Iout (Output Current) | Efficiency |
|---|---|---|---|---|
| 5V | 0.3A | 170V | 6.5mA | 74% |
| 9V | 0.467A | 170V | 20mA | 81% |
| 9V | 0.476A | 220V | 15mA | 77% |
| 12V | 0.446A | 170V | 25mA | 79% |
| 12V | 0.477A | 220V | 20mA | 77% |
6. Troubleshooting
- No Output Voltage:
- Verify input power (9V-12V DC) is correctly connected and supplied.
- Check SHDN pin connection. Ensure it is pulled high or connected to GND for normal operation.
- Inspect all wiring for loose connections or incorrect polarity.
- Ensure the HV ADJ potentiometer is not set to its minimum position, which might result in very low or no measurable output.
- Incorrect Output Voltage:
- Adjust the HV ADJ potentiometer carefully while monitoring with a high-voltage multimeter.
- Ensure the input voltage is within the specified 9V-12V range.
- Module Overheating:
- Verify that the output load current does not exceed the module's capabilities (refer to the performance table in Section 5.1).
- Ensure adequate airflow around the module, especially if operating at higher loads or ambient temperatures.
7. Maintenance
The DykbRadio Nixie Tube Booster Module is designed for reliable operation with minimal maintenance. Follow these guidelines:
- Keep Clean: Ensure the module is free from dust and debris. Use a soft, dry brush or compressed air for cleaning.
- Avoid Moisture: Protect the module from water, humidity, and corrosive environments.
- Handle with Care: Avoid physical shock or excessive force on the components or connectors.
- Regular Inspection: Periodically check connections for tightness and signs of wear or damage.
8. Warranty and Support
This DykbRadio product is covered by a standard manufacturer's warranty against defects in materials and workmanship. For specific warranty terms, please refer to your purchase documentation or contact DykbRadio customer support.
For technical assistance, troubleshooting, or further inquiries, please contact DykbRadio customer support through the retailer where the product was purchased or visit the official DykbRadio website for contact information.