1. Introduction
This manual provides detailed instructions for the installation, operation, maintenance, and troubleshooting of your maXpeedingrods 7" Portable Car Stereo. Please read this manual thoroughly before using the device to ensure proper functionality and safety.
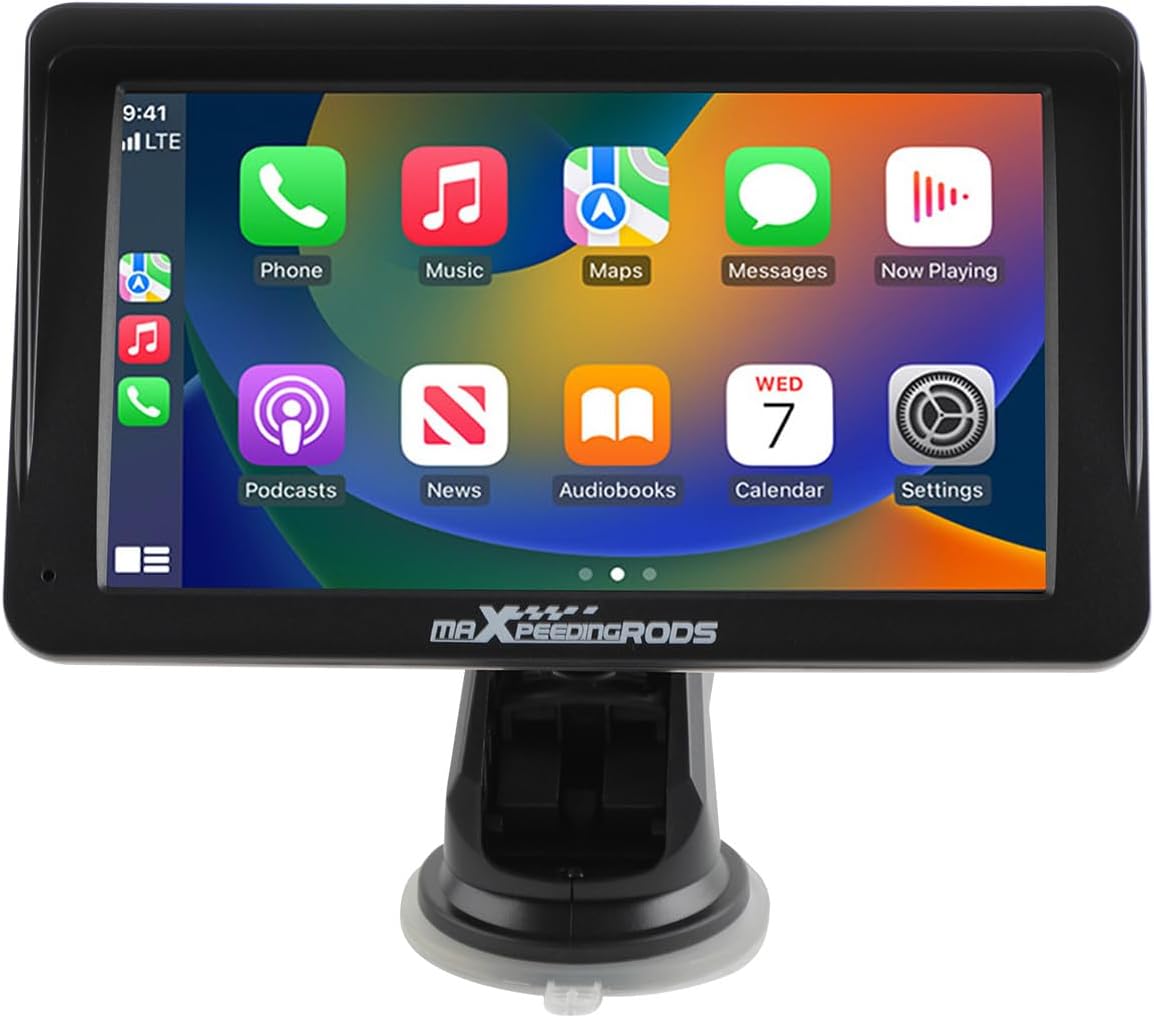
Figure 1.1: maXpeedingrods 7" Portable Car Stereo
Key Features:
- 7" HD IPS Display (1024*600 resolution)
- Wireless Apple CarPlay & Android Auto
- AHD Backup Camera support
- GPS Navigation & Voice Control (Siri/Google Assistant)
- Bluetooth connectivity and Mirror Link functionality
- Easy, non-invasive installation
2. Package Contents
Verify that all items listed below are included in your package. If any items are missing or damaged, please contact customer support.

Figure 2.1: What's in the Box
- Portable Car Stereo Device
- Backup Camera + Camera Cable
- GPS Cable
- Mounting Bracket (with suction cup)
- Power Cable (cigarette lighter adapter)
- AUX Cable
3. Setup and Installation
3.1 Device Mounting
The portable car stereo is designed for easy, non-permanent installation on your dashboard or windshield.
- Clean Surface: Ensure the dashboard or windshield surface is clean and dry where you intend to mount the device.
- Attach Bracket: Secure the mounting bracket to the device.
- Position Device: Peel off the protective film from the suction cup and firmly press the bracket onto the chosen surface. Engage the locking mechanism on the suction cup for a secure hold.

Figure 3.1: Easy Installation Steps
3.2 Power Connection
Connect the provided power cable to the device and then plug the cigarette lighter adapter into your vehicle's 12V-24V power socket.
3.3 External Connections
The device features various ports for connectivity:

Figure 3.2: Device Ports
- Power Cable: For connecting to the vehicle's power supply.
- TF Card Socket: For inserting a TF (MicroSD) card for media playback.
- USB: For connecting USB devices or charging.
- AVIN: For connecting the AHD backup camera.
- AUDIO: For AUX audio output.
3.4 Backup Camera Installation (Optional)
If you choose to install the AHD backup camera, connect its cable to the AVIN port on the main unit. Route the camera cable carefully to the rear of your vehicle and mount the camera in a suitable position, typically near the license plate. Ensure the camera is connected to your vehicle's reverse light power for automatic activation when reversing.

Figure 3.3: AHD Backup Camera Features
3.5 Vehicle Compatibility
The device is compatible with a wide range of vehicles supporting 12V-24V power systems.

Figure 3.4: Wide Vehicle Compatibility
4. Operating Instructions
4.1 Powering On/Off
The device will power on automatically when your vehicle's ignition is turned on and power is supplied to the cigarette lighter socket. To power off, simply turn off your vehicle's ignition or unplug the power cable.
4.2 Touchscreen Operation
The device features a responsive 7-inch HD IPS touchscreen with 1024x600 resolution and adjustable brightness for clear visibility.

Figure 4.1: Touchscreen Features
4.3 Wireless Apple CarPlay & Android Auto
Connect your smartphone wirelessly via Bluetooth to access Apple CarPlay or Android Auto. This allows you to use your phone's navigation, music, messaging, and other compatible apps directly on the car stereo display.
- Enable Bluetooth: On your smartphone, enable Bluetooth.
- Pair Device: On the car stereo, navigate to the Bluetooth settings and pair with your smartphone.
- Activate CarPlay/Android Auto: Once paired, the device should prompt you to activate Apple CarPlay or Android Auto. Follow the on-screen instructions.

Figure 4.2: Wireless CarPlay & Android Auto Connectivity
4.4 GPS Navigation & Voice Control
Utilize your preferred navigation apps (e.g., Google Maps, Apple Maps) through Apple CarPlay or Android Auto. Voice control features (Siri or Google Assistant) are supported for hands-free operation, allowing you to manage calls, music, and navigation commands safely while driving.

Figure 4.3: GPS Navigation and Voice Control
4.5 Mirror Link
The Mirror Link function allows you to mirror your smartphone's screen directly onto the car stereo display. This is useful for apps not natively supported by CarPlay or Android Auto.
4.6 Audio Output Modes
The car stereo offers multiple ways to output audio to your vehicle's sound system:

Figure 4.4: Audio Output Options
- Bluetooth: Stream audio wirelessly to your vehicle's Bluetooth-enabled stereo (if available).
- AUX Cable Input: Connect the provided AUX cable from the stereo's AUDIO port to your vehicle's AUX input for a wired audio connection.
- FM Transmitter: Broadcast audio from the portable stereo to your vehicle's FM radio by tuning both to the same unused FM frequency.
- Built-in Speaker: The device has a built-in speaker for direct audio output.
5. Maintenance
5.1 Cleaning
To clean the device, use a soft, dry, lint-free cloth. For stubborn smudges on the screen, lightly dampen the cloth with water or a screen-safe cleaning solution. Avoid using harsh chemicals, abrasive cleaners, or solvents, as these can damage the screen and casing.
5.2 Storage
If storing the device for an extended period, disconnect it from power and store it in a cool, dry place away from direct sunlight and extreme temperatures.
6. Troubleshooting
If you encounter issues with your maXpeedingrods car stereo, please refer to the following common problems and solutions:
| Problem | Possible Cause | Solution |
|---|---|---|
| Device does not power on. | No power supply; faulty cable; vehicle socket issue. | Check power cable connection. Ensure vehicle's cigarette lighter socket is functional. Try a different power source if available. |
| Wireless CarPlay/Android Auto not connecting. | Bluetooth not enabled; incorrect pairing; software glitch. | Ensure Bluetooth is active on your phone and the stereo. Delete previous pairings and re-pair. Restart both the stereo and your phone. |
| No sound or poor sound quality. | Incorrect audio output mode; volume too low; loose cable. | Verify the selected audio output mode (Bluetooth, AUX, FM). Adjust volume on both the stereo and your vehicle's system. Check AUX cable connections. Ensure FM frequency is clear if using FM transmitter. |
| Touchscreen unresponsive. | Temporary software issue; screen protector interference. | Restart the device. Ensure no debris or liquid is on the screen. If a screen protector is installed, ensure it is properly applied and not interfering with touch sensitivity. |
| Backup camera not displaying. | Camera cable loose; incorrect wiring; camera malfunction. | Check the AVIN cable connection. Ensure the camera is receiving power and correctly wired to the reverse light circuit. |
If the problem persists after trying these solutions, please contact maXpeedingrods customer support for further assistance.
7. Specifications
Detailed technical specifications for the maXpeedingrods 7" Portable Car Stereo:
| Feature | Detail |
|---|---|
| Product Dimensions | 9.06 x 5.51 x 4.72 inches |
| Item Weight | 1.87 pounds |
| Model Number | 7001 |
| Brand | maXpeedingrods |
| Vehicle Service Type | Car |
| Screen Size | 7 Inches |
| Special Feature | Touchscreen |
| Connectivity Technology | Bluetooth |
| Map Type | Road (via connected smartphone) |
| Audio Output Mode | Stereo |
| Mounting Type | Dashboard Mount |
| Resolution | 1024 x 600 |
| Operating System | Android (underlying system for CarPlay/Android Auto functionality) |
8. Warranty and Support
8.1 Product Warranty
maXpeedingrods warrants its products against manufacturing defects in materials and workmanship for 1 year from the date of purchase. This warranty covers defects that arise under normal use of the product.
8.2 Technical Support & Customer Service
maXpeedingrods provides unlimited technical support and customer service. If you have any questions, require assistance with installation, operation, or troubleshooting, or need to make a warranty claim, please contact our customer support team. Refer to your purchase documentation or the official maXpeedingrods website for contact information.


