
CYCPLUS M1
CYCPLUS GPS Wireless Bike Computer M1 User Manual
Comprehensive guide for setup, operation, and maintenance.
1. Introduction
This user manual provides detailed instructions for the CYCPLUS M1 GPS Wireless Bike Computer. It covers essential information for setting up, operating, maintaining, and troubleshooting your device to ensure optimal performance and a seamless cycling experience. Please read this manual thoroughly before using your new bike computer.
2. Product Overview
The CYCPLUS M1 is an advanced GPS wireless bike computer designed to enhance your cycling data tracking. It features a large, glare-free LCD screen and supports various sensors for comprehensive performance monitoring.
2.1 Key Features
- 2.9-inch Glare-Free LCD Screen: FSTN technology ensures high visibility in sunlight. Automatic backlight adjusts based on time zone.
- Dynamic GPS Positioning: High sensitivity and accuracy with a Swiss-imported navigating chip for fast positioning and route tracking.
- ANT+ Sync Sensor and App: Supports simultaneous recording of speed, cadence, heart rate, power, and altitude. Data can be synchronized with the "CYCPLUS FIT" or "XOSS" app and Strava.
- IPX6 Waterproof: Wireless and waterproof design allows for use in rainy conditions.
- Long Battery Life: 1200mAH capacity provides over 60 hours of continuous working time.
2.2 Product Specifications
| Brand | CYCPLUS |
| Model | M1 |
| Screen Size | 2.9 Inches |
| Dimensions | 2.17"L x 0.79"W x 3.54"H |
| Item Weight | 2.7 Ounces |
| Waterproof Rating | IPX6 |
| Battery Life | 60 Hours |
| Connectivity | Bluetooth, ANT+ |

Figure 2.1: The CYCPLUS M1 GPS Wireless Bike Computer, showcasing its large display and sleek design.

Figure 2.2: The CYCPLUS M1 features a large 2.9-inch LCD screen in a thin profile.

Figure 2.3: The M1 offers auto backlight and auto awakening for clear visibility day or night.
Video 2.1: CYCPLUS Cycling Computer M1 Product Introduction.
This video provides a brief introduction to the key features and design of the CYCPLUS M1 bike computer.
3. Setup
3.1 Initial Setup
Before your first ride, ensure the device is properly set up and has acquired a GPS signal.
- Power On/Off: Long press the left button (►► ||) to turn the device on. Long press it again to turn off.
- GPS Signal Acquisition: After turning on, the device will search for a GPS signal. This may take a few minutes, especially during the first use or if you've moved a significant distance. Ensure you are in an open, barrier-free area for faster acquisition.
Video 3.1: CYCPLUS M1 Usage Guidance (0:08 - 0:16 for power on/off and GPS signal acquisition).
This video demonstrates how to power on the device and the process of GPS signal acquisition. For optimal performance, ensure the device is in an open area when acquiring GPS for the first time.

Figure 3.1: The CYCPLUS M1 utilizes multiple satellite systems for fast and accurate positioning.
3.2 Sensor Connection (ANT+)
The M1 computer supports ANT+ sensors for comprehensive data tracking. To connect sensors:
- Long press the right button to enter settings (C2).
- Press the left button to start searching for ANT+ sensors. Data will appear once connected.
- To unpair all sensors, long press the right button to enter settings, short press the right button to switch to C9, then press the left button to unpair.
Video 3.2: Connecting and Unpairing Sensors (0:33 - 0:56 for connection, 0:57 - 1:13 for unpairing).
This video demonstrates the process of connecting ANT+ sensors like heart rate monitors, cadence sensors, and power meters, and how to unpair them.

Figure 3.2: The M1 is compatible with various ANT+ sensors for comprehensive data collection.
3.3 Wheel Circumference Setting
Setting the correct wheel circumference is crucial for accurate speed and distance readings, especially if not relying solely on GPS or using a speed sensor.
- Long press the right button to enter settings.
- Short press the right button to switch to C3.
- Press the left button to start setting.
- Press the right button to modify the digit. Press the mid button to switch the settable digit.
- Press the left button to finish setting.
- Long press the right button to return to the home page.
Video 3.3: Wheel Circumference Setting (1:14 - 1:41).
This video guides you through the steps to accurately set your wheel circumference on the device.
3.4 Time Zone Setting
Set your local time zone for accurate time display and auto backlight functionality.
- Long press the right button to enter settings.
- Short press the right button to switch to C4.
- Press the left button to start setting.
- Press the right button to modify the time zone.
- Press the left button to finish setting.
- Long press the right button to return to the home page.
Video 3.4: Time Zone Setting (1:42 - 2:03).
This video demonstrates how to adjust the time zone on your CYCPLUS M1.
3.5 Speed Unit Setting
Choose your preferred speed unit (KMH or MPH).
- Long press the right button to enter settings.
- Short press the right button to switch to C5.
- Press the left button to start setting.
- Press the right button to switch between KMH and MPH.
- Press the left button to finish setting.
- Long press the right button to return to the home page.
Video 3.5: Speed Unit Setting (2:04 - 2:25).
This video shows how to change the speed unit between kilometers per hour (KMH) and miles per hour (MPH).
3.6 Temperature Unit Setting
Set your preferred temperature unit (Celsius or Fahrenheit).
- Long press the right button to enter settings.
- Short press the right button to switch to C6.
- Press the left button to start setting.
- Press the right button to switch between ℃ and ℉.
- Press the left button to finish setting.
- Long press the right button to return to the home page.
Video 3.6: Temperature Unit Setting (2:26 - 2:45).
This video demonstrates how to change the temperature unit on your CYCPLUS M1.
3.7 Odometer Setting
You can set the initial odometer reading if needed.
- Long press the right button to enter settings.
- Short press the right button to switch to C8.
- Press the left button to start setting.
- Press the right button to modify the digit. Press the mid button to switch the settable digit.
- Press the left button to finish setting.
- Long press the right button to return to the home page.
Video 3.7: Odometer Setting (3:04 - 3:31).
This video shows how to set the odometer reading on your CYCPLUS M1.
4. Operating the Device
The CYCPLUS M1 is designed for intuitive operation during your rides.
- Start/Pause Recording: Press the left button (►► ||) to start recording your ride data. Press it again to pause.
- Save Record: Long press the mid button (⌛) to save the current recording data.
- Count Lap: Short press the mid button (⌛) to mark a lap during your ride.
- Navigate Pages: Press the right button (↻) to cycle through different data display pages.

Figure 4.1: The M1 displays various cycling metrics including speed, time, distance, heart rate, cadence, and power.
4.1 App Integration
Enhance your data analysis and tracking by connecting your M1 to the companion app.
- Download the "CYCPLUS FIT" app from Google Play Store or Apple App Store. The "XOSS" app can also be used.
- Open the app and follow the instructions to connect your M1 via Bluetooth.
- Once connected, you can view detailed activity records, track motion, analyze data, and synchronize your rides with platforms like Strava.
Video 4.1: App Connection (3:32 - 3:48).
This video demonstrates how to connect your CYCPLUS M1 to the companion app for data synchronization and analysis.
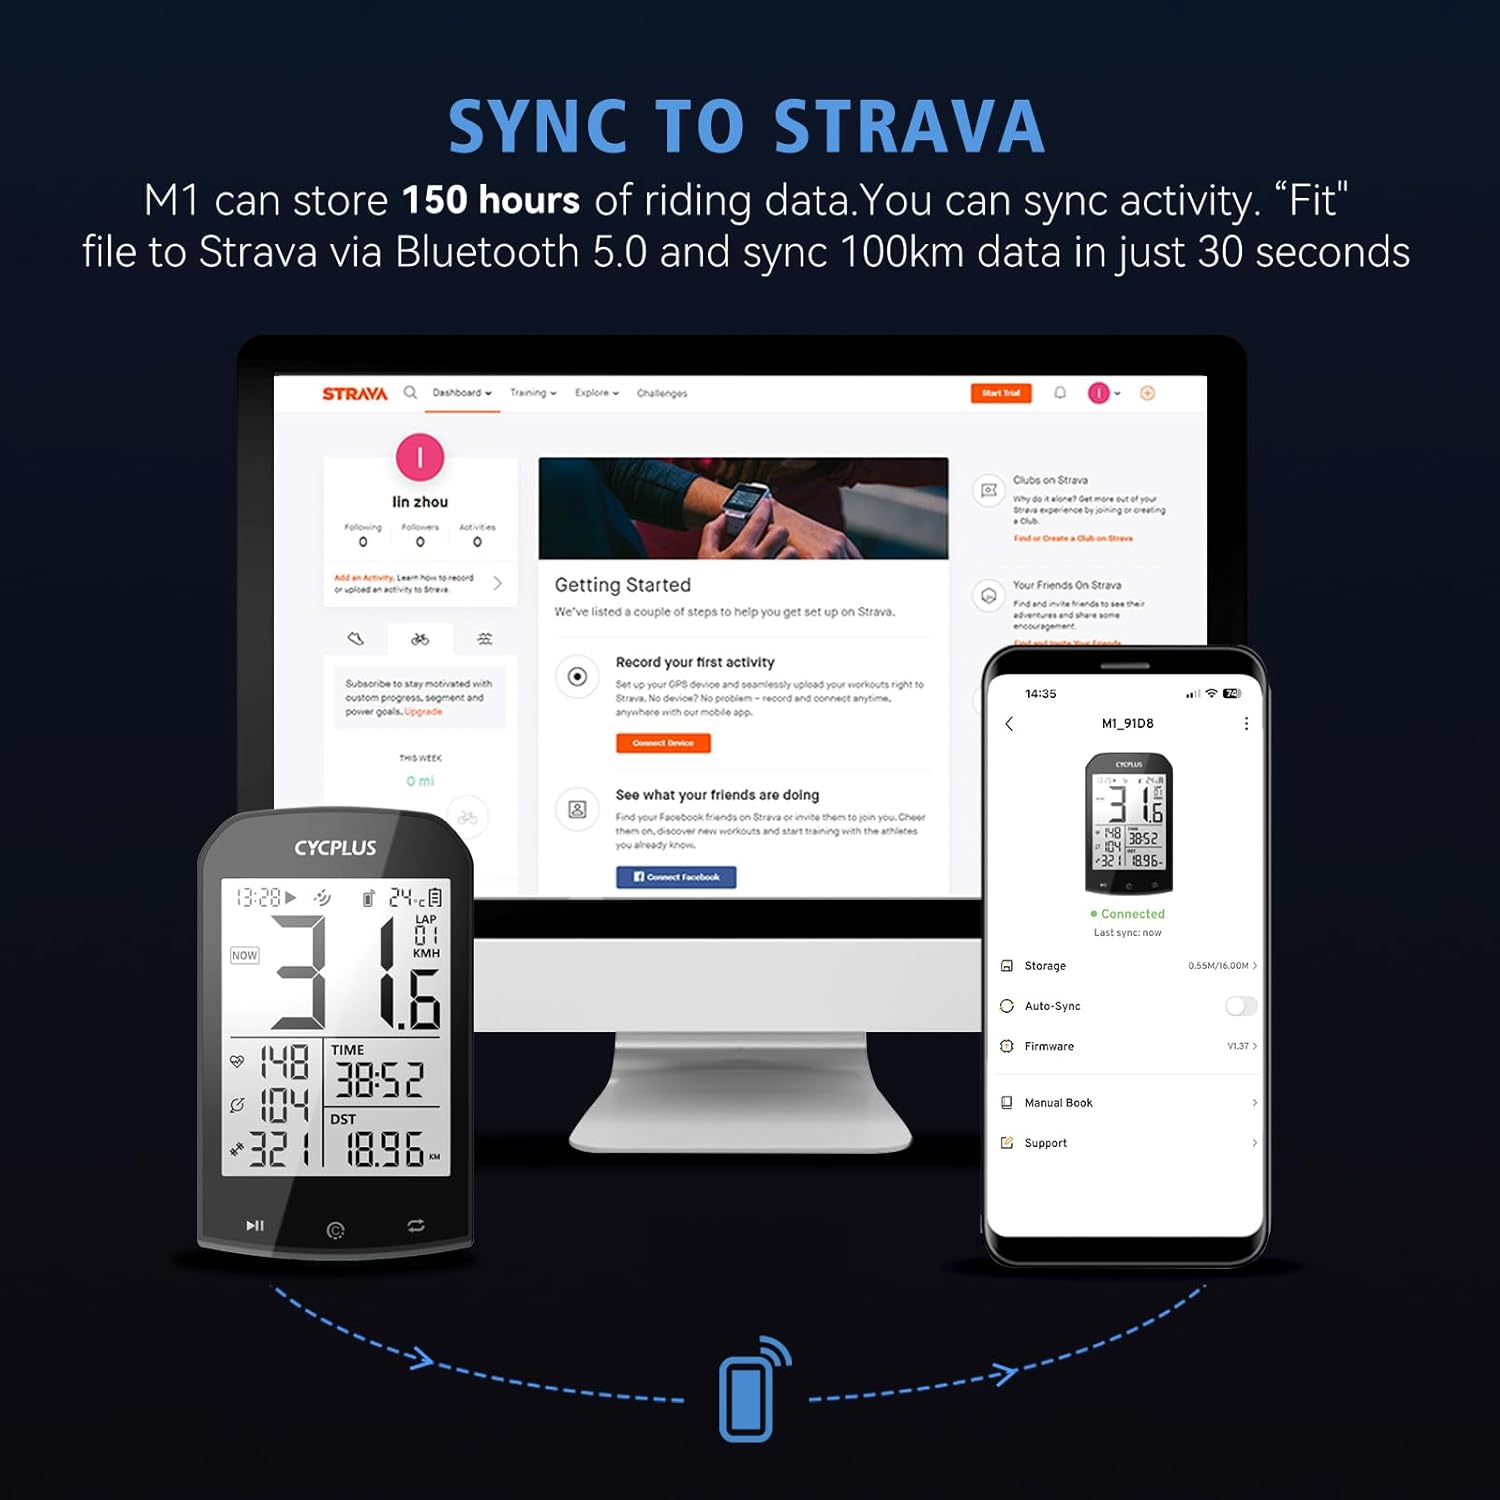
Figure 4.2: Easily sync your ride data from the CYCPLUS M1 to Strava via the app.
5. Maintenance
Proper maintenance ensures the longevity and optimal performance of your CYCPLUS M1.
- Cleaning: Wipe the device with a soft, damp cloth. Avoid using harsh chemicals or abrasive cleaners.
- Water Resistance: The device is IPX6 waterproof, meaning it is protected against high-pressure water jets. It can withstand rain but should not be submerged in water.
- Battery Charging: Charge the device using the provided USB cable. A full charge takes approximately 3 hours and provides up to 60 hours of use.
- Storage: Store the device in a cool, dry place when not in use. Avoid extreme temperatures.

Figure 5.1: The CYCPLUS M1 features a long-lasting battery and convenient USB charging.
6. Troubleshooting
If you encounter issues with your CYCPLUS M1, refer to the following common solutions:
| Problem | Possible Cause | Solution |
|---|---|---|
| Cannot acquire GPS signal | Device is indoors or in an area with poor satellite reception. First use or significant location change. | Move to an open, outdoor area. Allow several minutes for signal acquisition. Ensure time zone is set correctly. |
| Sensors not connecting | Sensor battery low, sensor not active, or device not in pairing mode. | Ensure sensors are active (e.g., spin wheel for speed/cadence). Check sensor batteries. Re-enter pairing mode on the M1 (Section 3.2). |
| Incorrect speed/distance readings | Incorrect wheel circumference setting or poor GPS signal. | Verify wheel circumference setting (Section 3.3). Ensure clear view of the sky for GPS. |
| Device unresponsive/frozen | Software glitch. | Perform a factory reset (see below). |
6.1 Factory Reset
A factory reset can resolve many software-related issues by restoring the device to its original settings. All recorded data will be erased.
- Long press the right button to enter settings.
- Short press the right button to switch to C7.
- Press the left button to start setting.
- Long press the mid button to restore factory settings. The computer will turn off.
Video 6.1: Factory Reset (2:46 - 3:03).
This video demonstrates the steps to perform a factory reset on your CYCPLUS M1.
7. Warranty and Support
CYCPLUS stands behind its products with dedicated customer support.
- Warranty: The CYCPLUS M1 comes with a two-year warranty.
- Technical Support: For any concerns or technical assistance, please contact CYCPLUS' professional technical support team. They offer 24/7 support to quickly and efficiently address your needs.
For further assistance, please refer to the official CYCPLUS website or contact their customer service directly.
Related documentsM1


Ask a question about this manual
Ask about setup, troubleshooting, compatibility, parts, safety, or missing instructions. Manuals+ will review the question and use this page’s manual context to help answer it.