1. Introduction
This manual provides detailed instructions for the installation, operation, and maintenance of your BEAMFLY H4 LED Headlight Bulbs. Please read this manual thoroughly before installation and use to ensure proper function and safety.
2. Safety Information
WARNING: May cause a CANbus error in some vehicles. Verify product compatibility with your vehicle before purchase.
- Always disconnect the vehicle's battery before performing any electrical work.
- Wear appropriate safety gear, including gloves and eye protection, during installation.
- Ensure the bulbs are securely installed to prevent vibration damage.
- Do not touch the LED chips directly, as this can damage them.
- Keep out of reach of children.
3. Package Contents
Verify that all items are present in your package:
- 2 x H4 LED Bulbs
- 1 x Installation Manual (this document)
4. Specifications
| Feature | Specification |
|---|---|
| Model | LEDZ9-H4 |
| Light Source Type | LED (Light Emitting Diode) |
| Wattage | 55 Watts/Kit |
| Brightness | 20000 Lumens/Pair |
| Color Temperature | 6000 Kelvin (Cool White) |
| Voltage | 12 Volts |
| Waterproof Rating | IP68 |
| Operating Temperature | -40℃ to +120℃ |
| Operational Lifespan | >100,000 hours |
| Fit Type | Vehicle Specific Fit |
| Automotive Part Position | Front |
5. Installation (Setup)
The BEAMFLY H4 LED bulbs are designed for direct replacement of halogen bulbs, offering a quick installation process.
5.1 Compatibility
These bulbs are compatible with 12V cars and motorcycles and are designed to fit 99% of vehicles. However, always verify your vehicle's specific requirements.
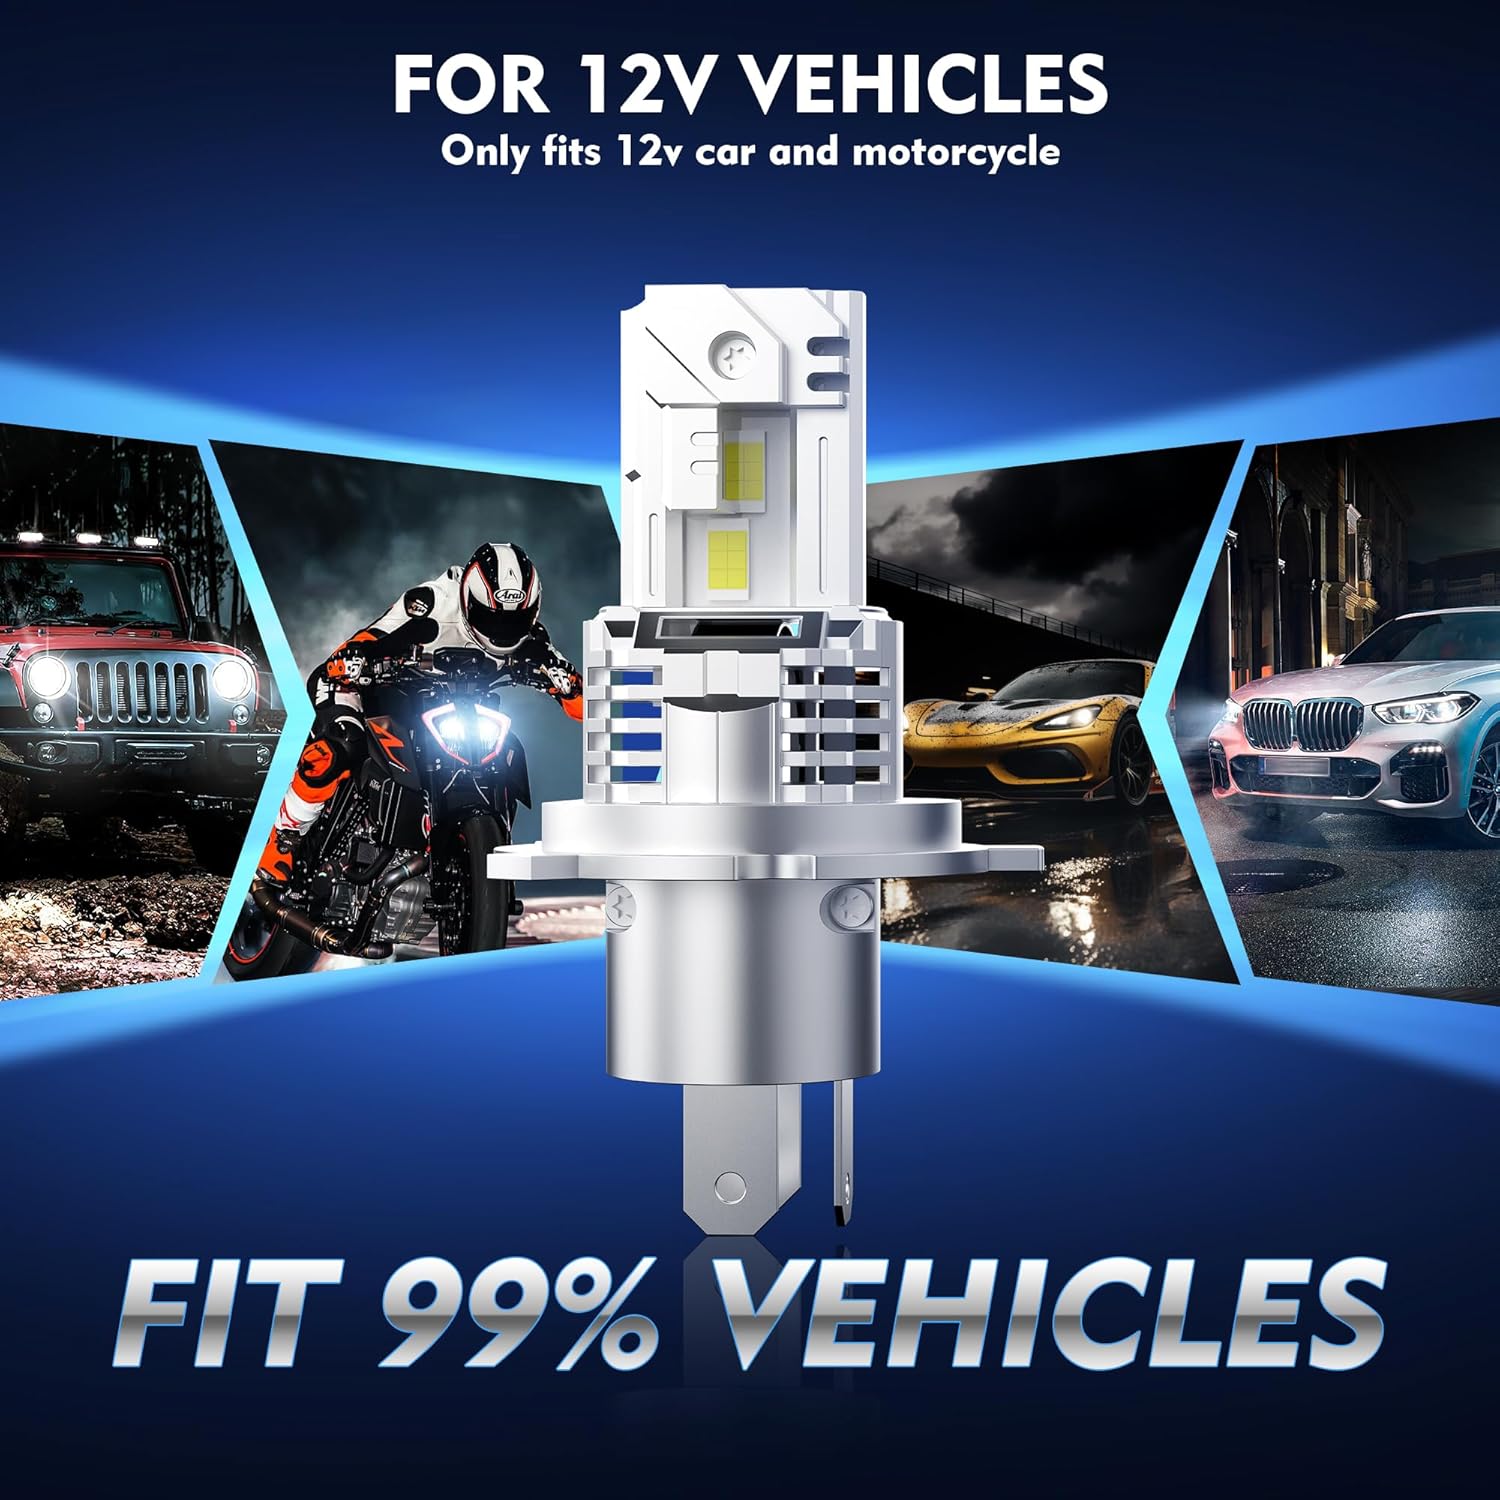
Image: BEAMFLY H4 LED bulb compatibility with 12V vehicles.
5.2 Installation Steps (Approx. 5 minutes)
- Step 1: Disconnect the power to your existing halogen bulb. Carefully remove the old halogen bulb from the headlight assembly.
- Step 2: Insert the BEAMFLY H4 LED bulb into the headlight housing. Ensure it is seated correctly and securely.
- Step 3: Fix the adapter ring with the retaining clip to secure the LED bulb in place.
- Step 4: Plug the LED bulb's connector into the vehicle's headlight power socket.
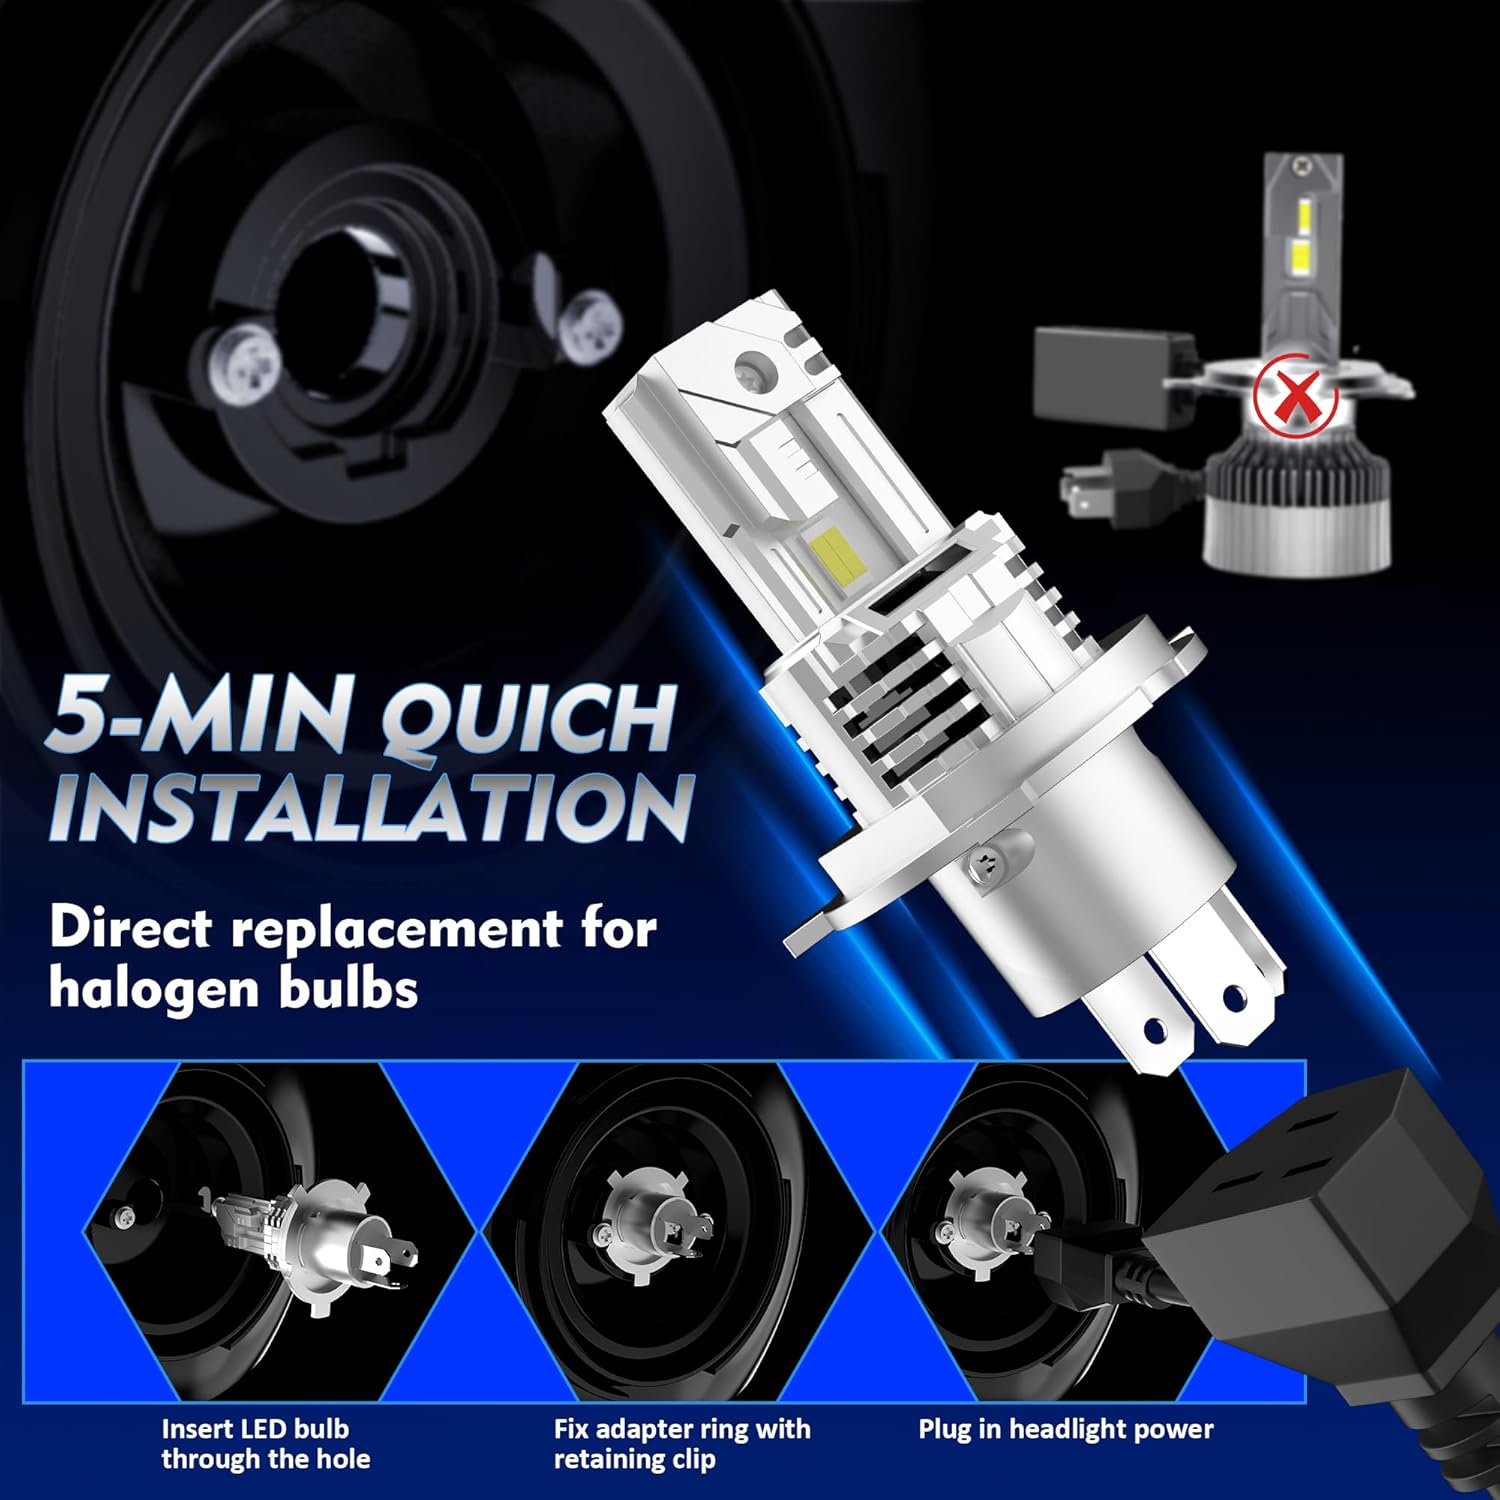
Image: Quick installation steps for BEAMFLY H4 LED bulbs.
5.3 Beam Pattern Adjustment
The BEAMFLY H4 LED bulbs are designed to provide a perfect beam pattern that minimizes glare for oncoming traffic. No specific adjustment is typically required after installation, but it is recommended to verify the beam alignment.

Image: Perfect beam pattern for low and high beams.
6. Operating Instructions
Once installed, the BEAMFLY H4 LED Headlight Bulbs operate like standard vehicle headlights. Turn on your vehicle's headlights as usual. The bulbs will provide a bright, 6000K cool white light, significantly brighter than standard halogen bulbs.

Image: Brightness comparison between BEAMFLY LED and Halogen headlights.
7. Maintenance
BEAMFLY H4 LED bulbs are designed for long-term, maintenance-free operation with a lifespan exceeding 100,000 hours. They feature a triple cooling channel system to ensure optimal performance and longevity.

Image: Triple cooling channel system for extended lifespan.
To maintain optimal performance:
- Periodically inspect the headlight assembly for dirt or debris that might obstruct light output or airflow around the bulb.
- Clean the headlight lens with a soft cloth and appropriate cleaner if necessary.
- Avoid using harsh chemicals or abrasive materials on the bulbs or headlight lenses.
8. Troubleshooting
If you encounter issues with your BEAMFLY H4 LED Headlight Bulbs, consider the following:
8.1 Bulb Not Lighting Up
- Check Connections: Ensure all electrical connections are secure and properly plugged in.
- Check Fuse: Verify the vehicle's headlight fuse is not blown.
- Polarity: Some LED bulbs are polarity sensitive. If the bulb does not light up, try reversing the plug connection.
- Test Bulb: If possible, test the bulb in another compatible vehicle or with a 12V power source to confirm it is functional.
8.2 Flickering or Intermittent Operation
- CANbus Error: As noted in Safety Information, some vehicles may experience CANbus errors, leading to flickering or warning lights. An additional CANbus decoder may be required (not included).
- Loose Connection: Recheck all connections for tightness.
- Voltage Fluctuation: Ensure your vehicle's electrical system is providing stable 12V power.
8.3 Headlight Warning Light on Dashboard
- This is often related to CANbus incompatibility. LED bulbs draw less power than halogen bulbs, which can trigger a 'bulb out' warning in some vehicle systems. A CANbus decoder is typically needed to resolve this.
9. Warranty and Support
Specific warranty details are not provided in the product information. For warranty claims or technical support, please contact the seller or BEAMFLY customer service through the platform where the product was purchased. Please have your purchase details and model number (LEDZ9-H4) ready.


