1. Introduction
Thank you for choosing the Best Choice Products 6V Electric Kids Ride On Bumpin Bumper Car. This manual provides essential information for the safe assembly, operation, and maintenance of your new ride-on toy. Please read it thoroughly before use and retain it for future reference.

Image: The Best Choice Products 6V Electric Kids Ride On Bumpin Bumper Car, shown in light blue, ready for use.
2. Safety Information
WARNING: To reduce the risk of injury, adult supervision is required at all times. Never use this product on roadways, near motor vehicles, on or near steep inclines or steps, swimming pools, or other bodies of water. Always ensure the child wears shoes. Only one rider is permitted at a time. Protective equipment should be worn.
- Suitable Age: 1.5 - 6 years old.
- Maximum Weight Capacity: 66 lbs.
- Battery Safety:
- Battery can fall out and cause injury if vehicle tips over. Make sure the battery bracket is properly assembled over the battery.
- Rechargeable battery is not replaceable by the user.
- Never modify the electrical system. Alterations could result in a fire.
- Using the wrong battery type or charger could result in a fire or explosion.
- Unplug charger BEFORE turning vehicle on.
- General Precautions:
- Never leave child unattended.
- Not to be used in traffic.
- Keep away from flame.
3. What's in the Box
Upon opening the package, you should find the following items:
- Best Choice Products 6V Electric Kids Ride On Bumpin Bumper Car
- Assembly Guide
- 2.4GHz Remote Control (requires 2 AAA batteries, not included)
- Charging Cable
- Decorative Stickers (optional application)
Video: An unboxing and initial setup demonstration of the bumper car, showing the contents and basic connections.
4. Setup & Assembly
The bumper car comes mostly pre-assembled. Follow these steps for quick setup:
- Battery Connection: Locate the battery compartment, usually under the seat. Connect the battery terminals as indicated in the assembly guide. Ensure the connection is secure.
- Remote Control Batteries: Insert 2 AAA batteries into the remote control.
- Initial Charge: Before first use, fully charge the bumper car for the recommended duration (refer to the charging section).
- Optional Decoration: Apply the included decorative stickers to personalize the bumper car.

Image: A light blue bumper car with colorful flower stickers applied, demonstrating the customizable appearance.
5. Operating Instructions
Manual Control
Children can drive the bumper car manually using the two control sticks located on either side of the seat. Pushing both sticks forward moves the car forward, pulling both back moves it backward. To turn, push one stick forward and pull the other back, or push one forward while the other is neutral.

Image: A child seated in a blue bumper car, holding the two control sticks for manual operation.
Remote Control Operation
For younger children or for parental assistance, the 2.4GHz remote control can be used to guide the bumper car. The remote features forward/reverse and turn controls. Ensure the remote control has fresh AAA batteries installed.

Image: An adult operating the white remote control, guiding a child in a pink bumper car.
Video: A demonstration of the bumper car's controls, including forward, backward, and 360-degree spin, both manually and via remote control.
6. Features
- 360-Degree Spin: The bumper car is designed for easy maneuvering with a full 360-degree turning radius, allowing kids to spin and navigate in any direction. The bumper ring is surface-friendly, protecting floors.
- Lights & Sounds: Functional lights are located on the seat-mounted control panel, adding a realistic touch to playtime.
- Child-Friendly Design: Equipped with a functional 5-point seat harness for safety and a maximum speed of 1.2 MPH for controlled movement.
- Classic Design: The smooth, curved profile and thick rubber-like bumper provide a fun, nostalgic aesthetic.

Image: Two children enjoying their bumper cars, highlighting the 360-degree spin capability.
Video: A demonstration of the bumper car's movement and lights in a home setting.
7. Charging
To charge the bumper car, locate the charging port, typically near the control panel. Plug the provided charging cable into the port and then into a standard wall outlet. The indicator light will show charging status. Ensure the vehicle is turned OFF during charging. Unplug the charger before turning the vehicle on.
Video: A demonstration of how to plug in the bumper car for charging.
8. Maintenance
- Cleaning: Wipe the bumper car with a damp cloth. Avoid using harsh chemicals or abrasive cleaners.
- Storage: Store the bumper car in a dry, cool place away from direct sunlight when not in use.
- Battery Care: To prolong battery life, charge the battery fully after each use and at least once a month during periods of non-use.
- Inspection: Regularly check all parts for wear and tear, especially the seat harness and bumper ring. Replace any damaged parts immediately.
9. Troubleshooting
| Problem | Possible Cause | Solution |
|---|---|---|
| Bumper car does not move. | Battery not connected or low charge. | Ensure battery is properly connected. Charge the battery fully. |
| Remote control not working. | Remote batteries are dead or not inserted correctly. | Replace AAA batteries in the remote control. Ensure correct polarity. |
| Vehicle moves slowly. | Low battery charge or exceeding weight capacity. | Charge the battery fully. Ensure rider weight is within 66 lbs limit. |
10. Specifications
- Product Dimensions: 27.5" (L) x 27.5" (W) x 15.7" (H)
- Item Weight: 15 pounds
- Model Number: SKY7128
- Manufacturer Recommended Age: 18 months - 6 years
- Battery Requirement (Remote): 2 AAA batteries (not included)
- Weight Capacity: 66 lbs.
- Maximum Speed: 1.2 MPH
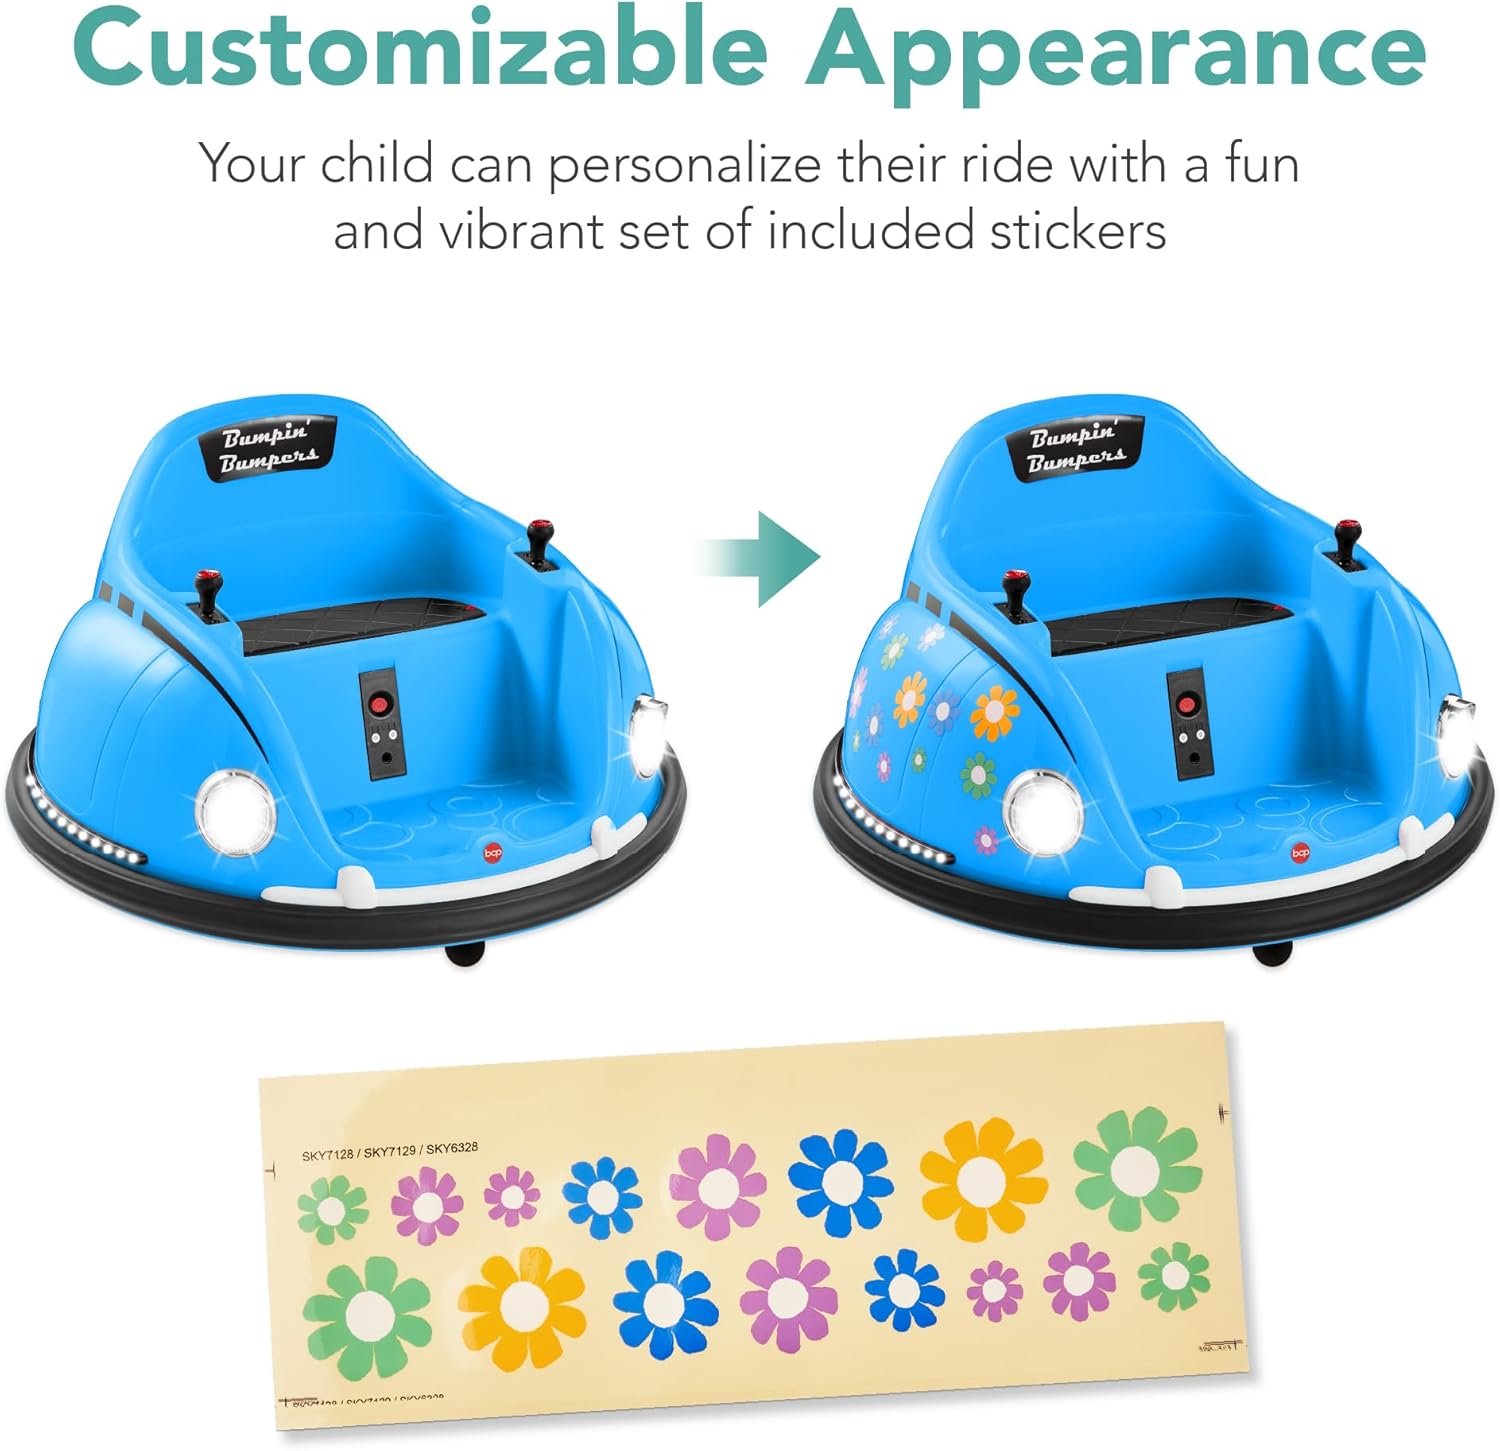
Image: A diagram showing the product dimensions of the bumper car.
11. Warranty & Support
For warranty information, product support, or to purchase replacement parts, please contact Best Choice Products customer service. Refer to your purchase documentation for specific warranty terms and contact details.
Contact Information:
- Website: Best Choice Products Store
- (Please refer to your product packaging or the official website for the most up-to-date contact information.)