1. Product Overview
The PROSTER 200EP Tone Generator Kit is an essential tool designed for efficient cable and wire maintenance. It provides high accuracy and ease of use for various electrical tasks. This kit is widely used for line tracing, short circuit testing, and identifying clear, busy, or ringing lines, making it indispensable for electricians and DIY enthusiasts.
Key features include an optional continuous or adjustable tone generator, simple and accurate test results, and the ability to identify cables quickly. The insulated probe and built-in speaker enhance safety during operation, preventing accidental short circuits.
2. Included Components
The PROSTER 200EP Tone Generator Kit comes with the following items:
- Cable Tester (Inductive Amplifier Probe)
- Tone Generator (Transmitter)
- Replacement Head (Carbon Fiber Tip)
- 2 x 9V Batteries
- Stripping Tool
- Instruction Manual
- Organizer Bag

Figure 2.1: Complete contents of the PROSTER 200EP Tone Generator Kit.
Video 2.1: Unboxing and overview of the Tone Generator Kit components.
3. Setup
3.1 Battery Installation
- Locate the battery compartments on both the Tone Generator (transmitter) and the Inductive Amplifier Probe (receiver).
- Open the battery covers.
- Insert the provided 9V batteries, ensuring correct polarity (+/-).
- Close the battery covers securely.
3.2 Connecting the Transmitter
The Tone Generator (transmitter) can be connected to the circuit or cable you wish to test using its integrated test leads:
- Alligator Clips: For direct connection to exposed wires or terminals.
- RJ11/RJ45 Connector: For testing network or telephone cables.
3.3 Powering On
Turn on the Tone Generator by sliding the switch to either 'TONE' or 'CONT' (Continuity) mode. The Inductive Amplifier Probe is activated by its spring-loaded ON/OFF button.
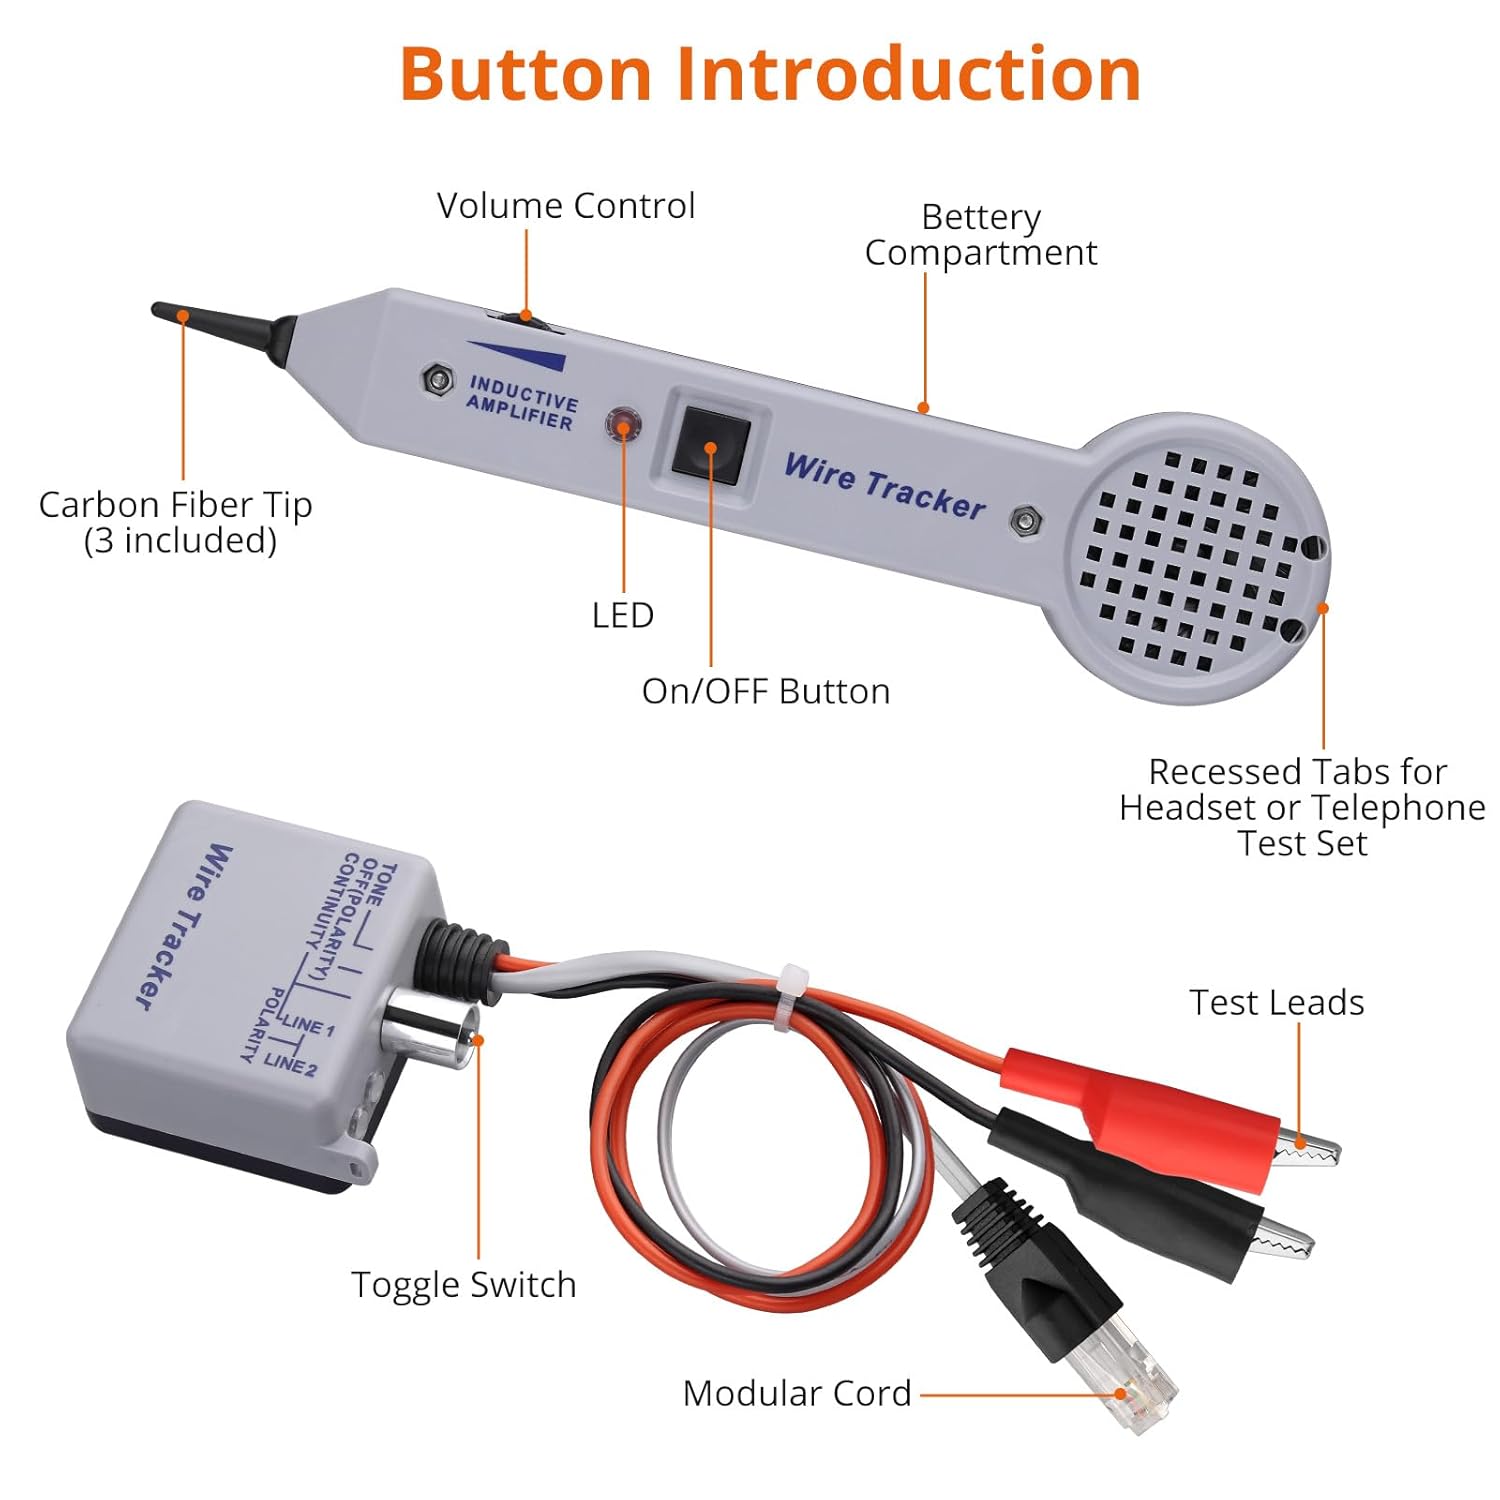
Figure 3.1: Labeled components of the PROSTER 200EP kit, showing controls and connections.
4. Operating Instructions
4.1 Wire Tracing (Tone Mode)
This mode is used to identify and trace wires within bundles, walls, or conduits without damaging insulation.
- Connect the Tone Generator to the wire or circuit you wish to trace. Ensure the switch is set to 'TONE'.
- Turn on the Inductive Amplifier Probe by pressing its spring-loaded ON/OFF button.
- Adjust the volume sensitivity control on the probe to a suitable level.
- Place the carbon fiber tip of the probe near the suspected wire path.
- Listen for the audible tone emitted by the probe. The tone will be loudest when the probe is directly over the energized wire.
- Follow the path of the wire by moving the probe along the loudest tone.

Figure 4.1: Demonstrating the clamp and trace function for cable identification.
Video 4.1: Practical demonstration of wire tracing using the kit.
Video 4.2: Short demonstration of the 200EP kit for line tracing.
4.2 Short Circuit Testing (Continuity Mode)
To test for short circuits or continuity:
- Connect the Tone Generator to both ends of the wire or circuit. Set the switch to 'CONT'.
- If the circuit is continuous (no break or short), the green 'CONT' LED on the Tone Generator will illuminate.
- If there is a short circuit, the red 'TONE' LED may also illuminate or behave erratically, depending on the nature of the short.
4.3 Clear/Busy/Ringing Identification
When connected to a telephone line, the Tone Generator can help identify the line status:
- Clear: Indicates an idle line.
- Busy: Indicates an active call.
- Ringing: Indicates an incoming call.
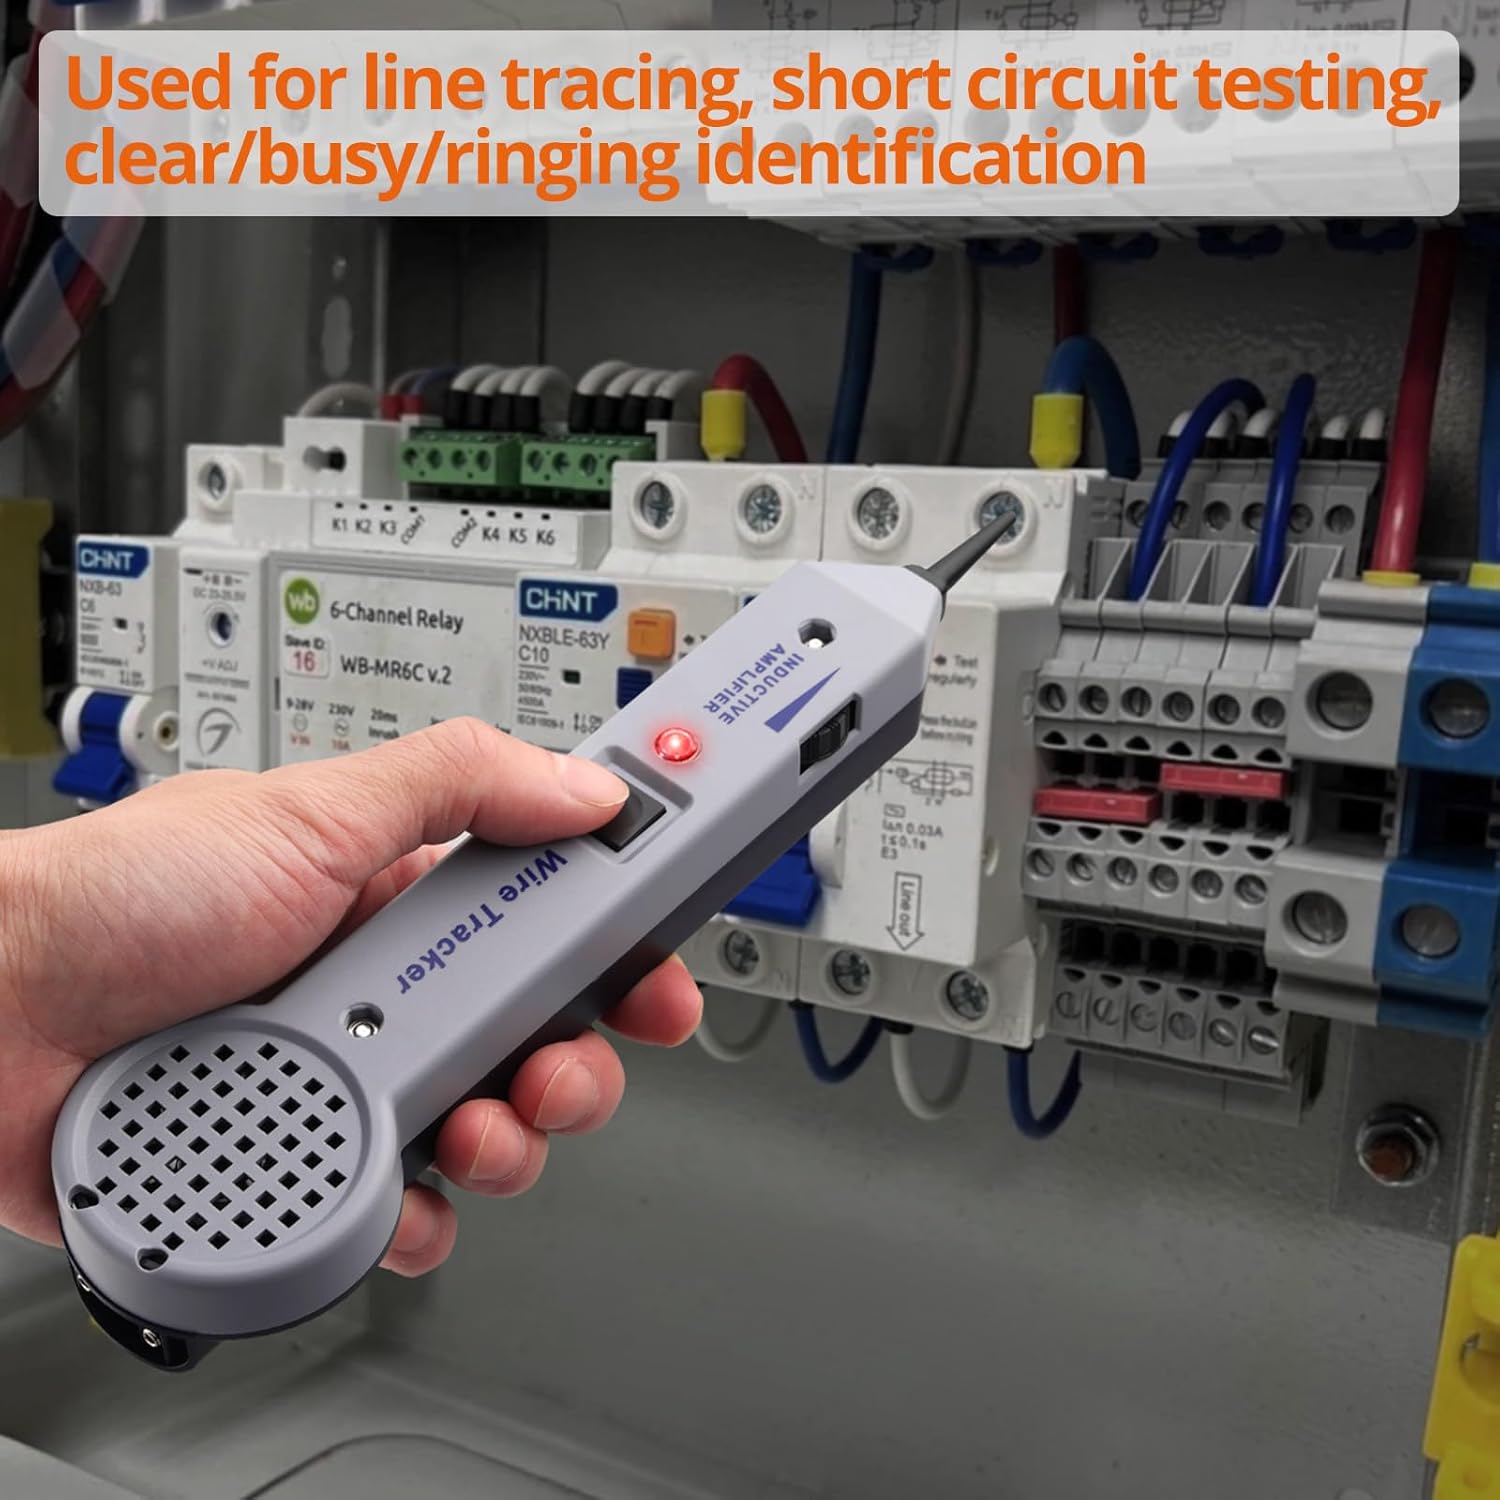
Figure 4.2: The Inductive Amplifier Probe being used to trace wiring within an electrical panel.
5. Maintenance
5.1 Battery Replacement
Replace the 9V batteries in both units when the indicator lights dim or the tone becomes weak. Always use fresh 9V batteries for optimal performance.
Video 5.1: Demonstration of battery replacement and general automotive wiring troubleshooting.
5.2 Cleaning and Storage
Wipe the units with a dry, soft cloth after each use. Do not use abrasive cleaners or solvents. Store the kit in its organizer bag in a cool, dry place away from direct sunlight and extreme temperatures.
6. Troubleshooting
- No Tone/Weak Signal:
- Check if batteries are correctly installed and have sufficient charge. Replace if necessary.
- Ensure the Tone Generator is switched to 'TONE' mode.
- Verify proper connection of the Tone Generator to the circuit.
- Adjust the volume sensitivity on the Inductive Amplifier Probe.
- No Continuity Indication:
- Ensure the Tone Generator is switched to 'CONT' mode.
- Check for breaks or open circuits in the wire.
- Verify secure connections of the test leads.
- Erratic Readings:
- Ensure the probe tip is not accidentally shorting out against other wires or metal surfaces.
- Reduce the sensitivity if interference from nearby electrical fields is suspected.
7. Specifications
| Feature | Specification |
|---|---|
| Gain | Nominal 30dB |
| Input Impedance | Nominal 100M Ohm |
| Probe Tip Resistance (Min) | Metal Tip: 0 Ohm, Plastic Tip: 300 Ohm |
| Power Source | 2 x 9V batteries (included) |
| Item Weight | 370 g |
| Parcel Dimensions | 25.4 x 11.7 x 5.9 cm |
| Color | Gray |
| Style | Circuit Tester |
| Certifications | CE, IP 67, RoHS |
8. Warranty and Support
For warranty information, technical support, or service inquiries, please refer to the contact details provided with your purchase or visit the official PROSTER website. Keep your purchase receipt as proof of purchase.


