
XYGStudy Luckfox Pico Mini RV1103
Contents
Luckfox Pico Mini RV1103 Development Board User Manual
Model: Luckfox Pico Mini RV1103 | Brand: XYGStudy
1. Product Overview
The Luckfox Pico Mini RV1103 is a compact and powerful Linux micro development board designed for various embedded applications. It integrates an ARM Cortex-A7 processor, RISC-V MCU, NPU, and ISP, offering high performance in a small form factor. This board is ideal for developers looking for an efficient platform for prototyping and deployment.
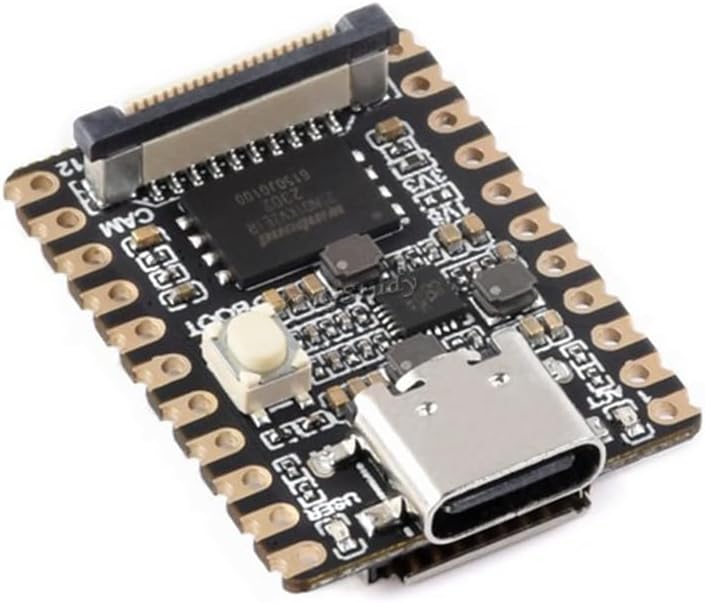
Figure 1: Luckfox Pico Mini RV1103 Development Board. This image shows the compact size and various components of the board, including the USB-C port and pin headers.
Key Features:
- Single-core ARM Cortex-A7 32-bit core with integrated NEON and FPU.
- Built-in Rockchip self-developed 4th generation NPU with 0.5 TOPS (int8) up to 1.0 TOPS (int4) computing power.
- Third-generation ISP3.2 supporting 4-Megapixel with HDR, WDR, and multi-level noise reduction.
- Powerful encoding performance with intelligent encoding mode for efficient bit rate saving.
- Built-in RISC-V MCU for low power consumption and fast start-up.
- Integrated 16-bit DRAM DDR2, POR, audio codec, and MAC PHY.
- Castellated Holes with Immersion Gold Design for easy integration.
2. Package Contents
Verify that all items are present in your package:
- Luckfox Pico Mini B Development Board x1
If any items are missing or damaged, please contact your vendor immediately.
3. Setup Guide
3.1 Initial Inspection
Before connecting the board, visually inspect it for any physical damage or bent pins. Ensure the board is clean and free of debris.
3.2 Powering the Board
The Luckfox Pico Mini B is powered via its USB Type-C port. Connect the board to a computer or a 5V power adapter using a compatible USB-C cable. The board will typically draw power and enumerate as a USB device.
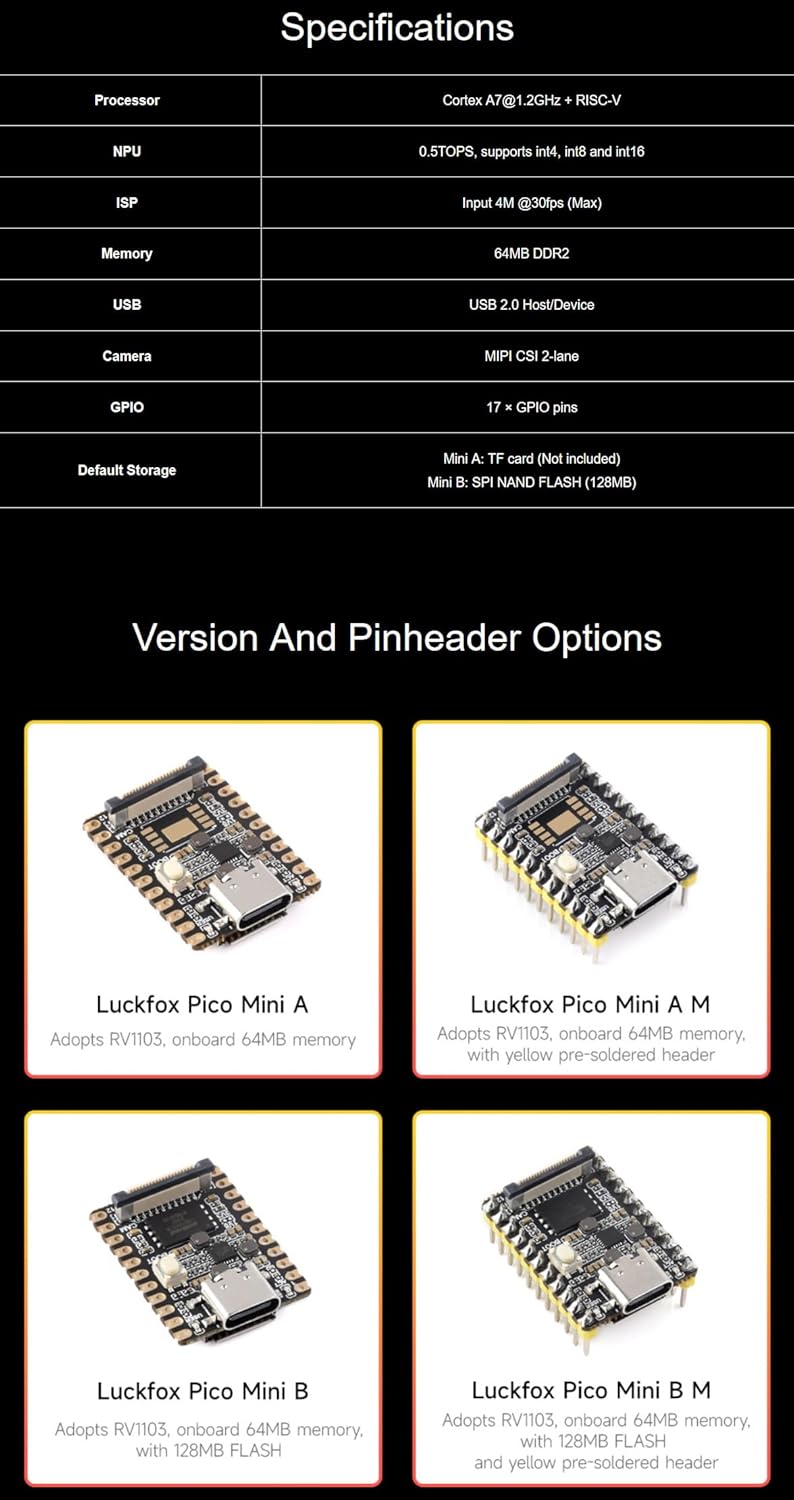
Figure 2: Close-up of the USB Type-C port on the Luckfox Pico Mini B, used for power supply and program burning.
3.3 Connecting Peripherals
The board supports various interfaces for connecting peripherals:
- Camera Interface: Connect a compatible MIPI CSI 2-lane camera module to the dedicated camera interface.
- GPIO Pins: Utilize the 17 GPIO pins for general-purpose input/output, connecting sensors, actuators, or other custom hardware.
- TF Card Slot: (Note: Only available on Mini A version, Mini B uses SPI NAND FLASH). If using a Mini A, insert a TF card for additional storage.
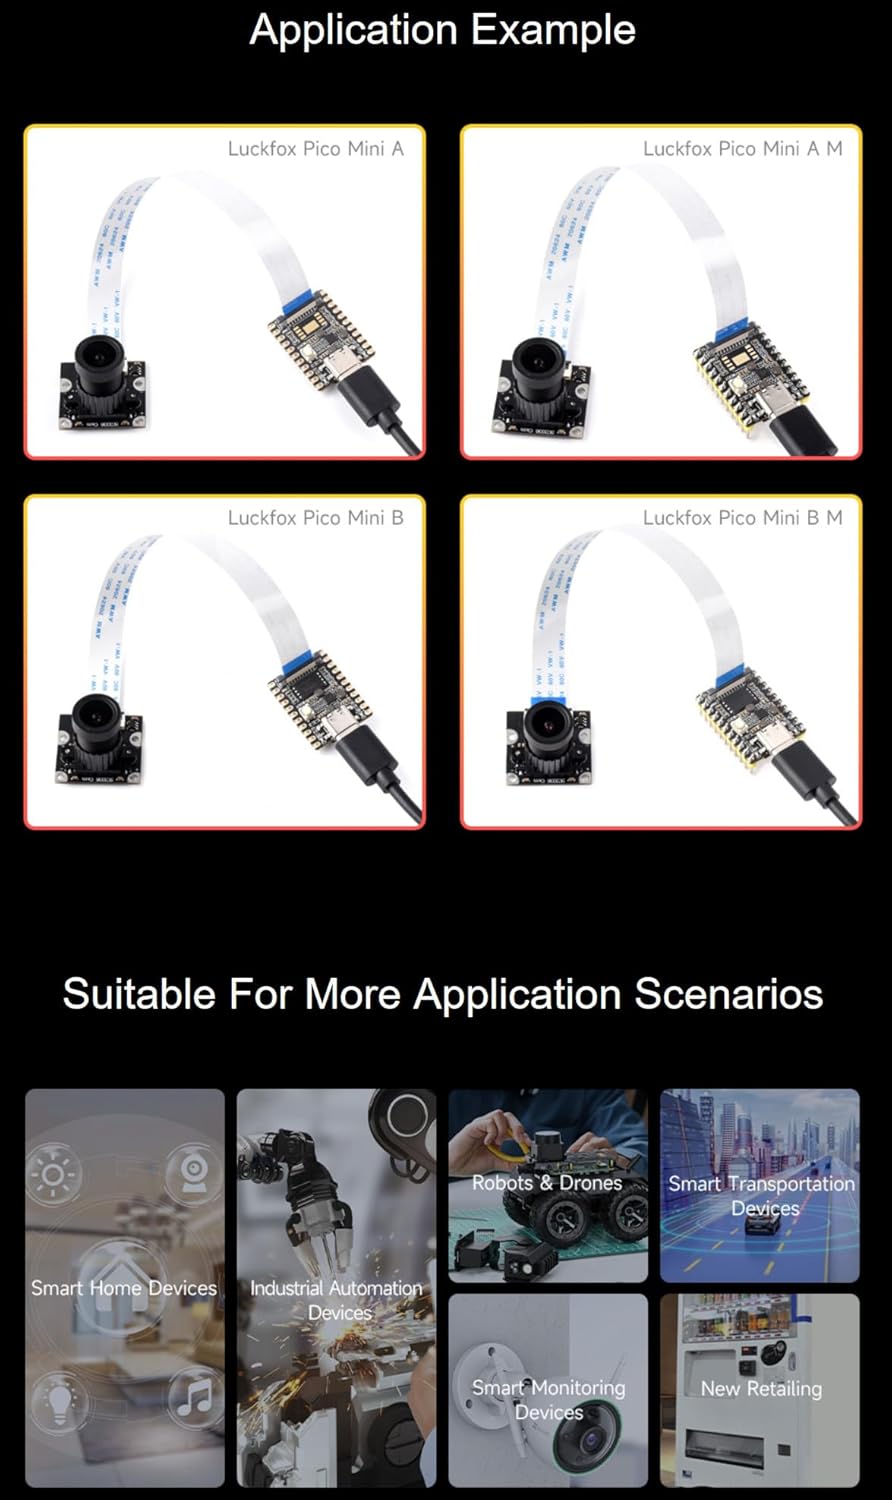
Figure 3: TF Card Slot, available on Luckfox Pico Mini A for expandable storage.

Figure 4: Camera Interface, supporting MIPI CSI 2-lane camera modules.
3.4 Software Setup
The Luckfox Pico Mini RV1103 runs Linux. To begin development, you will need to set up your development environment. This typically involves:
- Obtaining Firmware: Download the latest firmware image for the Luckfox Pico Mini RV1103 from the official XYGStudy resources or community forums.
- Flashing Tool: Use a compatible flashing tool (e.g., Rockchip RKDevTool or similar) to write the firmware image to the board's 128MB SPI NAND FLASH.
- SDK and Toolchain: Download the Software Development Kit (SDK) and cross-compilation toolchain to develop applications for the board.
- Driver Installation: Install necessary USB drivers on your host computer for proper communication with the board.
For detailed instructions on software setup and development, refer to the official documentation and community resources provided by XYGStudy. You may need to contact the seller for specific resource links.
4. Operating the Board
4.1 Booting and Accessing the System
Once the firmware is flashed and the board is powered, it will boot the Linux operating system. You can typically access the system via a serial console (UART) or SSH over USB/Ethernet (if configured).
- Serial Console: Connect a USB-to-UART converter to the board's UART pins and use a terminal emulator (e.g., PuTTY, minicom) to access the command line.
- SSH: If network connectivity is established (e.g., via USB gadget mode or an external Ethernet adapter), you can SSH into the board using its assigned IP address.
4.2 Using the NPU and ISP
The integrated NPU (Neural Processing Unit) and ISP (Image Signal Processor) are key features for AI and vision applications:
- NPU: Leverage the NPU for accelerating machine learning inference tasks. The SDK provides libraries and examples for deploying AI models (e.g., TensorFlow Lite, ONNX) to the NPU.
- ISP: The ISP handles image processing from connected cameras, providing features like HDR, WDR, and noise reduction. Developers can configure ISP parameters through the provided APIs to optimize image quality.
4.3 GPIO and Peripheral Control
Control the GPIO pins and other peripherals through standard Linux interfaces (e.g., sysfs) or specific libraries provided in the SDK. Refer to the pin definition diagram for correct pin assignments.
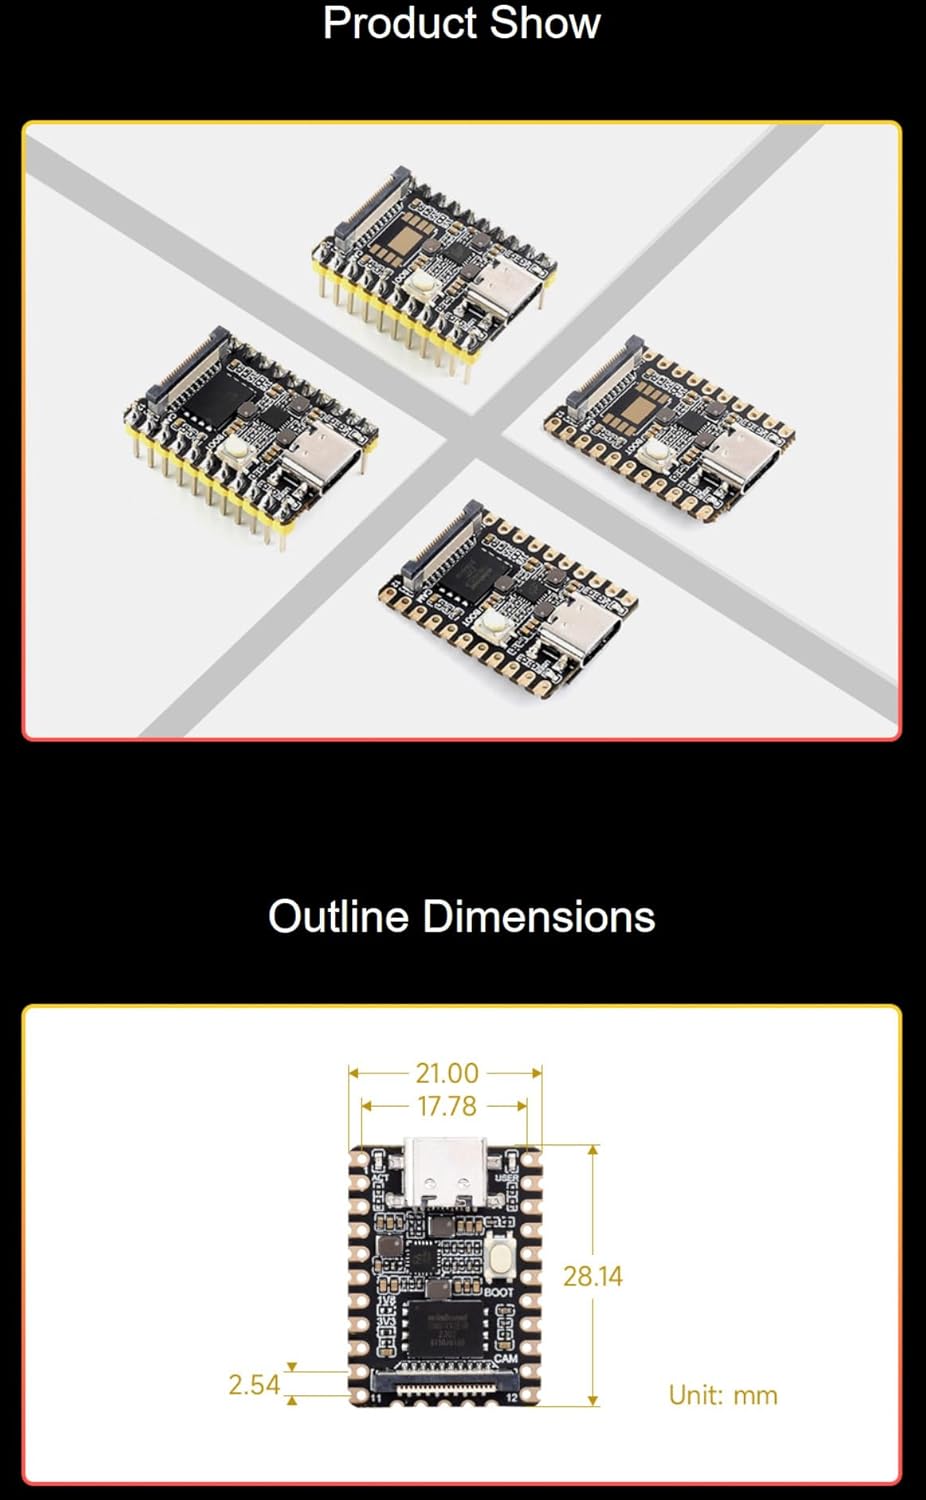
Figure 5: Pin Definition Diagram for Luckfox Pico Mini, showing GPIO, UART, I2C, SPI, and other pin assignments.
5. Maintenance
The Luckfox Pico Mini RV1103 is a robust development board, but proper handling and maintenance can extend its lifespan and ensure reliable operation.
- Environmental Conditions: Operate the board within recommended temperature and humidity ranges. Avoid extreme temperatures, direct sunlight, and high humidity.
- Cleaning: Keep the board clean and free of dust and debris. Use a soft, dry brush or compressed air to gently clean the components. Avoid using liquids or abrasive cleaners.
- Static Discharge: Always handle the board by its edges and use anti-static precautions (e.g., anti-static wrist strap) to prevent damage from electrostatic discharge.
- Firmware Updates: Regularly check for and apply firmware updates from XYGStudy to benefit from bug fixes, performance improvements, and new features.
6. Troubleshooting
6.1 Board Not Powering On
- Check Power Source: Ensure the USB-C cable is securely connected to a reliable 5V power source (e.g., computer USB port, power adapter).
- Cable Integrity: Try a different USB-C cable to rule out a faulty cable.
- LED Indicators: Observe the onboard LEDs. If they do not light up, there might be a power issue.
6.2 Unable to Connect via Serial/SSH
- Driver Installation: Verify that the necessary USB-to-UART drivers are correctly installed on your host computer.
- Port Settings: Ensure the serial port settings (baud rate, data bits, parity, stop bits) match the board's configuration (typically 115200, 8N1).
- Network Configuration: For SSH, confirm the board has obtained an IP address and that network settings are correct.
6.3 Flashing Issues
- Boot Mode: Ensure the board is correctly put into download/boot mode before attempting to flash firmware. This usually involves pressing and holding the BOOT button while connecting power.
- Flashing Tool Version: Use the recommended version of the flashing tool.
- Firmware Integrity: Re-download the firmware image to ensure it's not corrupted.

Figure 6: Top view of the Luckfox Pico Mini B, highlighting the BOOT button (for entering download mode) and USER button.
7. Specifications
| Feature | Detail |
|---|---|
| Processor | ARM Cortex-A7 @1.2GHz + RISC-V MCU |
| NPU | 0.5 TOPS (int8), supports int4, int8, int16 hybrid quantization |
| ISP | Input 4M @30fps (Max), ISP3.2 with HDR, WDR, noise reduction |
| Memory | 16-bit DRAM DDR2 (128MB for Mini B) |
| Default Storage | SPI NAND FLASH (128MB for Mini B) |
| USB | USB 2.0 Host/Device (Type-C port) |
| Camera Interface | MIPI CSI 2-lane |
| GPIO Pins | 17 x GPIO pins |
| Operating System | Linux |
| Dimensions | Approximately 28.14 x 21.00 x 17.78 mm (based on outline dimensions image) |

Figure 7: Outline Dimensions of the Luckfox Pico Mini, showing its compact size in millimeters.
8. Warranty and Support
8.1 Warranty Information
This product is covered by a standard manufacturer's warranty. Please retain your proof of purchase for warranty claims. The warranty typically covers defects in materials and workmanship under normal use. It does not cover damage caused by misuse, accidents, unauthorized modifications, or improper installation.
For specific warranty terms and conditions, please refer to the documentation provided with your purchase or contact XYGStudy directly.
8.2 Technical Support
For technical assistance, additional resources, or to report issues, please contact XYGStudy through the Amazon messaging system or their official support channels. Providing detailed information about your issue, including steps to reproduce it and any error messages, will help expedite the support process.
You may also find valuable information and community support on online forums and development communities dedicated to Rockchip RV1103 and Linux embedded systems.
Documents and downloads
Ask a question about this manual
Ask about setup, troubleshooting, compatibility, parts, safety, or missing instructions. Manuals+ will review the question and use this page’s manual context to help answer it.