1. Introduction
The DXZ A3 UV Printer is an advanced printing solution designed for high-quality, versatile printing on a wide range of materials. Featuring an L805 6-color printhead, this printer supports both flatbed and cylindrical printing, offering capabilities such as varnish and 3D embossing effects. This manual provides essential information for setting up, operating, maintaining, and troubleshooting your DXZ A3 UV Printer to ensure optimal performance and longevity.
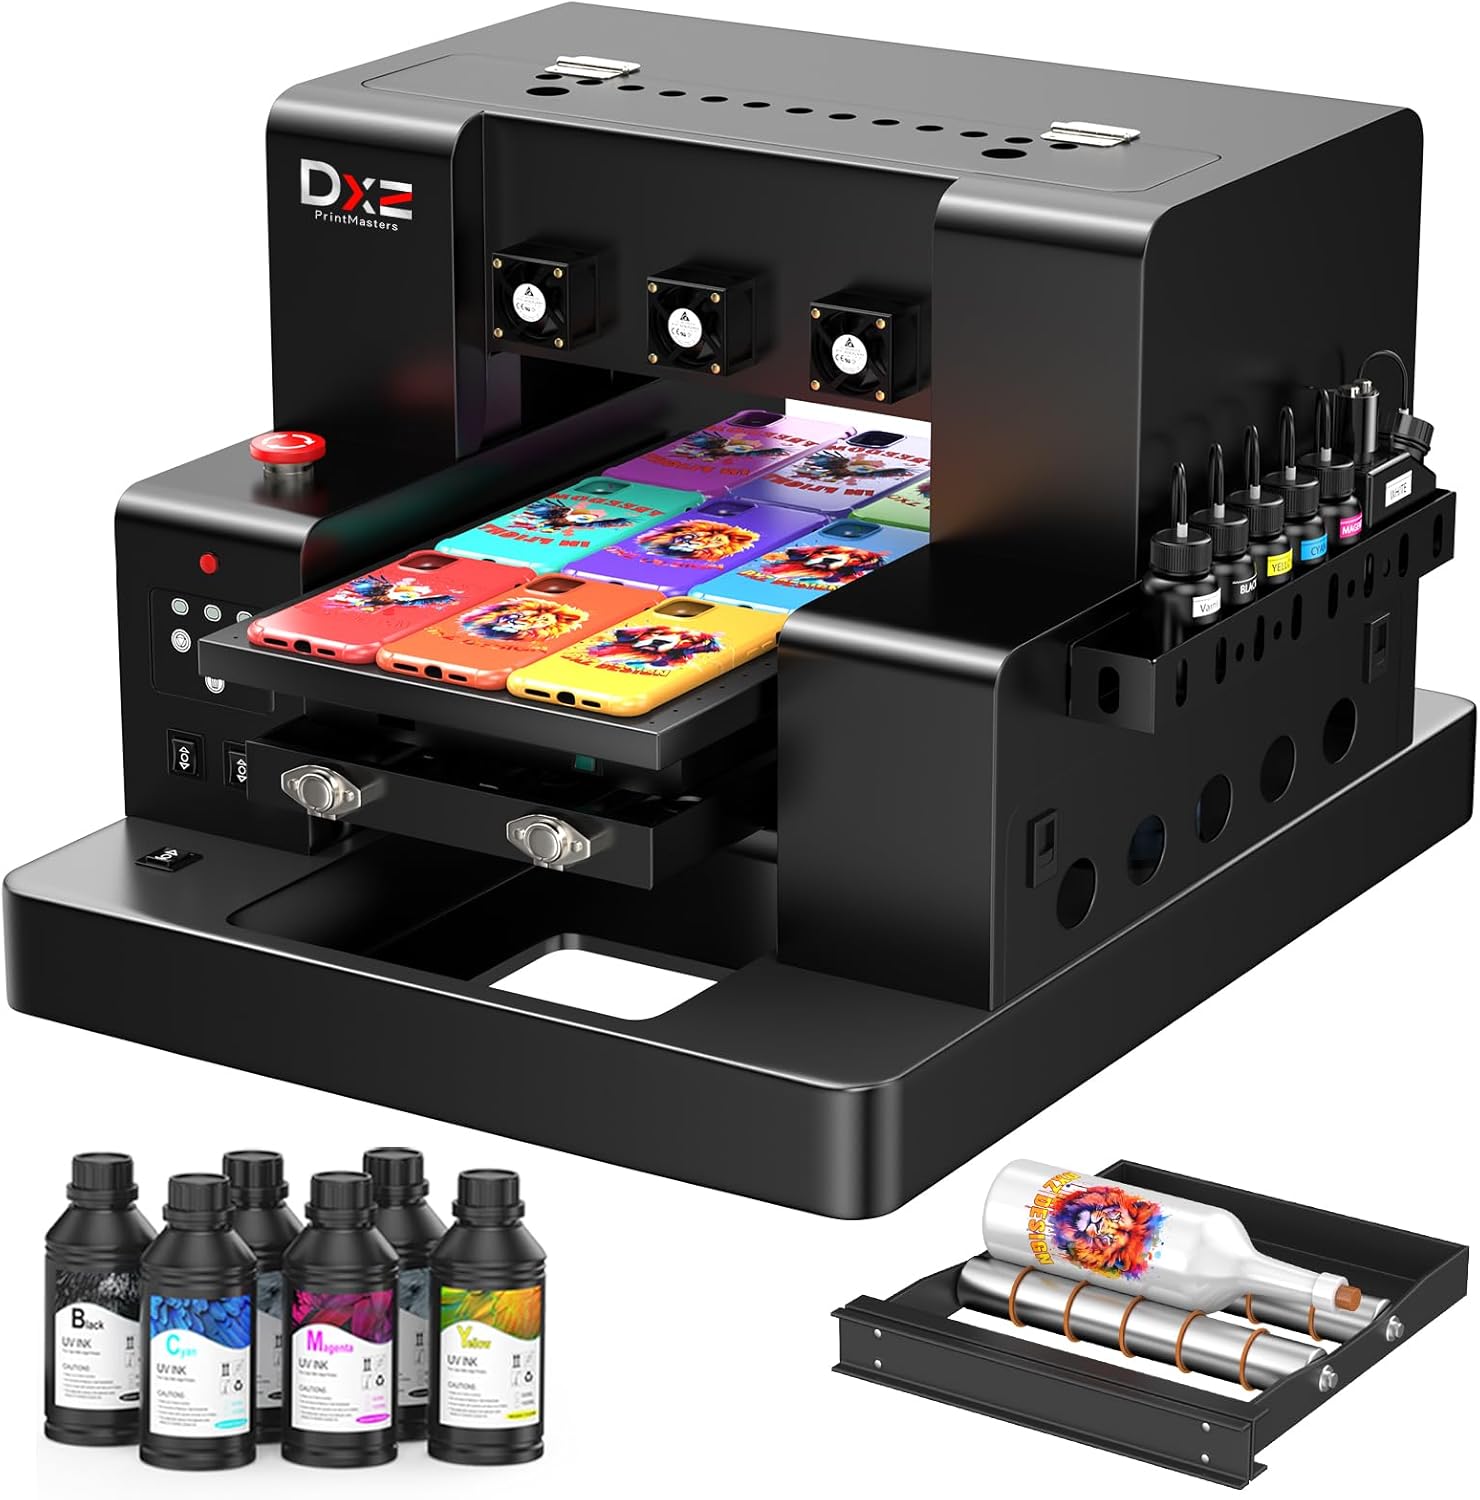
Figure 1: Main product view of the DXZ A3 UV Printer with ink bottles and a bottle holder.
2. Setup
2.1 Unboxing and Component Identification
Carefully unpack all components from the packaging. Verify that all items listed below are present. If any items are missing or damaged, contact customer support immediately.
- 1 x A3 UV Printer
- 6 x 500ml UV Inks (CMYK+WW)
- 1 x Bottle Holder
- 1 x Software (on flash drive)
- Cleaning Accessories
- 1 x Ink Refilling Syringe
- 5 x Phone Cases (for testing)
- 1 x Ruler
- Paper Tape
- Double-sided Tape
- 1 Set of Ink Dampers
- Power Cable
- USB Cable

Figure 2: All included accessories for the DXZ A3 UV Printer.
2.2 Ink System Setup
The printer utilizes a Continuous Ink Supply System (CISS) and includes a white ink mixing system to ensure consistent ink flow and prevent sedimentation. Refer to the instructional videos on the provided flash drive for detailed steps on filling and priming the ink system.

Figure 3: The white ink mixing system ensures even ink flow and prevents pigment clumping.
2.3 Software Installation
Install the provided RIP software from the flash drive onto your computer. This software is essential for preparing your designs for printing and managing printer settings. Follow the on-screen instructions during installation.
2.4 Physical Placement and Connectivity
Place the printer on a stable, level surface with adequate space for operation and ventilation. Connect the printer to your computer using the supplied USB cable. Ensure the power cable is securely connected to the printer and a suitable power outlet.
3. Operating Instructions
3.1 Powering On/Off
To power on the printer, press the main power button. The indicator lamp on the control panel will illuminate. To power off, press the main power button again.
3.2 Printing Methods
The DXZ A3 UV Printer supports two main printing methods:
- Flat Printing: For flat objects such as phone cases, acrylic, metal, leather, and wood panels.
- Cylinder Printing: For cylindrical items like bottles and golf balls, using the included bottle holder.

Figure 4: The printer supports both flat and cylinder printing methods.
3.3 Loading Materials and Print Area
The printer has a maximum printing size of 12.59 inches by 19.68 inches (A3) and can accommodate objects up to 5.90 inches in height. Ensure your material is properly positioned on the vacuum platform for flat printing or secured in the bottle holder for cylindrical printing.
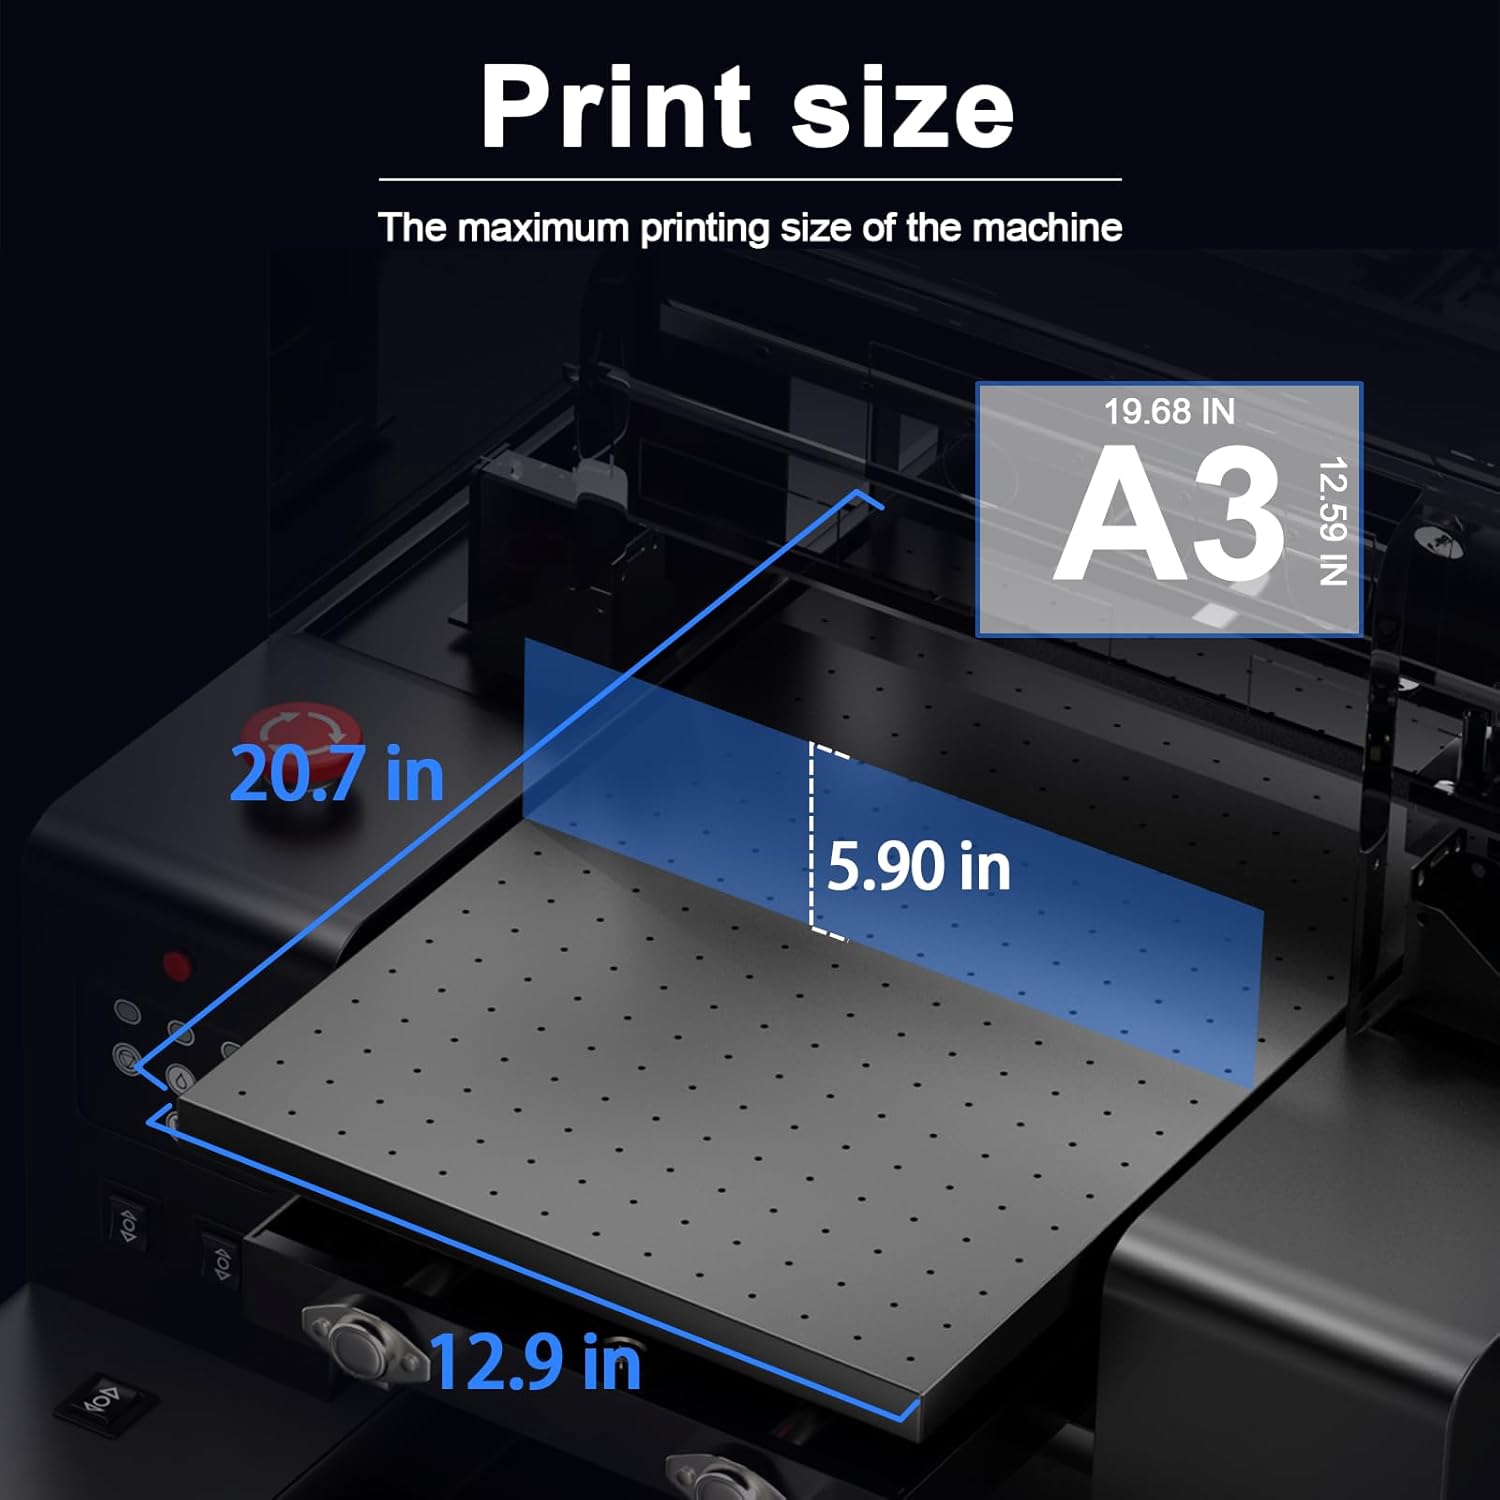
Figure 5: The maximum printing size is A3 (12.59" x 19.68") with a maximum printing height of 5.90 inches.
3.4 Printing Process
The printing process is streamlined for ease of use:
- Design Preparation: Edit the size of your image in design software (e.g., Photoshop).
- RIP Software: Import the prepared image into the RIP software and configure print settings.
- Position Object: Place the object to be printed accurately on the printer's platform or in the bottle holder.
- Print: Initiate the print job from the RIP software and wait for the machine to complete printing.

Figure 6: Easy-to-use three-step printing workflow.
3.5 Advanced Printing Features
- Varnish and 3D Embossing: The printer can apply varnish layers and create multi-layer transparent raised effects for stunning gloss and matte finishes.
- Infrared Automatic Height Measurement: This feature allows for one-click automatic adjustment of the printing height, ensuring precise and accurate prints without manual intervention.
- Vacuum Platform: The built-in vacuum platform secures the printed material in place, preventing movement and misalignment during the printing process.

Figure 7: The printer supports varnish and 3D embossing for enhanced print effects.

Figure 8: Infrared automatic height measurement for precise printing.

Figure 9: The suction platform system ensures print stability.
3.6 Control Panel Functions
The control panel provides easy access to various printer functions:
- Indicator Lamp: Shows printer status.
- Function Keys: Includes buttons for general cleaning, print out of paper, and deleting tasks.
- Manual/Automatic Lift: Controls the intelligent lifting and lowering of the print platform.
- Emergency Shut-off: Red button for immediate power cut-off in emergencies.

Figure 10: Overview of the printer's control panel and key features.
3.7 Wider Applications
The DXZ A3 UV Printer is suitable for printing on a variety of materials and products, including but not limited to:
- Phone cases
- Power banks
- Metal cups
- Ceramic cups
- U disks
- Pens
- Acrylic
- Golf balls

Figure 11: Examples of wider applications for the DXZ A3 UV Printer.
4. Maintenance
4.1 Ink System Maintenance
- Automatic Cleaning Function: The printer features an automatic cleaning function to prevent printhead clogging and maintain optimal performance. Utilize this function regularly as instructed by the software.
- Ink Purification System: An integrated ink purification system helps ensure the quality and consistency of the ink, reducing issues related to pigment clumping.
4.2 Water Cooling System
The printer is equipped with a water cooling system that effectively dissipates heat generated during operation. This helps prevent performance degradation and ensures the machine's ability to operate continuously for extended periods.

Figure 12: The water cooling system helps maintain printer performance.
4.3 General Cleaning
Regularly clean the printer's exterior and print platform to prevent dust and debris buildup. Use a soft, lint-free cloth. Avoid using harsh chemicals that could damage the printer's surfaces.
5. Troubleshooting
If you encounter any issues with your DXZ A3 UV Printer, please refer to the troubleshooting section in the software manual or contact our professional after-sales service team for assistance. Common issues may include print quality problems, ink flow irregularities, or mechanical malfunctions.
6. Specifications
| Parameter | Value |
|---|---|
| Model | UV3250 (A3 L805 UV Printer) |
| Print Head | L805 (6-color) |
| Printing Size | 12.59" x 19.68" (A3) |
| Printing Accuracy | 2880 x 1440 dpi |
| Print Speed | A4 size 6 minutes |
| Printing Height | Up to 5.90 inches |
| Ink Consumption | 5ml/m² |
| Color Configuration | CMYK+WV (Cyan, Magenta, Yellow, Black + White, Varnish) |
| Method of Ink Supply | CISS (Continuous Ink Supply System) |
| Product Dimensions | 83"D x 63"W x 52"H (Printer dimensions: 35.8" x 27.3" x 23.2") |
| Item Weight | 151 pounds |
| Connectivity Technology | USB |

Figure 13: Detailed printer parameters and dimensions.
7. Warranty and Support
7.1 Warranty Information
DXZ offers a comprehensive warranty for your A3 UV Printer:
- 2-Year Warranty: Covers non-consumable parts of the printer.
- 6-Month Warranty: Covers the print head (up to 1 printhead).
Additionally, with your printer purchase, you receive a two-year supply of ink (5 bottles of 500ml each). A new set can be claimed every two months, with only shipping costs to be covered.
7.2 Technical Support
Our dedicated technical support team is available 24 hours a day to assist you with any installation or printing-related issues. We are committed to providing timely and effective help for all product concerns.
Contact Information:
- Phone: +86 1587-472-8347
- Email: printmasters1@outlook.com

Figure 14: DXZ PrintMasters after-sales support contact details.