Introduction
This instruction manual provides detailed guidance for the installation, operation, and maintenance of your BQMAX Porcelain Steel Heat Plate and Burner Kit. This kit is designed to replace worn or damaged components in compatible Kenmore 3-burner gas grills, restoring optimal performance and extending the life of your grill. Please read these instructions thoroughly before proceeding with installation or use.
Compatibility
This BQMAX replacement kit is compatible with various Kenmore grill models. Please verify your grill's model number to ensure proper fitment.
Compatible Kenmore 3 Burner Grill Models:
- PG-4030400L
- PG-4030400LD
- PG-A4030400LD
- 146.16132110
- 146.16133110
- 146.23674310
- 146.23673310
- 146.23678310
- 146.29162310
- 146.23675310
- 146.23679310
- 146.29163310
- 146.33586410
- 640-05057345-0
Also compatible with certain 2, 4, 5, and 6 Burner Kenmore and Permasteel Grills:
- Kenmore 2 Burner Grill Model: 146.10038510
- Kenmore 4 Burner Grill Models: 146.23676310, 146.34611410, 146.34611411, 146.34461410, 146.46372610, 146.46366610, 146.46365610, 146.05349710, 146.10016510, 146.10017510, 146.16197211, 146.16142210, 146.16197210, 146.16198210, 146.16198211, 146.16222010, 146.23770310, 146.33577410, PG-40409SOLB, 640-06446338-3, 640-03982839-7
- Kenmore 5 Burner Grill Models: 146.23770310, 146.23680310, 146.47469610, 146.30213510, 146.47468610, 640-05057375-7
- Kenmore 6 Burner Grill Models: 146.23681310, 146.47223610, 146.23766310
- Permasteel Grill Models: PG-40401SOL, PG-40407SOLB, PG-40407SOLF, PG-40522SOLB, PG-40612SOL, PG-40522SOLA, PG-40611SOL
Package Contents
Your BQMAX Porcelain Steel Heat Plate and Burner Kit (3-Pack) includes the following components:
- 3 x Porcelain Steel Heat Plates
- 3 x Stainless Steel Burners
- 2 x Adjustable Stainless Steel Crossover Tubes
- Associated hardware (e.g., pins for crossover tubes)
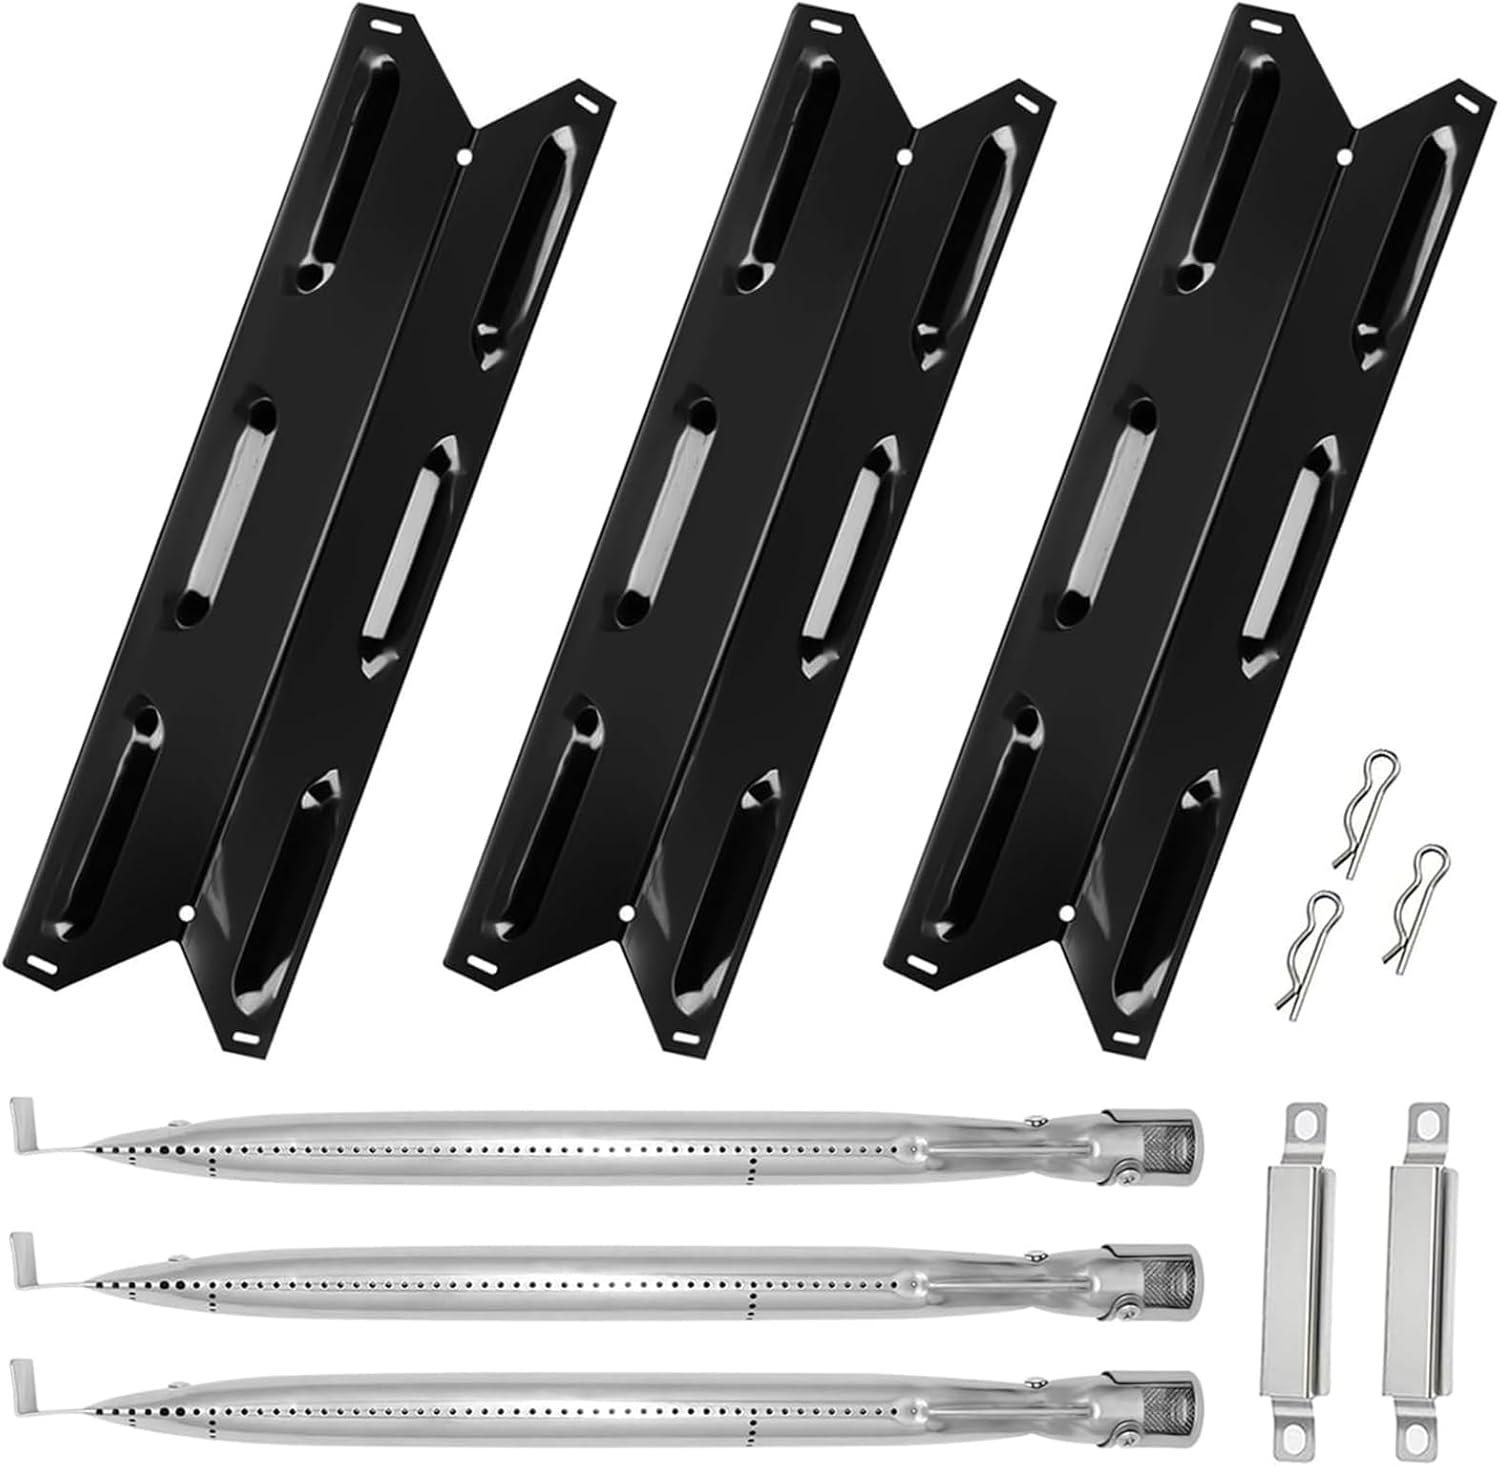
Image: All components included in the BQMAX Porcelain Steel Heat Plate and Burner Kit. This includes three heat plates, three burners, and two adjustable crossover tubes, along with small pins for assembly.
Specifications
| Component | Dimension | Material |
|---|---|---|
| Burner | 14 3/4" x 1" | Stainless Steel |
| Heat Plate | 14 15/16" x 3 13/16" | Porcelain Steel |
| Crossover Tube | Adjustable (extends from 5" to 9") | Stainless Steel |

Image: Detailed dimensions of the heat plate (14 15/16" x 3 13/16") and burner (14 3/4" long).
Setup and Installation
Before beginning installation, ensure your grill is completely cool and disconnected from its fuel source. It is recommended to wear protective gloves.
- Remove Old Components: Open the grill lid and carefully remove the cooking grates and any existing heat plates. Then, detach the old burners and crossover tubes. Note their orientation for easier reassembly.
- Clean Grill Interior: While the grill is disassembled, take the opportunity to clean out any grease, debris, or rust from the firebox. This will improve performance and safety.
- Install New Burners: Carefully place the new stainless steel burners into their designated positions. Ensure the gas inlet end of each burner properly aligns with the gas valve orifices.
- Connect Crossover Tubes: Attach the adjustable crossover tubes between the burners. These tubes help distribute flame evenly. Adjust their length as needed to fit securely and use the provided pins to fasten them.
- Place Heat Plates: Position the new porcelain steel heat plates over the burners. Ensure they sit securely and cover the burners adequately to distribute heat and protect them from drippings.

Image: A view of the heat plate and burner installed inside a grill, demonstrating proper placement.

Image: A side-by-side comparison showing a heavily corroded old heat plate next to a new, clean replacement heat plate, highlighting the improvement after replacement.
Operating Your Grill with New Parts
After installation, perform a leak test on all gas connections before lighting the grill. Refer to your grill's original instruction manual for specific lighting procedures.
- Initial Burn-Off: Before cooking, preheat the grill on high for 10-15 minutes to burn off any manufacturing residues.
- Even Heat Distribution: The new heat plates and burners are designed to provide consistent heat across the cooking surface. Monitor your food closely during initial uses to familiarize yourself with the grill's renewed performance.
- Flame Appearance: Observe the flames. They should be primarily blue with yellow tips. Irregular or excessively yellow flames may indicate an issue with gas flow or burner alignment.
Maintenance
Regular maintenance will prolong the life of your replacement parts and ensure safe grilling.
- Cleaning Heat Plates: After each use, once the grill has cooled, scrape off any food debris or grease from the heat plates. Periodically, remove them and wash with warm, soapy water. Ensure they are completely dry before reinstalling.
- Cleaning Burners: Use a soft brush (not wire) to gently clean the burner ports to prevent clogging. Ensure all ports are clear for even flame distribution. Do not use abrasive cleaners on stainless steel.
- Inspect Crossover Tubes: Check crossover tubes for any blockages or corrosion during cleaning.
- Storage: If storing the grill for an extended period, ensure all components are clean and dry. Consider covering the grill to protect it from elements.

Image: A close-up view highlighting the robust construction of the porcelain steel heat plate, designed for durability.

Image: A detailed shot emphasizing the quality materials used in the heat plate's construction.

Image: A close-up of the burner's construction, showcasing the quality of the stainless steel material.
Troubleshooting
| Problem | Possible Cause | Solution |
|---|---|---|
| Uneven heating | Clogged burner ports, improperly seated heat plates, or gas flow issues. | Clean burner ports. Ensure heat plates are correctly positioned. Check gas connections and regulator. |
| Weak or yellow flames | Clogged burner ports, spider webs in burner tubes, or low gas pressure. | Clean burner ports and inside of burner tubes. Ensure gas tank is not low and regulator is functioning correctly. |
| Burner not lighting | No gas flow, igniter issue, or burner not properly aligned with gas orifice. | Check gas supply. Verify igniter spark. Realign burner with gas orifice. |
Warranty and Support
BQMAX is committed to providing quality products. For any questions regarding installation, compatibility, or product performance, please contact BQMAX customer support. Refer to your purchase documentation for specific warranty details.
You can visit the BQMAX Store for more information: BQMAX Store on Amazon.


