1. Introduction
Thank you for purchasing the Zenwire A10 Mini Portable Projector. This device is designed to provide a versatile and convenient projection experience, allowing you to display content from various sources, including smartphones, tablets, and computers. Please read this manual carefully before using the projector to ensure proper operation and to maximize its lifespan.
2. Important Safety Instructions
- Do not look directly into the projector lens when the lamp is on.
- Ensure proper ventilation around the projector to prevent overheating. Do not block ventilation openings.
- Use only the power adapter supplied with the projector.
- Keep the projector away from water, moisture, and flammable materials.
- Do not attempt to disassemble or repair the projector yourself. Contact qualified service personnel for assistance.
- Place the projector on a stable, level surface.
- Unplug the projector during lightning storms or when unused for long periods.
3. Package Contents
Please check the package contents upon unboxing. If any items are missing or damaged, contact your retailer.
- Zenwire A10 Mini Portable Projector
- Remote Control
- Power Adapter
- User Manual
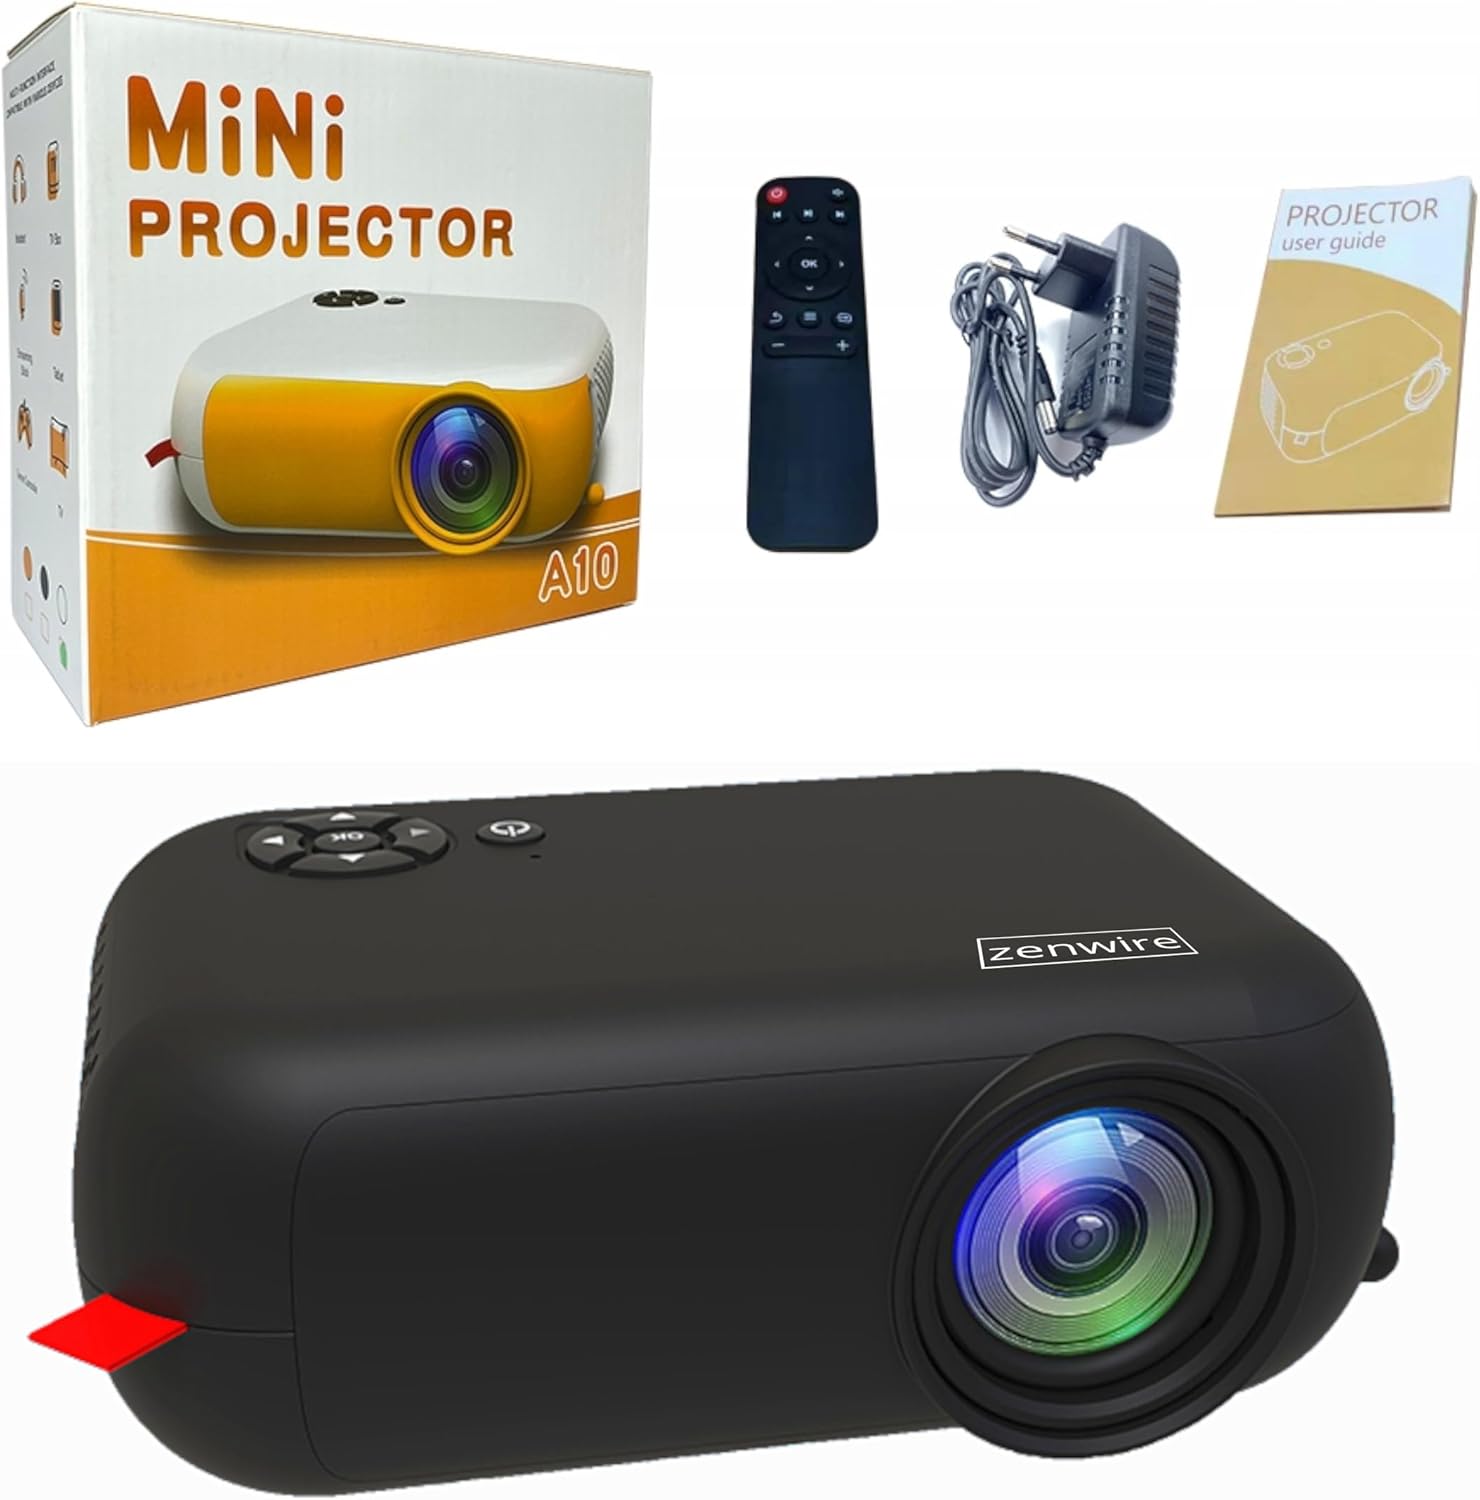
Image: Contents of the Zenwire A10 Mini Projector package, including the projector, remote control, power adapter, and user manual.
4. Product Overview
4.1 Projector Dimensions and Design
The Zenwire A10 is designed for portability, featuring a compact and lightweight form factor. Its dimensions are approximately 14cm x 10cm x 5.5cm, making it easy to carry and set up in various locations.

Image: The Zenwire A10 Mini Projector held in a hand, illustrating its compact size and portability.
4.2 Ports and Controls
The projector features a range of input and output ports for versatile connectivity, along with intuitive controls.

Image: Rear panel of the Zenwire A10 Mini Projector, showing the 5V-IN DC power input, IR receiver, USB port, 3.5mm audio jack, HDMI port, and SD card slot.
- 5V-IN DC: Power input for the projector.
- IR: Infrared receiver for the remote control.
- USB: Connect USB storage devices for media playback.
- Headphone Jack (3.5mm): Connect external speakers or headphones.
- HDMI: Connect devices such as laptops, gaming consoles, or streaming sticks.
- SD: Insert Micro SD cards for media playback.
- Focus Wheel: Adjust image sharpness (located on the side).
- Control Panel: Buttons on top for navigation and selection.
5. Setup
5.1 Power Connection
- Connect the supplied power adapter to the 5V-IN DC port on the projector.
- Plug the power adapter into a wall outlet.
- Press the power button on the projector or remote control to turn it on.
5.2 Placement and Focus Adjustment
- Place the projector on a stable surface or mount it according to your preference. Ensure the projector lens is facing the projection surface (wall or screen).
- Adjust the distance between the projector and the screen to achieve your desired image size. The projector supports screen sizes up to 100 inches.
- Rotate the focus wheel (typically located near the lens) until the projected image appears clear and sharp.

Image: Diagram illustrating the Zenwire A10 Mini Projector's capability to project various screen sizes, from 13 inches up to 100 inches, depending on the projection distance.
6. Operating the Projector
6.1 Wireless Connection (Miracast & Airplay)
The Zenwire A10 supports wireless screen mirroring via 2.4/5GHz WiFi, compatible with Android (Miracast) and iOS (Airplay) devices.
- Ensure your projector and mobile device are connected to the same Wi-Fi network.
- On the projector's main menu, select the 'Screen Mirroring' or 'Wireless Display' option.
- For Android: On your Android phone/tablet, enable 'Wireless Display', 'Screen Mirroring', 'Smart View', or similar function (names may vary by device). Select the projector from the list of available devices.
- For iOS: On your iPhone/iPad, open Control Center and tap 'Screen Mirroring'. Select the projector from the list of available devices.
- The content from your mobile device should now be mirrored on the projector screen.
6.2 Wired Connections
The projector offers multiple wired input options for various devices.

Image: The Zenwire A10 Mini Projector connected to various devices such as smartphones, tablets, laptops, desktop computers, gaming consoles, and media players, highlighting its versatile connectivity.
- HDMI: Connect a laptop, PC, gaming console (e.g., Xbox, PlayStation), or streaming device (e.g., Amazon Fire TV Stick, Google Chromecast) using an HDMI cable. Select the HDMI input source on the projector.
- USB: Insert a USB flash drive or external hard drive into the USB port. The projector's media player will allow you to browse and play supported video, audio, and image files.
- Micro SD: Insert a Micro SD card into the SD card slot. Similar to USB, you can access media files through the projector's interface.
- Audio Out (3.5mm Jack): Connect external speakers or headphones to enhance the audio experience.
6.3 Menu Navigation
Use the remote control or the buttons on the projector to navigate through the on-screen menu. Select input sources, adjust picture settings (brightness, contrast, color), sound settings, and other system preferences.
7. Maintenance
- Lens Cleaning: Use a soft, lint-free cloth specifically designed for optical lenses to gently wipe the projector lens. Avoid using abrasive cleaners or excessive force.
- Dust Removal: Regularly clean the projector's exterior with a soft, dry cloth. Use a small brush or compressed air to clear dust from the ventilation openings to ensure proper airflow.
- Storage: When not in use, store the projector in a cool, dry place, away from direct sunlight and extreme temperatures. Use the original packaging or a protective case to prevent dust accumulation and damage.
8. Troubleshooting
If you encounter issues with your Zenwire A10 projector, refer to the following common problems and solutions:
| Problem | Possible Cause | Solution |
|---|---|---|
| No image on screen | Power not connected; Incorrect input source; Device not connected properly. | Check power cable; Select correct input source (HDMI, USB, etc.); Reconnect source device. |
| Image is blurry | Focus not adjusted; Projector too close/far from screen. | Adjust the focus wheel; Adjust projection distance. |
| No sound | Volume too low; Muted; External audio device not connected/selected. | Increase volume; Unmute; Check external speaker connection or select internal speaker. |
| Wireless connection issues | Not on same Wi-Fi network; Device not compatible; Interference. | Ensure both devices are on the same Wi-Fi; Verify device compatibility; Try moving closer to Wi-Fi router. |
9. Specifications
| Feature | Detail |
|---|---|
| Brand | Zenwire |
| Model Number | A10 |
| Product Type | Compact and Portable Projector |
| Native Resolution | 480 x 360p |
| Maximum Display Resolution | 1920 x 1080 (Full HD) |
| Brightness | 1800lm / 60 ANSI |
| Contrast Ratio | 2000:1 |
| Display Type | LED |
| Connectivity Technology | Wi-Fi (2.4/5GHz), HDMI, USB, Micro SD, 3.5mm Audio Jack |
| Wireless Features | Miracast, Airplay |
| Compatible Devices | Smartphones (Android, iOS), Tablets, Laptops, PCs, Gaming Consoles |
| Recommended Uses | Home Cinema |
| Dimensions (Approx.) | 14cm x 10cm x 5.5cm |
10. Warranty and Support
The Zenwire A10 Mini Portable Projector comes with a standard manufacturer's warranty. For specific warranty terms and conditions, please refer to the documentation provided at the time of purchase or contact your retailer. For technical support or service inquiries, please reach out to Zenwire customer service through their official website or the contact information provided with your product.


