1. Introduction
Thank you for choosing BLS LED Puck Lights. This manual provides detailed instructions for the installation, operation, and maintenance of your new wireless, battery-operated puck lights. These lights feature 13 color options, dimmable brightness, remote control, and timer functions, making them versatile for various indoor lighting applications.
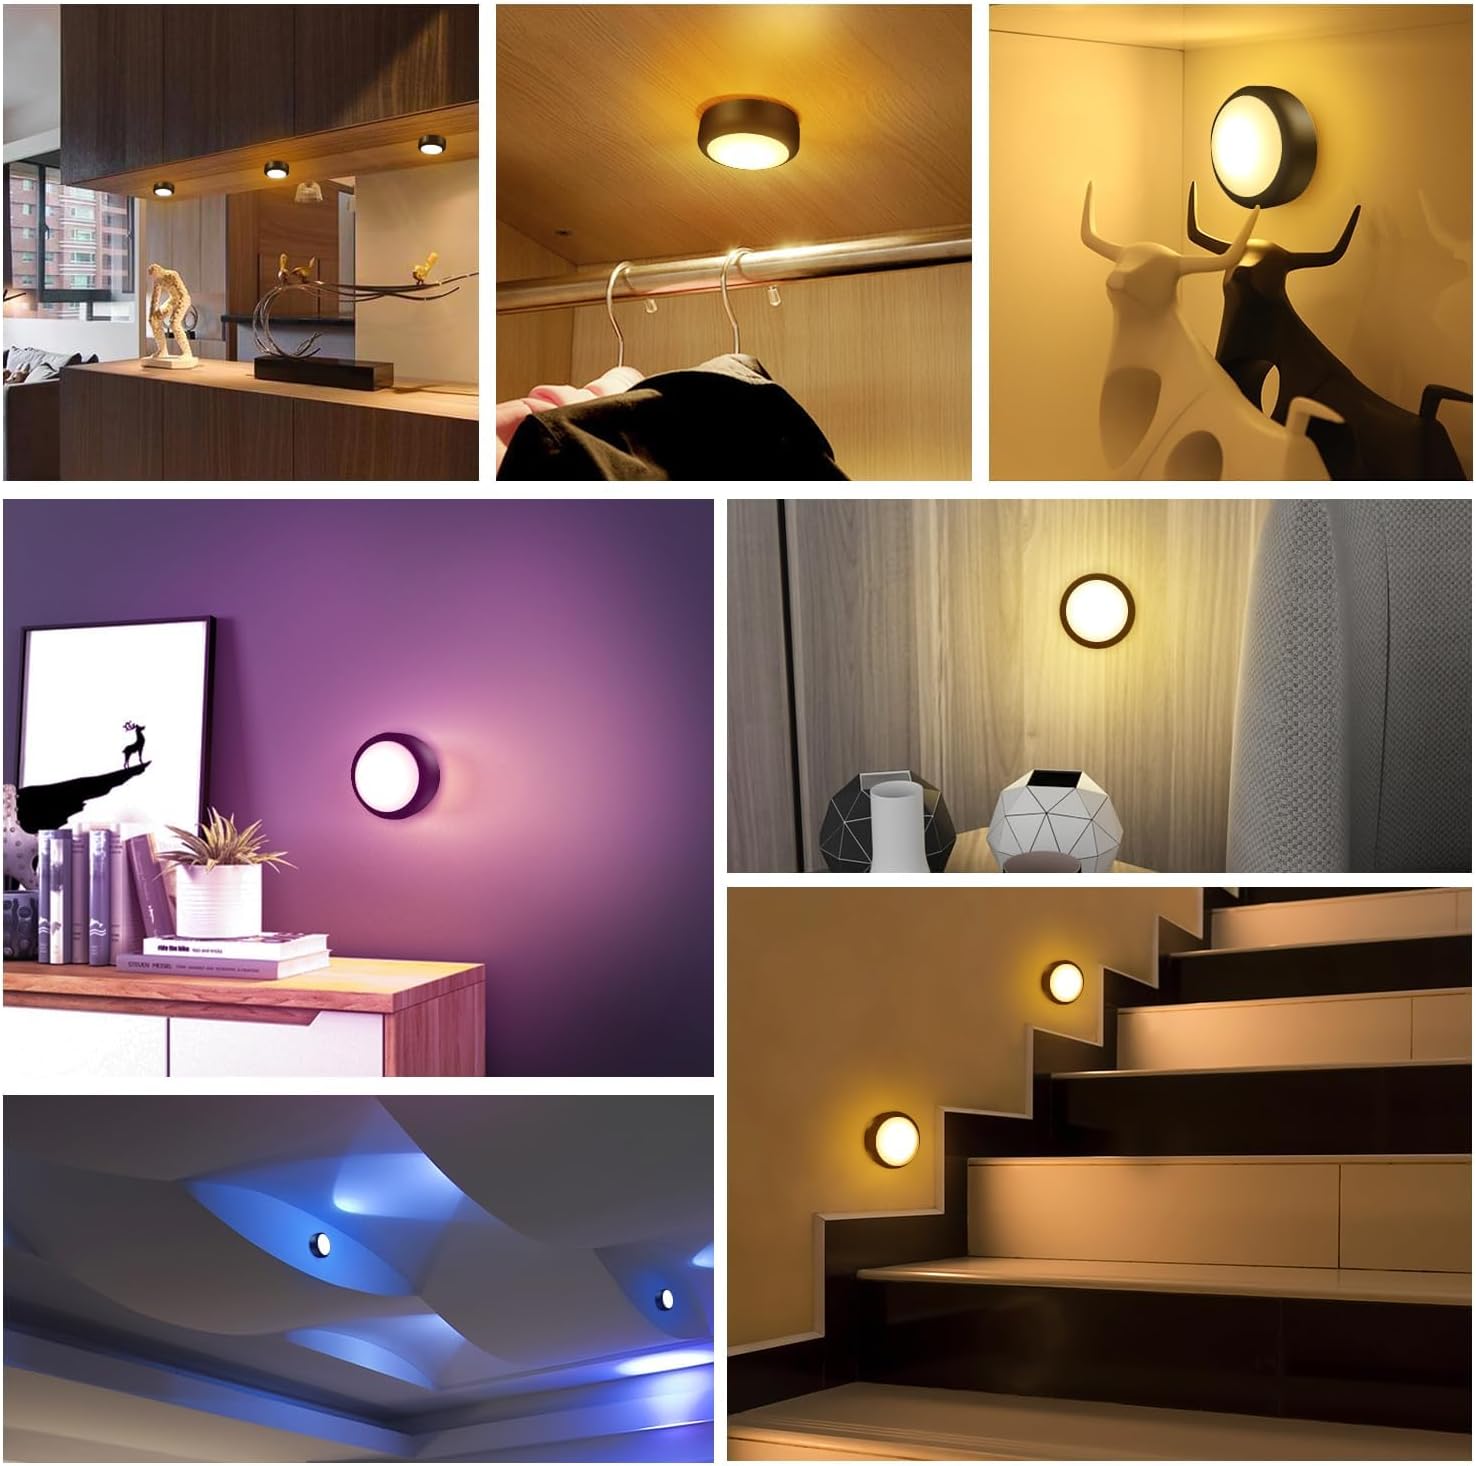
The BLS LED Puck Lights are designed for convenience and flexibility, suitable for areas such as under cabinets, closets, stairs, and display cases. Please read this manual thoroughly before use to ensure proper function and longevity of your product.
2. What's in the Box
Please check the package contents to ensure all items are present:
- 6 x BLS LED Puck Lights
- 2 x Remote Controls (with 2 CR2032 batteries included in each)
- 6 x Adhesive Tapes
- 12 x Screws
- 1 x User Manual (this document)
3. Setup
3.1 Battery Installation (Puck Lights)
- Gently twist the back cover of the puck light counter-clockwise to open the battery compartment.
- Insert 3 AA batteries (not included) into the compartment, ensuring correct polarity (+/-).
- Align the back cover with the puck light and twist clockwise to securely close it.

3.2 Mounting the Puck Lights
The puck lights can be installed using either adhesive tapes or screws.
Option A: Adhesive Tapes
- Clean the surface where you intend to mount the light, ensuring it is dry and free of dust or grease.
- Peel off one side of the protective film from an adhesive tape and firmly attach it to the back of the puck light.
- Peel off the other side of the protective film and press the puck light firmly onto the desired surface for at least 30 seconds.
Option B: Screws
- Twist off the back cover of the puck light.
- Use the provided screws to attach the back cover to the desired mounting surface.
- Once the back cover is securely mounted, align the puck light with the cover and twist clockwise to lock it in place.

4. Operating Instructions
4.1 Power On/Off
- Manual Operation: Press the center of the puck light lens to turn it ON or OFF.
- Remote Control: Press the "ON" or "OFF" button on the remote control. The remote can control all paired puck lights within a 20-foot range.
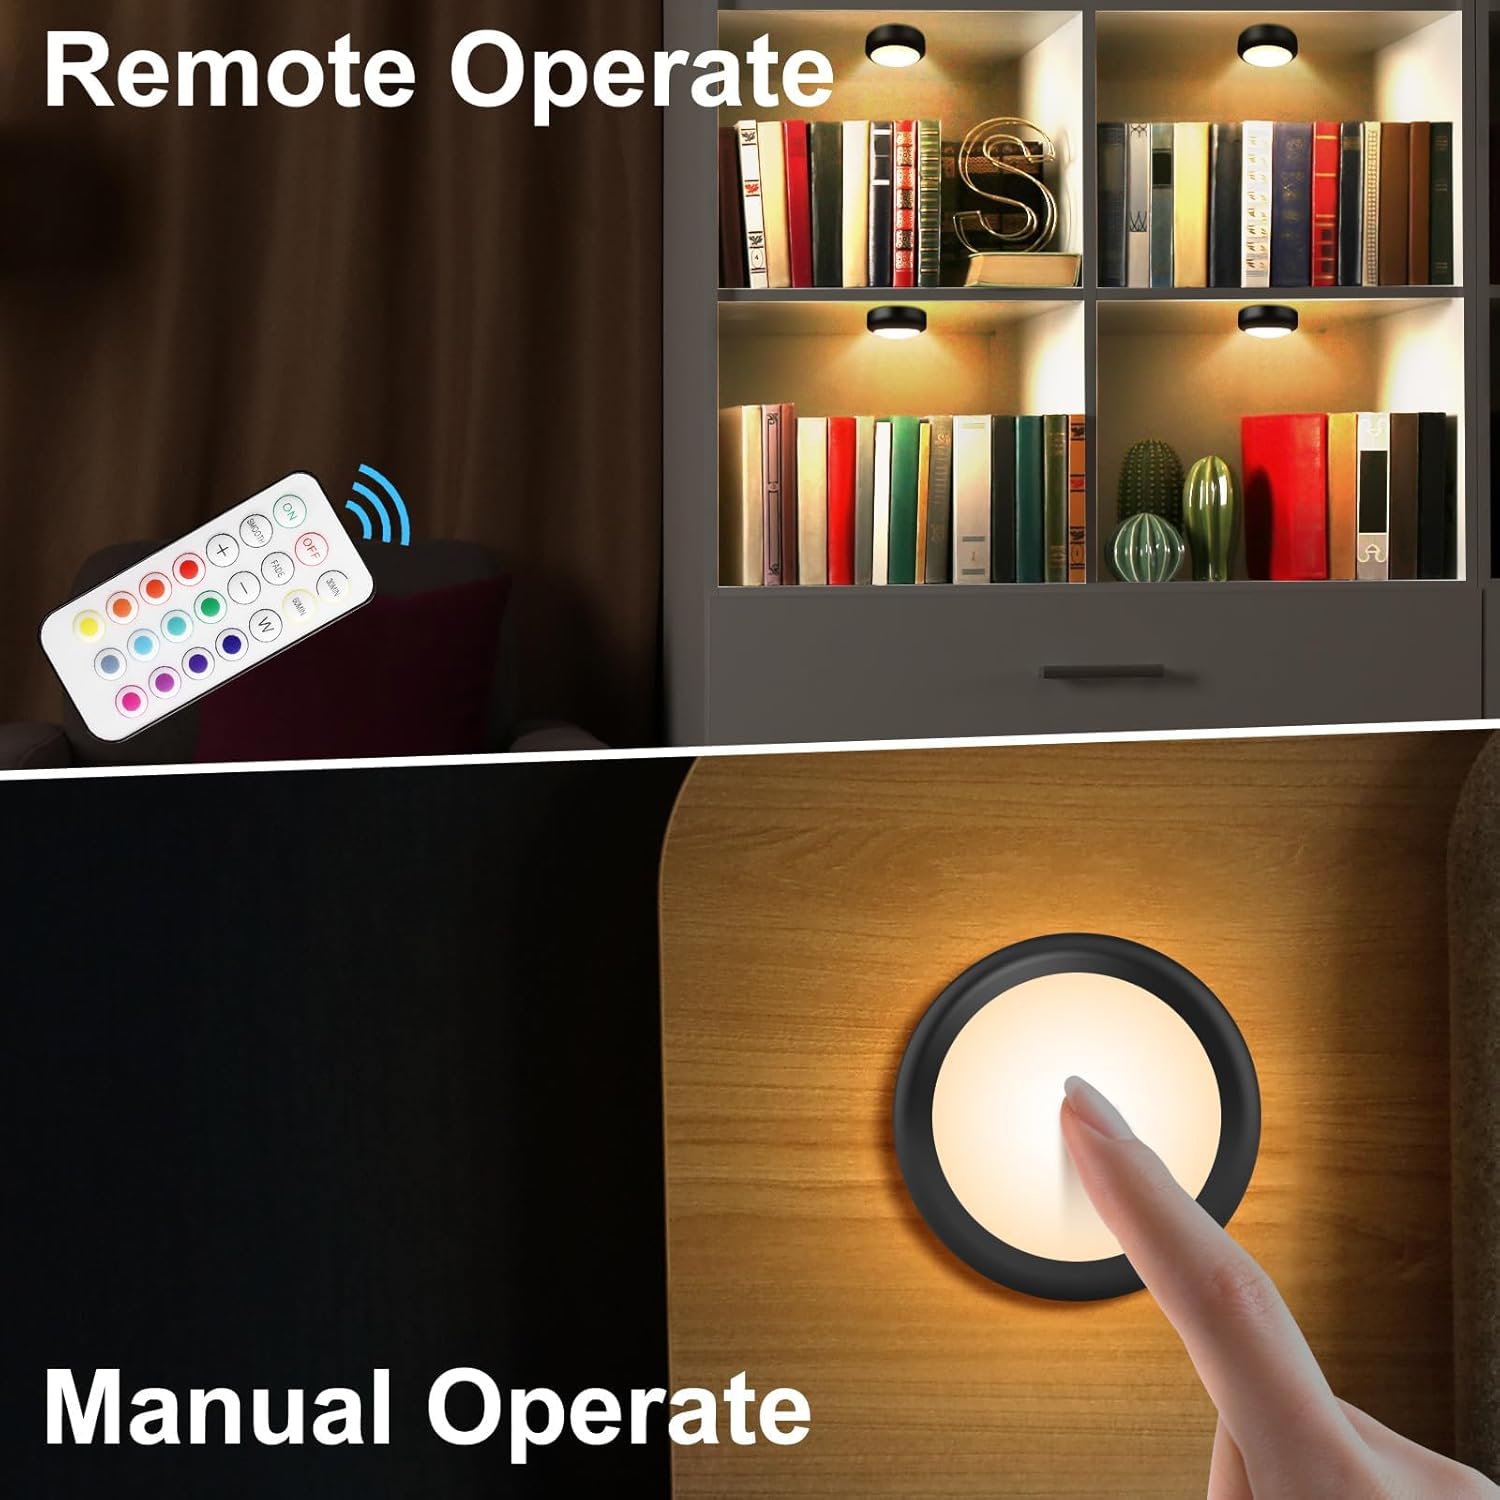
4.2 Remote Control Functions
The remote control provides comprehensive control over the puck lights:

- Power Buttons (ON/OFF): Turns all paired lights on or off.
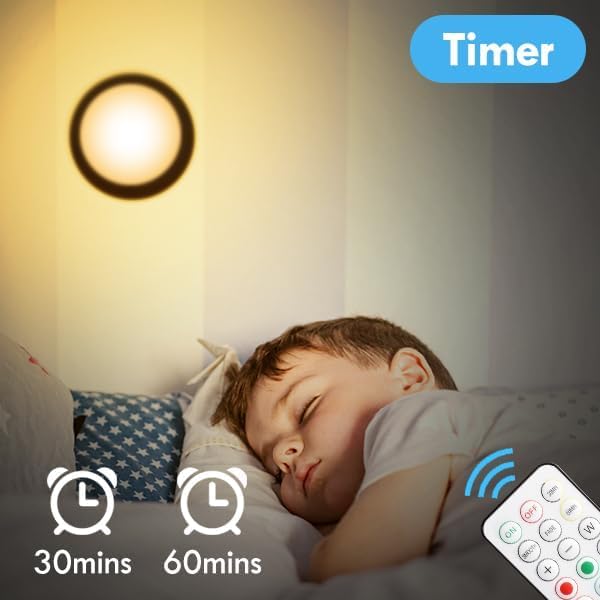
- Timer (30MIN/60MIN): Sets the lights to automatically turn off after 30 or 60 minutes.
- Dimmer (+/-): Adjusts the brightness level. There are 8 levels of brightness.
- Warm White (W): Activates the warm white light mode (3000K).
- 12 Preset Colors: Selects one of the 12 available static colors.
- Color Changing Modes:
- SMOOTH: Cycles through the 12 rainbow colors smoothly.
- FADE: Slowly changes the brightness of the current color.

5. Maintenance
5.1 Battery Replacement
When the lights dim or the remote control becomes unresponsive, it's time to replace the batteries.
- Puck Lights: Replace with 3 new AA batteries per light. Follow the battery installation steps in Section 3.1.
- Remote Control: Replace with 2 new CR2032 batteries. The battery compartment is typically on the back of the remote.
5.2 Cleaning
To clean the puck lights, wipe them gently with a soft, dry cloth. Do not use abrasive cleaners or immerse the lights in water, as they are not waterproof.
6. Troubleshooting
| Problem | Possible Cause | Solution |
|---|---|---|
| Light does not turn on. | Dead or incorrectly installed batteries. | Replace batteries with new AA batteries, ensuring correct polarity. |
| Remote control is not working. | Remote batteries are dead or out of range. | Replace CR2032 batteries in the remote. Ensure you are within 20 feet of the lights. |
| Short battery life. | Frequent use, high brightness settings, or low-quality batteries. | Use high-quality alkaline batteries. Utilize timer functions (30/60 min) to conserve power. Reduce brightness if maximum output is not required. |
| Adhesive tape not holding. | Surface not clean or unsuitable for adhesive. | Ensure surface is clean, dry, and smooth. For rough or porous surfaces, consider using screws for mounting. |
| Lights turn on or change color independently. | Interference from other remote controls or electronic devices. | Ensure no other remote controls are being used nearby. If the issue persists, try resetting the lights by removing and reinserting batteries. |
7. Specifications
- Model Name: T025 (AA-1066)
- Product Dimensions: 3"D x 3"W x 1.2"H
- Item Weight: 5.4 ounces (per puck light)
- Light Source Type: LED
- Brightness: Up to 40 Lumens
- Color Temperature: 3000K (Warm White) + 12 RGB Colors
- Power Source: 3 x AA Batteries (per puck light, not included)
- Control Method: Remote Control, Push Button
- Remote Control Range: Up to 20 feet
- Special Features: Color Changing, Cordless, Remote Control, Dimmable, Timer (30/60 min)
- Material: Acrylonitrile Butadiene Styrene (ABS)
- Indoor/Outdoor Usage: Indoor Use Only
- Water Resistance Level: Not Water Resistant
8. Warranty & Support
BLS provides an 18-month warranty for these LED Puck Lights from the date of purchase. We also offer lifetime technical support.
If you have any questions, concerns, or require assistance with your product, please do not hesitate to contact our customer support team. Refer to the contact information provided with your purchase or visit the official BLS website for support details.
We are committed to ensuring your satisfaction with BLS products.


