1. Introduction
This manual provides detailed instructions for the installation, operation, and maintenance of your Real HD 24 Port 2.5G Web Managed Ethernet Network Switch. This device is designed to provide high-speed network connectivity with advanced management features for various environments.
The switch features 24 x 2.5G RJ45 ports and 2 x 10G SFP+ ports, offering a total switching capacity of 160Gbps. Its fanless design ensures quiet operation and efficient heat dissipation, suitable for temperatures from -20 to 50℃.
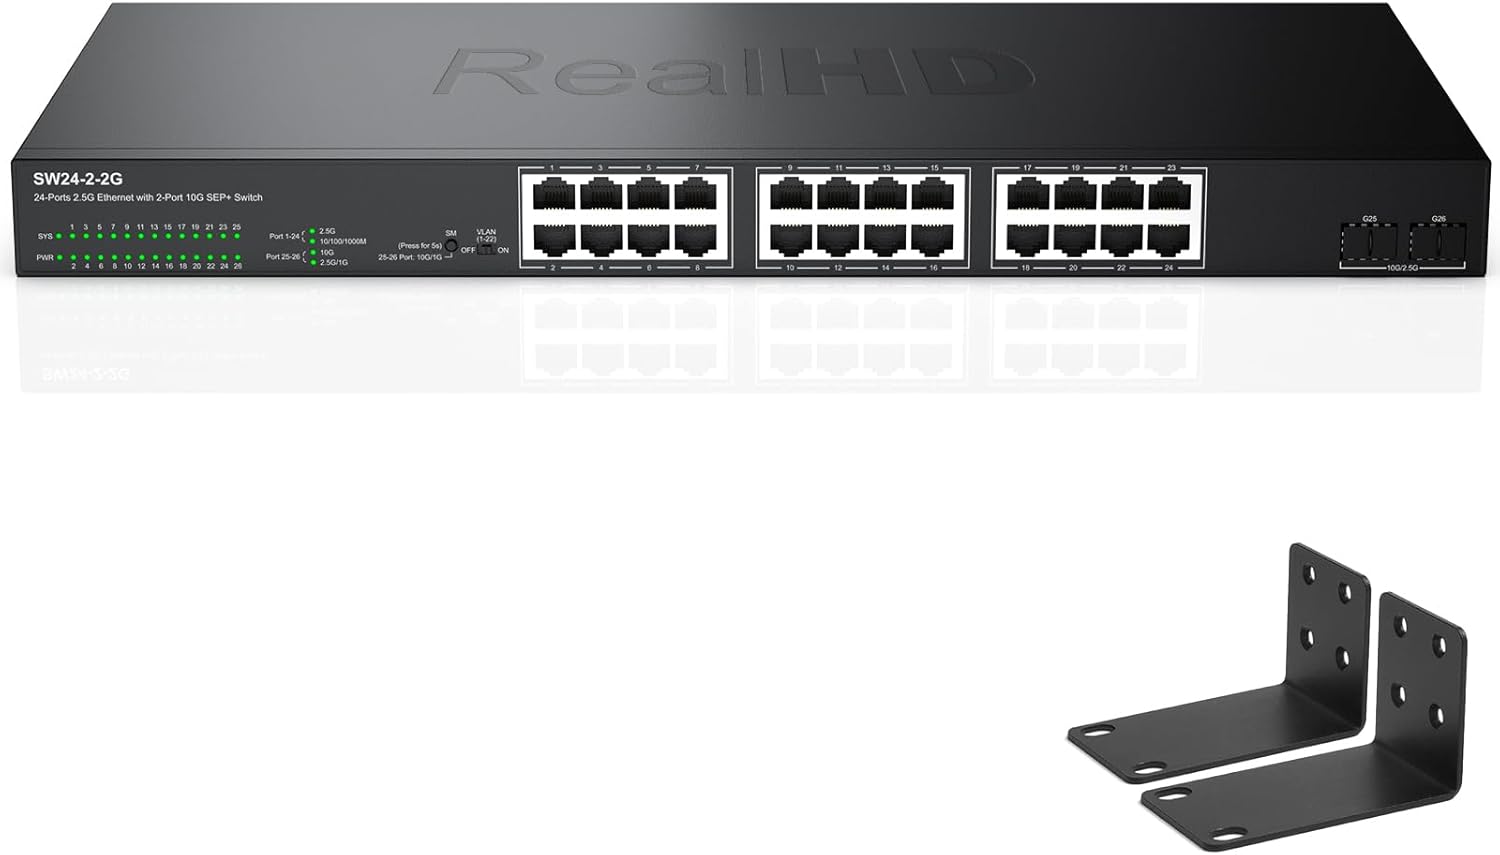
Figure 1: Front view of the Real HD 24 Port 2.5G Web Managed Ethernet Network Switch.
2. Setup and Installation
2.1 Package Contents
Verify that your package contains the following items:
- Real HD 24 Port 2.5G Web Managed Ethernet Network Switch
- Power Adapter
- Rack Mount Brackets (2)
- Screws for Rack Mount
- User Manual (this document)
2.2 Physical Installation
The switch supports both desktop placement and 1U rack mounting.
2.2.1 Desktop Placement
Place the switch on a flat, stable surface. Ensure adequate ventilation around the device to prevent overheating.
2.2.2 Rack Mounting
To install the switch in a standard 19-inch equipment rack:
- Attach the two rack mount brackets to the sides of the switch using the provided screws.
- Secure the switch into the rack using appropriate rack screws (not included).
Figure 2: Rack mounting the switch.
2.3 Connecting to Power
Connect the provided power adapter to the DC input port on the switch and then plug the adapter into a standard AC power outlet. The Power LED indicator will illuminate when the switch receives power.
2.4 Network Connections
Connect your network devices (computers, servers, routers, access points, NAS devices) to the RJ45 ports using Ethernet cables. For optimal 2.5G performance, use Cat6, Cat6a, or Cat7 Ethernet cables. The switch is backward compatible with 10/100/1000Mbps devices.
The two 10G SFP+ ports can be used for high-speed uplinks to other switches or servers, requiring compatible SFP+ modules and fiber optic cables (not included).

Figure 3: Connecting devices to the switch for 2.5G network speeds.
3. Operating the Switch
3.1 LED Indicators
The front panel of the switch features LED indicators that provide status information:
- SYS LED: Indicates system status.
- PWR LED: Indicates power status.
- Port Link/Act LEDs: Indicate link status and activity for each RJ45 port. Green for 2.5G link/activity, Amber for 10/100/1000Mbps link/activity.
- SFP+ Link/Act LEDs: Indicate link status and activity for SFP+ ports.
3.2 Web Management Interface
This switch is web-managed, allowing configuration and monitoring through a web browser. To access the management interface:
- Ensure your computer is connected to the switch via an Ethernet cable.
- Open a web browser (e.g., Chrome, Firefox, Edge).
- Enter the default IP address of the switch (refer to the product label or quick start guide for the default IP).
- Enter the default username and password when prompted.
Once logged in, you can configure various network settings, including:
- VLANs: For network segmentation and traffic isolation.
- QoS (Quality of Service): To prioritize network traffic for applications like VoIP and video streaming.
- Security: MAC address table management and port security.
- Multicast: IGMP snooping for efficient video stream delivery.
- Diagnosis: Tools for network troubleshooting.

Figure 4: Overview of web management interface features.
4. Maintenance
The Real HD 24 Port 2.5G Web Managed Ethernet Network Switch is designed for low maintenance. Its fanless metal housing contributes to quiet operation and efficient heat dissipation, allowing it to function reliably in a wide temperature range.
- Cleaning: Periodically clean the exterior of the switch with a soft, dry cloth. Do not use liquid or aerosol cleaners.
- Ventilation: Ensure that the ventilation openings on the sides of the switch are not obstructed to maintain proper airflow.
- Firmware Updates: Check the manufacturer's website periodically for firmware updates to ensure optimal performance and security.
5. Troubleshooting
If you encounter issues with your switch, refer to the following common troubleshooting steps:
- No Power: Verify that the power adapter is securely connected to both the switch and a working power outlet. Check the PWR LED.
- No Link/Connectivity:
- Ensure Ethernet cables are securely connected to both the switch port and the network device.
- Check the Link/Act LED for the specific port. If it's off, try a different cable or port.
- Verify that the connected device is powered on and functioning correctly.
- Slow Network Speed:
- Ensure you are using Cat6, Cat6a, or Cat7 Ethernet cables for 2.5G connections.
- Confirm that all connected devices (network cards, routers, NAS) support 2.5G Ethernet for optimal performance. The network speed will be determined by the slowest device in the chain.
- Check for excessive network traffic or bottlenecks on other devices.
- Cannot Access Web Management:
- Verify your computer's IP address is in the same subnet as the switch's default IP address.
- Ensure there are no IP address conflicts on your network.
- Try clearing your browser's cache or using a different browser.
- If the default IP address has been changed and forgotten, a factory reset may be necessary (refer to the quick start guide for reset procedures).
6. Specifications
| Feature | Specification |
|---|---|
| Model Number | 24 port 2.5G ethernet switch without PoE |
| Brand | Real HD |
| Number of Ports | 24 x 2.5G RJ45, 2 x 10G SFP+ |
| Data Transfer Rate | 2500 Megabits Per Second (2.5G) |
| Switching Capacity | 160 Gbps |
| Interface Type | RJ45, SFP+ |
| Case Material | Metal |
| Fanless Design | Yes |
| Operating Temperature | -20 to 50℃ |
| Product Dimensions | 17.3 x 8 x 1.8 inches (43.9 x 20.3 x 4.6 cm) |
| Item Weight | 7.09 pounds (3.22 Kilograms) |
| Compatible Devices | Laptop, Router, WiFi 6 AP, Gaming PC, NAS |

Figure 5: Product dimensions and port layout.
7. Warranty and Support
For warranty information and technical support, please contact the Real HD Store directly through your purchase platform or their official website. Keep your purchase receipt as proof of purchase for warranty claims.


