Introduction
Thank you for choosing the ODK L-Shaped Desk. This manual provides detailed instructions for the assembly, operation, and maintenance of your new desk. Designed for home office use, this desk features an L-shaped configuration, integrated LED lighting, and convenient power outlets with USB charging ports. Please read this manual thoroughly before beginning assembly or operation to ensure proper use and longevity of your product.
Safety Information
WARNING: Failure to follow these safety instructions may result in injury or damage to the product.
- Always assemble the desk with at least two people to prevent injury and ensure stability.
- Keep all electrical components, including the power strip and LED lights, away from water or damp environments.
- Do not place excessively heavy objects on the edges or unsupported sections of the desk to prevent tipping.
- Ensure all screws and fasteners are securely tightened during assembly and periodically check for looseness.
- Do not overload the integrated power outlets or USB ports. Refer to the specifications for maximum ratings.
- Keep small parts and packaging materials away from children to avoid choking hazards.
Package Contents
Before assembly, verify that all components listed below are present and undamaged. If any parts are missing or damaged, please contact customer support.
- Desk Panels (L-shaped desktop, monitor stand, drawer unit panels)
- Metal Frame Components
- Hardware Kit (screws, bolts, nuts, Allen wrench, screwdriver)
- LED Light Strip with Controller
- Integrated Power Strip with 2 AC Outlets and 2 USB Ports
- Fabric Drawers (4 units)
- Cable Management Accessories
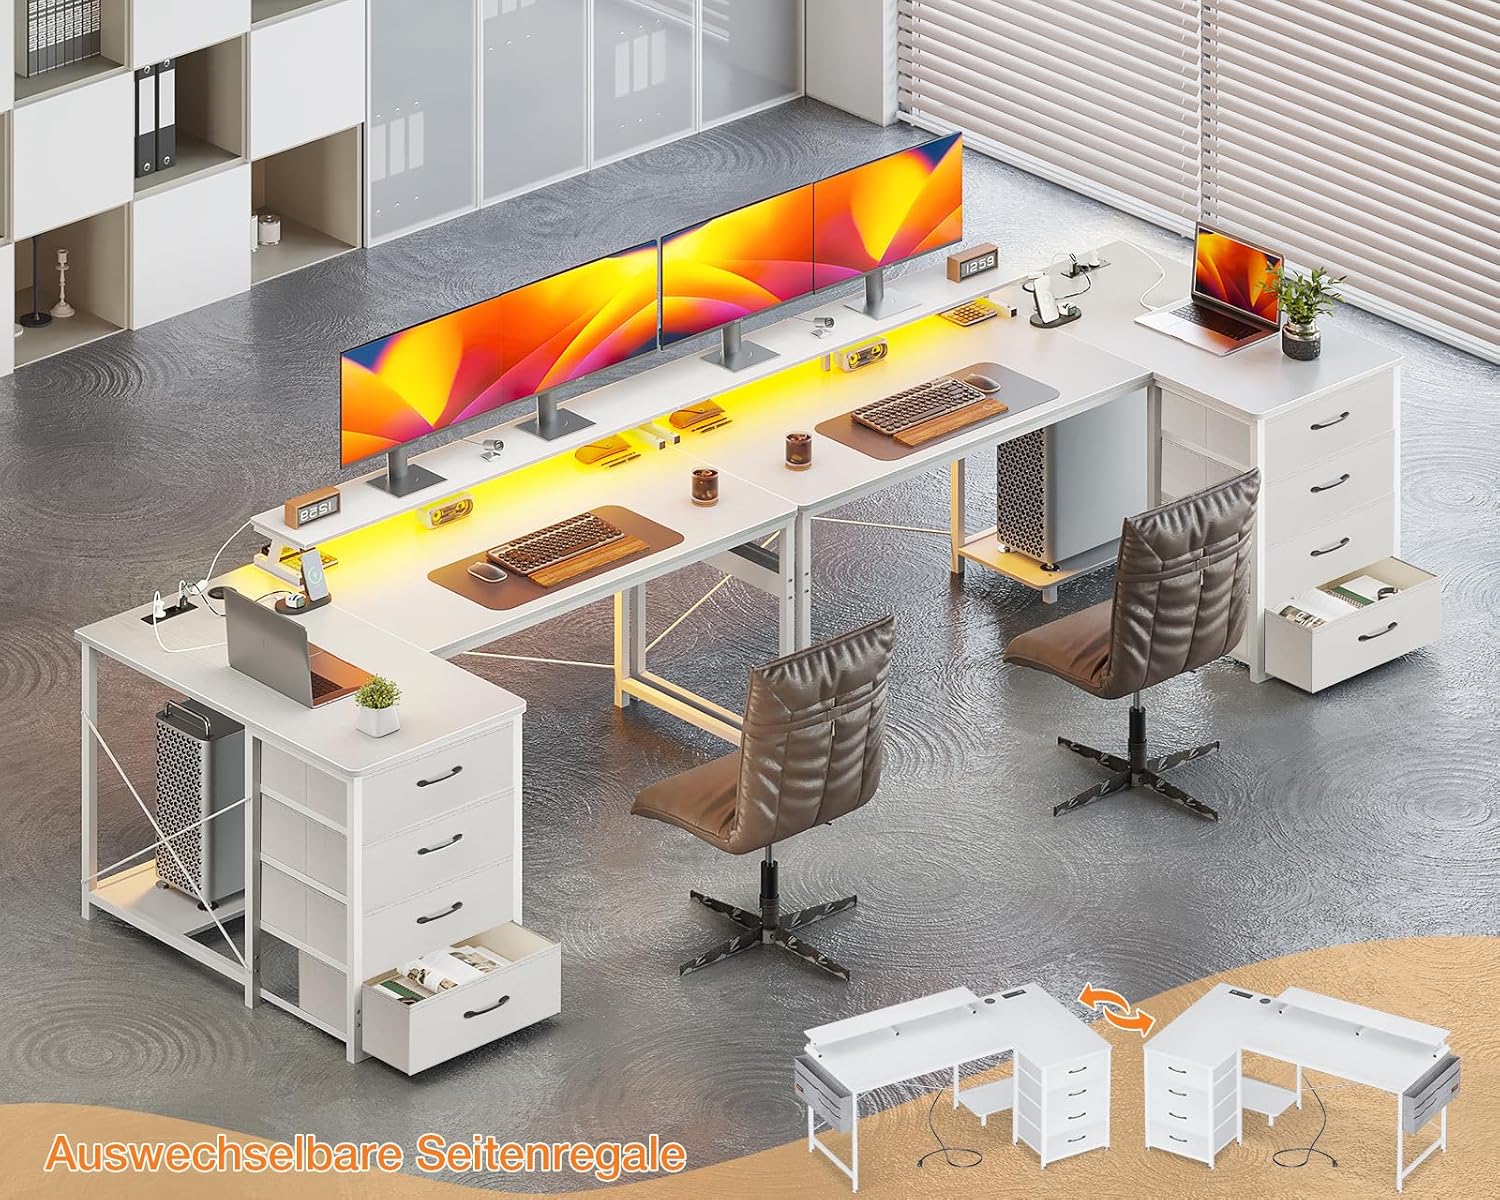
Image: Overview of the ODK L-Shaped Desk setup, showing the main desk sections, monitor stands, and integrated drawer units. Note the reversible design of the side shelves.
Setup and Assembly
Assembly is required for this product. Please follow the numbered steps in the included assembly guide. It is highly recommended to have two people for assembly.
- Prepare Workspace: Clear a spacious area for assembly. Lay down a soft cloth or cardboard to protect desk components from scratches.
- Identify Parts: Unpack all components and identify them using the provided parts list and diagrams. All parts are typically labeled with letters or numbers.
- Assemble Frame: Begin by assembling the metal frame structure according to the instructions. Ensure all connections are secure but do not fully tighten screws until the entire frame is assembled.
- Attach Desktop Panels: Carefully place and secure the desktop panels onto the assembled frame. Ensure proper alignment before tightening all screws.
- Install Monitor Stand: Attach the elevated monitor stand to the main desktop. This stand provides additional space and ergonomic viewing.
- Assemble Drawer Unit: Construct the drawer unit frame. Insert the fabric drawers into their respective slots. The drawer unit can be placed on either side of the L-shaped desk, offering flexibility in layout.
- Integrate Power Strip: Install the recessed power strip into the designated cutout on the desktop. Connect its power cable.
- Apply LED Lights: Adhere the LED light strip to the underside of the monitor stand or desired location using its adhesive backing. Connect the LED controller.
- Final Tightening: Once all components are in place and aligned, fully tighten all screws and fasteners.

Image: Detailed dimensional diagram of the ODK L-Shaped Desk, showing overall length (160cm), width (80cm), and height (87cm), along with individual section measurements. This diagram also illustrates the reversible L-shape configuration.

Image: Visual comparison demonstrating the flexibility of the drawer unit. It can be integrated under the desk for storage or used as a side cabinet, providing space for a PC tower under the desk.
Operating Instructions
LED Lighting System
The desk is equipped with an integrated LED light strip for ambient lighting. The LED strip is controlled via a wired remote.
- On/Off Button: Press to turn the LED lights on or off.
- Dimming Buttons: Use the '+' and '-' buttons to adjust the brightness level (6 levels available).
- Modes Button: Cycle through various lighting modes and effects (10 modes available).
- Color Button: Select from 10 different static colors.
- Memory Function: The system retains the last used settings when powered off and on.
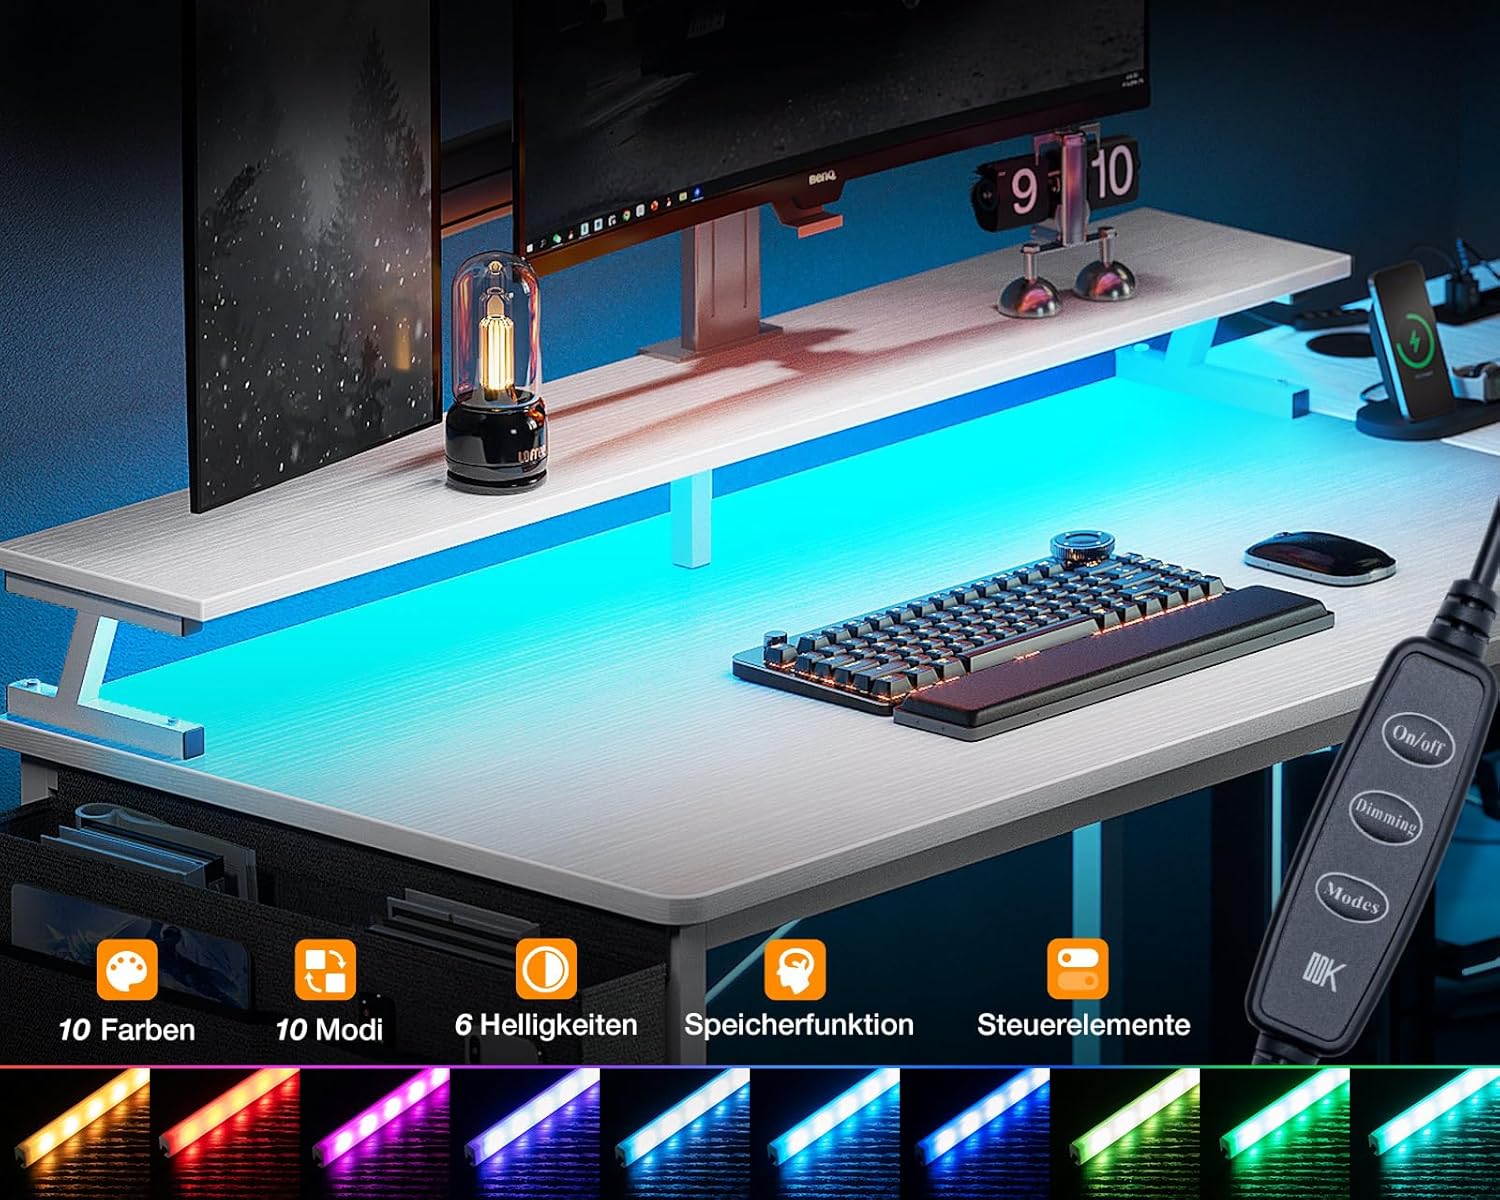
Image: Close-up of the LED light strip and its wired controller, illustrating the available functions: On/Off, Dimming, Modes, and Color selection. The image also shows various color outputs.
Integrated Power Outlets and USB Charging Ports
The desk includes a recessed power strip with two AC outlets and two USB charging ports for convenient access to power for your electronic devices.
- AC Outlets: Provide 220-250V/16A power for standard electronic devices.
- USB Charging Ports: Provide 5V-2A power for charging smartphones, tablets, and other USB-powered devices.
- Power Cable: The integrated power strip comes with a 200cm (approximately 6.5 ft) power cable.
- Usage: Simply plug your devices into the appropriate outlets. Ensure devices do not exceed the maximum power ratings.

Image: Detailed view of the recessed power strip, highlighting its two AC outlets and two USB charging ports. Specifications for voltage, amperage, and cable length are also shown.
Maintenance
Regular maintenance will help prolong the life and appearance of your ODK L-Shaped Desk.
- Cleaning: Wipe the desk surfaces with a soft, damp cloth. Avoid using harsh chemicals or abrasive cleaners, which can damage the finish.
- Dusting: Regularly dust the desk, especially around the LED strip and power outlets, to prevent dust buildup.
- Hardware Check: Periodically check all screws and fasteners to ensure they remain tight. Re-tighten if necessary.
- Electrical Components: Ensure the power strip and LED connections are secure and free from damage. Do not attempt to repair electrical components yourself; contact a qualified technician if issues arise.
- Drawer Care: The fabric drawers can be spot cleaned with a mild detergent and damp cloth. Allow to air dry completely.

Image: Close-up view of the four fabric drawers, demonstrating their capacity for storing daily essentials and office supplies.
Troubleshooting
If you encounter any issues with your ODK L-Shaped Desk, refer to the following common problems and solutions:
- Desk is unstable/wobbly:
- Ensure all assembly screws are fully tightened.
- Check that the desk is placed on a level surface. Adjust leveling feet if present.
- LED lights are not working:
- Verify that the LED strip is properly connected to the power source and controller.
- Check if the power outlet the desk is plugged into is functional.
- Ensure the On/Off button on the controller has been pressed.
- Power outlets/USB ports are not providing power:
- Confirm the desk's main power cable is securely plugged into a working wall outlet.
- Check if the wall outlet itself is functional (test with another device).
- Ensure the power strip is correctly installed and its internal connections are secure.
- Avoid overloading the outlets; disconnect some devices if too many are connected.
- Drawers are difficult to open/close:
- Ensure the fabric drawers are correctly inserted into their slots and not overloaded.
- Check for any obstructions within the drawer unit.
Specifications
| Feature | Detail |
|---|---|
| Brand | ODK |
| Model Number | SNKLFZDE-01 |
| Color | White |
| Product Dimensions (L x W x H) | 160 x 80 x 87 cm (approx. 63 x 31.5 x 34.3 inches) |
| Item Weight | 25 kg (approx. 55 lbs) |
| Top Material Type | Engineered Wood |
| Base Material | Wood (likely referring to engineered wood components) |
| Desk Design | L-Shape Computer Desk |
| Special Features | Built-In USB Outlet, Integrated Monitor Stand, LED Lights |
| AC Outlets | 2 (220-250V/16A) |
| USB Charging Ports | 2 (5V-2A) |
| Power Cable Length | 200 cm |
Warranty and Support
ODK products are manufactured to high-quality standards. For specific warranty information, please refer to the documentation included with your purchase or contact ODK customer support directly. If you require assistance with assembly, parts replacement, or troubleshooting beyond what is covered in this manual, please reach out to the retailer or manufacturer's customer service department.
Please retain your proof of purchase for warranty claims.


