1. Introduction
Thank you for choosing the LE MARQUIER Plancha Original 260 Duo Edition. This manual provides essential information for the safe assembly, operation, and maintenance of your gas plancha. Please read these instructions carefully before use and retain them for future reference.
2. Important Safety Information
Always follow these safety precautions to prevent injury or damage:
- This appliance is for outdoor use only.
- Read all instructions before assembling and using the appliance.
- Keep children and pets away from the plancha during operation.
- Ensure adequate ventilation. Do not use in enclosed spaces.
- Check for gas leaks before each use.
- Use only butane or propane gas.
- Do not store or use gasoline or other flammable vapors and liquids in the vicinity of this or any other appliance.
- Always wear protective gloves when handling hot surfaces.
- Disconnect the gas supply when the plancha is not in use.
3. Package Contents
Verify that all components are present before assembly:
- Enameled cast iron cooking plate (60x40 cm)
- 2 Trumpet burners
- Stainless steel and epoxy painted steel chassis
- Cart with 2 side tables (41x30.5 cm each)
- Epoxy painted steel lid
- 2 Large wheels with hubcaps
- Spice rack
- Integrated gas bottle cover
- Ergonomic, non-slip control knobs
- Mechanical piezo ignition system
- Concealed cooking juice collector
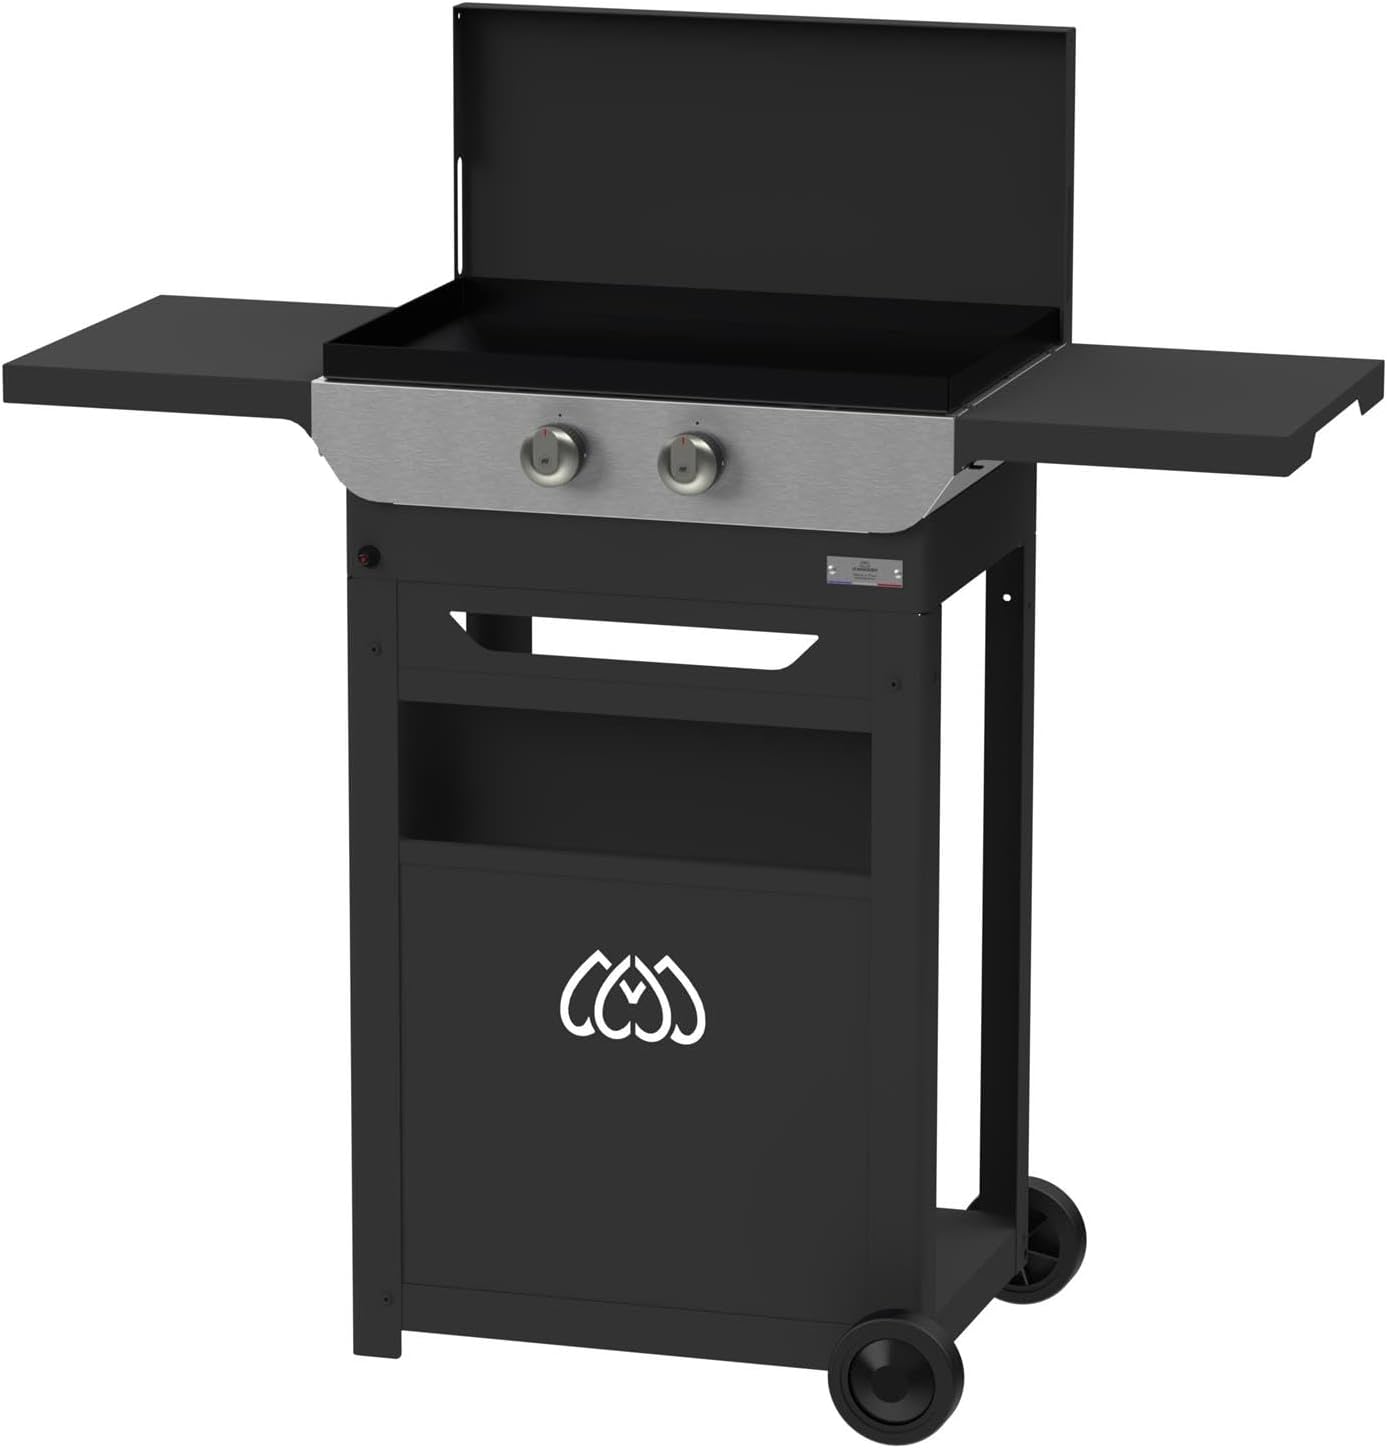
An overview of the LE MARQUIER Plancha Original 260 Duo Edition, showcasing its black cart, stainless steel control panel, and open lid.
4. Assembly and Setup
Assembly is required for this product. Follow the detailed instructions provided in the separate assembly guide for your specific model. General steps include:
- Unpack all components and verify against the package contents list.
- Assemble the cart structure, ensuring all screws are tightened securely.
- Attach the side tables and wheels to the cart.
- Place the plancha chassis onto the assembled cart.
- Insert the enameled cast iron cooking plate into the chassis.
- Connect the gas regulator to a butane or propane gas bottle. Ensure the connection is tight and check for leaks using a soapy water solution.
- Position the gas bottle within the integrated bottle cover in the cart.
5. Operation
5.1 Gas Connection
Ensure your gas bottle (butane or propane) is securely connected to the plancha's gas inlet via a suitable regulator and hose. Always check for leaks before lighting.
5.2 Ignition
- Open the gas supply valve on the gas bottle.
- Push and turn one of the ergonomic control knobs to the maximum position.
- Press the mechanical piezo ignition button repeatedly until the burner ignites.
- Once lit, hold the knob for a few seconds before releasing.
- Repeat for the second burner if desired.
5.3 Temperature Control
The plancha features two independent burners, allowing for precise temperature control across different cooking zones. Adjust the control knobs to achieve your desired heat level for various foods.
5.4 Cooking
Preheat the plancha for 5-10 minutes. Apply a thin layer of cooking oil to the enameled cast iron plate before placing food. The large 60x40 cm surface is suitable for 6 to 10 servings.

A close-up view of various vegetables and meat cooking on the hot enameled cast iron plate of the plancha, highlighting its cooking surface.
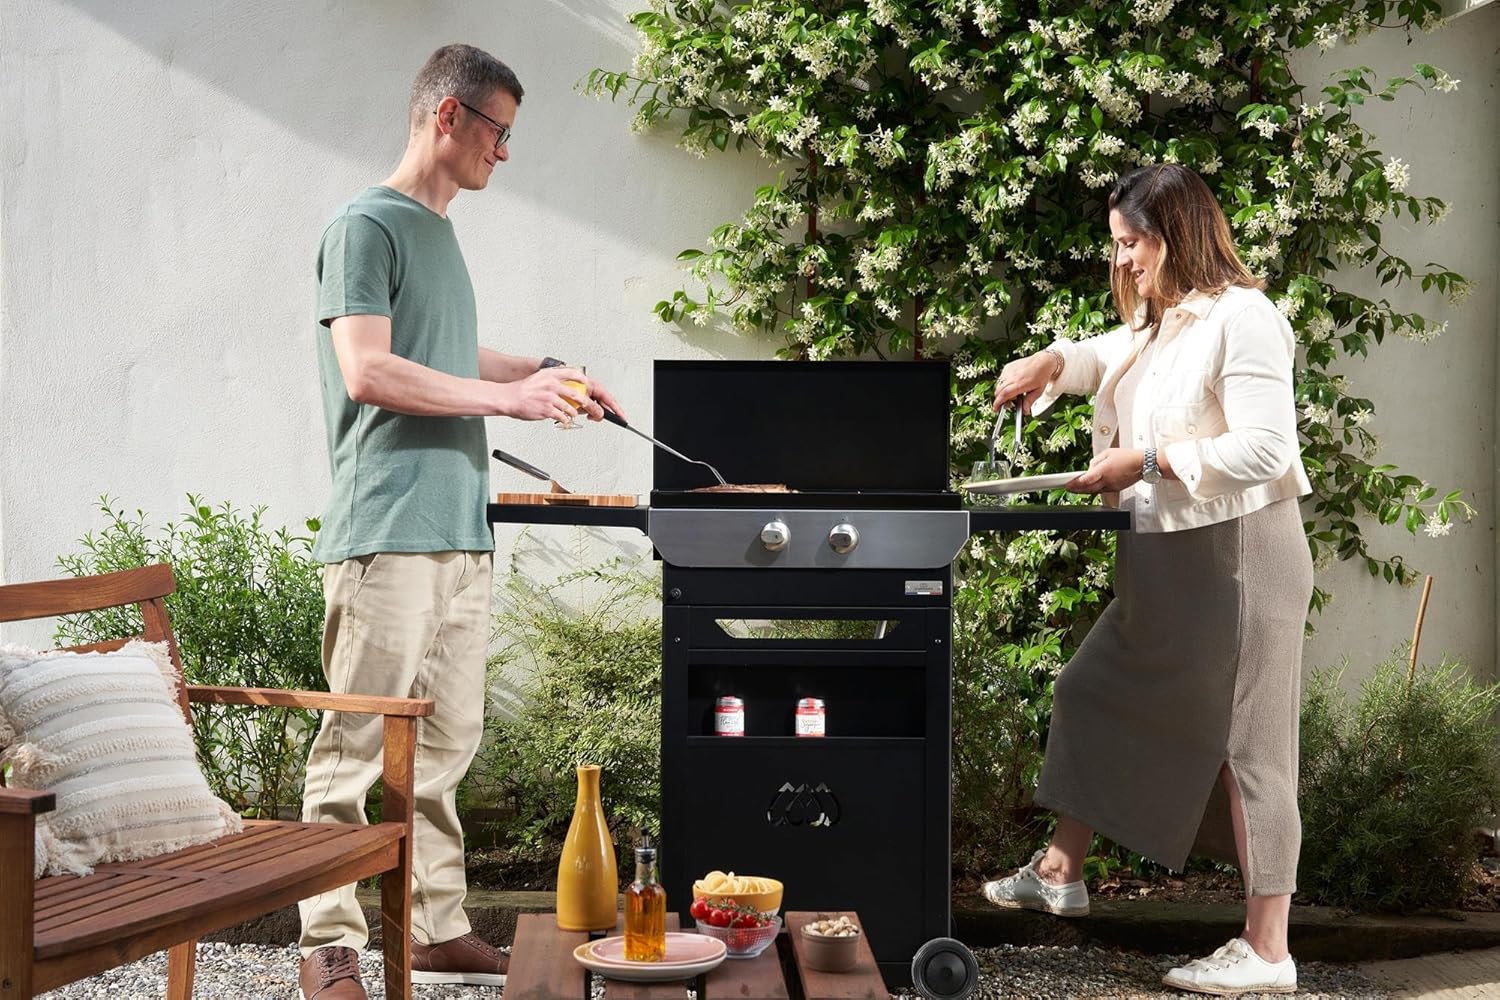
A man and a woman are cooking on the plancha outdoors, demonstrating its use for social gatherings. The plancha is set up on its cart with side tables extended.
6. Cleaning and Maintenance
Regular cleaning ensures the longevity and performance of your plancha.
- After Each Use: While the plate is still warm, scrape off food residues with a suitable spatula. Wipe clean with a damp cloth. For stubborn residues, use a specialized plancha cleaner.
- Grease Collector: Regularly empty and clean the concealed cooking juice collector.
- Chassis and Cart: Clean the stainless steel and epoxy painted surfaces with a soft, damp cloth and mild detergent. Avoid abrasive cleaners.
- Storage: When not in use, ensure the plancha is clean and dry. Close the lid to protect the cooking surface. The IPX4 rating indicates resistance to water splashes, but prolonged exposure to harsh weather should be avoided.
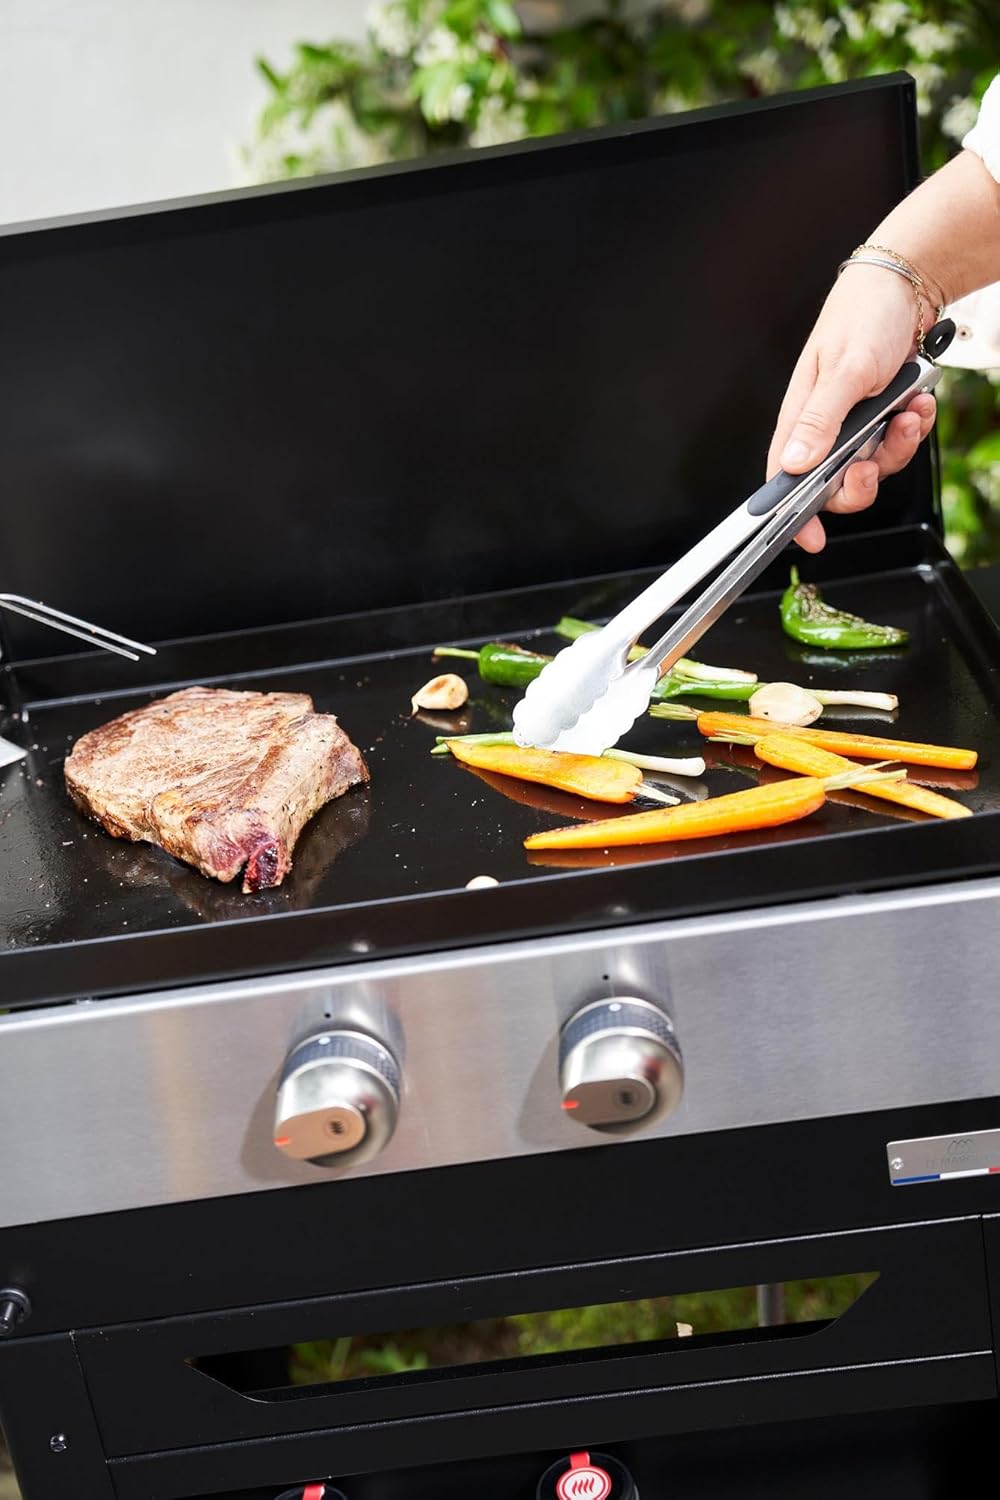
A detailed shot of a steak, carrots, and garlic cloves sizzling on the plancha's cooking surface, emphasizing the dual cooking zones. This image also shows the clean cooking surface.
7. Troubleshooting
- Burner not igniting: Check gas supply, ensure gas bottle valve is open. Verify gas hose connection. Ensure piezo igniter is clicking and sparking.
- Low flame: Check gas bottle level. Ensure gas hose is not kinked.
- Gas smell: Immediately turn off gas supply. Check all connections for leaks using soapy water. If smell persists, do not use and contact a qualified technician.
8. Specifications
| Feature | Detail |
|---|---|
| Model Number | PLOG260D |
| Dimensions (L x W x H) | 122.5 x 51 x 123.5 cm |
| Product Dimensions (packaged) | 78 x 50 x 35 cm |
| Weight | 30 kg |
| Cooking Plate Material | Enameled Cast Iron |
| Chassis/Cart Material | Satin Stainless Steel and Epoxy Painted Steel |
| Fuel Type | Butane or Propane Gas |
| Special Feature | Non-stick surface |
| Color | Black |
| Assembly Required | Yes |
| Certifications | CE, Origine France Garantie, IPX4 |
9. Warranty and Support
Your LE MARQUIER Plancha Original 260 Duo Edition comes with the following warranties:
- Cooking Plate: Lifetime warranty
- Chassis, Cart, and Lid: 2-year warranty
This product is certified with Origine France Garantie and complies with CE standards, including IPX4 for resistance to water splashes.
Information regarding the availability of spare parts is currently unavailable. For further assistance or to report an issue, please visit the official LE MARQUIER brand store or contact customer support.