1. Introduction
This manual provides essential information for the safe and efficient operation, assembly, and maintenance of your ANCHEER 500W Electric Bike Gladiator AM001907_P. Please read this manual thoroughly before your first ride and retain it for future reference. Proper understanding and adherence to these instructions will ensure optimal performance and longevity of your electric bicycle.
2. Safety Information
Always prioritize safety when operating your electric bike. Wear a helmet and appropriate safety gear. Familiarize yourself with local traffic laws and regulations. Perform a pre-ride inspection before each use, checking brakes, tires, and battery level. Avoid riding in adverse weather conditions or under the influence of substances. Ensure all components are securely fastened.
3. Package Contents
Upon unpacking, verify that all components are present:
- ANCHEER Electric Bike (partially pre-assembled)
- Battery Charger
- User Manual
- Bell
- Kickstand
- Assembly Tools (if included)
4. Assembly and Setup
Your ANCHEER electric bike arrives mostly pre-assembled. Follow these steps for final assembly:
- Handlebar Installation: Attach the handlebar to the stem, ensuring it is centered and tightened securely.
- Front Wheel Attachment: If not already attached, install the front wheel, ensuring the quick-release skewer or axle nuts are properly tightened.
- Pedal Installation: Identify the left (L) and right (R) pedals. Thread the pedals into the crank arms by hand, then tighten firmly with a wrench. Note that the left pedal has a reverse thread.
- Seat Post and Saddle Adjustment: Insert the seat post into the frame and adjust the saddle height for comfortable riding. Secure with the quick-release lever or bolt.
- Battery Installation and Initial Charge: Insert the battery into its compartment and lock it. Fully charge the battery before your first ride. The fast charging technology allows for a full charge in approximately 3.5 hours.
- Pre-Ride Check: Verify tire pressure, brake function, and gear shifting.

Figure 4.1: Bike Dimensions and Rider Recommendations. This image illustrates the various dimensions of the ANCHEER electric bike, including wheel size, total length, handlebar height, seat post height, front center, chainstay length, standover height, reach, mid tube length, and wheelbase. It also provides information on the maximum payload (265 lbs) and recommended rider height range (5.2 to 6.2 feet).
5. Components Overview
Understanding the key components of your ANCHEER electric bike is crucial for its operation and maintenance.
5.1. Motor
The bike is equipped with a 48V 500W brushless motor, providing robust power for various terrains and commuting needs. It supports speeds up to 20 mph.

Figure 5.1: Motor System. This image displays a cutaway view of the electric bike's rear wheel hub, highlighting the 500W, 48V brushless motor. It also indicates a peak power of 750W, a top speed of 22 MPH, and 55 Nm of torque.
5.2. Battery
The removable and lockable 48V/10.4Ah lithium-ion battery offers a range of up to 50 miles in pedal-assist mode. It features short circuit, over temperature, over voltage, and over current protection for enhanced safety.
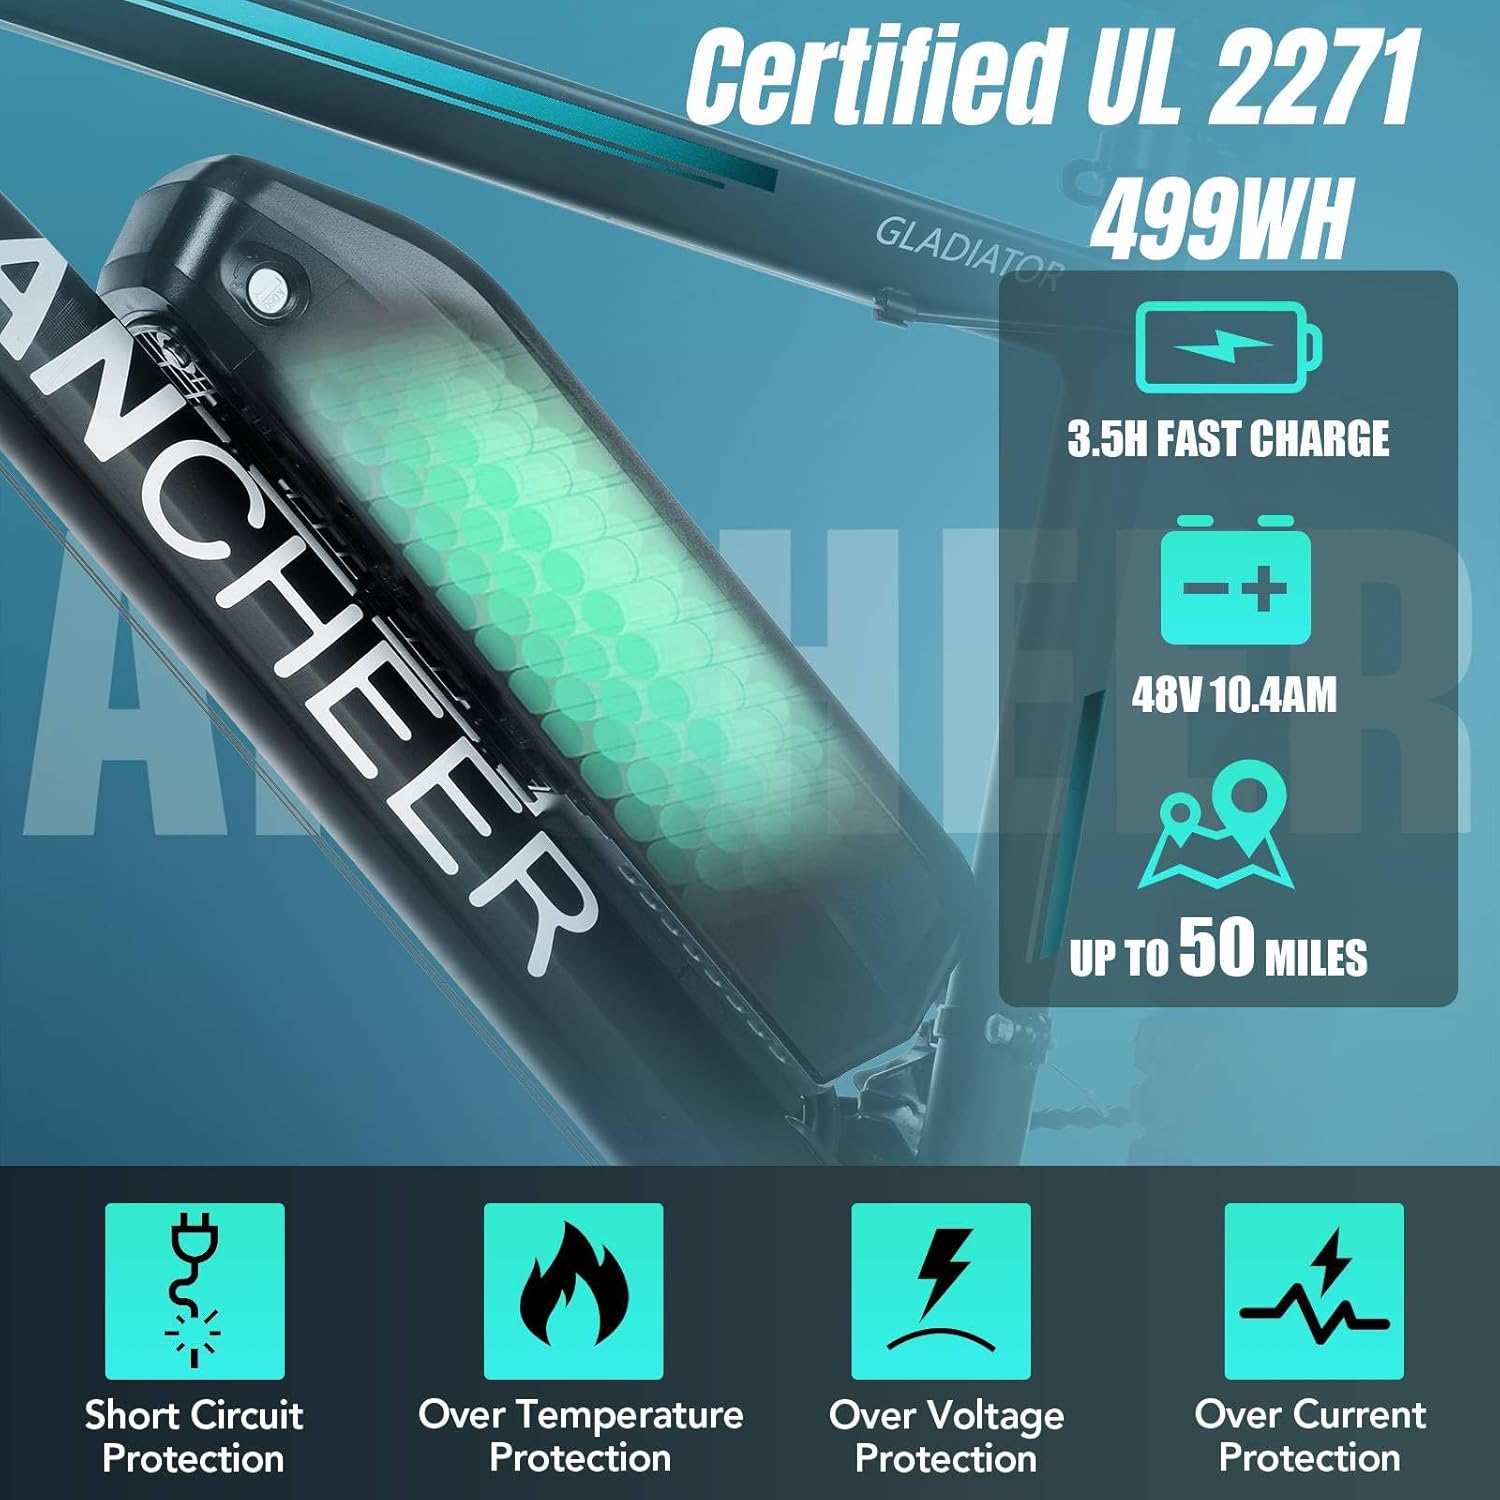
Figure 5.2: Battery Unit. This image shows the 499WH, 48V 10.4Ah lithium-ion battery, highlighting its 3.5-hour fast charge capability and a range of up to 50 miles. Icons indicate built-in protections against short circuit, over temperature, over voltage, and over current.
5.3. Digital Display
The ABS 5-speed color screen LCD display provides real-time information including battery level, 3 assist levels, mileage, voltage, and current speed.

Figure 5.3: Digital Display. This image provides a close-up view of the bike's digital LCD display, showing various metrics such as average maximum speed, distance, odometer, voltage, trip time, and assist level. Icons below the display indicate 5 assist levels, battery level, current speed, cruise control, and mileage.
5.4. Suspension Fork
The front suspension fork is lockable, providing comfort and control over varied terrain.

Figure 5.4: Front Suspension. This image focuses on the shock-absorbing front fork of the electric bike, illustrating its design for improved ride comfort and handling on uneven surfaces.
5.5. Tires
The 26" x 2.1" MTB tires are designed for good impact resistance, strong climbing power, and comfort across various terrains.

Figure 5.5: MTB Tire. This image provides a close-up of the 26" x 2.1" MTB tire, highlighting its tread pattern and features such as good impact resistance, strong climbing power, ability to conquer all terrains, and great comfort.
6. Operating Instructions
Familiarize yourself with the operating modes and controls of your electric bike.
6.1. Powering On/Off
Press and hold the power button on the LCD display to turn the bike's electrical system on or off.
6.2. Riding Modes
Your ANCHEER electric bike offers three riding modes:
- Throttle (Ebike) Mode: Engage the throttle to propel the bike without pedaling.
- Pedal-Assist Mode: The motor provides assistance as you pedal. Adjust the assist level (1-5) via the LCD display.
- Normal Bike Mode: Ride the bike like a traditional bicycle with no electrical assistance.
6.3. Gear Shifting
The bike features a 21-speed transmission system. Use the shifters on the handlebar to change gears according to terrain and desired speed. Shift smoothly to avoid strain on the drivetrain.
6.4. Braking System
The mechanical front and rear disc brakes provide reliable stopping power. Apply both brakes simultaneously for effective and controlled deceleration. Regularly check brake pad wear and cable tension.
6.5. Cruise Control
To activate cruise control, engage the throttle and maintain a consistent speed for 6-8 seconds. The bike will then maintain this speed automatically. To disengage, simply apply the brakes or briefly twist the throttle.

Figure 6.1: Rider in Action. This image shows a person riding the ANCHEER electric mountain bike on a challenging, rocky outdoor trail, demonstrating its capability for off-road use.
7. Battery Management
Proper battery care is essential for performance and longevity.
- Charging: Use only the provided charger. Connect the charger to the battery and then to a power outlet. The indicator light on the charger will show charging status. A full charge takes approximately 3.5 hours.
- Removal and Locking: The battery is removable for convenient charging off the bike. Always ensure the battery is securely locked in place before riding.
- Storage: If storing the bike for an extended period, charge the battery to 50-70% and store it in a cool, dry place. Avoid fully discharging the battery for long periods.
- Protection Features: The battery is designed with multiple protection features including short circuit, over temperature, over voltage, and over current protection.
8. Maintenance
Regular maintenance ensures the safety and performance of your electric bike.
- Tires: Check tire pressure before each ride. Maintain recommended pressure for optimal performance and to prevent punctures.
- Brakes: Inspect brake pads for wear and replace them when necessary. Ensure brake levers are firm and responsive. Adjust brake cable tension as needed.
- Chain: Keep the chain clean and lubricated to ensure smooth gear changes and prevent premature wear.
- Fasteners: Periodically check all bolts, nuts, and quick-release levers to ensure they are securely tightened.
- Electrical Connections: The bike features PX54 waterproof plugs, making component replacement more convenient. Ensure all electrical connections are clean and secure.
- Cleaning: Clean your bike regularly with a damp cloth. Avoid using high-pressure washers directly on electrical components.
9. Troubleshooting
This section addresses common issues you might encounter with your electric bike.
- No Power to Display:
Possible Cause: Battery not installed correctly or discharged. Loose electrical connection.
Solution: Ensure battery is fully seated and locked. Check battery charge level. Inspect main power cables for secure connection. - Motor Not Assisting:
Possible Cause: Pedal-assist level set to zero. Brake levers engaged. Faulty sensor.
Solution: Increase pedal-assist level on the display. Ensure brake levers are fully released. If issue persists, contact support. - Battery Not Charging:
Possible Cause: Charger not connected properly. Faulty charger or battery.
Solution: Verify charger connections to battery and wall outlet. Check charger indicator light. If no change, contact support. - Brakes Squealing or Ineffective:
Possible Cause: Worn brake pads. Contaminated rotors. Loose cables.
Solution: Inspect brake pads and replace if worn. Clean rotors with disc brake cleaner. Adjust cable tension.
For issues not listed here or if troubleshooting steps do not resolve the problem, please contact ANCHEER customer support.
10. Specifications
| Feature | Specification |
|---|---|
| Model Name | AM001907_P |
| Bike Type | Electric Mountain Bike |
| Age Range | Adult |
| Brand | ANCHEER |
| Motor Wattage | 500 Watts |
| Battery | 48V 10.4Ah Lithium-ion (499 Watt Hours) |
| Charging Time | Approx. 3.5 hours |
| Max Range | Up to 50 miles (pedal-assist mode) |
| Number of Speeds | 21 |
| Wheel Size | 26 Inches |
| Frame Material | Aluminum |
| Suspension Type | Front (Lockable) |
| Brake Style | Disc (Mechanical Front & Rear) |
| Special Feature | LCD-Display, Cruise Control, PX54 Waterproof Plugs |
| Item Weight | 27 kg |
| Assembly Required | Yes (Partial) |
11. Warranty and Support
11.1. Warranty
This ANCHEER electric bike comes with a Limited Warranty. Please refer to the warranty card included in your package or contact ANCHEER customer service for specific terms and conditions.
11.2. Technical Support
ANCHEER provides lifelong technical support and update services for its products. If you require assistance with assembly, operation, maintenance, or troubleshooting, please reach out to our customer support team. A video guide for assembly is available on the product page and official ANCHEER channels.


