
1. Introduction
This manual provides detailed instructions for the installation, operation, and maintenance of your Garage Outlet Push Button Garage Door Opener. Designed as an aftermarket replacement, this 1-button unit is compatible with various Liftmaster, Chamberlain, and Craftsman garage door openers featuring a Yellow Learn Button. Please read this manual thoroughly before beginning installation or operation to ensure proper function and safety.
2. Product Features
- 1-Button Push Button Bell Garage Door Opener
- Designed for systems with a Yellow Learn Button
- Compact dimensions: Approximately 2.75 inches (L) x 1 inch (W) x 0.75 inches (H)
- Aftermarket replacement for original equipment
- Includes necessary mounting hardware (screws and anchors)
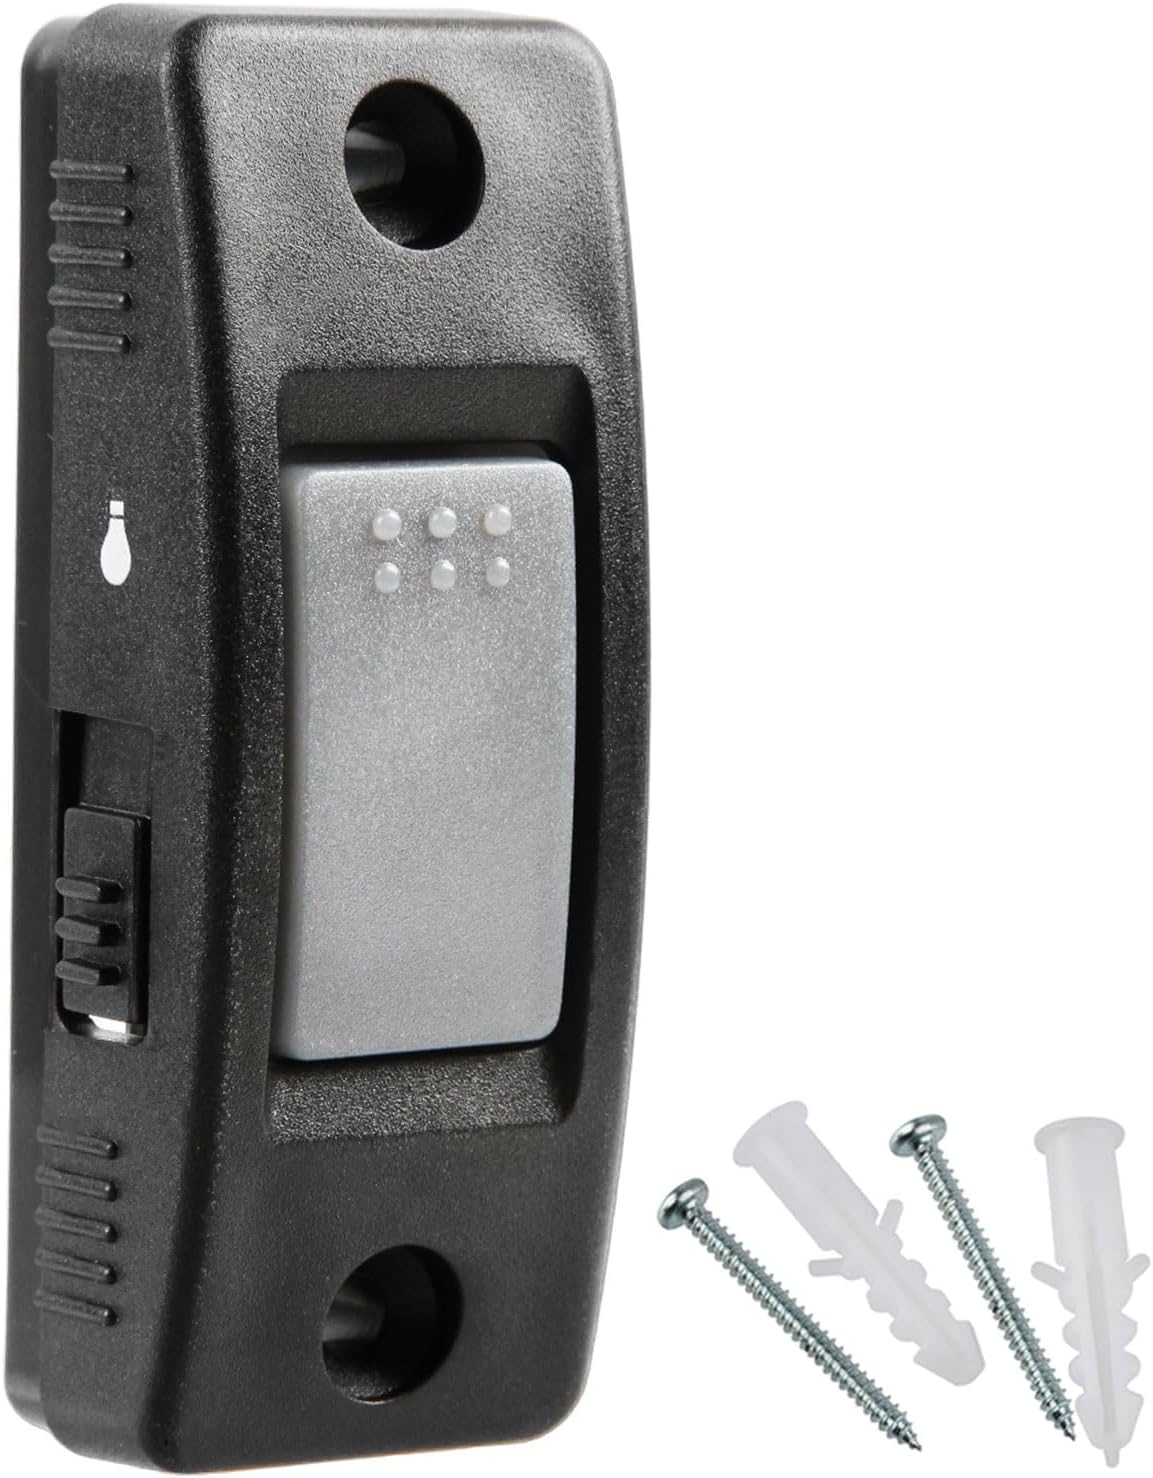
Figure 2.1: Front view of the Garage Outlet Push Button Garage Door Opener with included screws and anchors.
3. Compatibility
This garage door opener is specifically designed for use with Liftmaster, Chamberlain, and Craftsman garage door openers that feature a Yellow Learn Button. It is compatible with models such as 883LM, 8065, 8155, 8165, 8355, 8360, 8365-267, 8500, 8550, 8557, and 8587. Please verify your garage door opener's learn button color to ensure compatibility.

Figure 3.1: Learn Button Compatibility Chart. This unit is compatible with systems featuring the Yellow Learn Button (2013 to present).
4. Setup & Installation
The Garage Outlet Push Button Garage Door Opener is designed for easy installation and programming. Follow these steps:
4.1 Physical Installation
- Choose a convenient location inside your garage, typically near the access door.
- Using the included screws and anchors, securely mount the push button unit to the wall. Ensure it is at a height accessible to all users but out of reach of small children.
- Connect the low-voltage wires from your garage door opener to the terminals on the back of the push button unit. Pay attention to polarity if indicated (though typically not critical for simple push buttons, ensure a secure connection).
4.2 Programming Instructions
This unit requires programming to your garage door opener. The process involves using the 'Learn' button on your garage door opener motor unit.

Figure 4.1: Visual guide for programming your garage door opener.
- Step 1: Locate the Learn Button. On your garage door opener motor unit (typically mounted on the ceiling), locate the 'Learn' button. This button is usually yellow for compatible models.
- Step 2: Activate Programming Mode. Press and immediately release the 'Learn' button on your garage door opener motor unit. The light on the motor unit will illuminate for approximately 30 seconds, indicating that the unit is in programming mode.
- Step 3: Program the Push Button. Within 30 seconds of activating programming mode, press and hold the main button on your Garage Outlet Push Button. The motor unit will typically 'click' or the light will flash/turn off when the remote is successfully programmed.
- Test the operation by pressing the button. The garage door should open or close.
5. Operating Instructions
Once installed and programmed, operating your Garage Outlet Push Button Garage Door Opener is straightforward:
- Opening/Closing the Door: Press the large gray button once to open or close your garage door.
- Controlling the Light: The smaller button on the side of the unit is designed to control the garage door opener's light. Press this button to turn the light on or off. Note: Some garage door opener models may not fully support this feature, or it may require specific wiring configurations.

Figure 5.1: Internal view of the push button unit, highlighting its design.
6. Maintenance
The Garage Outlet Push Button Garage Door Opener requires minimal maintenance. Keep the unit clean and free from dust and debris. The unit is powered by a Lithium Metal battery (included). If the unit stops responding, the battery may need replacement. The battery type is typically a CR2032 coin cell battery.
6.1 Battery Replacement
- Carefully open the casing of the push button unit.
- Remove the old CR2032 battery.
- Insert a new CR2032 battery, ensuring correct polarity (+/-).
- Close the casing securely.
7. Troubleshooting
| Problem | Possible Cause | Solution |
|---|---|---|
| Unit does not respond. | Not programmed; Dead battery; Loose wiring. | Re-program the unit (see Section 4.2); Replace battery; Check wire connections. |
| Light button does not work. | Incompatible garage door opener model; Wiring issue. | Verify your opener's compatibility with the light feature; Ensure wires are securely connected. |
| Loose wire connection at terminal. | Stripped screw terminal. | Ensure wires are firmly seated. If a screw is stripped, consider professional assistance or a secure alternative connection method. |
| Unsure if this is the correct replacement item. | Compatibility concerns. | Refer to Section 3 (Compatibility) and ensure your garage door opener has a Yellow Learn Button. Compare product photos with your existing unit. |
8. Specifications
- Manufacturer: Garage Outlet
- Part Number: GO10302026
- Item Weight: Approximately 0.634 ounces
- Package Dimensions: Approximately 4.69 x 3.27 x 1.1 inches
- Item Model Number: GO10302026
- Batteries: 1 Lithium Metal battery required (included)
- Battery Cell Type: Lithium Metal (CR2032)
- Color: Bell
9. Support & Warranty
For additional assistance or technical support, please refer to the following resources:
- Online Support: Live chat and technical support may be available through the Garage Outlet official channels.
- Brand Store: Visit the official Garage Outlet Store for more products and information.

Figure 9.1: Support information for Garage Outlet products.
Warranty Information: Specific warranty details for this product are not provided in this manual. Please refer to the product packaging or contact Garage Outlet customer service for warranty terms and conditions.


