1. Introduction
Thank you for purchasing the NIKAI NK-822 Multi Grooming Kit. This versatile 3-in-1 device is designed for precise trimming and styling of facial hair, body hair, and head hair. Please read this manual carefully before first use to ensure safe and optimal performance of your grooming kit. Keep this manual for future reference.

Image 1: NIKAI NK-822 Multi Grooming Kit with all included accessories.
2. Safety Information
To reduce the risk of injury, electric shock, fire, or damage to the product, always follow these basic safety precautions:
- Avoid use on infants.
- Keep the trimmer away from water sources. Do not use it while bathing or showering.
- Be cautious when using near eyes and ears to prevent injury.
- Follow all electrical safety precautions. Ensure the charging cable is not damaged.
- Do not disassemble the unit. For service, contact qualified personnel.
3. Package Contents
Verify that all items are present in the package:
- Full Size Trimmer Unit
- USB Charging Cable
- Foil Shaver Attachment
- Nose & Ear Trimmer Attachment
- 3 Cutting Guide Combs (1mm, 3mm, 5mm)
- Cleaning Brush
- Oil Bottle
- User Manual
Image 2: All components included in the NIKAI NK-822 Multi Grooming Kit package.
4. Product Features
The NIKAI NK-822 Multi Grooming Kit incorporates several features for an efficient grooming experience:
- Patented Motor: Provides powerful performance with low noise operation.
- Stainless Steel Blades: High-carbon, self-sharpening blades for superior cutting performance and durability.
- Rechargeable Lithium-Ion Battery: Offers up to 120 minutes of cordless running time after a 2-hour charge.
- USB Charging: Convenient charging via USB cable, supporting both corded and cordless operation.
- Soft Touch Grip: Ergonomically designed for comfort and easy control.
- LED Indicator Light: Displays charging status and battery level.
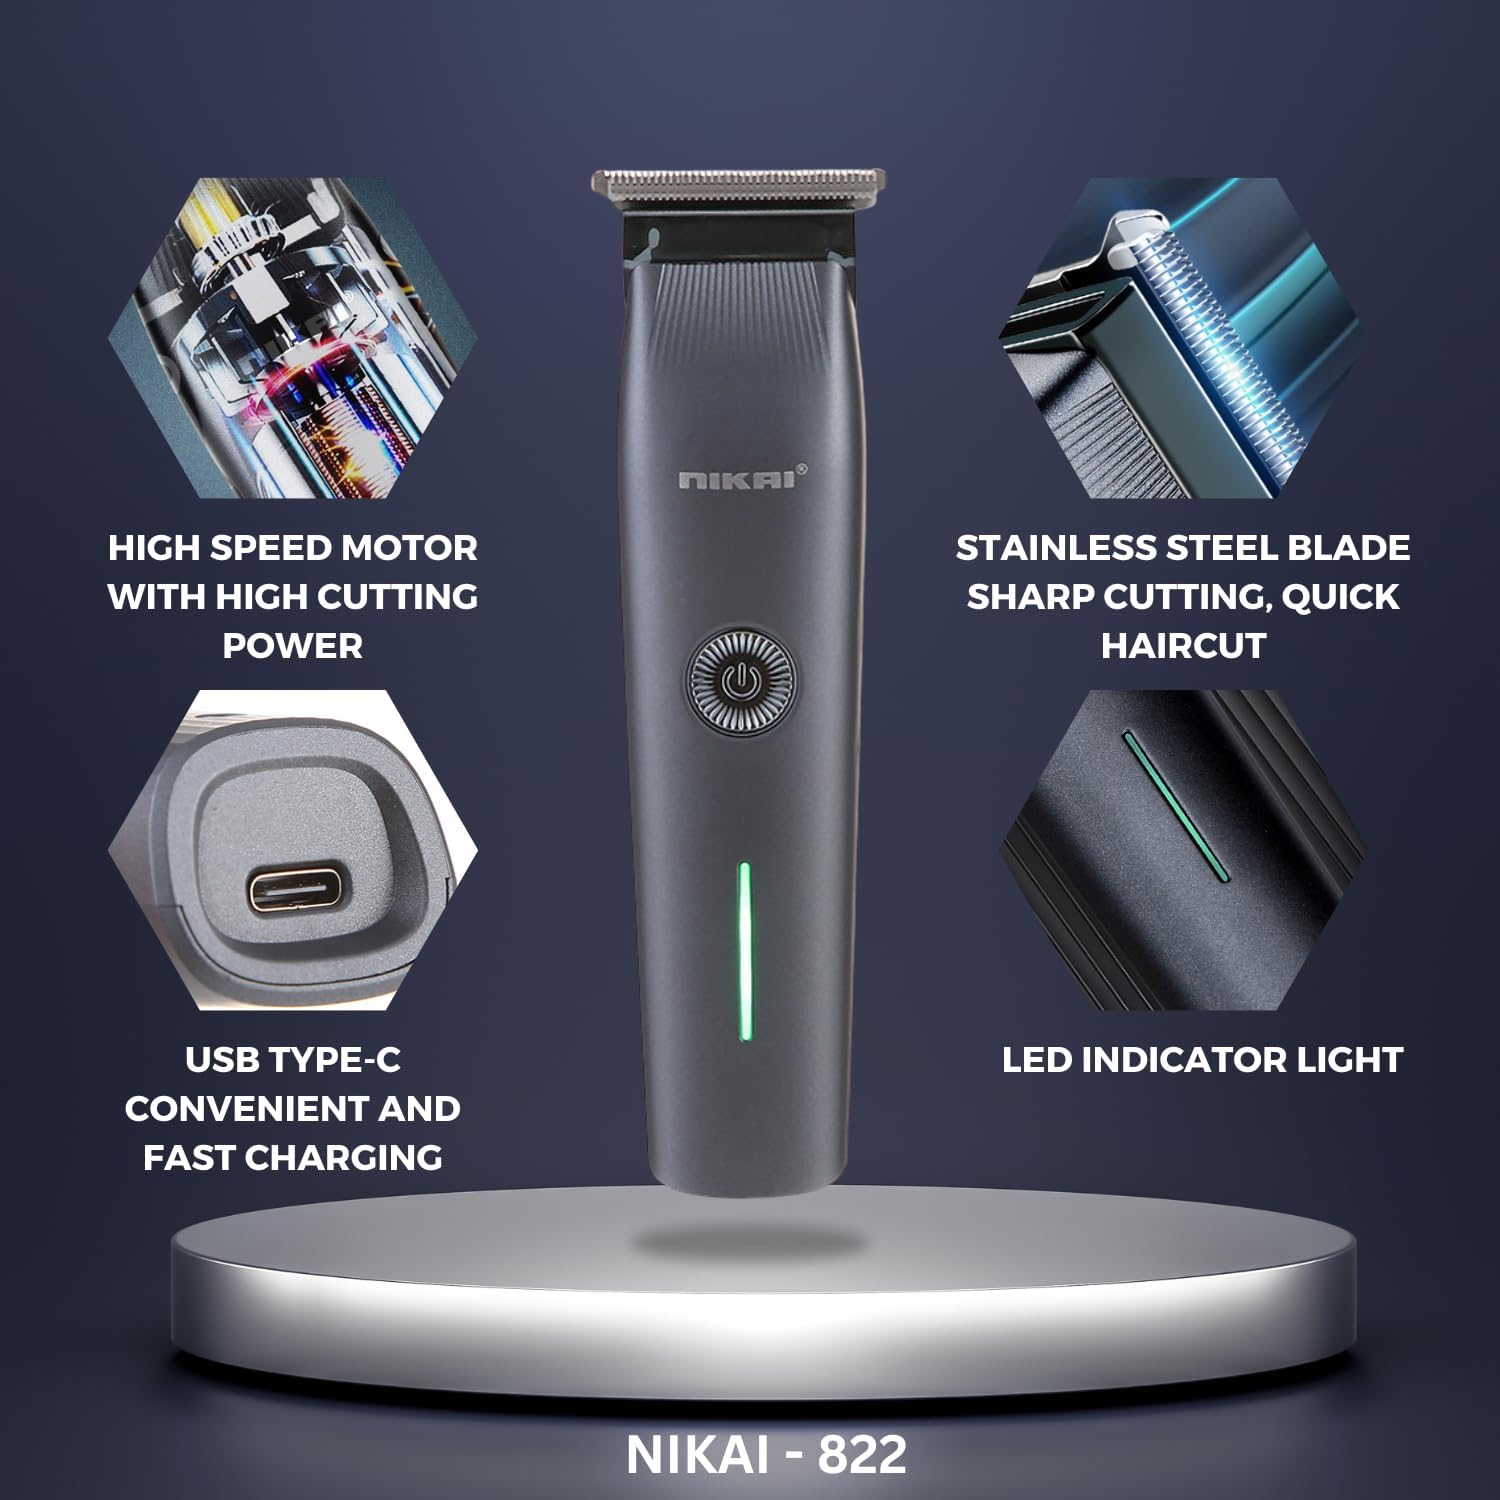
Image 3: Visual representation of key features including motor, blade, USB-C port, and LED indicator.

Image 4: Detailed view of the stainless steel blade for sharp and quick haircuts.

Image 5: Illustration of the high-performance lithium battery and its charging status.
5. Setup
5.1 Initial Charging
- Before first use, fully charge the grooming kit for approximately 2 hours.
- Connect the USB charging cable to the trimmer and plug the other end into a compatible USB power source (e.g., computer, USB wall adapter).
- The LED indicator light will show the charging status. Once fully charged, the light may change color or turn off depending on the model.
5.2 Attaching and Detaching Heads
- To attach a head (e.g., foil shaver, nose & ear trimmer), align the head with the main unit and gently push until it clicks into place.
- To detach a head, firmly hold the main unit and pull the attached head upwards or outwards, following the specific design for each attachment. Refer to the diagrams in the manual for visual guidance.
6. Operating Instructions
6.1 General Operation
Press the power button located on the main unit to turn the trimmer ON or OFF.
6.2 Hair and Beard Trimming
- Attach the full-size trimmer head to the main unit.
- Select the desired cutting length by attaching one of the guide combs (1mm, 3mm, 5mm). Ensure the comb is securely fastened.
- Turn on the trimmer and move it against the direction of hair growth for an even trim.
- For detailing or shaping, remove the guide comb and use the trimmer blade directly.

Image 6: The three replaceable guide combs (1mm, 3mm, 5mm) for adjusting trimming length.

Image 7: Examples demonstrating the use of the grooming kit for body and belly hair trimming.
6.3 Ear and Nose Trimming
- Attach the nose & ear trimmer head.
- Gently insert the trimmer tip into the nostril or ear canal.
- Move the trimmer in a circular motion to trim unwanted hair. Do not insert too deeply.
6.4 Foil Shaver Use
- Attach the foil shaver head.
- Hold the shaver flat against the skin and move it in short, gentle strokes.
- This attachment is ideal for achieving a smooth finish on smaller areas or for touch-ups.
7. Maintenance
7.1 Cleaning
- Turn off the trimmer and detach the head after each use.
- Use the provided cleaning brush to remove hair clippings from the blades and inside the trimmer head.
- The trimmer heads may be rinsed under running water for thorough cleaning. Ensure the main unit is not submerged in water.
- Allow all parts to air dry completely before reattaching or storing.
7.2 Oiling Blades
- After cleaning and drying, apply a small drop of the provided oil to the blades.
- Turn on the trimmer for a few seconds to distribute the oil evenly. This helps maintain blade sharpness and prevents rust.
7.3 Storage
Store the grooming kit and its accessories in a cool, dry place, away from direct sunlight and out of reach of children.
8. Troubleshooting
- Trimmer not turning on: Ensure the battery is charged. Connect the USB cable and charge for 2 hours.
- Poor trimming performance: Clean the blades and trimmer head thoroughly. Apply oil to the blades. Ensure the correct attachment and guide comb are used.
- Excessive noise or vibration: Check if the trimmer head is securely attached. Clean any hair or debris that might be obstructing the blades.
If problems persist, please refer to the warranty and support section for further assistance.
9. Specifications
| Product Name | Hair Trimmer |
| Model Number | NK-822 |
| Brand | CETC (NIKAI) |
| Power Source | Battery Powered (USB Rechargeable) |
| Battery Type | 1 Lithium Ion battery (included) |
| Charging Time | Approx. 2 hours |
| Running Time | Up to 120 minutes |
| Blade Material | Stainless Steel |
| Product Dimensions | 21 x 14 x 5.1 cm |
| Item Weight | 350 Grams |
| Special Features | Detachable Head, Fast Charge, Rechargeable, USB Charging |
10. Warranty and Support
The NIKAI NK-822 Multi Grooming Kit comes with a 12-month quality warranty from the date of purchase. This warranty covers manufacturing defects under normal use.
If you encounter any issues with your product or require technical assistance, please contact customer service through your retailer or the official NIKAI support channels. Please have your purchase receipt and product model number ready when contacting support.


