1. Introduction
1.1 Product Overview
This manual provides instructions for the Walfront 180dB Industrial Siren Alarm with LED Stroboscopic Light. This device is designed for industrial safety and warning applications, featuring a high-decibel siren and a bright LED strobe light. It is rated IP65 for dust and water resistance, making it suitable for various demanding environments.
1.2 Intended Use
The industrial siren alarm is applicable in environments such as mines, stone yards, sand yards, forest yards, port machinery, mechanical and electrical industries, large and medium-sized driving vehicles, ships, wharfs, belt conveying equipment, large and medium-sized cranes, construction sites, railway crossings, workshops, banks, campuses, factories, shopping malls, and security posts.
1.3 Package Contents
- 1 x Industrial Siren Alarm
2. Safety Information
2.1 Important Safety Instructions
- Read all instructions thoroughly before installation and operation.
- Ensure power is disconnected from the device before performing any installation, maintenance, or troubleshooting.
- Installation should be performed by qualified personnel in accordance with local electrical codes and regulations.
- Do not expose the device to extreme temperatures outside its specified operating range of -30℃ to 70℃.
- The siren produces a very loud sound (up to 180dB). Prolonged exposure to high sound levels can cause hearing damage. Use appropriate hearing protection when testing or operating in close proximity.
- The device is rated IP65, providing protection against dust ingress and low-pressure water jets. It is not designed for submersion in water.
- Use only the specified power supply (US Plug 110V for this model). Using an incorrect power supply may damage the device or pose a safety risk.
- Keep children and unauthorized personnel away from the device during operation.
3. Setup
3.1 Installation
The Walfront Industrial Siren Alarm is designed for wall mounting. Follow these steps for proper installation:
- Choose a Location: Select a suitable wall location that provides clear sound and light transmission, free from obstructions. Ensure the mounting surface is strong enough to support the device's weight (approximately 2.97 kg).
- Mark Mounting Points: Use the device's mounting holes as a template to accurately mark the drilling points on the wall.
- Drill Holes: Drill appropriate holes for mounting screws (screws and anchors are not included and must be sourced separately based on wall material).
- Secure the Device: Attach the siren alarm securely to the wall using suitable screws and anchors. Ensure it is firmly fixed to prevent accidental dislodgement.
- Power Connection: Connect the US Plug 110V power cord to a compatible power outlet. Ensure the power source matches the device's voltage requirements.

Figure 3.1: Front-side view of the Walfront Industrial Siren Alarm with power cord.
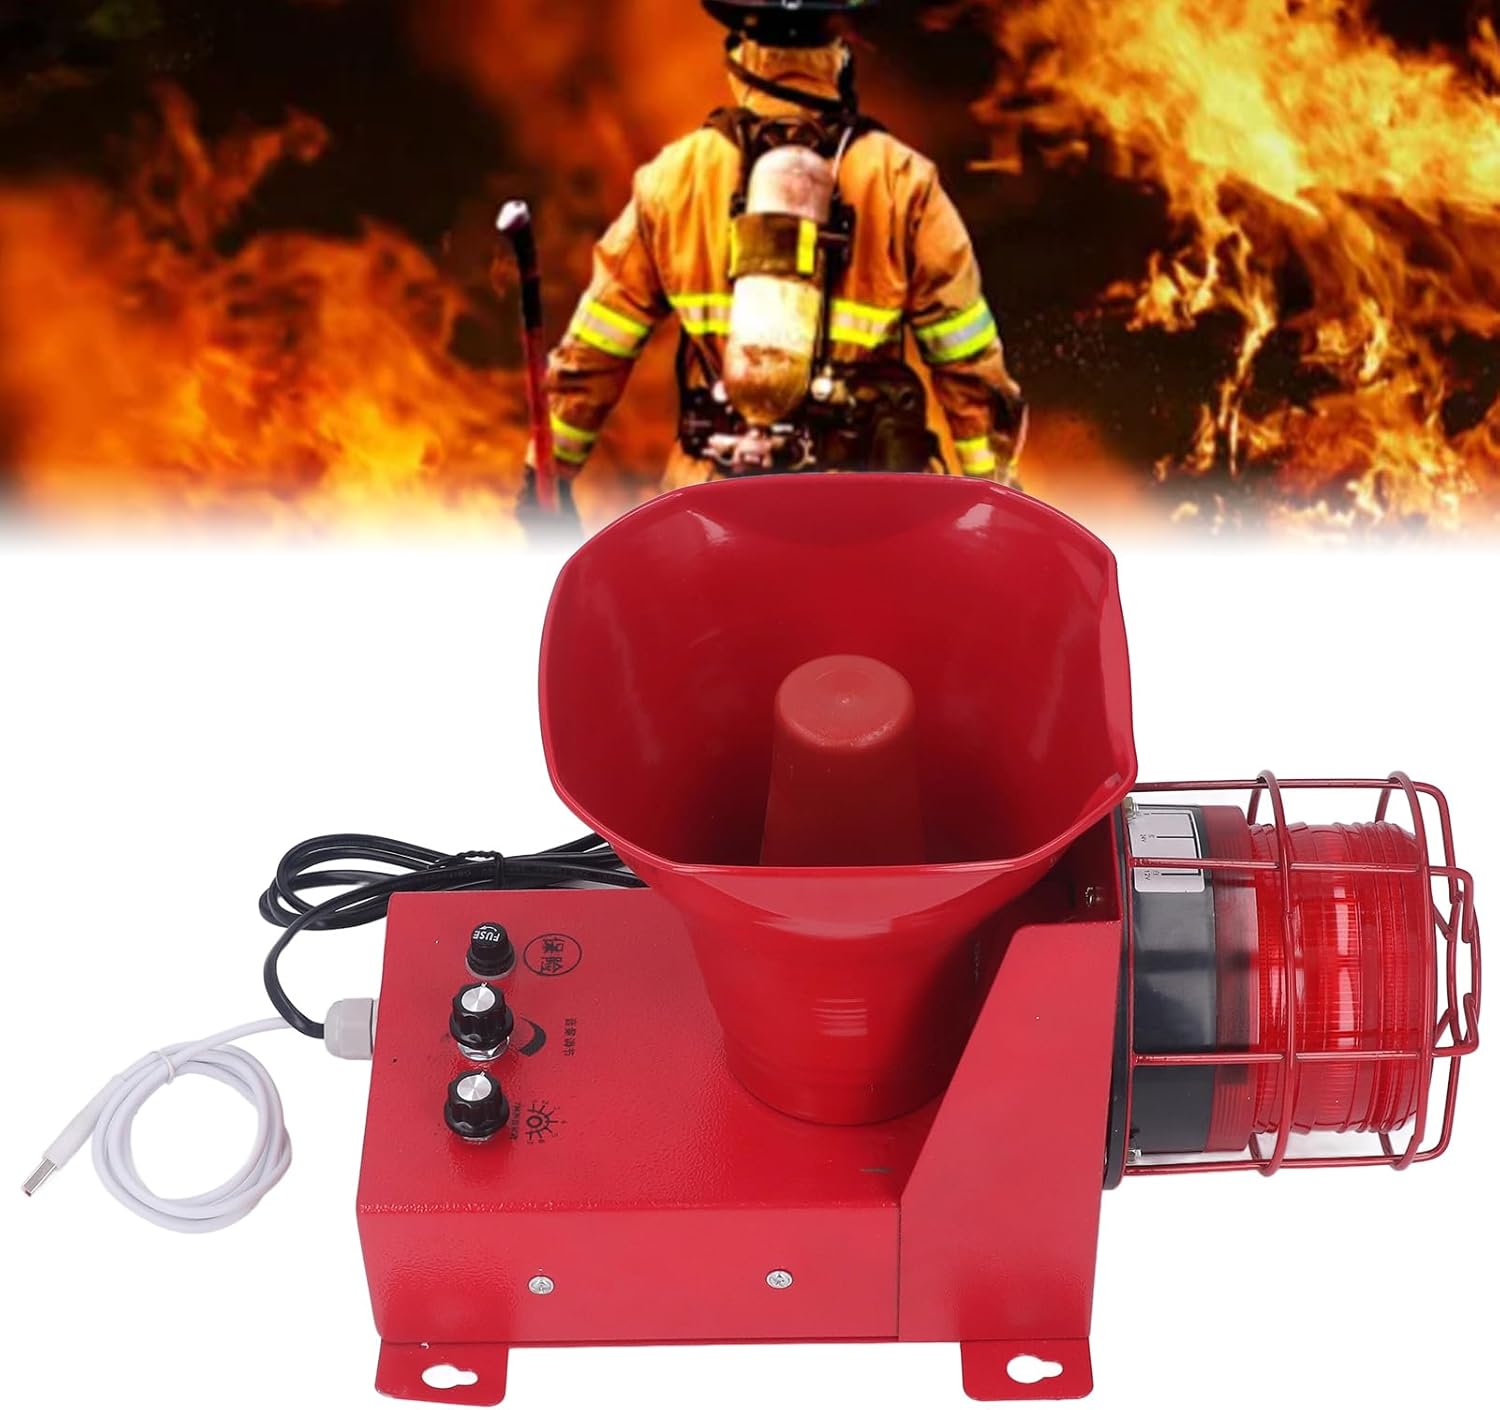
Figure 3.2: Top-down view highlighting the mounting brackets.
4. Operating Instructions
4.1 Powering On/Off
Once properly installed and connected to a power source, the device is ready for operation. The siren alarm typically activates upon receiving a signal from a connected system or through its internal controls, if applicable. There is no explicit on/off switch on the unit itself, implying activation is controlled externally or by its internal logic.
4.2 Adjusting Volume and Tone
The industrial siren alarm features controls for adjusting the sound volume and selecting from various alarm tones.
- Volume Adjustment: Locate the knob or button on the side of the unit designated for volume control. Rotate or press to adjust the sound level, which is adjustable from 0 to 180dB.
- Tone Selection: The device offers 6 optional alarm tones. Use the tone selection control (typically a knob or switch near the volume control) to cycle through and select the desired alarm tone.
- Custom Voice (USB Port): A USB port is available for advanced users to set up custom voice messages. Connect a USB device to this port to upload or configure personalized audio. Refer to the device's internal software interface or specific instructions for detailed guidance on custom voice setup.

Figure 4.1: Side view of the siren alarm, illustrating the control knobs and USB port.
5. Maintenance
5.1 Cleaning
Regularly clean the exterior of the siren alarm with a soft, damp cloth. Do not use abrasive cleaners, solvents, or harsh chemicals, as these can damage the device's finish or internal components.
5.2 Inspection
Periodically inspect the device for any signs of physical damage, such as cracks or corrosion. Check for loose connections in the wiring and ensure that the mounting hardware remains secure. Verify that the LED strobe light is clear of obstructions.
5.3 Fuse Replacement
The device includes a fuse for electrical protection. If the device fails to power on or operate, check the fuse. To replace the fuse:
- Disconnect Power: Ensure the device is completely disconnected from the power source.
- Locate Fuse Holder: Identify the fuse holder on the unit (refer to Figure 5.1).
- Remove Old Fuse: Carefully remove the old fuse from its holder.
- Insert New Fuse: Insert a new fuse of the correct rating. Using a fuse with an incorrect rating can lead to damage or fire.
- Reconnect Power: Reconnect the power and test the device.

Figure 5.1: Close-up view of the fuse holder and control knobs.
6. Troubleshooting
6.1 Common Issues and Solutions
| Problem | Possible Cause | Solution |
|---|---|---|
| Device does not power on | No power supply | Check power connection and ensure the outlet is functional. |
| Device does not power on | Blown fuse | Replace the fuse with one of the correct rating (refer to Section 5.3). |
| No sound or light when activated | Incorrect settings | Verify volume and tone settings are correctly configured (refer to Section 4.2). |
| Sound is too low or inaudible | Volume set too low | Adjust the volume control to a higher setting (refer to Section 4.2). |
| Strobe light not flashing | LED malfunction or connection issue | Ensure all connections are secure. If the LED is still not functioning, contact customer support. |
6.2 Contact Support
If issues persist after attempting the troubleshooting steps, please contact Walfront customer support for further assistance.
7. Specifications
7.1 Technical Data
- Model: WALFRONT8btv9q7ek6-12
- Brand: Walfront
- Power Frequency: 50-60Hz
- Working Current: 6.7A
- Power Supply: 80W
- Operating Temperature: -30℃ to 70℃
- Volume: 0-180dB (Adjustable)
- Maximum Sound Power: 60W
- Volume Adjustment: 6 Tones optional, adjustable sound volume, USB port for custom voice.
- Protection Level: IP65 (Dust and water resistant)
- Installation Mode: Wall mounting
- Working Mode: LED stroboscopic light
- Voltage: 110 Volts (US Plug)
- Item Weight: 2.97 kg
- Parcel Dimensions: 44.2 x 27.8 x 23.4 cm
- Country of Origin: China
- ASIN: B0CM1FC83X
8. Warranty and Support
8.1 Warranty Information
For details regarding product warranty and return policies, please refer to the terms provided by your retailer or point of purchase. The product typically includes a return period of 31 days from the date of purchase.
8.2 Customer Support
For further assistance, technical support, or inquiries, please visit the Walfront Store on Amazon or contact your original point of purchase.


