1. Introduction
Thank you for purchasing the COSTWAY Electric Panini Press Grill. This manual provides important information regarding the safe operation, use, and maintenance of your appliance. Please read this manual thoroughly before using the product and retain it for future reference.
2. Important Safety Instructions
When using electrical appliances, basic safety precautions should always be followed to reduce the risk of fire, electric shock, and injury to persons, including the following:
- Read all instructions before operating the appliance.
- Do not touch hot surfaces. Use handles or knobs.
- To protect against electrical hazards, do not immerse cord, plugs, or the appliance in water or other liquid.
- Close supervision is necessary when any appliance is used by or near children.
- Unplug from outlet when not in use and before cleaning. Allow to cool before putting on or taking off parts, and before cleaning the appliance.
- Do not operate any appliance with a damaged cord or plug, or after the appliance malfunctions or has been damaged in any manner. Contact customer service for examination, repair, or adjustment.
- The use of accessory attachments not recommended by the appliance manufacturer may cause injuries.
- Do not use outdoors.
- Do not let cord hang over edge of table or counter, or touch hot surfaces.
- Do not place on or near a hot gas or electric burner, or in a heated oven.
- Extreme caution must be used when moving an appliance containing hot oil or other hot liquids.
- Always attach plug to appliance first, then plug cord into the wall outlet. To disconnect, turn any control to 'off', then remove plug from wall outlet.
- Do not use appliance for other than intended use.
- A short power-supply cord is provided to reduce the risk resulting from becoming entangled in or tripping over a longer cord.
- Extension cords may be used if care is exercised in their use. If an extension cord is used, the marked electrical rating of the extension cord should be at least as great as the electrical rating of the appliance.
3. Product Overview
The COSTWAY Electric Panini Press Grill is a versatile 1200W appliance designed for various cooking needs. It features double non-stick plates and a stainless steel heating tube for efficient and even cooking. The unit includes a detachable drip tray for easy cleaning and an anti-scalding handle for safe operation. Anti-skid feet provide stability during use.
Key Features:
- 3-in-1 Design: Functions as a panini press, contact grill (90° opening), or double grill (180° opening).
- 1200W Fast Heating: Ensures quick and even cooking.
- LED Touch Control Panel: Easy operation with precise temperature control (194°F to 446°F / 90°C to 230°C) and a 0-4 hour timer.
- Removable Non-Stick Plates: Machine washable for easy cleaning.
- Detachable Drip Tray: Collects excess fats and liquids.
- Safety Features: Anti-scalding handle and anti-slip pads.

Image 3.1: The COSTWAY Electric Panini Press Grill in panini press mode, preparing two sandwiches.
4. Before First Use
- Unpacking: Carefully remove the grill and all accessories from the packaging. Retain packaging for future storage or transport.
- Initial Cleaning: Wipe the exterior of the grill with a damp cloth. Remove the grill plates and drip tray (refer to Section 6 for removal instructions) and wash them with warm, soapy water. Rinse thoroughly and dry completely.
- First Use Preparation: Before cooking food, it is recommended to run the grill empty for approximately 10 minutes at a medium temperature setting to burn off any manufacturing residues. A slight odor or smoke may be present; this is normal. Ensure the area is well-ventilated.
5. Operating Instructions
5.1 Powering On and Preheating
- Ensure the grill plates are properly installed and the drip tray is in place.
- Plug the power cord into a standard 120V AC electrical outlet. The LED display will illuminate.
- Press the power button (U symbol) to turn on the grill.
- Select your desired cooking mode (Panini Press, Contact Grill, or Double Grill) and adjust the temperature using the touch controls.
- Allow the grill to preheat. The grill will beep when the set temperature is reached and preheating is complete.
- Important: After preheating is finished and the beep sounds, press the power button again to activate the cooking function normally.
5.2 Cooking Modes
The grill offers three primary cooking configurations:
- Panini Press: Use with the lid closed for pressing sandwiches, paninis, or grilling thinner items. The floating hinge adjusts to the thickness of your food.
- Contact Grill (90° Opening): Open the lid to a 90-degree angle. This allows for grilling on both plates simultaneously, ideal for thicker items or when you need to check food frequently.
- Double Grill (180° Opening): Fully open the lid to lay the grill flat, creating a larger cooking surface. This is suitable for grilling multiple items or larger quantities of food.

Image 5.1: Illustration of the grill's three operational modes: Panini Press, Contact Grill, and Double Grill.
5.3 Temperature and Timer Control
The LED touch control panel allows for precise adjustment of cooking parameters.
- Temperature Adjustment: Use the temperature up/down arrows to set the desired cooking temperature between 194°F (90°C) and 446°F (230°C).
- Timer Function: The built-in timer can be set from 0 to 4 hours. Use the timer controls to set the cooking duration. The grill will automatically shut off or alert you when the time expires.
- Auto Cooking Modes: The grill features 5 pre-set auto cooking modes for common food types, simplifying operation.

Image 5.2: The control panel displaying 5 auto cooking modes with recommended settings.

Image 5.3: Detailed view of the LED touch control panel, anti-scalding handle, and anti-slip pads.
6. Cooking Guide
The following are suggested cooking times and temperatures. Actual cooking times may vary based on food thickness, initial temperature, and desired doneness. Always ensure food is cooked to a safe internal temperature.
| Food Type | Suggested Time | Suggested Temperature |
|---|---|---|
| Vegetables | 8 minutes | 392°F (200°C) |
| Sausage | 10 minutes | 428°F (220°C) |
| Fish | 8 minutes | 410°F (210°C) |
| Chicken | 7 minutes | 446°F (230°C) |
| Beef Steak | 8 minutes | 446°F (230°C) |
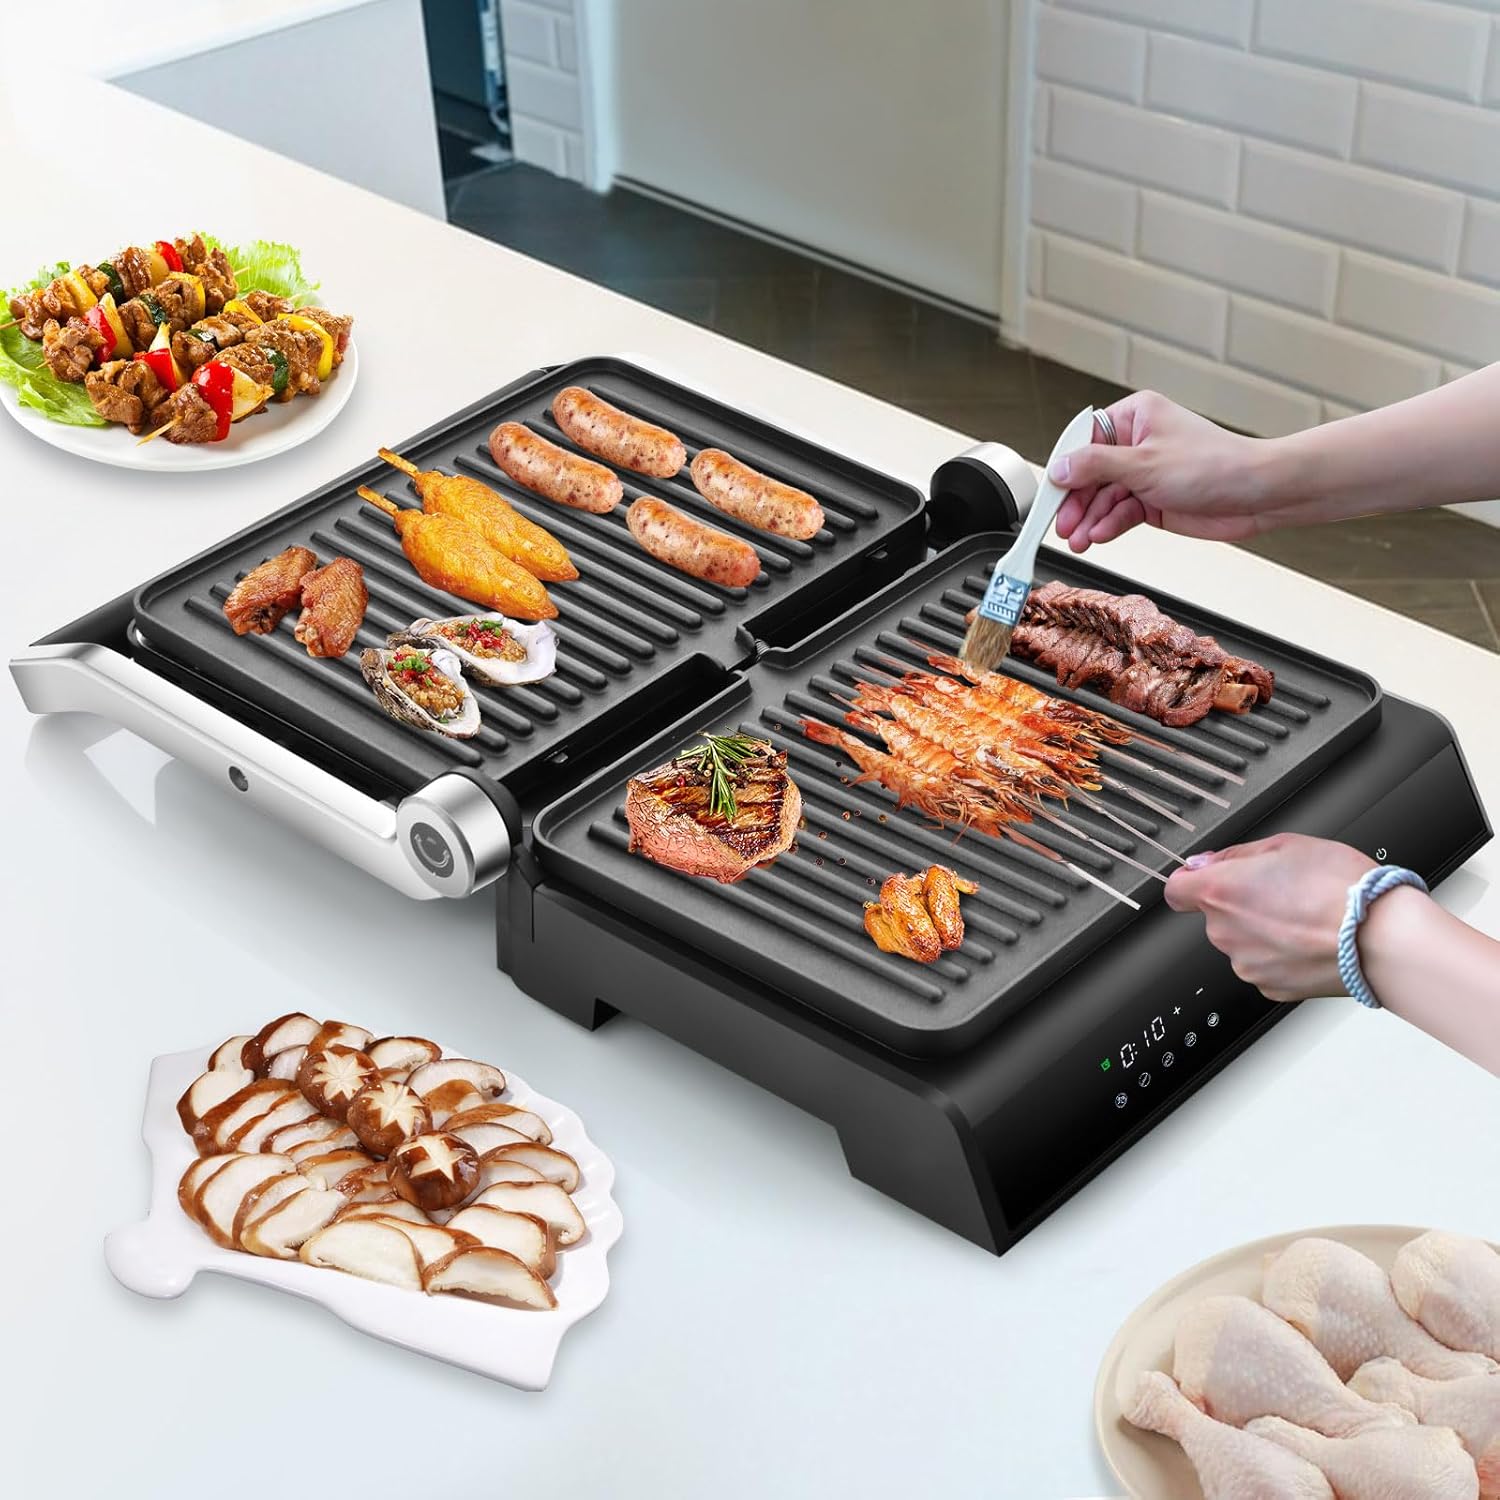
Image 6.1: The grill in 180-degree open mode, demonstrating its use for grilling a variety of foods.
7. Cleaning and Maintenance
Regular cleaning ensures optimal performance and extends the lifespan of your grill. Always unplug the appliance and allow it to cool completely before cleaning.
7.1 Removing Grill Plates and Drip Tray
- Ensure the grill is unplugged and cool.
- Locate the plate release buttons on the side of the grill. Press the buttons to release the grill plates.
- Carefully lift the plates off the grill.
- Slide out the drip tray from the front or side of the unit.
7.2 Cleaning Instructions
- Grill Plates: The non-stick grill plates are machine washable. They can also be hand-washed with warm, soapy water and a non-abrasive sponge. Avoid using metal scouring pads or harsh detergents that could damage the non-stick coating.
- Drip Tray: The drip tray is also machine washable or can be hand-washed with warm, soapy water.
- Exterior: Wipe the exterior of the grill with a damp cloth. Do not use abrasive cleaners or immerse the main unit in water.
- Storage: Ensure all parts are clean and dry before storing the grill. Store in a cool, dry place.

Image 7.1: Steps for removing and cleaning the grill plates, including dishwasher compatibility.
8. Troubleshooting
If you encounter issues with your grill, refer to the following common problems and solutions:
| Problem | Possible Cause | Solution |
|---|---|---|
| Grill does not turn on. | Not plugged in; power outlet malfunction; power button not pressed. | Ensure plug is securely in outlet. Test outlet with another appliance. Press the power button. |
| Grill not heating after preheat beep. | Power button not pressed again after preheat. | Press the power button again after the preheat beep to begin cooking. |
| Food sticking to plates. | Plates not properly seasoned; food not oiled; non-stick coating damaged. | Lightly brush plates with cooking oil before use. Ensure plates are clean. If coating is damaged, contact support. |
| Uneven cooking. | Food unevenly distributed; grill not fully preheated. | Ensure food is spread evenly. Allow grill to fully preheat before adding food. |
| Excessive smoke. | Food residue on plates; too much oil/fat; high-fat food. | Clean plates thoroughly. Use less oil. Ensure drip tray is empty. |
9. Specifications
| Feature | Specification |
|---|---|
| Model Number | 10271US-DK-CYSE |
| Rated Voltage | 120V |
| Rated Frequency | 60Hz |
| Rated Power | 1200W |
| Adjustable Temperature Range | 194-446°F (90-230°C) |
| Timer Range | 0-4 hours |
| Product Dimensions (Closed) | 14" L x 12.5" W x 6" H (35 cm x 31.5 cm x 15 cm) |
| Extended Dimensions (180° Open) | 22" L x 14" W x 3.5" H (56 cm x 35 cm x 9 cm) |
| Grill Plate Dimensions | 11.5" L x 8" W (29 cm x 21 cm) |
| Net Weight | 10 lbs (4.5 kg) |
| Material | Tempered Glass, Aluminum, Metal, Stainless Steel |
| Color | Black |

Image 9.1: Product dimensions in closed and fully open states.
10. Warranty and Support
This COSTWAY Electric Panini Press Grill comes with a limited warranty. For specific warranty terms, conditions, and duration, please refer to the warranty card included with your purchase or contact COSTWAY customer service.
For technical support, troubleshooting assistance, or to inquire about replacement parts, please contact COSTWAY customer service through their official website or the contact information provided in your product packaging. Please have your model number (10271US-DK-CYSE) and purchase date available when contacting support.