
1. Introduction
This manual provides detailed instructions for the safe installation, operation, and maintenance of your kvtinmty 55-inch Rectangular Silver Crystal Tree Branch Chandelier. Please read this manual thoroughly before beginning installation and retain it for future reference. This chandelier features a unique tree branch-inspired design adorned with K9 crystals, designed for indoor use in spaces such as dining rooms, living rooms, and kitchen islands.
2. Important Safety Instructions
- Always turn off the main power supply at the circuit breaker before installing, cleaning, or servicing the fixture.
- Consult a qualified electrician if you are not experienced with electrical wiring.
- Ensure the mounting surface can support the weight of the fixture.
- Handle crystal components with care to prevent breakage or injury.
- Do not connect the fixture to an ungrounded electrical system.
- Use only the specified bulb type and wattage to avoid fire hazards.
- Keep flammable materials away from the light bulbs.
3. What's in the Box
Verify that all components are present and undamaged before proceeding with installation.
- Chandelier Main Frame (with pre-attached flexible branches and bulb sockets)
- Ceiling Canopy
- Adjustable Suspension Cables
- K9 Crystal Strands (various sizes)
- Mounting Hardware (screws, wire nuts, mounting bracket)
- Installation Instructions
4. Product Specifications
| Brand | kvtinmty |
| Model Name | PX-140047 |
| Item Model Number | crystal chandeliers 09 |
| Color | Silver |
| Material | Aluminum, K9 Crystal |
| Product Dimensions | 55"L x 13"W x 19.2"H |
| Item Weight | 34.1 pounds |
| Light Fixture Form | Chandelier |
| Number of Light Sources | 16 |
| Bulb Base | G9 (Bulbs not included) |
| Wattage | 60 watts (max per bulb) |
| Voltage | 110 Volts |
| Special Features | Adjustable Color Temperature (with compatible bulbs), Dimmable (with compatible bulbs and dimmer switch), Energy Efficient |
| Installation Type | Semi Flush Mount |
| Ceiling Compatibility | Flat and Sloped Ceilings |
| Certification | ETL, UL |
5. Setup and Installation
Professional installation is recommended. Ensure power is OFF at the circuit breaker before starting.
5.1. Tools Required (Not Included)
- Screwdriver
- Wire Strippers
- Electrical Tape
- Ladder
- Safety Glasses
5.2. Pre-Installation
- Carefully unpack all components and lay them out on a clean, soft surface to prevent scratches.
- Identify all parts against the 'What's in the Box' section.
- Turn off the electricity at the main fuse box or circuit breaker.
5.3. Mounting the Ceiling Canopy
- Attach the mounting bracket to your ceiling junction box using the provided screws. Ensure it is securely fastened.
- The ceiling canopy is compatible with both flat and sloped ceiling installations.
5.4. Electrical Wiring
- Connect the fixture's ground wire (usually bare copper or green) to the house ground wire using a wire nut.
- Connect the fixture's neutral wire (usually white) to the house neutral wire (white) using a wire nut.
- Connect the fixture's live wire (usually black) to the house live wire (black) using a wire nut.
- Carefully tuck all wires into the junction box.
5.5. Chandelier Frame Assembly and Height Adjustment
- The chandelier's branches are made of aluminum alloy one-piece molding. Each branch is removable and can be easily assembled.
- The suspension cables are adjustable from 0 to 66 inches. To adjust the length, press the button on the cable gripper within the ceiling canopy and slide the cable to the desired length. It is recommended to adjust the cables to achieve the desired height and levelness before cutting any excess cable.
- Secure the chandelier main frame to the ceiling canopy, ensuring all connections are tight.

Figure 5.5.1: Chandelier dimensions and suitable ceiling types (flat and sloped).

Figure 5.5.2: Illustration highlighting the one-piece molded aluminum branches for easy assembly and durability.
5.6. Crystal Installation
- Carefully hang each K9 crystal strand onto the designated hooks on the chandelier branches.
- Ensure each crystal is securely attached.
5.7. Bulb Installation
- This chandelier requires 16 G9 bulbs (not included).
- Gently insert each G9 bulb into its socket. Do not overtighten.
6. Operating Instructions
6.1. Powering On
Once installation is complete and verified, restore power at the circuit breaker. Operate the chandelier using your wall switch.
6.2. Dimmable Functionality
The chandelier is dimmable when used with dimmable G9 bulbs and a compatible dimmer switch (both sold separately). You can choose bulbs with different color temperatures to match your home décor; 3000K warm white light bulbs are generally recommended for a cozy ambiance.
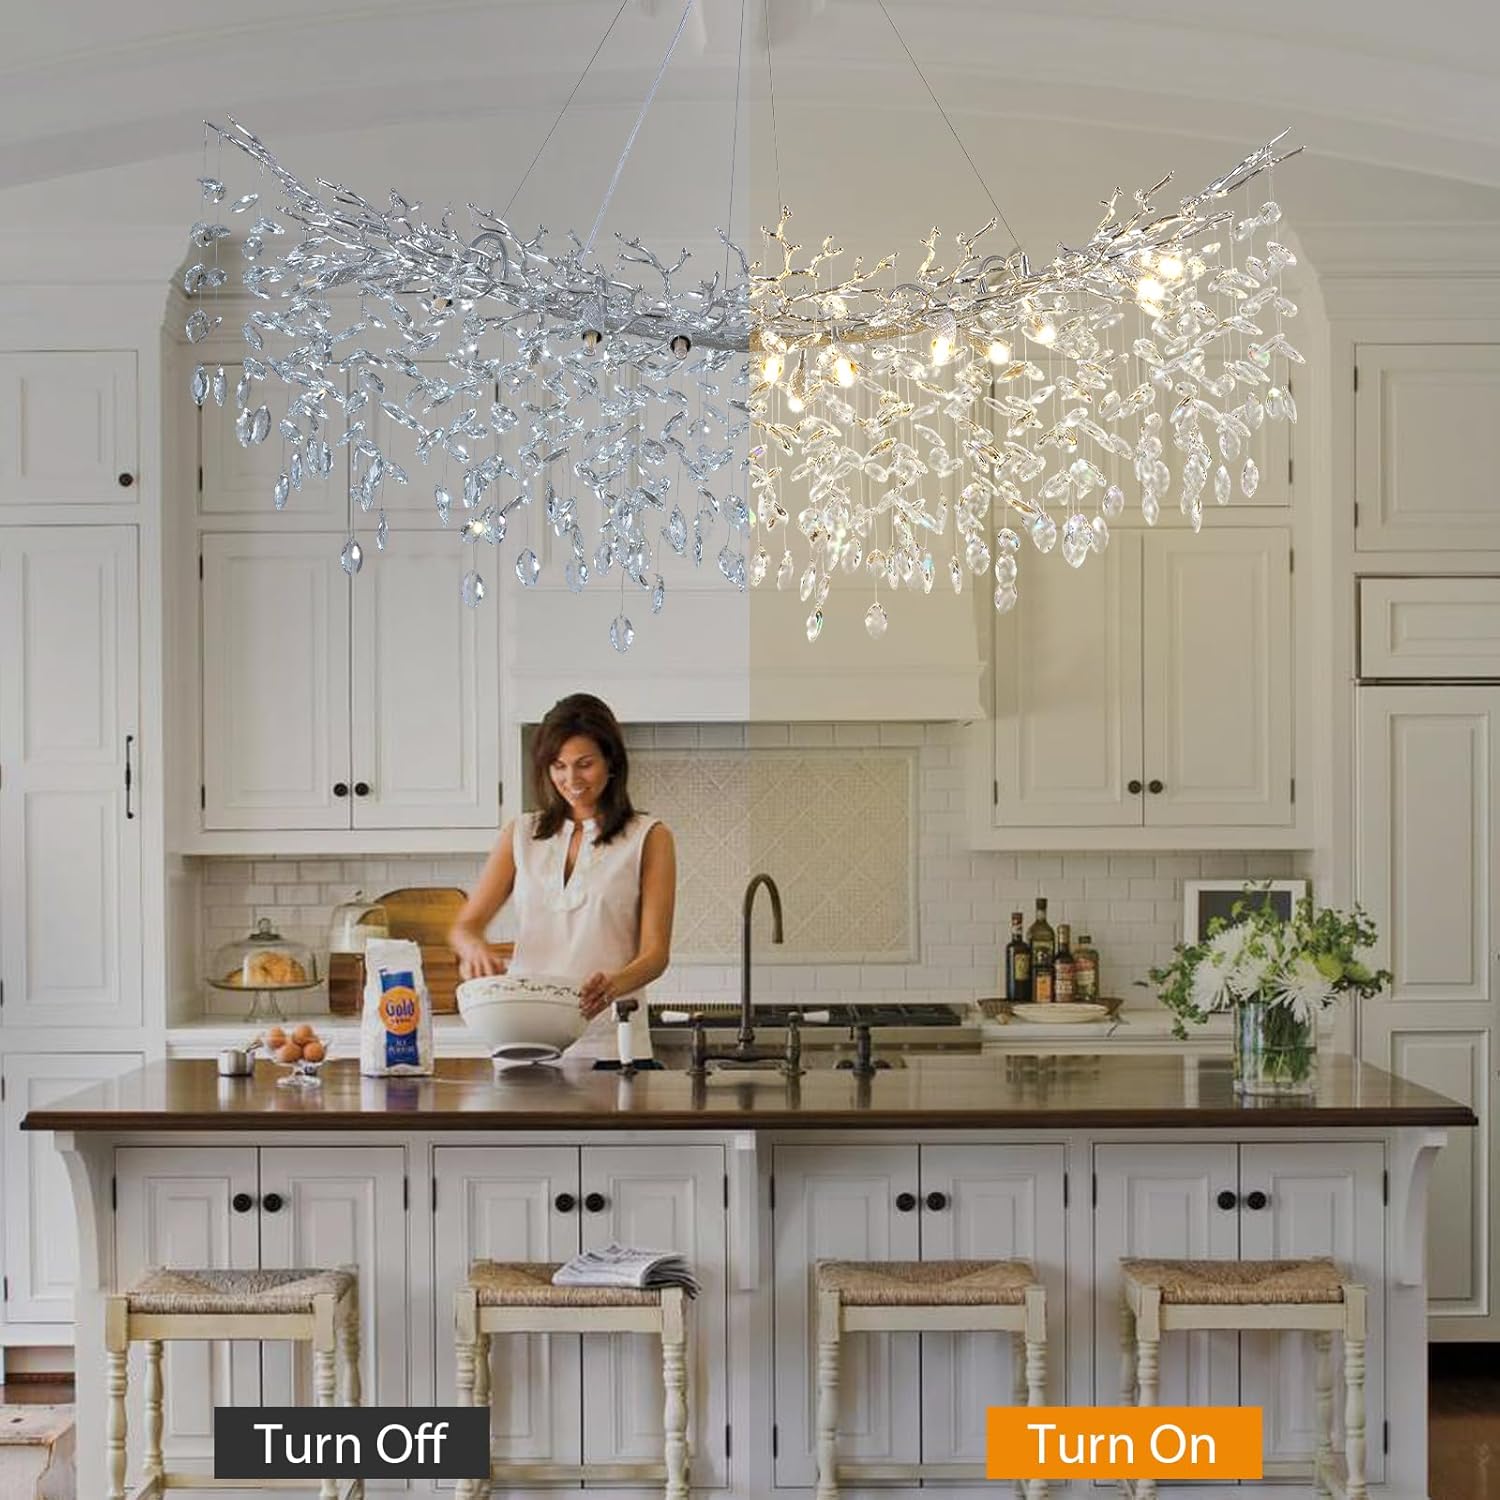
Figure 6.2.1: Visual representation of the chandelier with lights off and on, demonstrating its illumination.
7. Care and Maintenance
7.1. Cleaning
- Always turn off power before cleaning.
- For the metal frame, wipe with a soft, dry cloth. Avoid abrasive cleaners that may damage the finish. The aluminum alloy branches feature an antioxidant paint coating designed to maintain its appearance over time.
- For the K9 crystals, use a soft, lint-free cloth dampened with a mild glass cleaner or distilled water. Gently wipe each crystal.
7.2. Bulb Replacement
- Ensure power is off and bulbs have cooled before attempting replacement.
- Gently remove the old G9 bulb and insert a new one.
8. Troubleshooting
| Problem | Possible Cause | Solution |
|---|---|---|
| Chandelier does not light up. | No power supply; loose wiring; faulty bulb. | Check circuit breaker. Ensure all wire connections are secure. Replace bulbs. |
| Lights flicker. | Incompatible dimmer switch; non-dimmable bulbs used with dimmer; loose connection. | Ensure dimmer switch is compatible with LED bulbs. Use dimmable G9 bulbs. Check for loose wiring connections. Consider 'No Flicker' bulbs if issue persists. |
| Chandelier is not level. | Uneven cable adjustment. | Adjust the length of individual suspension cables by pressing the button on the cable gripper within the ceiling canopy. |
9. Warranty and Support
9.1. Warranty Information
kvtinmty provides a 5-year promise for all chandeliers, which includes replacement of lost or damaged parts. Please retain your proof of purchase for warranty claims.
9.2. Customer Support
If you encounter any problems during the installation process or have questions regarding your product, please contact kvtinmty customer support. We are committed to providing timely assistance and will communicate with our technical department to help resolve any issues.
