
Introduction
This user manual provides comprehensive instructions for the safe and effective operation, setup, and maintenance of your Dragonhawk Tattoo Machine Set. Please read this manual thoroughly before using the product to ensure optimal performance and longevity. This kit is designed for tattoo beginners and apprentices, offering a complete solution for learning and practicing.
Product Overview
The Dragonhawk Tattoo Machine Set is a complete kit featuring a wireless rotary tattoo pen machine, a wireless battery power supply, and essential accessories. It is engineered for precision and ease of use, making it suitable for various tattooing procedures.

Figure 1: Complete Dragonhawk Tattoo Machine Set including the pen, wireless battery, cartridges, and accessories.
Key Components:
- Dragonhawk Tattoo Pen Machine: Constructed with a space aluminum frame and a custom Dragonhawk motor, ensuring reliable, quiet, and lightweight operation. Compatible with all standard cartridge needles.
- Wireless RCA Jack Battery Power Supply: Features an 1100mAh capacity, operating from 5 to 12 volts, providing approximately 3 hours of continuous use on a full charge.
- Tattoo Cartridge Needles: Includes 20 individually packaged cartridge needles, designed for easy installation and quick rebound. Semi-transparent for convenient observation.
- Accessories: Transfer paper, practice skin, and tattoo gloves are included to provide a comprehensive starter kit.
Setup
Follow these steps to set up your Dragonhawk Tattoo Machine:
- Charge the Wireless Battery: Connect the wireless RCA Jack battery power supply to a suitable USB power source using the provided cable. A full charge typically takes about 2 hours.
- Attach the Wireless Battery: Securely connect the fully charged wireless battery power supply to the RCA jack of the tattoo pen machine. Ensure a firm connection for stable power delivery.

Figure 2: Illustration of the RCA socket for connecting the wireless power supply or a wired RCA cable.
- Install a Cartridge Needle: Select the desired cartridge needle. Insert the needle firmly into the front end of the tattoo pen machine until it clicks into place. The semi-transparent design allows for easy visual confirmation of proper seating.

Figure 3: Dragonhawk cartridge needles, designed for easy installation and thorough inspection.
Operating Instructions
Operating your Dragonhawk Tattoo Machine is straightforward:
- Power On/Off: Double-click the power button on the wireless battery to turn the machine on or off. The voltage display will illuminate upon activation.

Figure 4: Simple operating system of the wireless battery, showing voltage display and power buttons.
- Adjust Voltage: Use the Voltage (+) and Voltage (-) buttons on the wireless battery to adjust the operating voltage. The machine operates stably between 6-8V, with a range of 5-12V.
- Adjust Needle Depth: Rotate the grip of the tattoo pen machine to adjust the needle depth. This allows for precise control over the needle's protrusion, with a stroke of 3.5mm.

Figure 5: Rotating the grip to precisely adjust the needle length and stroke.
- Operation: The machine is robust and powerful, suitable for both shading and lining. Its 6500 R/Minute motor ensures efficient performance.
Maintenance
Proper maintenance ensures the longevity and hygiene of your tattoo machine:
- Cleaning: After each use, carefully wipe down the exterior of the tattoo pen and battery with a clean, damp cloth. For disinfection, use an appropriate surface disinfectant spray, ensuring no liquid enters the internal components.
- Storage: Store the machine and its components in a clean, dry place, away from direct sunlight and extreme temperatures. Keep it in its original packaging or a dedicated case to prevent damage.
- Needle Disposal: Always dispose of used cartridge needles in a designated sharps container according to local regulations. Never reuse needles.
- Battery Care: Do not overcharge or completely drain the wireless battery. Charge it regularly, even if not in frequent use, to maintain battery health.
Troubleshooting
If you encounter issues with your Dragonhawk Tattoo Machine, refer to the following common problems and solutions:
| Problem | Possible Cause | Solution |
|---|---|---|
| Machine does not turn on. | Battery is not charged or not properly connected. | Ensure the battery is fully charged. Check that the wireless battery is securely attached to the RCA jack. Double-click the power button to activate. |
| Machine runs weakly or inconsistently. | Low battery charge or incorrect voltage setting. | Recharge the battery. Adjust the voltage to the recommended 6-8V range using the (+) and (-) buttons. |
| Needle not extending/retracting properly. | Improperly installed cartridge or grip not rotated correctly. | Ensure the cartridge needle is fully seated. Rotate the grip to adjust the needle depth. |
| Unusual noise or vibration. | Loose components or internal issue. | Check all connections. If the issue persists, discontinue use and contact customer support. |
If the problem persists after attempting these solutions, please contact Dragonhawk customer support for further assistance.
Specifications
Technical specifications for the Dragonhawk Tattoo Pen Machine (Model DML-220):
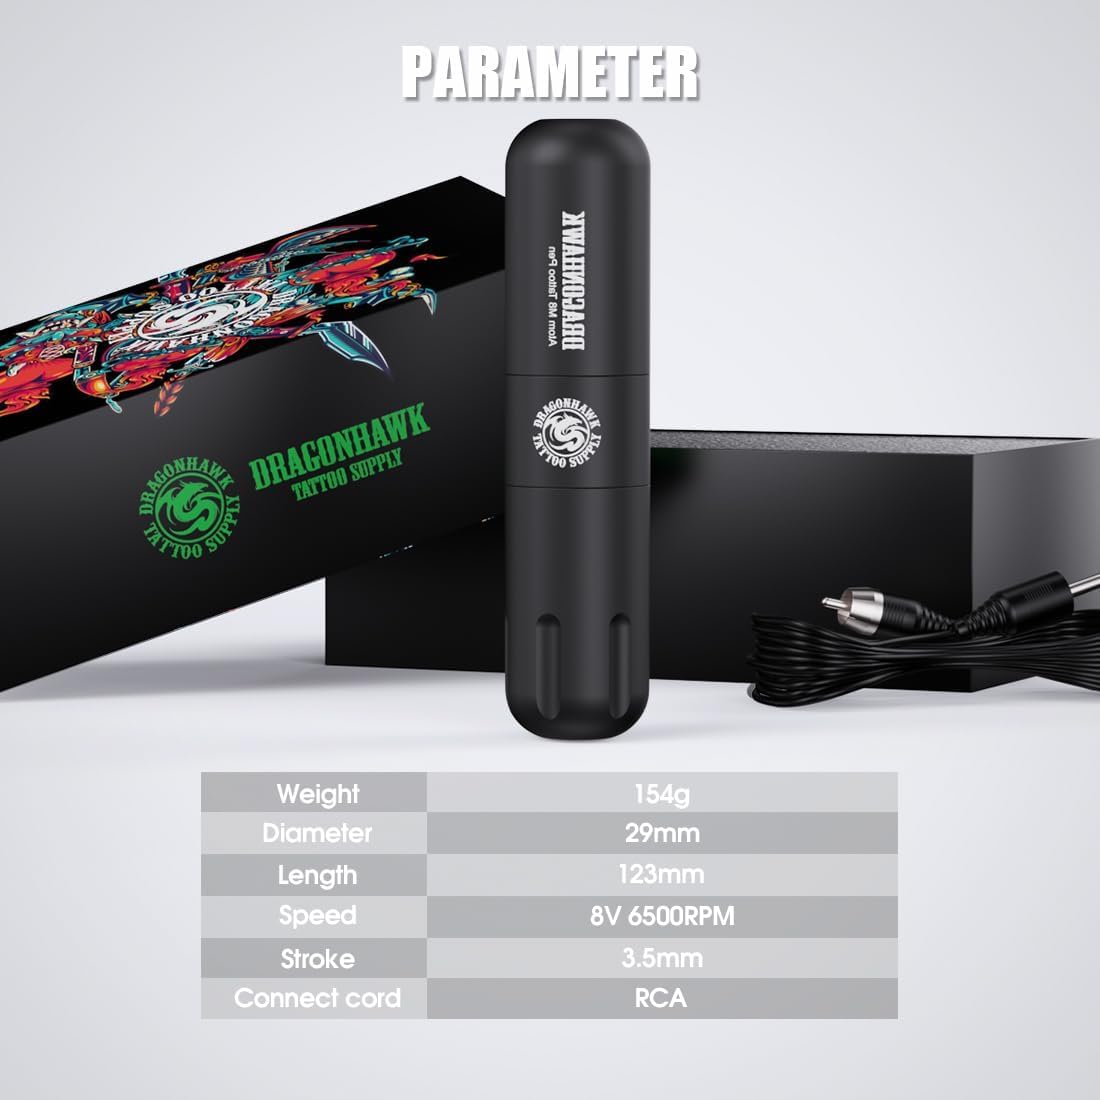
Figure 6: Visual representation of the tattoo pen machine parameters.
| Feature | Detail |
|---|---|
| Manufacturer | Dragonhawk Tattoo Supply |
| Model Number | DML-220 |
| Weight | 710 grams (total package), Pen: 154g |
| Dimensions (Pen) | Diameter: 29mm, Length: 123mm |
| Motor Speed | 8V 6500 RPM |
| Stroke | 3.5mm |
| Connection Type | RCA Jack |
| Wireless Battery Capacity | 1100mAh |
| Operating Voltage (Battery) | 5-12 Volts (Stable operation 6-8V) |
| Battery Operating Time | Approx. 3 hours (depending on voltage) |
| Battery Charging Time | Approx. 2 hours for full charge |
Warranty and Support
Dragonhawk is committed to providing high-quality products. For any warranty claims, technical support, or inquiries regarding your tattoo machine set, please contact Dragonhawk customer service directly. Keep your purchase receipt as proof of purchase for any warranty-related requests.
Please refer to the official Dragonhawk website or your point of purchase for the most current warranty information and contact details.