
Introduction
This manual provides detailed instructions for the proper installation, operation, and maintenance of your Monstrum Banshee 1-6x24 Low Power Variable Optic (LPVO) Rifle Scope. Please read this manual thoroughly before using your scope to ensure optimal performance and longevity.
Package Contents
Verify that all items are present in your package:
- Monstrum Banshee 1-6x24 LPVO Rifle Scope
- Monstrum Offset Scope Mount
- Flip-Up Lens Covers (matching set)
- Lens Cleaning Cloth
- User Manual (this document)
Key Features
- Magnification: 1-6x variable power for versatile use.
- Optics: Newly designed assembly for extended eye relief, wider eye box, and true 1x magnification.
- Reticle Options: Available with Second Focal Plane (SFP) MX1 (MOA hashmarks), BDC B1 (5.56 BDC hashmarks), or BDC C1 (daylight bright) reticles.
- Illumination: Inline dial-controlled reticle illumination with 5 brightness levels in both red and green.
- Lens Coating: Enhanced anti-reflective lens coatings for superior light transmission and optical clarity.
- Durability: Water-resistant, fog-proof, and shock-proof construction.
Setup
1. Mounting the Scope
The Monstrum Banshee 1-6x24 LPVO comes with a dedicated offset scope mount for optimal positioning on your rifle. Ensure your rifle is unloaded and safe before proceeding.
- Attach the offset scope mount to your rifle's Picatinny rail. Ensure the mount is seated firmly and tighten the mounting screws securely.
- Place the scope into the rings of the mount. Ensure the reticle is level with the rifle.
- Adjust the scope's position forward or backward in the rings to achieve proper eye relief. This is the distance between your eye and the eyepiece where you see a full, clear image.
- Once the correct eye relief is established and the reticle is level, tighten the ring screws evenly and gradually to secure the scope. Do not overtighten.

Image: The Monstrum Banshee 1-6x24 LPVO Rifle Scope with its included offset mount, ready for installation.
2. Battery Installation (for Reticle Illumination)
The reticle illumination requires a CR2032 battery (not included). The battery compartment is located on the illumination turret.
- Unscrew the battery cap on the illumination turret (typically the left-side turret).
- Insert a fresh CR2032 battery with the positive (+) side facing outwards.
- Screw the battery cap back on firmly, ensuring a proper seal.
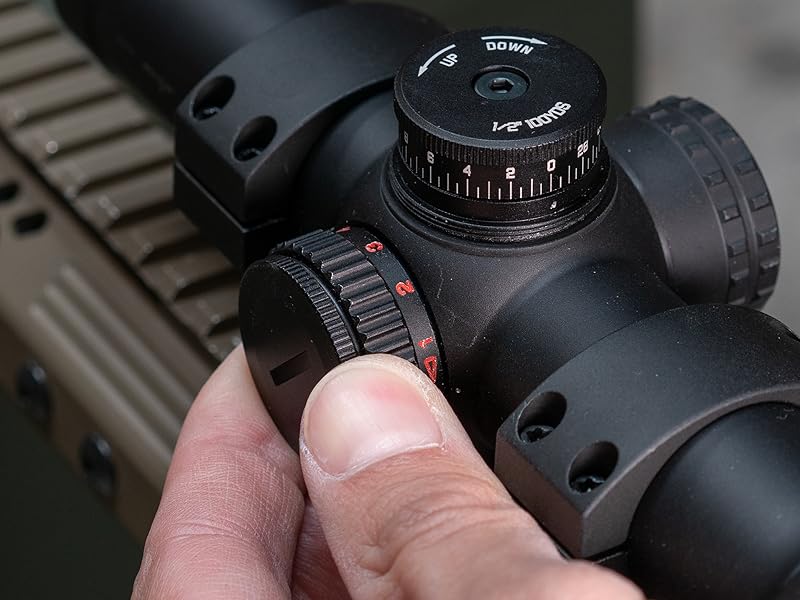
Image: The illumination turret with its dial for brightness control and battery compartment.
3. Diopter Adjustment (Focusing the Reticle)
The diopter adjustment allows you to focus the reticle for your individual eyesight, ensuring it appears sharp and clear.
- Point the scope at a plain, bright background (e.g., a clear sky or a blank wall).
- Look through the scope and quickly glance at the reticle.
- Rotate the diopter ring (the ring closest to your eye on the eyepiece) until the reticle appears perfectly sharp and in focus.
- Once adjusted, the reticle should remain clear for your vision.
Operating the Scope
1. Magnification Adjustment
The Monstrum Banshee offers variable magnification from 1x to 6x. Rotate the magnification ring (located near the eyepiece) to your desired power setting. The integrated throw lever assists in quick adjustments.

Image: Adjusting the magnification ring with the integrated throw lever for rapid power changes.
2. Reticle Illumination
The reticle can be illuminated in red or green with 5 brightness settings for each color.
- Rotate the illumination dial (left-side turret) to turn on the reticle.
- Continue rotating to cycle through the 5 brightness levels for the current color.
- To switch between red and green illumination, push the center button on the illumination dial.
- Turn the dial back to "0" to turn off the illumination.
3. Windage and Elevation Adjustment
The windage (horizontal) and elevation (vertical) turrets are used to adjust the point of impact of your shots. Each click of the turret moves the point of impact by a specific increment (e.g., 1/2 MOA per click).
- Elevation Turret: Located on top of the scope. Rotate clockwise to move the point of impact DOWN, and counter-clockwise to move it UP.
- Windage Turret: Located on the right side of the scope. Rotate clockwise to move the point of impact RIGHT, and counter-clockwise to move it LEFT.
The turrets are tactile and provide audible clicks for precise adjustments. After zeroing, you can reset the turrets to "0" by lifting and rotating the turret cap to align the "0" mark with the indicator, then pressing it back down.
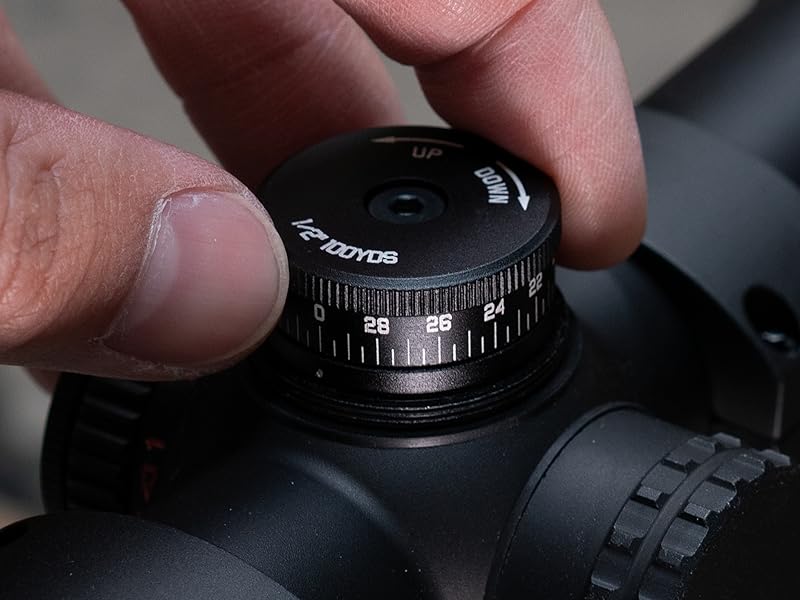
Image: Precision turrets for windage and elevation adjustments, featuring clear markings.
4. Zeroing the Scope
Zeroing your scope is crucial for accurate shooting. This process should be performed at a safe shooting range.
- Set up a target at your desired zeroing distance (e.g., 50 or 100 yards).
- Secure your rifle in a stable shooting rest.
- Fire a group of 3 shots at the target.
- Observe the point of impact relative to your aiming point.
- Adjust the windage and elevation turrets to move the point of impact towards your aiming point. For example, if your shots are hitting low and left, adjust the elevation turret UP and the windage turret RIGHT.
- Fire another group of 3 shots and repeat the adjustment process until your shots consistently hit your aiming point.
Reticle Information
The Monstrum Banshee 1-6x24 LPVO is available with several Second Focal Plane (SFP) reticle options. SFP reticles maintain their size relative to the field of view at all magnification levels.
BDC B1 Reticle (Ballistic Drop Compensating)
The BDC B1 reticle features specific hashmarks designed for ballistic drop compensation, typically calibrated for 5.56/.223 ammunition. These hashmarks allow for quick holdovers at various distances without adjusting elevation turrets.

Image: Comparison of the BDC B1 reticle view at 1x and 6x magnification, showing target acquisition at 50 yards.
MX1 Reticle
The MX1 reticle features MOA hashmarks for precise ranging and holdover calculations based on Minute of Angle measurements.
BDC C1 Reticle
The BDC C1 reticle is a daylight bright ballistic drop compensating reticle, offering enhanced visibility in bright conditions.
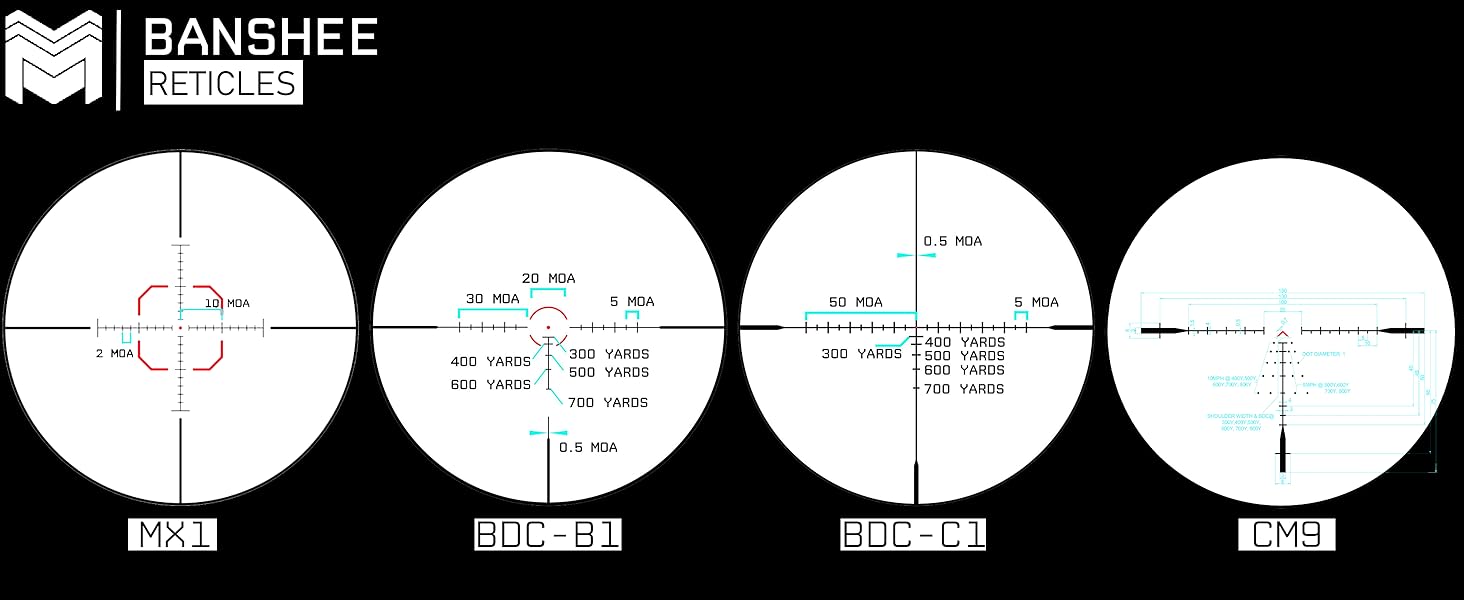
Image: Visual representation of various Monstrum Banshee reticle options, including MX1, BDC B1, and BDC C1.
Maintenance
- Cleaning Lenses: Use the provided lens cleaning cloth or a high-quality optical cleaning cloth. Gently brush off any dust or debris first. For stubborn smudges, use a small amount of lens cleaning solution designed for optics. Avoid using harsh chemicals or abrasive materials.
- Cleaning Body: Wipe the scope body with a soft, damp cloth. Avoid solvents that may damage the finish.
- Storage: Store the scope in a cool, dry place, away from direct sunlight and extreme temperatures. Use the flip-up lens covers to protect the lenses when not in use.
- Battery: Remove the CR2032 battery if the scope will be stored for an extended period to prevent leakage.
Troubleshooting
| Problem | Possible Cause | Solution |
|---|---|---|
| Reticle is blurry | Diopter not adjusted correctly | Adjust the diopter ring until the reticle is sharp. |
| Image is blurry | Improper eye relief | Adjust the scope's position in the mount to achieve optimal eye relief. |
| Reticle illumination not working | Dead battery, incorrect battery orientation, or loose battery cap | Replace battery, ensure correct polarity (+ up), tighten battery cap. |
| Point of impact shifts | Loose scope mount, loose scope rings, or rifle issue | Check and tighten all mounting screws. Ensure rifle components are secure. Re-zero if necessary. |
Specifications
| Magnification | 1-6x |
| Objective Lens Diameter | 24 mm |
| Reticle Type | Second Focal Plane (SFP) - BDC B1, MX1, BDC C1 (variant dependent) |
| Reticle Illumination | Red/Green, 5 Brightness Levels |
| Field of View (at 100 yards) | 118.4 ft (at 1x) |
| Material | Aircraft-grade Aluminum |
| Length | Approximately 11 inches |
| Mounting Type | Cantilever Mount (included) |
| Waterproof/Fogproof | Yes |
| Shockproof | Yes |
Warranty and Support
Monstrum products are designed for durability and performance. For specific warranty details, product support, or service inquiries, please visit the official Monstrum website or contact their customer service department. Keep your proof of purchase for warranty claims.
Official Monstrum Store: Monstrum Tactical Amazon Store