Product Overview
Thank you for choosing the iTOMA Alarm Clock. This device combines multiple essential features into one compact unit, including a dual alarm clock, wireless charging pad, USB charging port, large LED display, adjustable brightness, night light, and indoor temperature and humidity display. This manual provides detailed instructions to help you set up and operate your new alarm clock effectively.
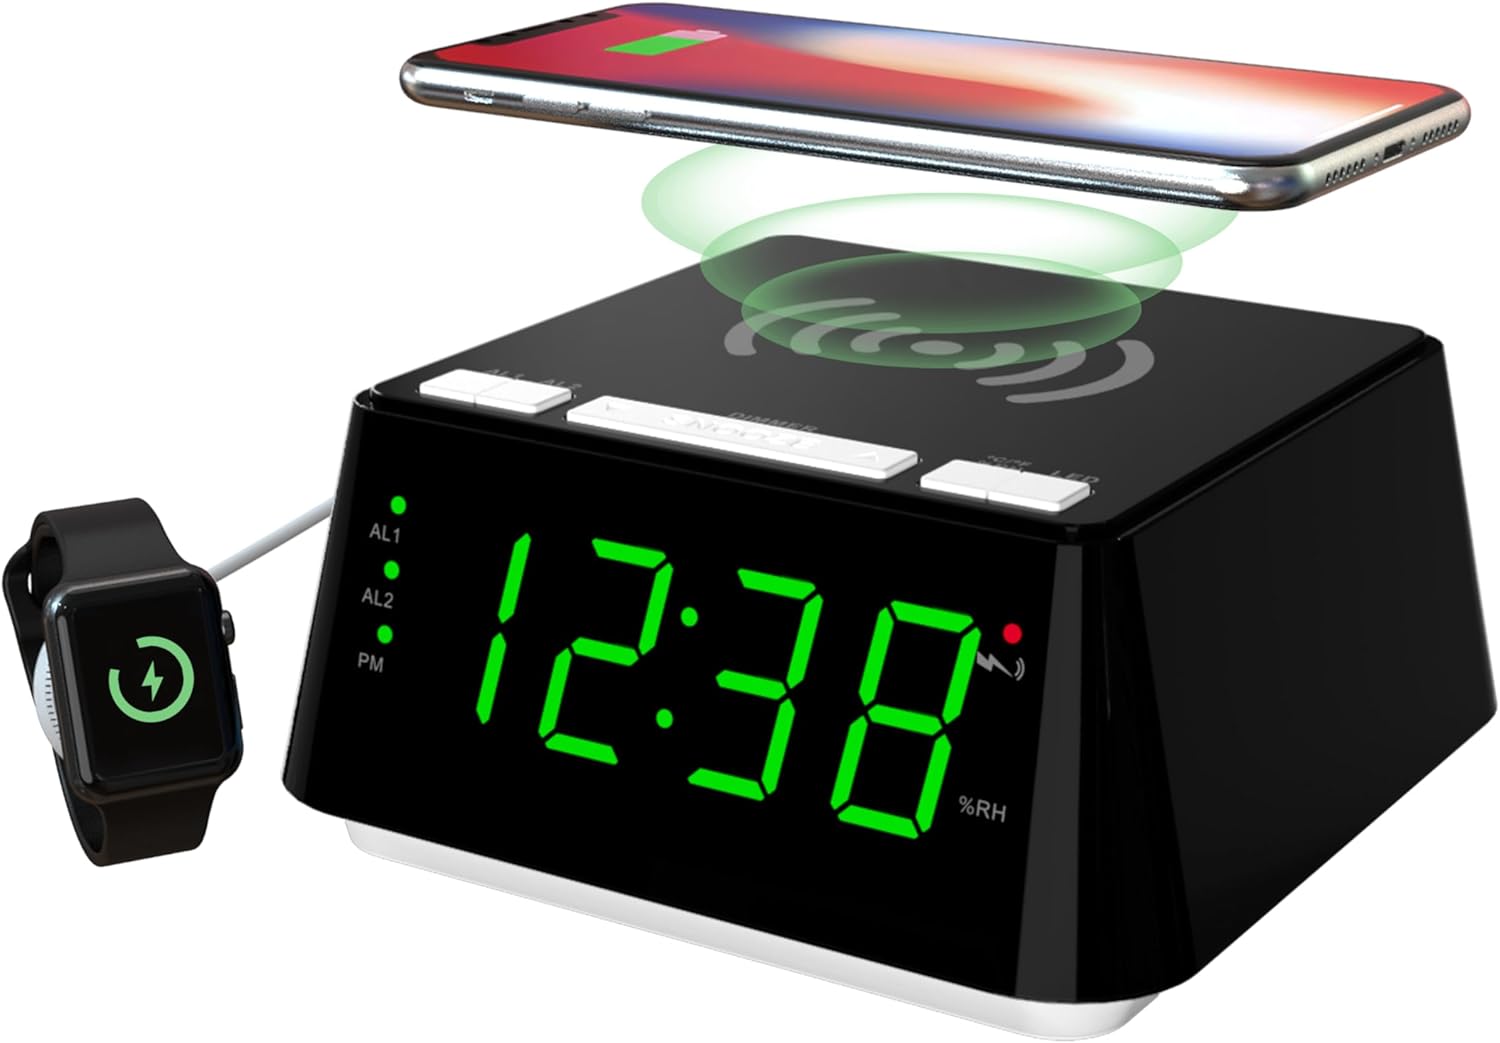
The iTOMA Alarm Clock, featuring a large green LED display, a wireless charging pad on top, and a USB charging port on the side. A smartphone is shown wirelessly charging on the top surface, and a smartwatch is connected to the USB port for charging.
Setup
Power Connection
- Unpack the iTOMA Alarm Clock and all accessories from the box.
- Connect the provided power adapter to the DC IN port on the back of the alarm clock.
- Plug the power adapter into a standard electrical outlet. The display will light up, indicating the device is powered on.
Initial Time Setting
- Upon initial power-on, the clock may display a default time.
- Press and hold the 'TIME SET' button (if available, or refer to the 'Operating Instructions' for specific time setting steps).
- Use the '+' or '-' buttons to adjust the hour, then press 'TIME SET' again to confirm.
- Repeat the process for minutes.
- To switch between 12-hour and 24-hour format, press the '12/24H' button. In 12-hour format, 'PM' will be displayed for afternoon hours.
Operating Instructions
Setting Dual Alarms (AL1 & AL2)
The iTOMA alarm clock allows you to set two independent alarms (AL1 and AL2) with different modes.
- Press and hold the 'AL1' or 'AL2' button to enter alarm setting mode for the respective alarm.
- The hour digits will flash. Use the '+' or '-' buttons to adjust the hour, then press the 'AL1' or 'AL2' button again to confirm.
- The minute digits will flash. Use the '+' or '-' buttons to adjust the minutes, then press the 'AL1' or 'AL2' button again to confirm.
- Next, select the alarm mode: ALL-7-DAY (Monday-Sunday), WEEKDAY (Monday-Friday), or WEEKEND (Saturday-Sunday). Use '+' or '-' to cycle through modes and press 'AL1' or 'AL2' to confirm.
- The alarm will be set to wake you by buzzer.

The alarm clock display with indicators for AL1 and AL2, illustrating the three available alarm modes: All-7-Day, Weekday, and Weekend, allowing for flexible scheduling.
Snooze Function
When an alarm sounds, press the large 'SNOOZE' button on the top of the clock to temporarily silence the alarm for 9 minutes. You can activate the snooze function up to 6 times.
Adjusting Display Brightness (Dimmer Control)
The clock features 4 levels of display brightness. Press the 'DIMMER' button on the top of the clock repeatedly to cycle through the brightness levels: High (L-3), Medium (L-2), Low (L-1), and Off.

Visual representation of the four dimmer settings for the LED display: High (L-3), Medium (L-2), Low (L-1), and completely Off, allowing users to customize display visibility.
Night Light Modes
The alarm clock includes 2 night light modes. Press the 'LED' button on the top of the clock to activate and cycle through the night light settings.

The iTOMA Alarm Clock demonstrating its night light feature, which provides a soft illumination from its base, ideal for a bedroom ambiance.
Indoor Temperature & Humidity Display
The clock displays the current indoor temperature and humidity. Press the '°C/°F' button to switch between Celsius and Fahrenheit temperature units. The humidity is displayed as a percentage (%RH).

Two iTOMA Alarm Clocks demonstrating the indoor temperature display, showing readings in both Celsius and Fahrenheit.

The iTOMA Alarm Clock displaying the indoor humidity level as a percentage (%RH).
Wireless Charging Function
The top surface of the alarm clock features a wireless charging pad compatible with most universal wireless charging cellphone models.
- Place your wireless charging compatible smartphone directly onto the center of the charging pad on top of the clock.
- Ensure the phone is properly aligned for optimal charging. A charging indicator on your phone or the clock (if available) will confirm charging has begun.

A smartphone positioned on the top surface of the iTOMA Alarm Clock, demonstrating the wireless charging capability.
USB Charging Port
The alarm clock is equipped with a USB charging port on the side, allowing you to charge an additional device, such as a second smartphone or a smartwatch, conveniently.
- Connect your device's USB charging cable to the USB port on the alarm clock.
- Connect the other end of the cable to your device. Charging will begin automatically.
Maintenance
- Cleaning: To clean the clock, gently wipe the surface with a soft, dry cloth. Do not use abrasive cleaners, waxes, or solvents as they may damage the finish.
- Placement: Place the clock on a stable, flat surface away from direct sunlight, heat sources, and excessive moisture.
- Power: Always disconnect the power adapter before cleaning or if the unit will not be used for an extended period.
Troubleshooting
| Problem | Possible Cause | Solution |
|---|---|---|
| Clock display is off or not working. | No power connection; Dimmer set to 'Off'. | Ensure power adapter is securely plugged in. Press 'DIMMER' button to increase brightness. |
| Wireless charging not working. | Phone not aligned; Phone case too thick; Phone not wireless charging compatible. | Reposition phone on the center of the pad. Remove thick phone case. Verify phone supports Qi wireless charging. |
| Alarm does not sound. | Alarm not activated; Alarm volume too low. | Ensure AL1/AL2 indicator is lit. Check alarm settings and ensure a valid time and mode are set. |
| Incorrect temperature/humidity reading. | Sensor blocked; Extreme environmental conditions. | Ensure no obstructions around the sensor. Allow time for readings to stabilize after moving the clock. |
Specifications
- Brand: iTOMA
- Model: CKS801
- Display Type: LED
- Color: Jade Green Led (Display)
- Power Source: Corded Electric
- Product Dimensions: 5.7"W x 2.76"H (144mm W x 70mm H)
- Special Features: Wireless Charging, Dual Alarm, Snooze, Brightness Dimmer, USB Charging Port, Night Light, Indoor Temperature & Humidity Display
- Room Type: Bedroom, Home Office, Kid's Room, Living Room
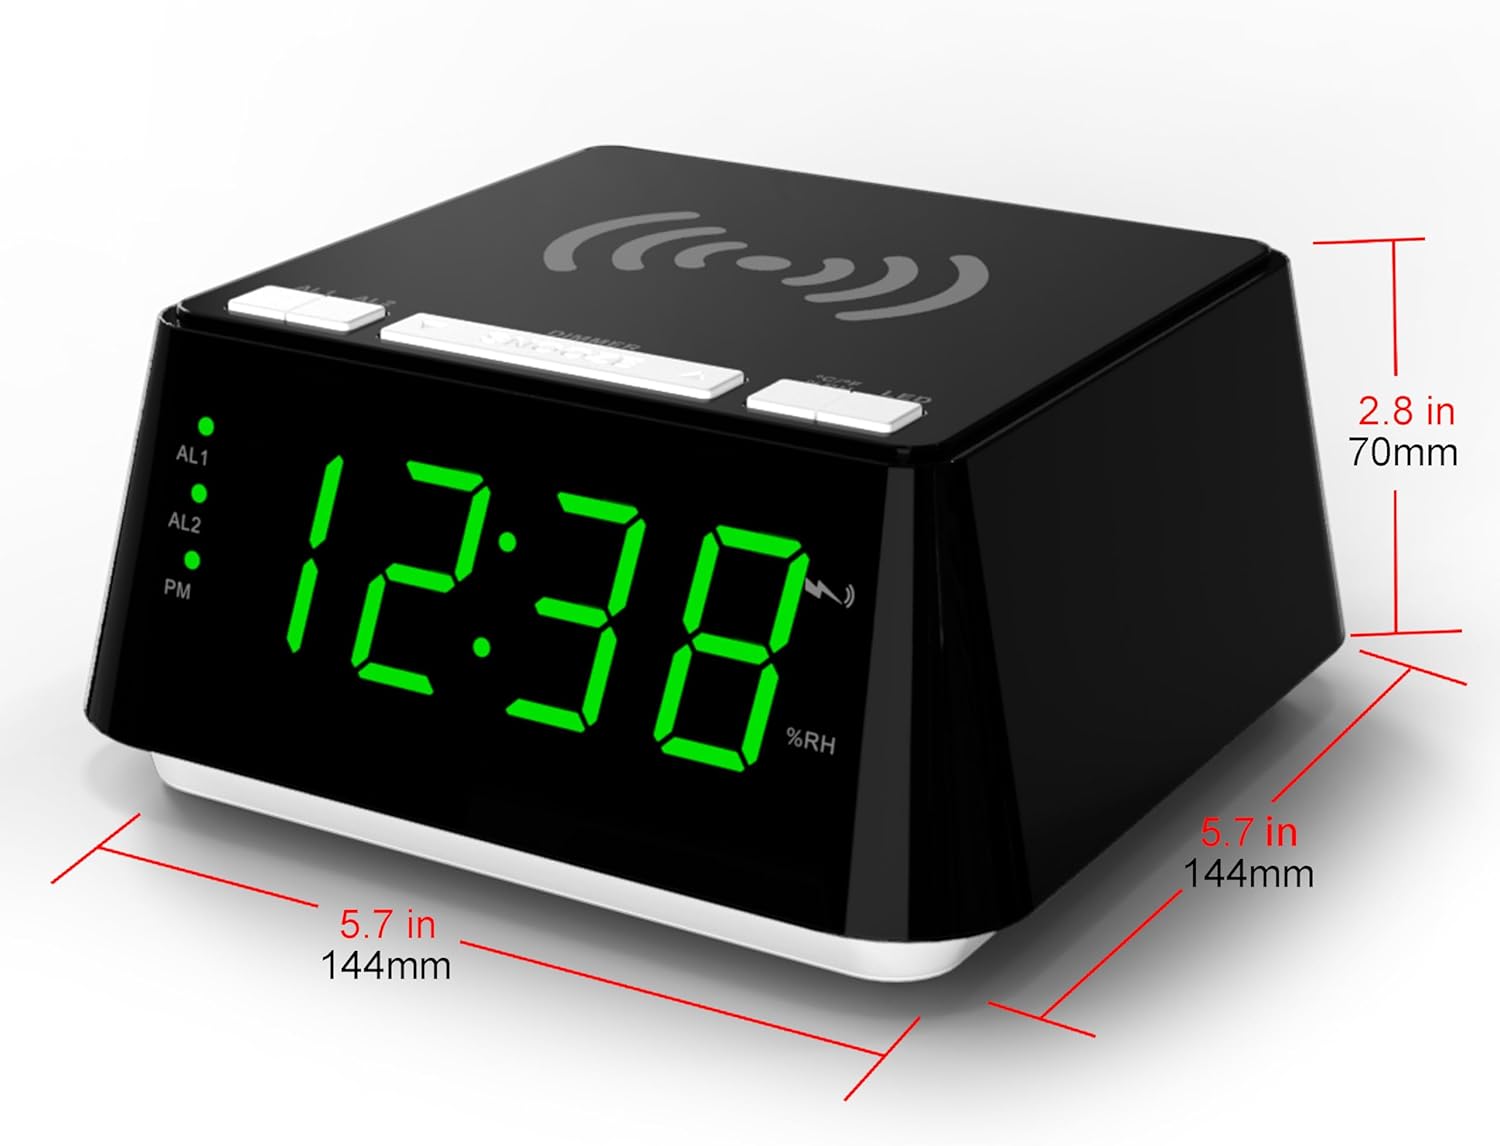
The iTOMA Alarm Clock with its key dimensions indicated: 5.7 inches (144mm) in width and 2.8 inches (70mm) in height.
Warranty and Support
For warranty information and technical support, please refer to the documentation included with your purchase or visit the official iTOMA website. Keep your proof of purchase for any warranty claims.
If you encounter any issues not covered in this manual, please contact iTOMA customer service for assistance.


