1. Introduction
This manual provides essential information for the installation and care of your OEM LCD Screen and Digitizer Full Assembly for ZTE Blade A610 Plus / A2 Plus. This replacement part is designed to restore the display and touch functionality of your device. Please read all instructions carefully before proceeding with installation.
2. Product Overview
The product is an OEM (Original Equipment Manufacturer) LCD display and touch screen digitizer assembly. It is a complete unit designed to replace a broken or unusable screen on compatible ZTE Blade models. The assembly includes the LCD panel for display and the digitizer for touch input, integrated into a single component for easier replacement.
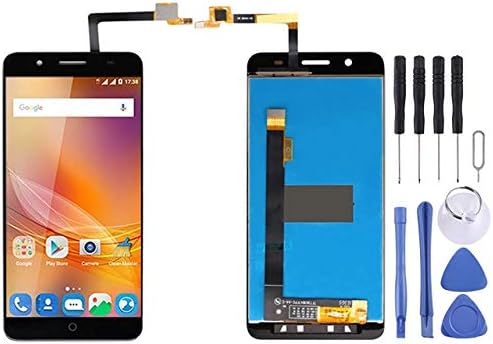
Image 2.1: The OEM LCD Screen and Digitizer Assembly, showing the display unit and the flexible connector cables. This image also shows a phone with the screen installed on the left, and the replacement screen assembly with included tools on the right.
2.1 Key Features
- Compatibility: Specifically designed for ZTE Blade A610 Plus and ZTE Blade A2 Plus models.
- Functionality: Restores both visual display and touch screen capabilities.
- Quality Assurance: Each unit is inspected to ensure good condition before shipment.
- Integrated Assembly: Simplifies replacement by combining LCD and digitizer.
3. Setup and Installation
Professional installation is highly recommended for this product due to the delicate nature of mobile phone components. Incorrect installation can lead to damage to the screen or the device itself.
3.1 Pre-Installation Notes
- Test Before Installation: Before fully installing the screen, connect it to the phone's motherboard and power on the device to test its functionality. Do not remove any protective films or tags during this testing phase.
- Static Electricity Precaution: Mobile phone electronic components are sensitive to static electricity. Always ground yourself with an ESD (Electrostatic Discharge) strap before handling the screen or internal phone components. This prevents static discharge from damaging the electronics.
- Eye Protection: Wear appropriate eye protection during the repair process to guard against glass splinters, especially when removing the old screen.
- Cable Handling: Be extremely careful with the flexible LCD cable. Do not over bend the cable. Bending it beyond 90 degrees can cause permanent damage, resulting in a black display or other malfunctions.
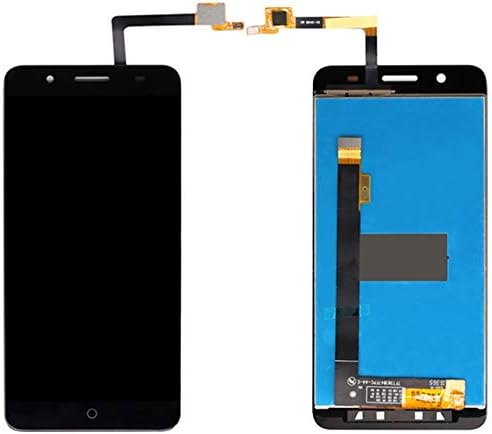
Image 3.1: A close-up view of the flexible ribbon cable attached to the LCD screen assembly. This cable is crucial for connecting the screen to the phone's motherboard and must be handled with extreme care to avoid damage.
3.2 Installation Steps (General Guidance)
While specific steps vary by device, the general process involves:
- Powering off the device and removing the battery (if removable).
- Carefully detaching the old screen assembly.
- Cleaning any adhesive residue from the phone frame.
- Connecting the new screen's flexible cable to the motherboard.
- Performing the pre-installation test.
- Applying new adhesive (not included) to secure the new screen.
- Carefully seating the new screen into the phone frame.
- Reassembling the phone.
For detailed, model-specific installation instructions, please consult online repair guides or professional repair services.
4. Maintenance
Once installed, the LCD screen and digitizer assembly requires minimal maintenance. To ensure its longevity and optimal performance:
- Screen Protection: Consider using a screen protector (tempered glass or film) to prevent scratches and minor impacts.
- Cleaning: Clean the screen with a soft, lint-free cloth, preferably microfiber. For stubborn smudges, use a screen-specific cleaning solution, applied to the cloth, not directly to the screen.
- Avoid Liquids: Keep the device away from water and other liquids, as internal damage can occur.
- Temperature Extremes: Avoid exposing the device to extreme temperatures, both hot and cold, as this can affect screen performance and lifespan.
- Impact Protection: Use a protective case for your phone to minimize the risk of damage from drops or impacts.
5. Troubleshooting
If you encounter issues after installing the new screen, consider the following troubleshooting steps:
5.1 Common Issues and Solutions
| Issue | Possible Cause | Solution |
|---|
| Screen does not display anything (black screen) | - LCD cable not properly connected.
- LCD cable bent or damaged (over 90 degrees).
- Static electricity damage during installation.
- Faulty screen unit.
| - Ensure all flexible cables are securely and correctly seated.
- Inspect the LCD cable for any creases or tears. If damaged, replacement may be necessary.
- Re-test the screen before full installation.
- Contact seller if unit is confirmed faulty after proper testing.
|
| Touch screen unresponsive or erratic | - Digitizer cable not properly connected.
- Digitizer cable damaged.
- Software glitch.
| - Check digitizer cable connection.
- Inspect digitizer cable for damage.
- Restart the phone.
|
| Display issues (lines, discoloration, flickering) | - LCD cable connection issue.
- LCD panel damage.
- Motherboard issue.
| - Re-seat LCD cable.
- If issues persist after re-seating and testing, the screen may be faulty.
- Consult a professional if motherboard damage is suspected.
|
If these steps do not resolve the issue, it is recommended to seek assistance from a qualified mobile phone repair technician.
7. Warranty and Support
7.1 Return Policy
This product is subject to a 30-day return policy from the date of purchase, allowing for refund or replacement. Please ensure the product is returned in its original condition with all protective films and tags intact, especially if testing revealed an issue. Damage incurred during installation due to improper handling (e.g., bent cables, static discharge) may void the return eligibility.
7.2 Customer Support
For any questions regarding the product, installation, or troubleshooting, please contact the seller directly through the platform where the purchase was made. Provide your order details and a clear description of the issue for prompt assistance.


