Dryer Lint Screen Filter User Manual
Brand: Samoser | Model: Replacement for various GE/Hotpoint models
Product Overview
This manual provides instructions for the installation, operation, maintenance, and troubleshooting of your new Samoser Dryer Lint Screen Filter. This product is designed as a replacement part for a wide range of GE and Hotpoint dryer models, ensuring efficient lint collection and maintaining dryer performance and safety.
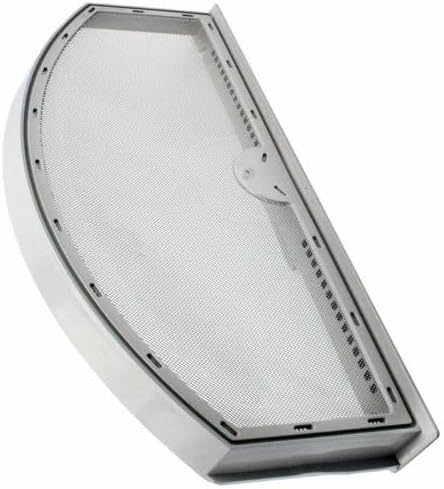
Image: The Samoser Dryer Lint Screen Filter, showing its overall design and mesh screen.
Compatibility
This dryer lint screen filter is an aftermarket replacement part compatible with numerous GE and Hotpoint dryer models. To ensure compatibility, please cross-reference your dryer's model number with the list below. You can typically find your dryer's model number on a label inside the dryer door, on the back, or on the control panel.
Compatible Models (Partial List):
- GTD33EASK0WW, GTD33GASK0WW, GTD33PASK0WW
- GTD40EBMK0WW, GTD40GBMK0WW
- GTD42EAAJ0WW, GTD42EAAJ1WW, GTD42EAAJ2WW, GTD42EAMJ0WW, GTD42EAMJ1WW, GTD42EAMJ2WW, GTD42EASJ0WW, GTD42EASJ1WW, GTD42EASJ2WW, GTD42EBAK0WS
- GTD42GAMJ0WW, GTD42GAMJ1WW, GTD42GAMJ2WW, GTD42GASJ0WW, GTD42GASJ1WW, GTD42GASJ2WW
- GTD45EAMJ0WS, GTD45EAMJ2WS, GTD45EASJ0WS, GTD45EASJ1WS, GTD45EASJ2WS, GTD45EBMK0WS
- GTD45GAMJ0WS, GTD45GAMJ1WS, GTD45GAMJ2WS, GTD45GASJ0WS, GTD45GASJ1WS, GTD45GASJ2WS, GTD45GBMK0WS
- GTD65EBMJ0WS, GTD65EBMJ1WS, GTD65EBMJ3WS, GTD65EBMK0DG, GTD65EBMK0WS, GTD65EBPL1DG, GTD65EBSJ0WS, GTD65EBSJ1WS, GTD65EBSJ2WS, GTD65EBSJ3WS, GTD65EBSJ4WS
- GTD65GBMJ0WS, GTD65GBMJ2WS, GTD65GBMK0WS, GTD65GBSJ0WS, GTD65GBSJ1WS, GTD65GBSJ2WS, GTD65GBSJ3WS
- GTD72EBPN0DG, GTD72EBSN0WS, GTD72GBPN0DG, GTD72GBSN0WS
- GTD75ECPL0DG, GTD75ECPL1DG, GTD75ECSL1WS, GTD75ECSL0WS, GTD75GCPL0DG, GTD75GCSL0WS
- GTD84ECPN0DG, GTD84ECPN1DG, GTD84ECSN0WS, GTD84ECSN1WS, GTD84GCPN0DG, GTD84GCPN1DG, GTD84GCSN0WS, GTD84GCSN1WS
- GTMP280GD5WW, GTX22EASK0WW, GTX22EBMK0WW, GTX22GASK0WW, GTX33EASK0WW, GTX33GASK0WW
- GTX42EASJ0WW, GTX42EASJ1WW, GTX42EASJ2WW, GTX42GASJ0WW, GTX42GASJ1WW, GTX42GASJ2WW
- GTX52GASP0WB, GTX60EBSJ0WS, GTX65EBSJ0WS, GTX65EBSJ1WS, GTX65EBSJ2WS, GTX65GBSJ0WS, GTX65GBSJ1WS, GTX65GBSJ2WS
- JES1140STC01, MTX22EBMK0WW
- YTD74E2PN0DG, YTD74E2PN1DG, YTD74E2SN0WS, YTD74E2SN1WS, YTD74G2PN0DG, YTD74G2PN1DG, YTD74G2SN0WS, YTD74G2SN1WS
Note: This list is extensive but may not be exhaustive. If your model number is not listed, please compare your existing lint screen with the product images and dimensions provided in this manual, or contact the manufacturer for confirmation.
Installation Instructions
Replacing your dryer's lint screen is a straightforward process. Always ensure the dryer is unplugged from the power outlet before performing any maintenance or part replacement.
- Locate the Existing Lint Screen: The lint screen is typically located in a slot just inside the dryer door opening, or sometimes on the top panel of the dryer.
- Remove the Old Lint Screen: Grasp the handle of the existing lint screen and pull it straight out of its housing.
- Inspect the Dryer Housing: Before inserting the new screen, inspect the lint screen housing for any accumulated lint or debris. Clean it thoroughly with a vacuum cleaner or a damp cloth if necessary.
- Insert the New Lint Screen: Align the new Samoser lint screen filter with the slot in the dryer. Gently push it all the way in until it is fully seated and flush with the dryer's surface. Do not force it.
- Test Operation: Plug the dryer back into the power outlet. Run a small load or a short cycle to ensure the lint screen is properly installed and the dryer operates normally.

Image: A top-down view of the lint screen, highlighting the fine mesh and frame structure.
Operation and Maintenance
Proper operation and regular maintenance of your lint screen are crucial for dryer efficiency, safety, and longevity.
Daily Operation
Always clean the lint screen before every load of laundry. This prevents lint buildup, which can restrict airflow, increase drying time, and pose a fire hazard.
Cleaning the Lint Screen
- Remove Lint: Pull the lint screen out of its slot. Roll the lint off the screen with your fingers.
- Deep Cleaning (Monthly/As Needed): If fabric softener sheets are used, a waxy buildup can occur on the screen, reducing airflow. To remove this, wash the screen in warm, soapy water using a soft brush. Rinse thoroughly under running water.
- Dry Completely: Ensure the lint screen is completely dry before reinserting it into the dryer.
Warning: Never operate the dryer without the lint screen properly installed. This can allow lint to enter the dryer's exhaust system, leading to potential fire hazards and reduced performance.
Troubleshooting
If you encounter issues related to your dryer's lint collection, consider the following common problems and solutions:
| Problem | Possible Cause | Solution |
|---|---|---|
| Dryer takes too long to dry clothes. | Clogged lint screen or exhaust vent. | Clean the lint screen thoroughly. Check and clean the dryer's exhaust vent system. |
| Lint screen appears damaged or torn. | Wear and tear; foreign objects. | Replace the lint screen immediately to prevent lint from entering the dryer's internal components. |
| Excessive lint on clothes after drying. | Lint screen not installed correctly or damaged. | Ensure the lint screen is fully seated. Inspect for tears or holes and replace if necessary. |
If troubleshooting steps do not resolve the issue, or if you suspect a more complex problem with your dryer, it is recommended to consult a qualified appliance technician.
Specifications
- Product Type: Dryer Lint Screen Filter
- Brand: Samoser
- Compatibility: Replacement for various GE and Hotpoint dryer models (refer to compatibility list)
- Material: Durable plastic frame with fine mesh screen
- Dimensions: Approximately 13 1/2 inches (length) x 6 1/8 inches (height)

Image: The lint screen with approximate dimensions of 13 1/2 inches in length and 6 1/8 inches in height.
Customer Support
For further assistance, questions regarding compatibility, or any issues not covered in this manual, please contact your retailer or the manufacturer. When contacting support, please have your dryer's model number and the product details readily available.
Manufacturer: Samoser
Note: This product is an aftermarket replacement part.