1. Product Overview
The Hilighting LED Light Kit is designed to enhance your Lego Hogwarts Castle and Grounds Building Set (Lego model 76419) by adding dynamic lighting effects. This kit brings your model to life with vibrant illumination, highlighting intricate details and creating an immersive display.

Image 1.1: The Lego Hogwarts Castle and Grounds model, brightly illuminated by the Hilighting LED light kit, demonstrating the enhanced visual appeal.
2. Safety Information
- Keep small parts away from children to prevent choking hazards.
- Ensure all connections are secure to avoid short circuits.
- Do not expose the light kit components to water or excessive moisture.
- Use only the specified power sources (3-5V USB or batteries) to prevent damage.
- Avoid direct eye exposure to LED lights for prolonged periods.
3. Package Contents
Verify that all components listed below are included in your package:
- USB Power Cable
- AAA Battery Case (batteries not included)
- Light Strips
- Connecting Cables
- Socket Expansion Board
- Instruction Manual

Image 3.1: Visual representation of the light kit components, including the USB power cable, battery case, light strips, connecting cables, and expansion board.
4. Setup Instructions
Follow these general steps to install your Hilighting LED Light Kit. Refer to the detailed instruction manual included in your package for model-specific guidance.
- Prepare Your Lego Model: Ensure your Lego Hogwarts Castle and Grounds (Model 76419) is fully assembled and stable.
- Identify Components: Familiarize yourself with the light strips, connecting cables, and expansion board.
- Integrate Lights: Carefully attach the LED light strips and individual lights to the designated areas of your Lego model as indicated in the detailed manual. This often involves carefully lifting or separating small sections of the Lego model to route wires and place lights.
- Connect Cables: Connect the light strips and individual lights to the socket expansion board using the provided connecting cables. Ensure connections are firm.
- Connect Power: Connect the USB Power Cable to the expansion board. You can power the kit via a USB port (e.g., computer, wall adapter) or by inserting AAA batteries (not included) into the AAA Battery Case and connecting it to the USB Power Cable.
- Test Lights: Once all connections are made, power on the kit to test the lights.
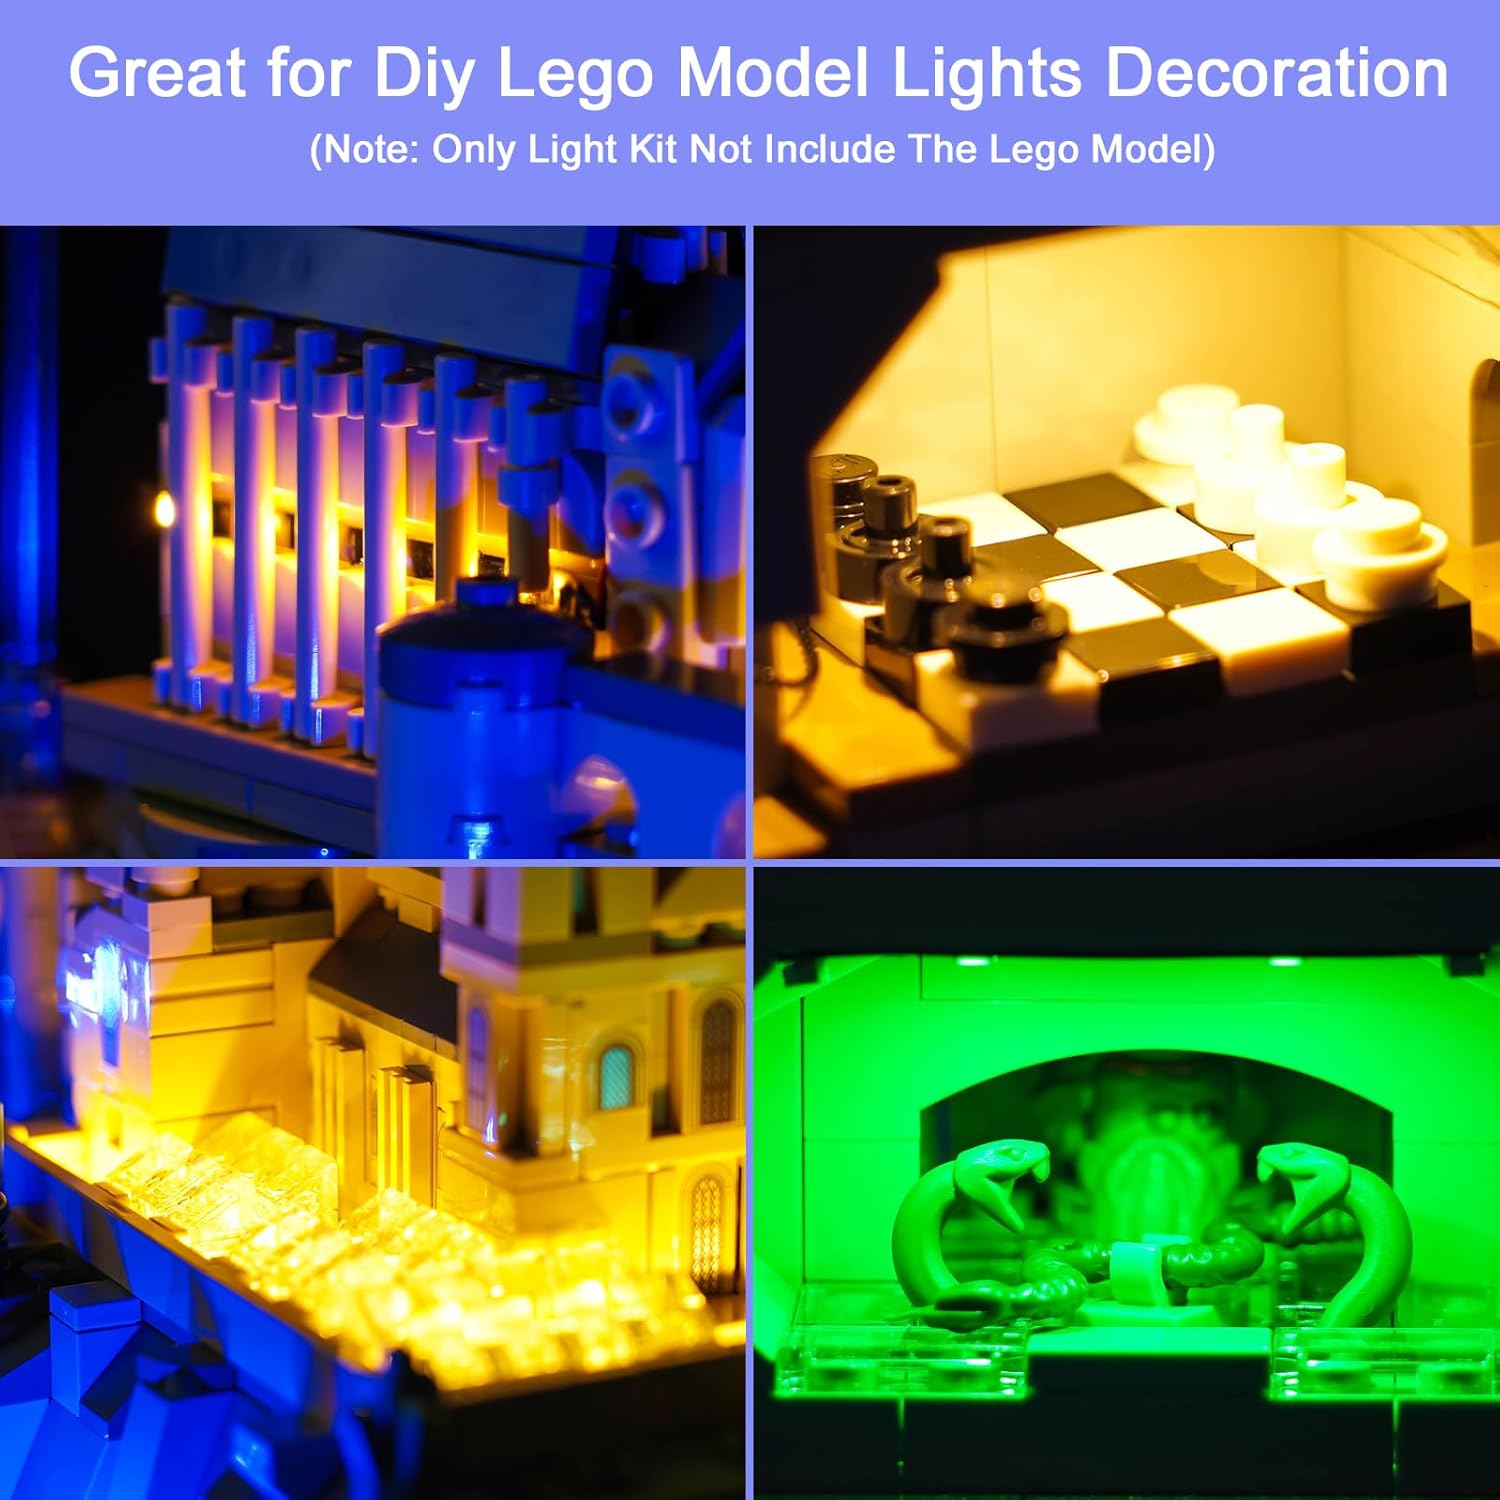
Image 4.1: Detailed view of the illuminated Lego model, showcasing how the lights integrate with the structure.
5. Operating Instructions
Your Hilighting LED Light Kit offers flexible power options and control for various lighting effects.
Powering the Light Kit
- USB Power: Connect the USB Power Cable to a standard USB power source (e.g., a 5V USB wall adapter, power bank, or computer USB port).
- Battery Power: Insert 3 AAA batteries (not included) into the AAA Battery Case. Connect the battery case to the USB Power Cable.
Using the Remote Control
The light kit may include a remote control for convenient operation. If included, use it to:
- Turn the lights ON or OFF.
- Adjust brightness levels.
- Select different lighting modes or effects (e.g., steady, flashing, color change).
Ensure the remote control has a clear line of sight to the receiver on the light kit for optimal functionality.
Video 5.1: Demonstration of the Hilighting LED Light Kit illuminating the Lego Hogwarts Castle and Grounds model, including a brief segment showing the use of a remote control to adjust lighting effects.
6. Maintenance
- Cleaning: Gently wipe the LED lights and wires with a dry, soft cloth to remove dust. Do not use liquid cleaners.
- Storage: If disassembling for storage, carefully disconnect all components and store them in a dry, cool place, away from direct sunlight.
- Cable Management: Ensure cables are not pinched or excessively bent, as this can damage the internal wiring.
7. Troubleshooting
| Problem | Possible Cause | Solution |
|---|---|---|
| Lights do not turn on. | No power supply; loose connection; dead batteries. | Check USB power source or replace AAA batteries. Ensure all cables are securely connected to the expansion board and lights. |
| Lights are dim or flickering. | Low battery power; insufficient USB power; loose connection. | Replace batteries or use a more powerful USB adapter. Check all connections for tightness. |
| Remote control not working. | Remote battery dead; no line of sight; receiver blocked. | Replace remote battery. Ensure remote is pointed directly at the receiver. Remove any obstructions. |
8. Specifications
- Model Number: GC593
- Power Input: 3-5V (USB or AAA batteries)
- Package Dimensions: 6.02 x 4.13 x 1.65 inches
- Item Weight: 5 ounces
- Manufacturer: Hilighting
9. Warranty and Support
Hilighting is committed to providing quality products and customer satisfaction. We offer lifetime worry-free technical support for your LED light kit. If you have any questions, concerns, or require assistance with installation or operation, please contact our support team through the vendor contact information provided at the point of purchase.


