1. Introduction
The AVATTO TRV10 is a smart thermostat radiator valve designed to provide intelligent control over your home heating system. Utilizing Zigbee technology, it integrates seamlessly with Tuya-compatible smart home platforms, allowing for precise temperature management, scheduling, and remote control via a smartphone application. This manual provides detailed instructions for the installation, operation, and maintenance of your TRV10 device.
2. Product Overview
The AVATTO TRV10 features a compact design with an integrated display for local temperature readings and settings. It is powered by batteries and communicates wirelessly with a Zigbee gateway.
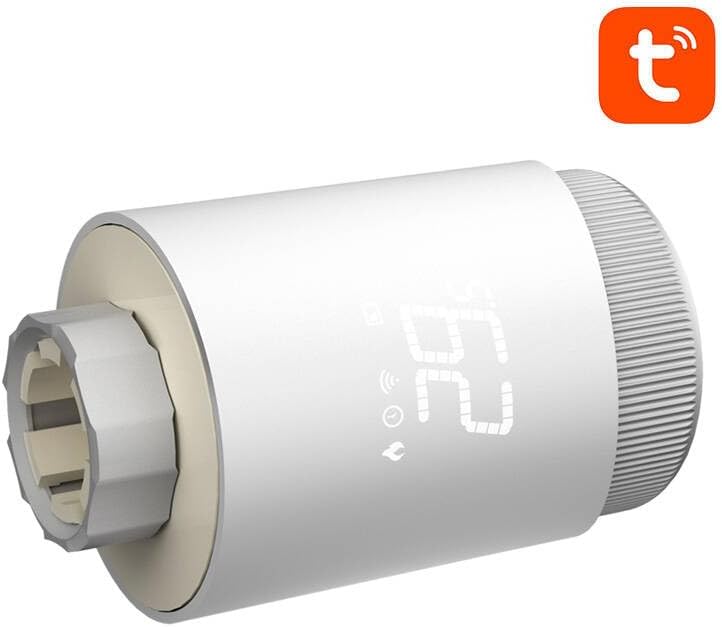
Figure 2.1: Front view of the AVATTO TRV10 Smart Thermostat Radiator Valve, showing the digital display and control knob.

Figure 2.2: Side view of the AVATTO TRV10 Smart Thermostat Radiator Valve, illustrating the connection point for the radiator valve.
Key Components:
- Digital Display: Shows current temperature, mode, and battery status.
- Control Knob: Used for manual temperature adjustment and menu navigation.
- Valve Connector: Attaches to the radiator valve body.
- Battery Compartment: Houses the power source.
3. Package Contents
Please check the package contents upon unboxing. If any items are missing or damaged, contact your retailer.
- AVATTO TRV10 Smart Thermostat Radiator Valve
- User Manual (this document)
- Adapter rings (various sizes for compatibility with different radiator valves)
- AA Batteries (may or may not be included, check packaging)
4. Specifications
| Feature | Detail |
|---|---|
| Model Number | TRV10 |
| Brand | AVATTO |
| Connectivity | Zigbee |
| Compatibility | Tuya Smart / Smart Life App |
| Power Supply | AA Batteries (typically 2x AA) |
| Temperature Range | 5°C - 30°C (Adjustable) |
| Temperature Accuracy | ±0.5°C |
| Valve Connection | M30x1.5 (with various adapters) |
5. Setup and Installation
5.1 Battery Installation
- Twist and remove the battery cover from the top or back of the TRV10 unit.
- Insert the required AA batteries, ensuring correct polarity (+/-).
- Replace the battery cover securely. The display should light up.
5.2 Mounting on Radiator Valve
- Identify your existing radiator valve type.
- Select the appropriate adapter ring from the package that matches your valve.
- Screw the adapter ring onto your radiator valve body.
- Align the TRV10 unit with the adapter ring and screw it on until it is hand-tight. Do not overtighten.
- The TRV10 will perform an initial calibration cycle.
5.3 Pairing with Zigbee Gateway and Tuya App
- Ensure you have a compatible Zigbee gateway connected to your home network and the Tuya Smart or Smart Life app installed on your smartphone.
- Open the Tuya Smart / Smart Life app and navigate to add a new device.
- Follow the app's instructions to put your Zigbee gateway into pairing mode.
- On the TRV10 device, press and hold the control knob for approximately 5-8 seconds until the Zigbee icon on the display starts flashing. This indicates pairing mode.
- The app should discover the TRV10. Select it to complete the pairing process.
- Once paired, the Zigbee icon on the TRV10 display will stop flashing and remain solid.
- You can now control and configure the TRV10 via the Tuya app.
6. Operating Instructions
6.1 Manual Temperature Adjustment
- Rotate the control knob clockwise to increase the target temperature.
- Rotate the control knob counter-clockwise to decrease the target temperature.
- The new target temperature will be displayed temporarily and then the display will revert to the current room temperature.
6.2 App Control
Once paired with the Tuya Smart / Smart Life app, you can access advanced control features:
- Remote Temperature Setting: Adjust the target temperature from anywhere.
- Scheduling: Create custom heating schedules for different days and times.
- Mode Selection: Switch between various operating modes (e.g., Auto, Manual, Holiday, Boost).
- Child Lock: Prevent unauthorized manual adjustments on the device.
- Open Window Detection: Automatically turns off heating if a sudden temperature drop is detected.
6.3 Operating Modes
- Auto Mode:
- The TRV10 follows the programmed schedule set in the app.
- Manual Mode:
- The TRV10 maintains a constant temperature set manually, overriding the schedule.
- Holiday Mode:
- Maintains a low, energy-saving temperature for a specified duration when you are away.
- Boost Mode:
- Quickly heats the room to a high temperature for a short period.
7. Maintenance
7.1 Battery Replacement
When the battery icon on the display flashes or the device stops responding, it's time to replace the batteries.
- Remove the TRV10 unit from the radiator valve by unscrewing it.
- Remove the battery cover.
- Replace the old batteries with new AA batteries, ensuring correct polarity.
- Reattach the battery cover and remount the TRV10 onto the radiator valve. The device will recalibrate.
7.2 Cleaning
Wipe the exterior of the TRV10 with a soft, dry cloth. Do not use abrasive cleaners or allow water to enter the device.
8. Troubleshooting
| Problem | Possible Cause | Solution |
|---|---|---|
| Device not powering on. | Batteries are dead or incorrectly inserted. | Check battery polarity and replace with new batteries. |
| Cannot pair with Zigbee gateway. | TRV10 not in pairing mode; Gateway not in pairing mode; Too far from gateway. | Ensure both devices are in pairing mode. Move TRV10 closer to the gateway. Check gateway status. |
| Radiator not heating/cooling as expected. | Valve stuck; Incorrect temperature setting; TRV10 not fully calibrated. | Manually check the radiator valve. Verify temperature settings in the app. Re-mount the TRV10 to trigger recalibration. |
| App shows device offline. | Zigbee gateway offline; TRV10 battery low; Poor Zigbee signal. | Check gateway's internet connection. Replace TRV10 batteries. Consider a Zigbee repeater if signal is weak. |
9. Warranty and Support
The AVATTO TRV10 Smart Thermostat Radiator Valve comes with a standard manufacturer's warranty. Please refer to the warranty card included with your purchase or contact your retailer for specific warranty terms and conditions.
For technical support, troubleshooting assistance, or inquiries regarding your device, please contact AVATTO customer service or your local distributor. Contact information can typically be found on the product packaging or the official AVATTO website.


