1. Introduction
Thank you for choosing the Seesii SE203 Dual Farad Spot Welder. This device is designed for precise spot welding of batteries, hardware, and electronic components, particularly suitable for nickel strips ranging from 0.1mm to 0.3mm thickness. It features a 3000F supercapacitor, 250 adjustable gears, and a 1.8-inch LCD for clear operation. Please read this manual thoroughly before use to ensure safe and efficient operation.

Image 1.1: The Seesii SE203 Dual Farad Spot Welder with its main components, including the welding unit, power adapter, welding pens, foot switch, nickel strip, and welding needles.
2. Safety Information
WARNING: Improper use of this spot welder can result in serious injury or damage to the equipment. Always follow these safety guidelines:
- Always wear appropriate personal protective equipment (PPE), including safety glasses and gloves, when operating the spot welder.
- Ensure the work area is well-ventilated and free from flammable materials.
- Do not touch the welding pens or electrodes during operation, as they can become extremely hot and carry electrical current.
- Never attempt to weld materials other than those specified (e.g., nickel strips) or exceed the recommended thickness.
- Keep the device away from water or damp environments to prevent electrical shock.
- Disconnect the power adapter before performing any maintenance, cleaning, or changing welding needles.
- Do not modify the device or use non-original parts, as this may void the warranty and pose safety risks.
- Ensure proper electrical grounding if required by local regulations.
- Keep out of reach of children.
Important Note: A user review mentioned a potential safety hazard regarding internal wiring and the handle screws. While the manufacturer aims for safe design, always inspect your unit for any loose components or exposed wiring before use. If you suspect any electrical issue, discontinue use immediately and contact customer support.
3. Package Contents
Verify that all items are present in your package:
- 1 x Seesii SE203 Spot Welder Unit
- 1 x Power Adapter
- 2 x Spot Welding Pens (with gold-plated terminals)
- 4 x Welding Needles (replaceable)
- 1 x Nickel Strip
- 1 x Foot Pedal Switch
- 4 x Non-slip Pads
- 1 x User Manual

Image 3.1: An overview of all items typically included in the Seesii SE203 Spot Welder package.
4. Setup
- Placement: Place the spot welder unit on a stable, flat, and non-flammable surface.
- Attach Non-slip Pads: Apply the four non-slip pads to the bottom of the unit for stability.
- Connect Welding Pens: Insert the two spot welding pens into the designated "Spot welding pen interface" ports on the front of the unit. Ensure they are securely connected.
- Connect Foot Pedal (Optional): If using the foot pedal for manual welding control, plug the foot pedal switch into the "Foot joint" port.
- Connect Power Adapter: Plug the power adapter into the "Charging interface" on the back of the unit, then connect the adapter to a suitable power outlet.
- Power On: Flip the "Switch" on the back of the unit to the ON position. The 1.8-inch LCD screen will illuminate.

Image 4.1: Connection diagram illustrating the spot welding pen interface, foot joint, charging interface, and power switch locations.
5. Operating Instructions
5.1 Understanding the LCD Display
The 1.8-inch TFT-LCD screen provides real-time information about the welding process:
- C: [Voltage]V: Displays the current capacitor voltage.
- Gear: Shows the selected welding gear level (1-250).
- Delay: Indicates the welding delay time (0.5-2.5s).
- Temp: Displays the internal temperature of the unit.
- Battery Icon: Shows the charge status of the supercapacitor.

Image 5.1: The LCD screen displaying welding parameters such as capacitor voltage, gear setting, delay, and temperature.
5.2 Adjusting Welding Parameters
Use the "Power Regu" knob on the front panel to adjust the welding gear (power level) from 1 to 250. Higher numbers indicate more power. The unit also allows for 0.1 gear precision adjustment and a welding delay from 0.5 to 2.5 seconds.
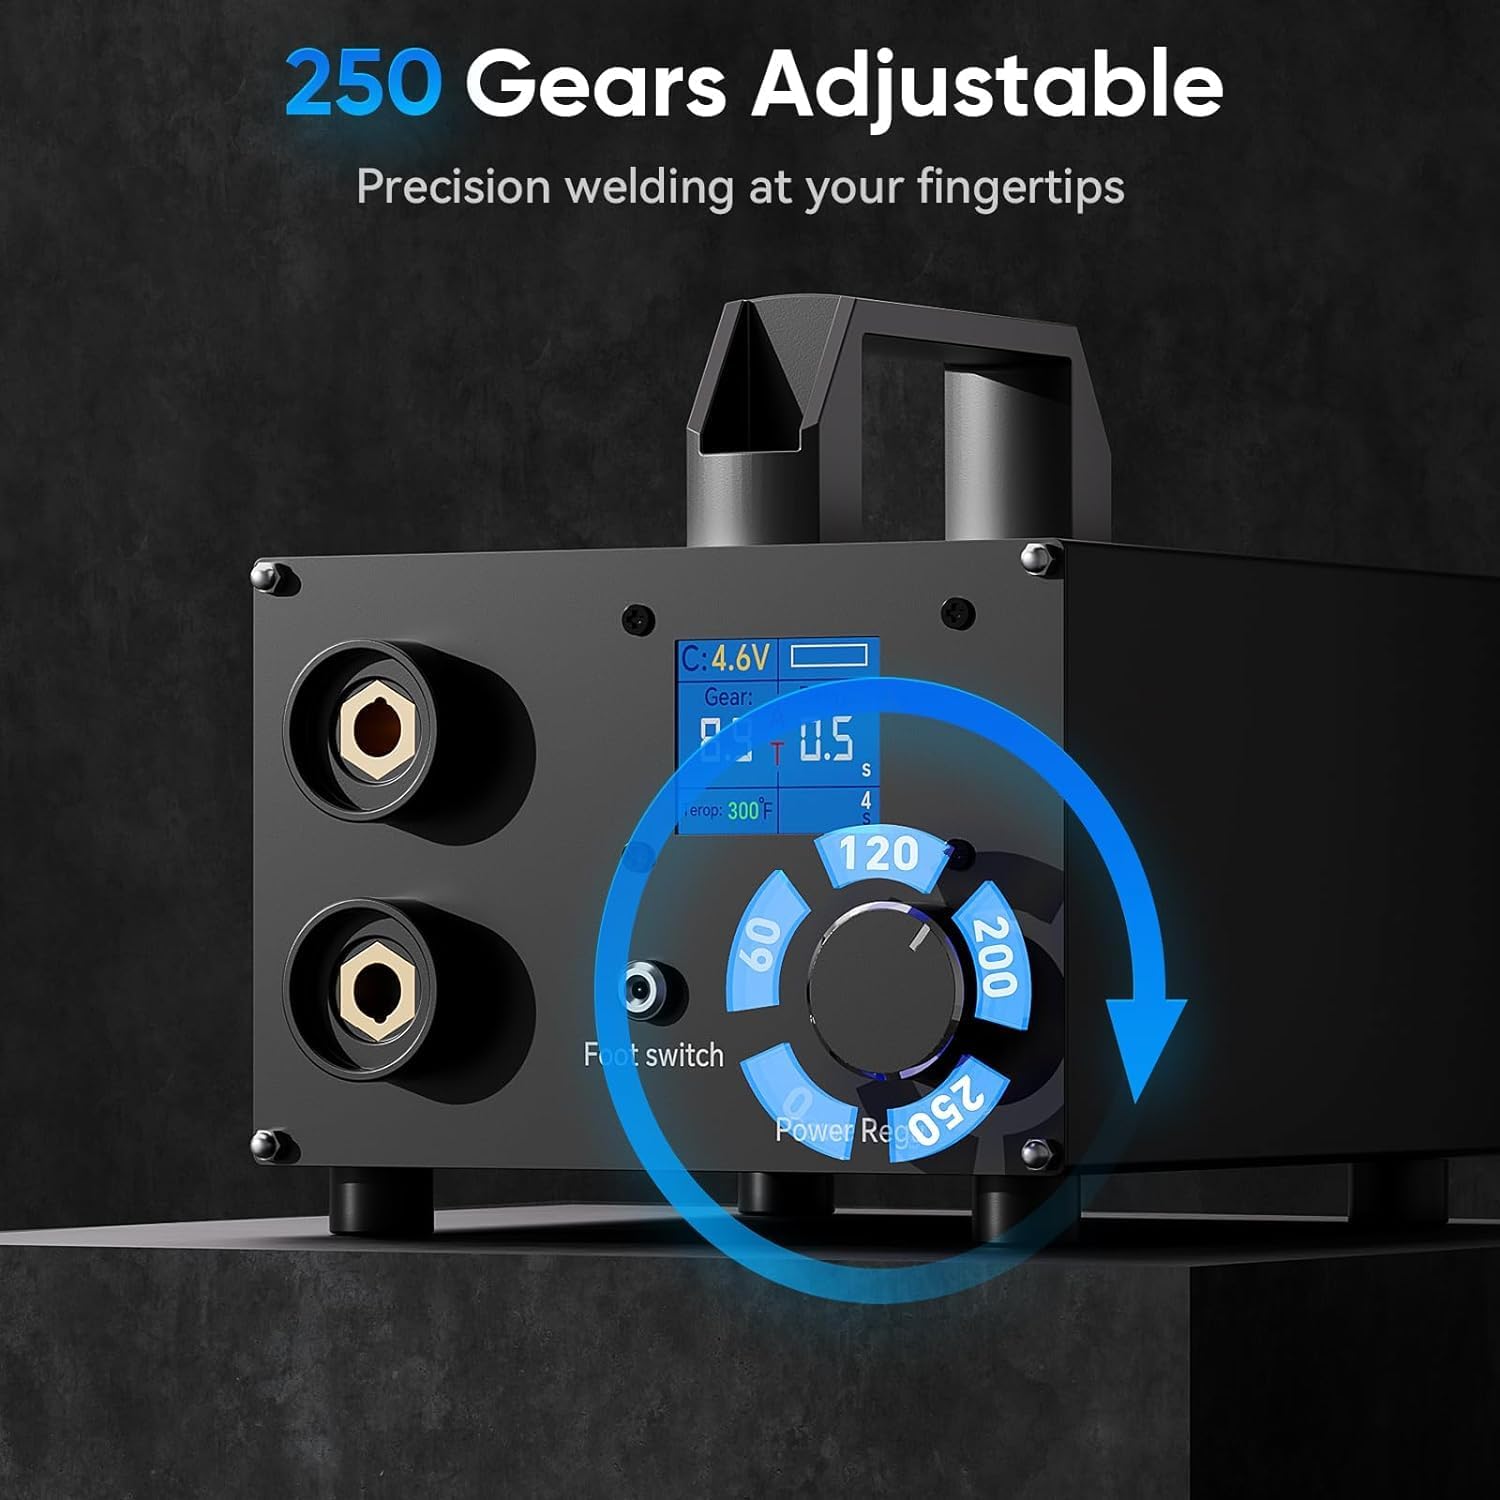
Image 5.2: The rotary knob for adjusting the welding gear, offering 250 levels of precision.
5.3 Welding Modes: Auto & Foot Pedal Switching
The SE203 supports both automatic and foot pedal-controlled welding modes. The selection is typically made via a switch or automatically detected when the foot pedal is connected.
- Automatic Mode: The welder will automatically detect contact with the nickel strip and initiate the weld after a set delay.
- Foot Pedal Mode: Press the foot pedal to initiate the weld after placing the welding pens on the nickel strip. This provides more precise control over the welding timing.

Image 5.3: Illustrates the two operational modes: automatic welding (left) and foot pedal-controlled welding (right).
5.4 Welding Process for Nickel Strips (0.1-0.3mm)
This spot welder is optimized for nickel strips between 0.1mm and 0.3mm thickness. Adjust the gear setting according to the thickness of the material you are welding. Thicker materials generally require higher gear settings.
- Ensure the battery terminals and nickel strip are clean and free of oxidation.
- Place the nickel strip firmly against the battery terminal.
- Position the two welding pens on the nickel strip, ensuring good contact and even pressure. The tips should be slightly apart, not touching each other.
- Initiate the weld:
- In Automatic Mode, the weld will trigger automatically after the set delay once good contact is detected.
- In Foot Pedal Mode, press the foot pedal to trigger the weld.
- After the weld, lift the pens carefully. Inspect the weld joint for strength and appearance. Adjust gear settings as needed for optimal results.

Image 5.4: Visual guide demonstrating the application of welding pens for different nickel strip thicknesses (0.1mm, 0.2mm, 0.3mm).

Image 5.5: An individual demonstrating the use of the spot welder for assembling battery packs.
6. Maintenance
- Cleaning: Regularly clean the welding pens and electrodes to remove any residue or oxidation. Use a fine-grit sandpaper or file if necessary to maintain sharp, clean tips.
- Needle Replacement: The welding needles are consumable and will wear down over time. Replace them when they become too short or blunt to ensure consistent weld quality.
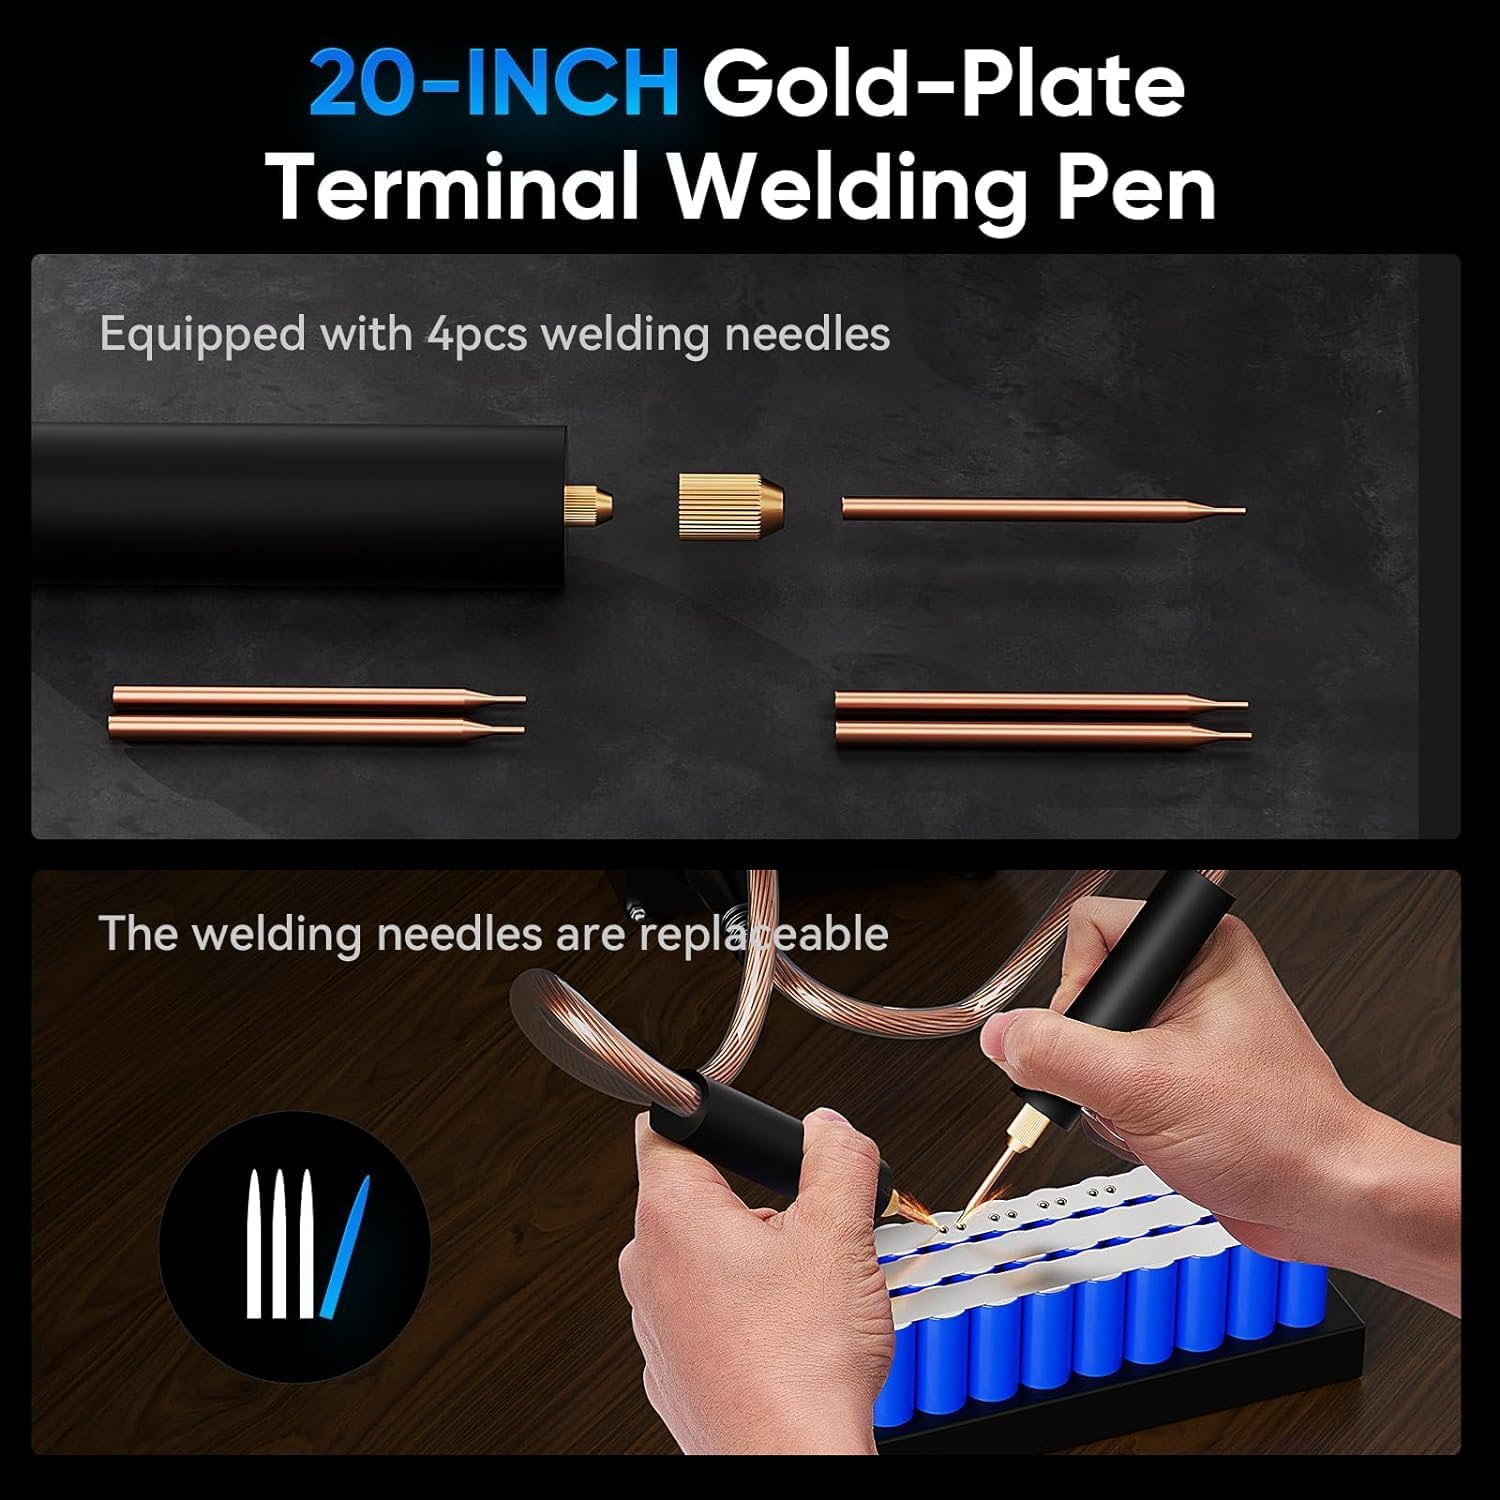
Image 6.1: Exploded view of the welding pen, highlighting the replaceable welding needles.
- Storage: Store the spot welder in a dry, cool place, away from direct sunlight and moisture.
- Supercapacitor Care: The integrated balancing circuit helps maintain the supercapacitor's health. Avoid completely discharging the unit for extended periods.
- Fan Control: The intelligent fan control strategy ensures the fan operates only when needed, extending its lifespan. Keep the fan vents clear of obstructions.
7. Troubleshooting
| Problem | Possible Cause | Solution |
|---|---|---|
| No power/LCD not lighting up | Power adapter not connected; Power switch off; Faulty power outlet. | Check power adapter connection; Ensure power switch is ON; Test outlet with another device. |
| Weak or inconsistent welds | Low gear setting; Dirty/worn welding needles; Poor contact with nickel strip/battery; Nickel strip too thick. | Increase gear setting; Clean or replace welding needles; Ensure firm, even pressure; Use appropriate nickel strip thickness (0.1-0.3mm). |
| Overheating | Continuous heavy use; Blocked ventilation. | Allow the unit to cool down; Ensure fan vents are clear. The intelligent fan control should manage this automatically. |
| Welder not triggering in Auto mode | Poor contact; Foot pedal connected (overrides auto mode). | Ensure good contact with both pens; Disconnect foot pedal if you intend to use auto mode. |
8. Specifications
| Brand | Seesii |
| Model Number | SE203 |
| Capacitor Type | Dual Farad Supercapacitor |
| Capacitor Capacity | 3000F |
| Adjustable Gears | 250 levels |
| LCD Screen Size | 1.8 inches |
| Nickel Strip Thickness | 0.1mm - 0.3mm |
| Power Source | AC (via included power adapter) |
| Package Dimensions | 25 x 21.5 x 20 cm |
| Item Weight | 3.3 kilograms |
9. Warranty and Support
For warranty information, technical support, or service inquiries, please refer to the contact details provided with your purchase documentation or visit the official Seesii website. Please have your model number (SE203) and purchase date ready when contacting support.


