Introduction
This manual provides detailed instructions for the assembly, operation, and maintenance of your Relaxdays Rolling Trolley, Model 10047627. This versatile 3-tier cart is designed to offer additional storage and mobility in various settings, including kitchens, bathrooms, offices, and craft areas. Please read these instructions carefully before use to ensure safe and efficient operation.
Safety Information
- Maximum Load Capacity: Do not exceed a maximum load capacity of 6 kg (13.2 lbs) per shelf. Overloading can compromise the trolley's stability and structural integrity.
- Brake Usage: Always engage the parking brakes on the wheels when the trolley is stationary, especially on uneven surfaces, to prevent unintended movement.
- Stable Placement: Ensure the trolley is placed on a flat, stable surface. Avoid placing it on inclines without engaging the brakes.
- Children and Pets: Keep children and pets away from the trolley during assembly and ensure it is used responsibly to prevent accidents.
- Sharp Objects: Exercise caution when handling sharp objects or tools during assembly and when placing items on the trolley.
Package Contents
Before beginning assembly, verify that all components listed below are present in your package. If any parts are missing or damaged, please contact customer support.
- 1x Serving Trolley (in individual parts)
- 5x Basket Separators
- 2x Storage Cups
- 4x Hooks
- 3x Felt Inserts
- Mounting Material (screws, wrench, etc.)
- Instruction Manual (this document)
Setup and Assembly
Follow these steps to assemble your Relaxdays Rolling Trolley. It is recommended to assemble the trolley on a soft, clean surface to prevent scratches.
- Unpack Components: Carefully remove all parts from the packaging and lay them out. Check against the "Package Contents" list.
- Attach Wheels: Secure the four wheels to the base frame of the trolley. Ensure that the two wheels with brakes are positioned on the same side for easier access. Tighten securely using the provided wrench.

Image: Close-up of a trolley wheel, showing the brake mechanism. Ensure wheels are securely attached and brakes are functional.
- Assemble Frame: Connect the vertical support rods to the base frame and then attach the upper frame section. Follow the diagrams in the included physical mounting instructions for specific screw placements.
- Install Shelves: Slide the three basket shelves into their designated slots on the vertical support rods. Ensure they are seated firmly.
- Add Felt Inserts: Place the felt inserts into the bottom of each basket shelf. These help protect items and reduce noise.

Image: Detail of a trolley shelf with a grey felt insert and white basket dividers. The shelf also features drainage holes.
- Attach Accessories: Hook the storage cups and hooks onto the side edges of the shelves as desired. The basket separators can be placed within the shelves to create customized compartments.
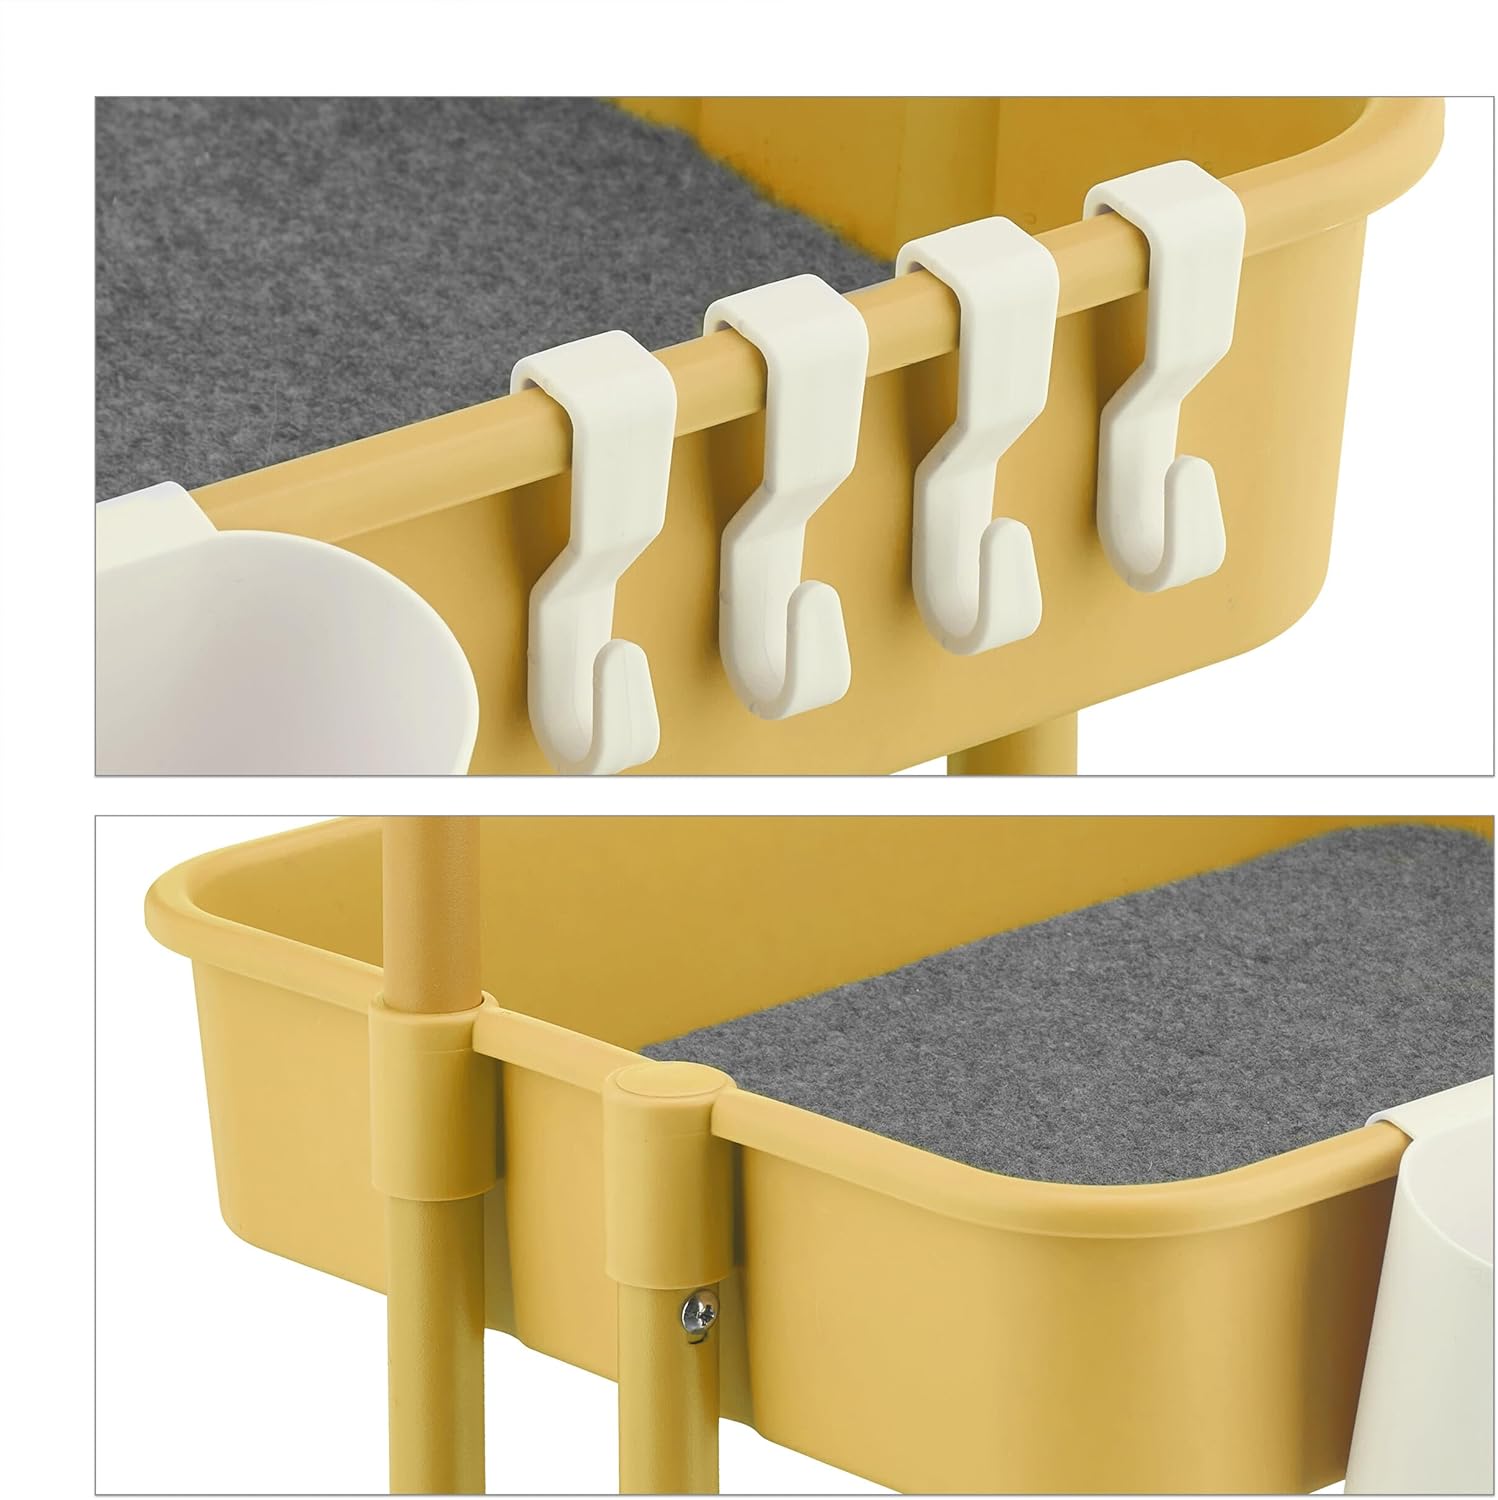
Image: Side view of a trolley shelf demonstrating the attachment of white hooks and a storage cup.

Image: A single white storage cup, designed to hang on the trolley's shelves.
- Final Check: Ensure all screws are tightened and the trolley is stable before loading items onto it.
Operating Instructions
- Loading the Trolley: Distribute weight evenly across the three shelves. Do not exceed the maximum load capacity of 6 kg per shelf. Place heavier items on lower shelves for better stability.
- Mobility: The 360° swivel wheels allow for easy movement. To move the trolley, release the brakes on the braked wheels.
- Stationary Use: When the trolley is in its desired position, engage the brakes on the two braked wheels to secure it and prevent accidental rolling.
- Customizing Storage: Use the provided basket separators to organize items within the shelves. The hooks and cups offer convenient external storage for smaller tools or accessories.

Image: The rolling trolley configured as a craft cart, holding art supplies and tools.
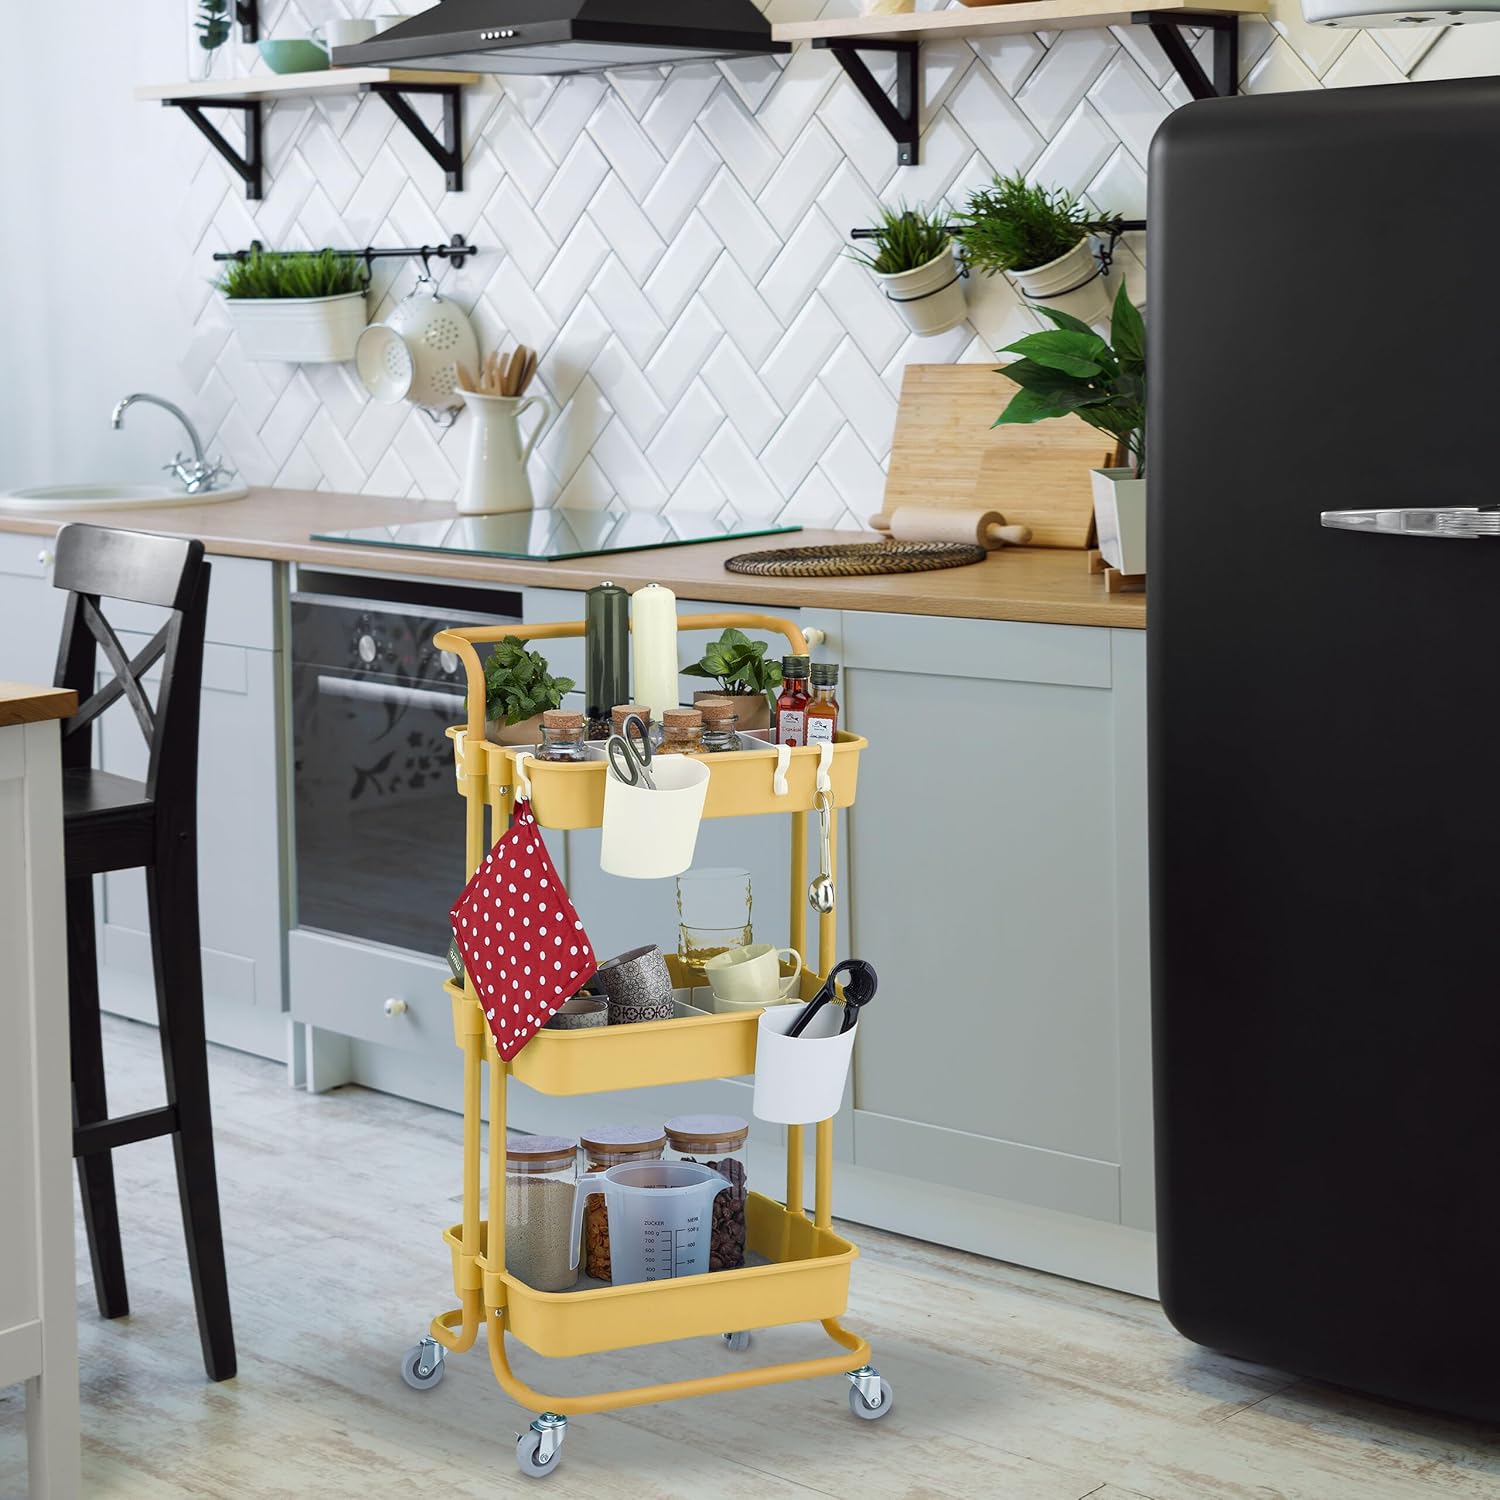
Image: The rolling trolley functioning as a kitchen cart, storing spices and utensils.

Image: The rolling trolley serving as a bathroom storage unit, holding toiletries and towels.
Maintenance
- Cleaning: Wipe the trolley surfaces with a damp cloth. For stubborn dirt, a mild soap solution can be used, followed by wiping with a clean, dry cloth. Avoid abrasive cleaners or harsh chemicals.
- Wheel Care: Periodically check the wheels for any accumulated debris (hair, lint, etc.) and clean them to ensure smooth rolling.
- Tightening Fasteners: Over time, screws may loosen. Periodically check all fasteners and tighten them as needed to maintain the trolley's stability.
- Felt Inserts: The felt inserts can be removed and cleaned separately if they become soiled.
Troubleshooting
| Problem | Possible Cause | Solution |
|---|---|---|
| Trolley is unstable or wobbly. | Loose screws; uneven weight distribution; damaged frame. | Check and tighten all assembly screws. Redistribute items evenly on shelves. Inspect for damage; contact support if frame is bent. |
| Wheels do not roll smoothly. | Debris caught in wheels; wheels not properly attached. | Clean any hair or debris from wheel axles. Ensure wheels are securely tightened to the frame. |
| Brakes are not holding the trolley. | Brake mechanism is faulty or not fully engaged. | Ensure the brake lever is fully pressed down. If still not holding, inspect the brake mechanism for damage. |
| Items slide off shelves easily. | Trolley is being moved too quickly; items are not secured. | Move the trolley at a moderate pace. Utilize the felt inserts and basket separators to help secure items. |
Specifications
| Model Number: | 10047627 |
| Total Dimensions (H x W x D): | Approx. 86 x 42.5 x 42 cm (33.86" H x 16.73" W x 16.54" D) |
| Dimensions (without accessories) (H x W x D): | Approx. 86 x 42.5 x 36 cm (33.86" H x 16.73" W x 14.17" D) |
| Inner Shelf Dimensions (H x W x D): | Each approx. 7 x 38 x 28 cm (2.76" H x 14.96" W x 11.02" D) |
| Distance Between Shelves: | Approx. 22 cm (8.66") |
| Storage Cup Inner Dimensions (H x W x D): | Approx. 11 x 11.5 x 5 cm (4.33" H x 4.53" W x 1.97" D) |
| Floor Clearance: | Approx. 7 cm (2.76") |
| Maximum Load Capacity per Shelf: | 6 kg (13.2 lbs) |
| Item Weight: | Approx. 3.3 kg (7.35 lbs) (total), 2.9 kg (6.39 lbs) (without accessories) |
| Material: | Steel, Plastic, Felt (50% steel, 40% plastic, 10% felt) |
| Color: | Yellow |
| Number of Shelves: | 3 |
| Assembly Required: | Yes (Minimal) |
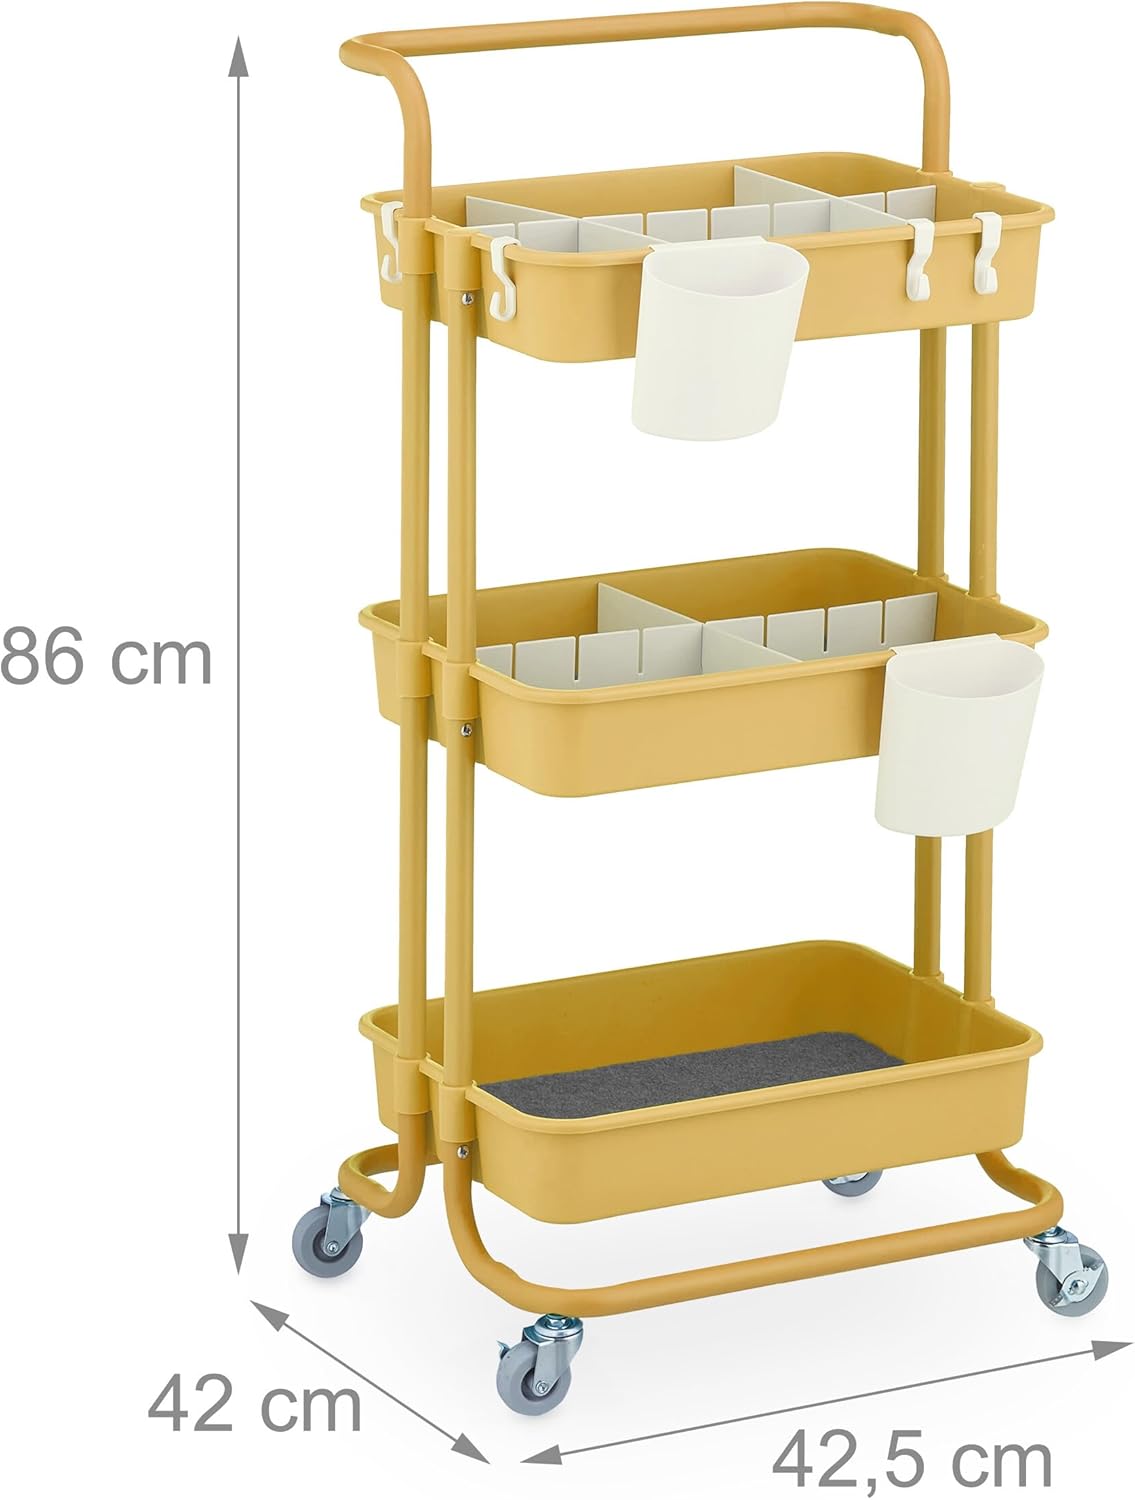
Image: A diagram illustrating the key dimensions of the Relaxdays Rolling Trolley.
Warranty and Support
For warranty information or technical support, please refer to the retailer's policy where the product was purchased or visit the official Relaxdays website. Keep your purchase receipt as proof of purchase.
For further assistance, you may contact Relaxdays customer service through their official channels. Please have your model number (10047627) and purchase details ready.


