1. Product Overview
The 10Gtek ESP8266 ESP-01S WiFi Module is a compact and versatile wireless transceiver designed for a wide range of applications. This module is ideal for scenarios such as wearable electronics, wireless location sensing devices, home automation, and sensor networks. Its robust design ensures reusability and reliable performance.
The module features a complete, self-calibrated RF section to ensure optimal wireless communication performance.

Image: A pack of four ESP8266 ESP-01S WiFi Modules, showcasing their compact size and pin configuration.
2. Specifications
| Feature | Detail |
|---|---|
| Brand | 10Gtek |
| Model | ESP-01S |
| Package Dimensions | 4.65 x 1.65 x 0.67 inches |
| Weight | 0.53 ounces |
| Mounting Type | DIN Rail |
| Number of Pins | 8 |
| Interface Type | USB |
| Material | High-quality electronic components |
| First Available Date | October 9, 2021 |
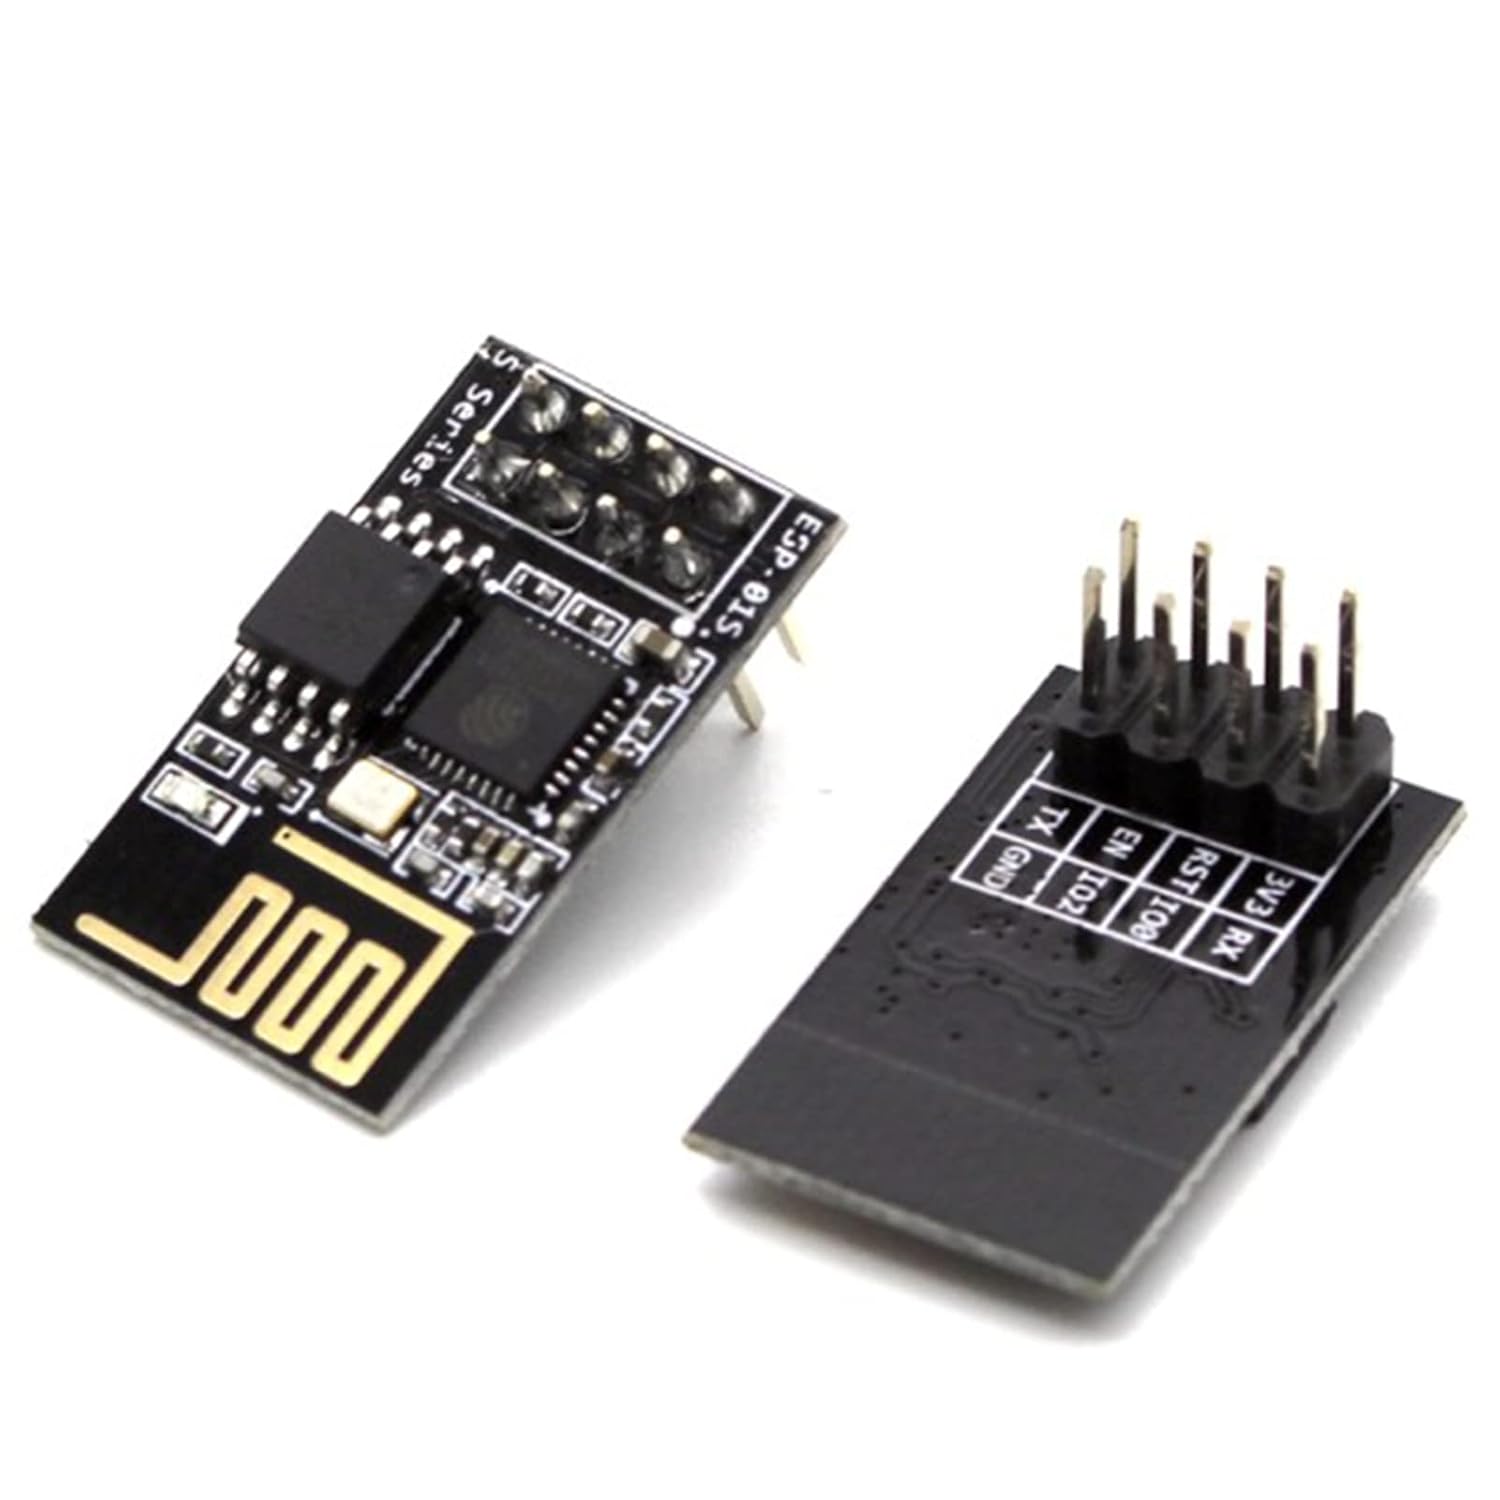
Image: An ESP-01S module shown alongside a compatible pin header, illustrating its compact form factor and connectivity options.
3. Setup and Configuration
3.1 UART Port Information
The ESP8266 module features two UART (Universal Asynchronous Receiver-Transmitter) ports:
- UART0: Equipped with both Tx (Transmit) and Rx (Receive) pins for standard data transmission.
- UART1: Primarily used for printing debug logs, as its Rx pin is occupied by the SPI-flash. It only has a Tx pin available for general use.
3.2 Firmware Download Methods
Firmware can be downloaded to the ESP8266 module during both development and mass production phases.
Development Phase:
During development, the flash memory can be programmed by connecting the ESP8266 to a computer via a UART link. A USB-UART converter is typically required for computers lacking external serial ports.
For detailed instructions on using the Espressif official flash download tool, refer to the ESP8266 SDK Getting Started Guide.
- Download Tool: Available at espressif.com/en/support/download/other-tools
- Download Method Documentation: Available at espressif.com/en/support/download/documents

Image: Screenshot of Arduino IDE settings, showing the selection of "Generic ESP8266 Module" as the board, "nodemcu" as the reset method, and COM port configuration, essential for flashing firmware.

Image: A diagram illustrating how to connect the ESP-01S module to a breadboard and an Arduino board for programming and development, showing pin assignments for GND, TX, EN, RST, 3V3, and RX.
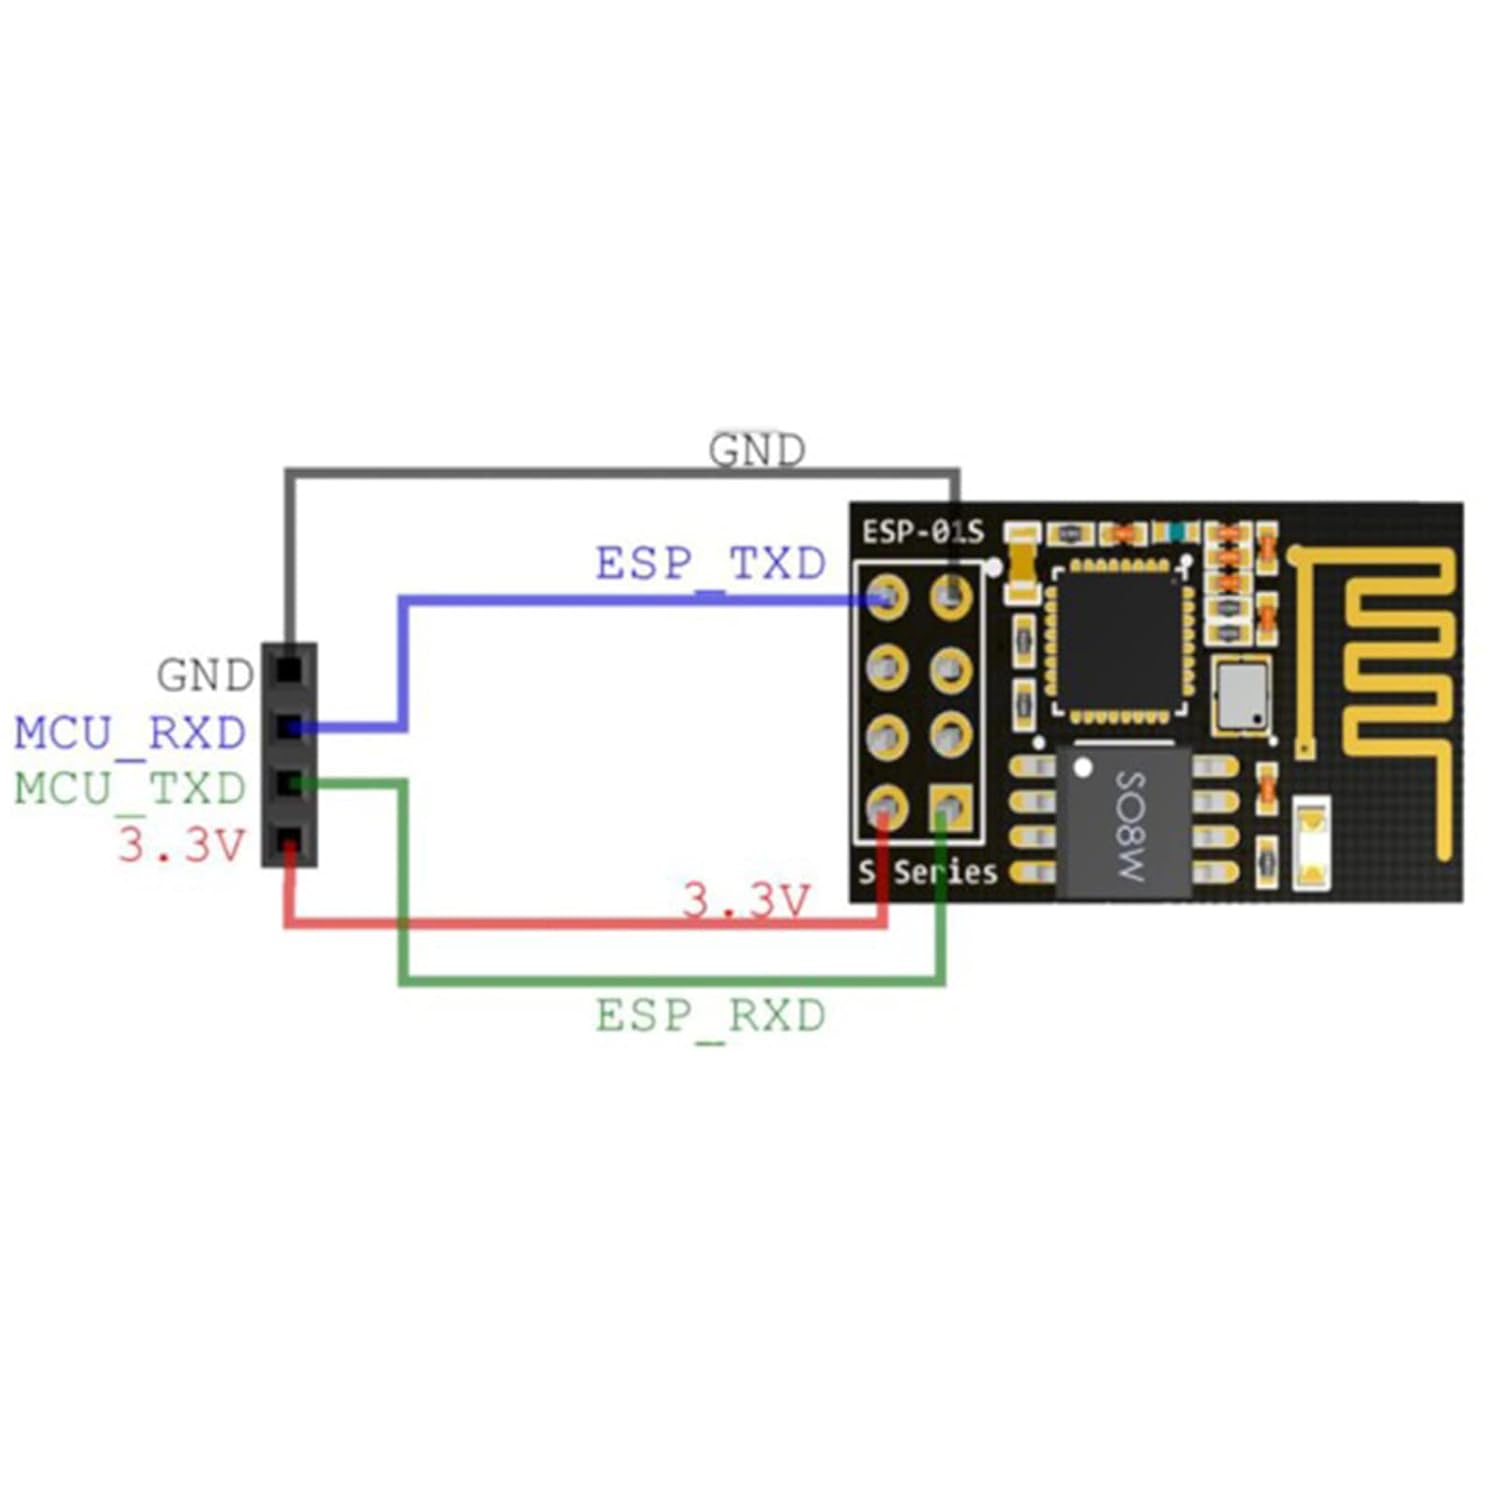
Image: A simplified wiring diagram for the ESP-01S module, showing connections for GND, ESP_TXD, ESP_RXD, and 3.3V to an MCU, highlighting essential power and communication lines.
4. Operation
4.1 Serial High-Speed Transmission
The ESP-01S module supports 4Mbps high-speed continuous transmission. This capability makes it suitable for large data transmission applications such as WiFi printers, WiFi serial cameras, and WiFi high-speed data acquisition systems.

Image: A graphical representation demonstrating the module's capability for serial high-speed continuous transmission, illustrating data rates from 1Mbps up to 4Mbps.
4.2 SoftAP + Station Mode
When operating in SoftAP + Station mode, the default IP address of the ESP8266 SoftAP is 192.168.4.1. It is important to note that the ESP8266 cannot distinguish if the IP addresses of both the SoftAP and the Station are within the same subnet (e.g., 192.168.4.x). This can lead to connectivity issues if not properly configured.
5. Troubleshooting
5.1 OTA (Over-The-Air) Update Failures
If you encounter issues with OTA updates, consider the following common reasons and troubleshooting steps:
- Flash Size: Ensure that the correct flash size is selected when downloading the firmware.
- Initial Firmware Download: The first time you download a new firmware, always include `blank.bin` in the download process.
- Binary Locations: Confirm that `user1.bin` and `user2.bin` (if optional) are downloaded to their correct locations.
- Configuration Consistency: Make sure `user1.bin` and `user2.bin` are generated with identical flash/boot configuration options.
- Documentation: Refer to the ESP8266 FOTA Guide before using FOTA APIs.
5.2 SmartConfig Failures
If SmartConfig fails, review these potential causes:
- APP/SDK Version Mismatch: The application version may not match the SDK or SmartConfig version.
- Router Frequency: The router being configured might be a 5 GHz-only router. ESP8266 typically operates on 2.4 GHz.
- API Conflicts: Avoid calling other APIs while SmartConfig is in progress. Do not call `smartconfig_stop` until the device has obtained an IP address from the router when using AT commands.
If these steps do not resolve your issue, provide a debug log for further analysis.
6. Maintenance
Regular firmware updates are crucial for optimal performance and security. Always follow the recommended firmware download procedures as outlined in Section 3.2.
Ensure the module is kept in a clean, dry environment to prevent damage from dust or moisture. Avoid exposing the module to extreme temperatures or static discharge.


